The right landscaping idea depends on how much of the work you plan to do yourself and how long you are willing to wait for results. A retaining wall built without a level will grin like a crooked smile through two winters before you tear it out and start over.
1. Layered Planting
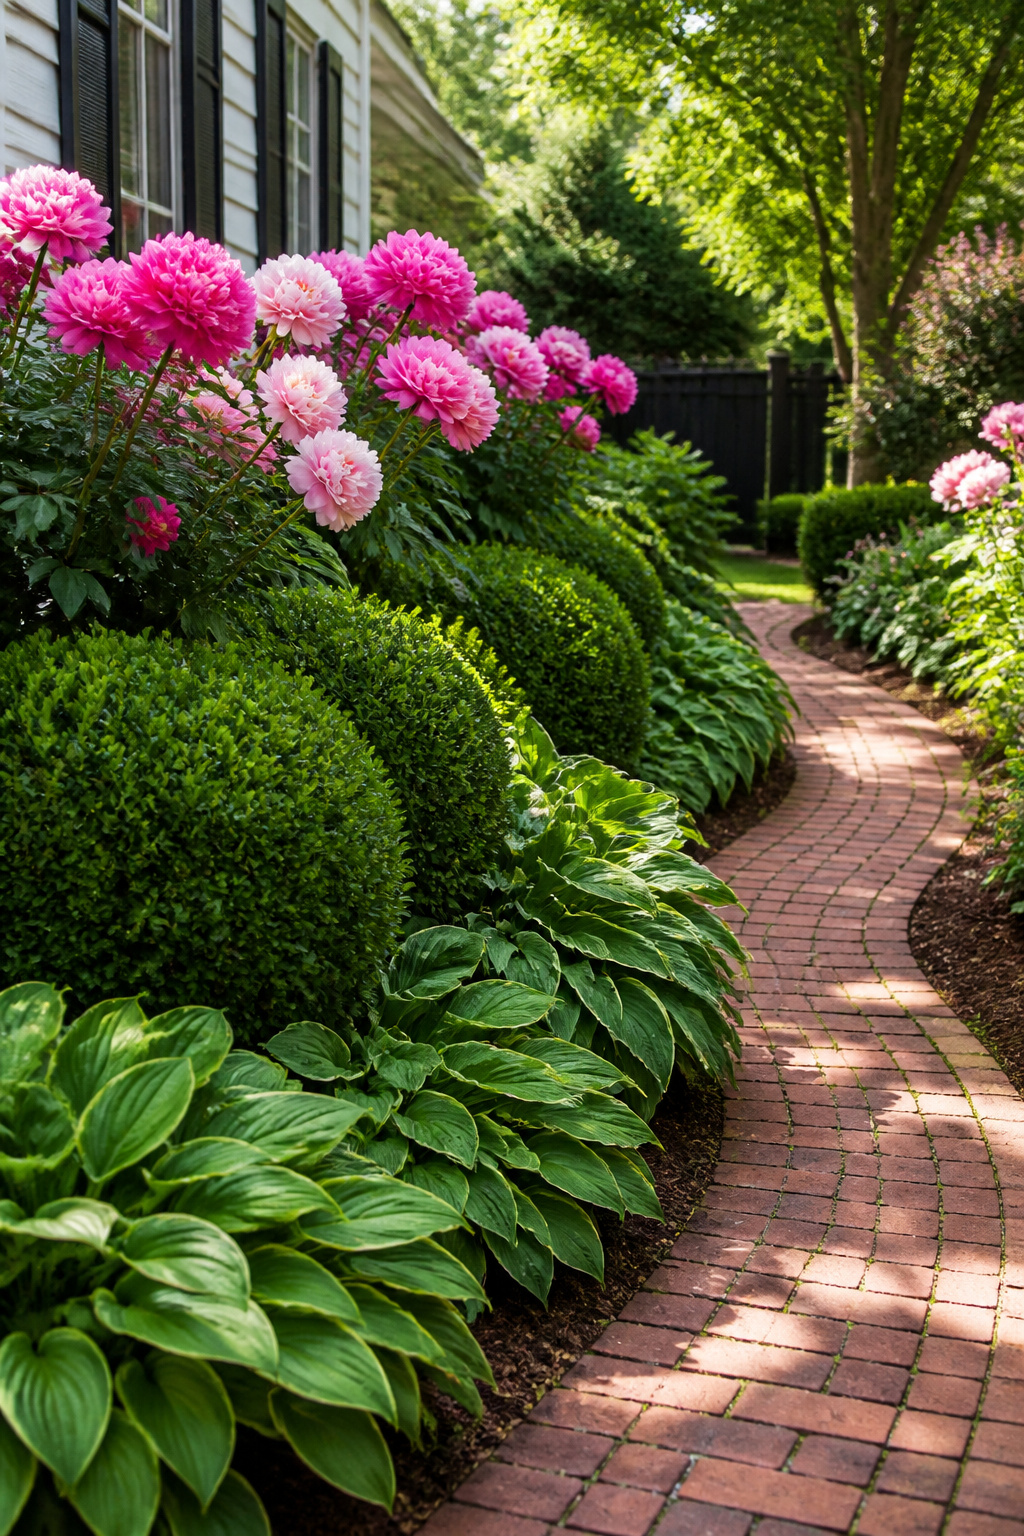
Layered planting works because your eye reads the scene from low to high, not as a flat wall of green. In my own small yard, I settled on taller peonies toward the back, mid-height boxwood shrubs in the middle, and low hostas at the front edge. The peonies hit about two to three feet when blooming, the boxwood holds a steady two-foot frame year-round, and the hostas spread at knee level or below. That three-tier stack cost me roughly the price of the plants themselves since no grading or hardscaping was involved; the depth comes from placement, not from owning more ground.
The boxwood proved the most useful anchor. It stays green through the seasons, so the structure does not collapse when the peonies finish in late spring or the hostas die back in fall. Texture matters too: I tried mixing in sparser plants like coneflowers between the hostas, and the contrast kept the lower layer from reading as a solid mat. In a narrow bed, even eighteen inches of staggered height fools the eye into reading more space than exists. The mistake I made early was planting everything at the same depth and spacing; it photographed like a grocery-store nursery row until I pulled every third plant forward or pushed it back.
2. DIY Composting Bin
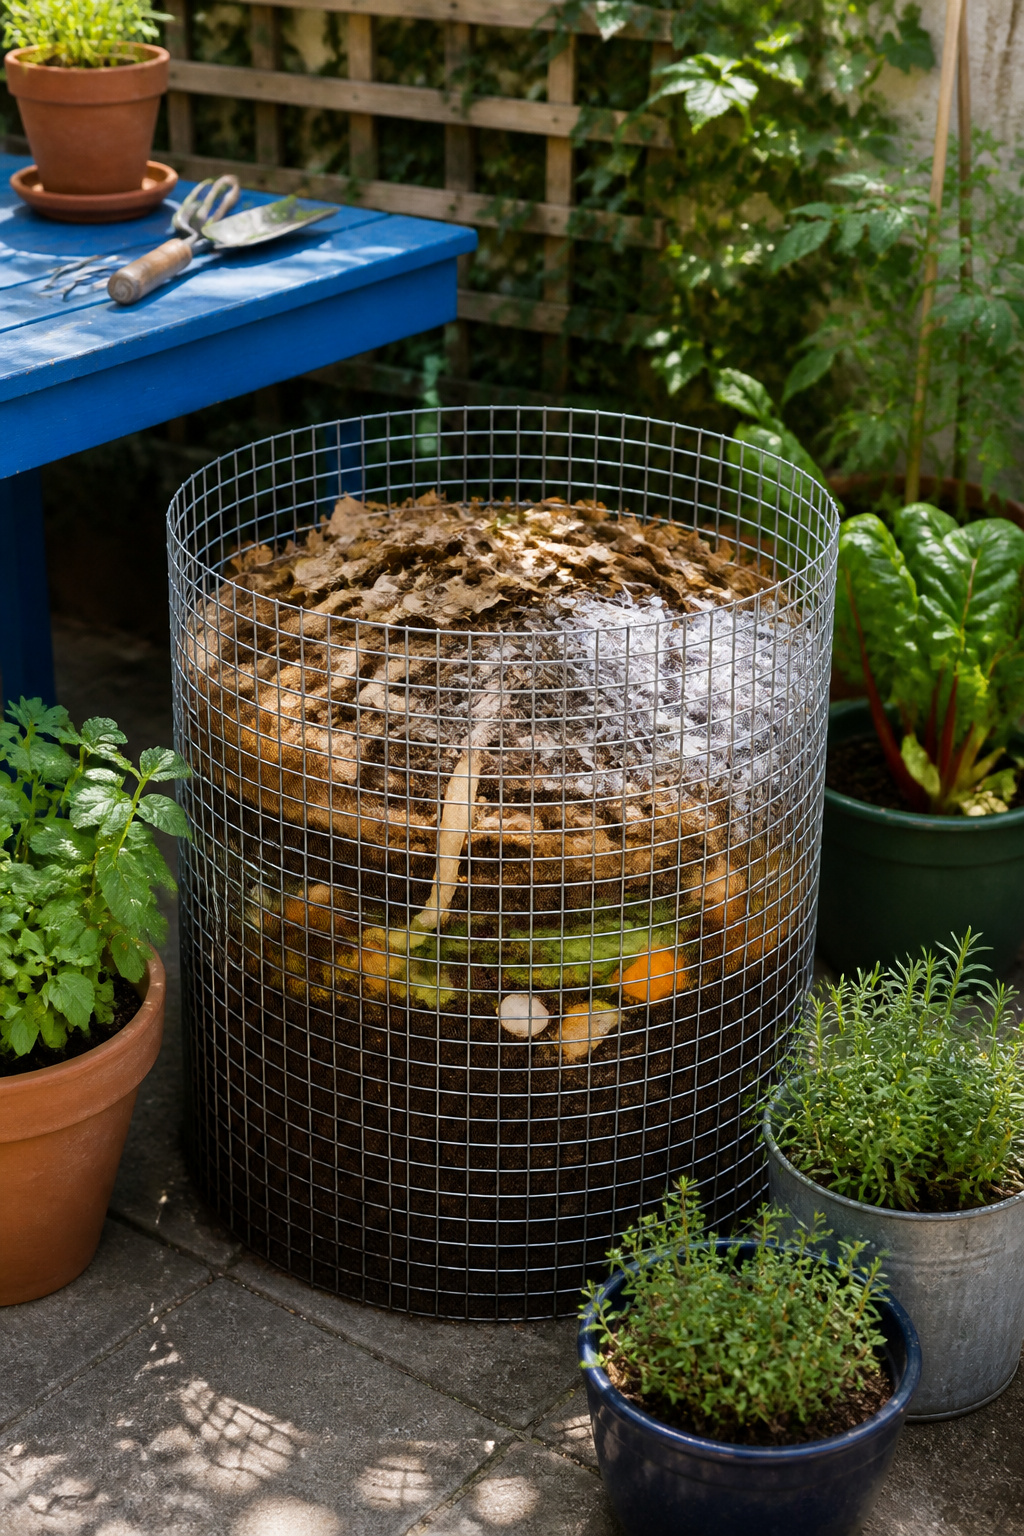
A three-foot cylinder of wire mesh and a few zip ties will hold enough compost to keep a small patio garden fed through the season. Kitchen scraps break down fastest when they are chopped small, and the green smell disappears once you bury them under a layer of dry leaves or shredded paper. I learned the ratio the hard way: too many vegetable peels and the pile turns slimy, too many leaves and it sits there for months. Two parts dry browns to one part fresh greens keeps the heat steady and the odor gone. Fruit peels, coffee grounds, and eggshells go in; meat and dairy stay out unless you want every raccoon in the neighborhood to visit. The bin needs air, so I leave gaps between the wire layers and turn the pile with a garden fork every two weeks. Finished compost looks like dark crumbly soil and smells like the forest floor after rain. In a small yard, one bin this size yields about two wheelbarrows a year, enough to top-dress a raised bed or mix into containers before spring planting.
3. Building a Retaining Wall
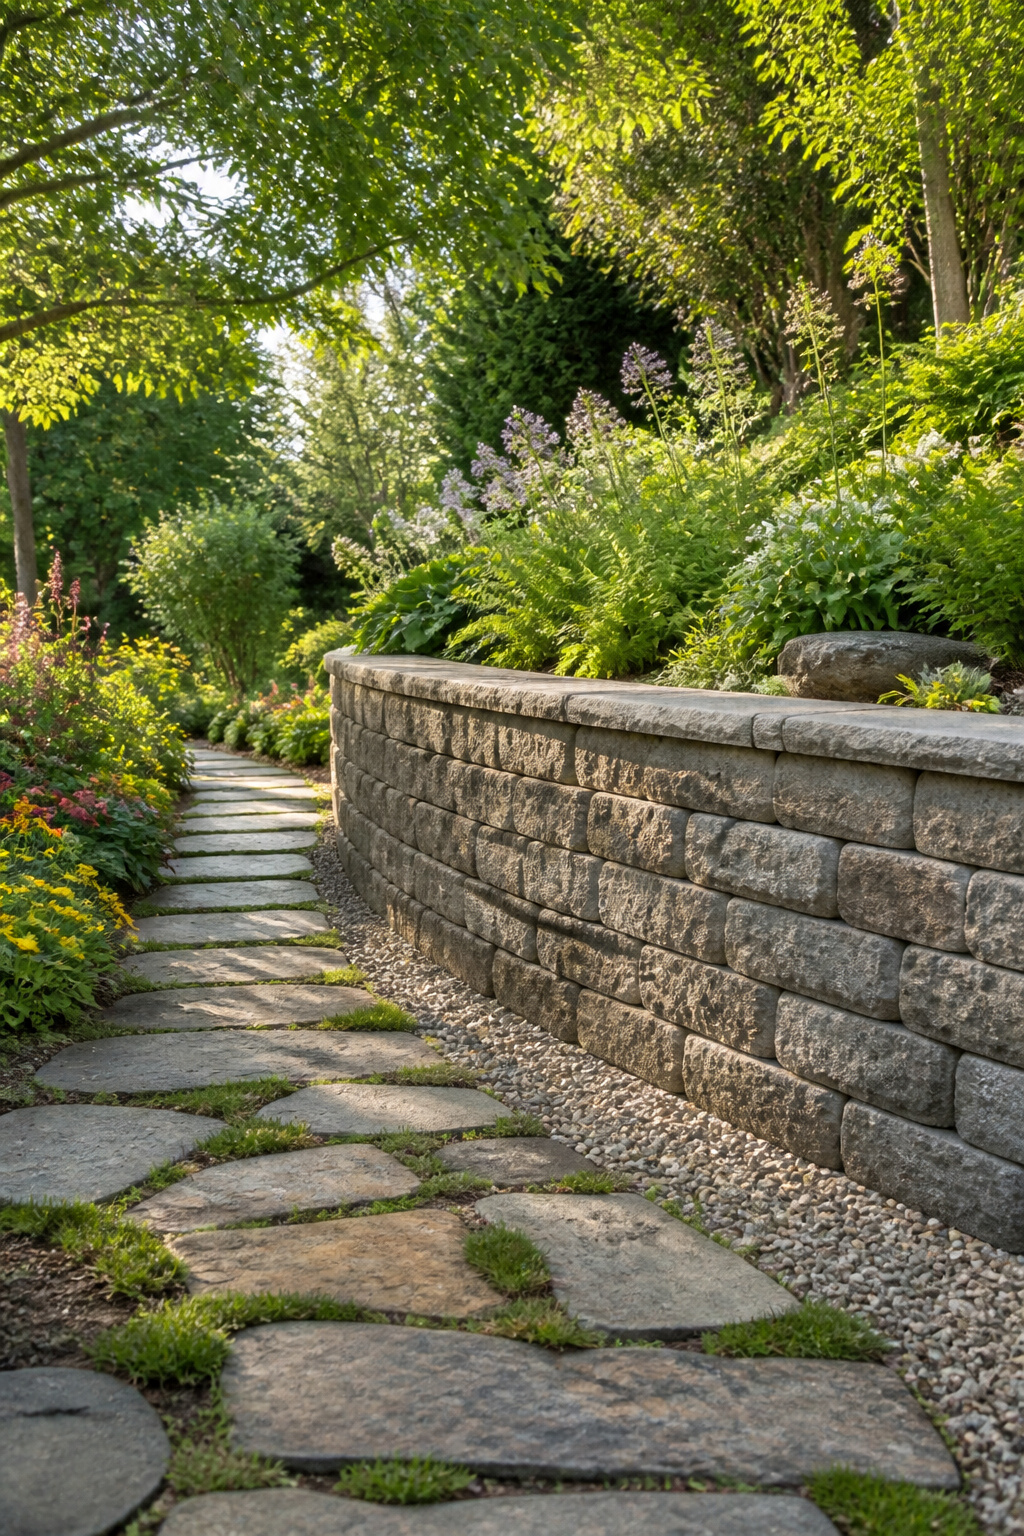
Soil in a small yard with even a slight grade will walk downhill one rain at a time, and before long your lawn thins to bare patches where grass cannot root. Interlocking blocks solve this without the engineering a hillside demands. They lock together under their own weight, so a wall two or three courses high needs no mortar and no permit in most municipalities.
The mistake that cost me an afternoon was skipping the level. I laid the first course by eye, stepped back, and watched the whole line grin like a crooked smile. Took it apart, rented a plate compactor for the base, and ran a four-foot level every eighteen inches. The second attempt held straight through two winters.
Drainage matters as much as the face you see. Backfill with gravel, lay perforated drain pipe behind the wall if water collects there, and use filter fabric between soil and stone so the weep holes do not clog with silt. Without it, hydrostatic pressure pushes the wall forward in freeze-thaw cycles.
For a run under fifteen feet on a gentle slope, material runs roughly $500–800 if you do the digging yourself. The compactor rental adds $60–90 for a day.
4. Creating a Walkway
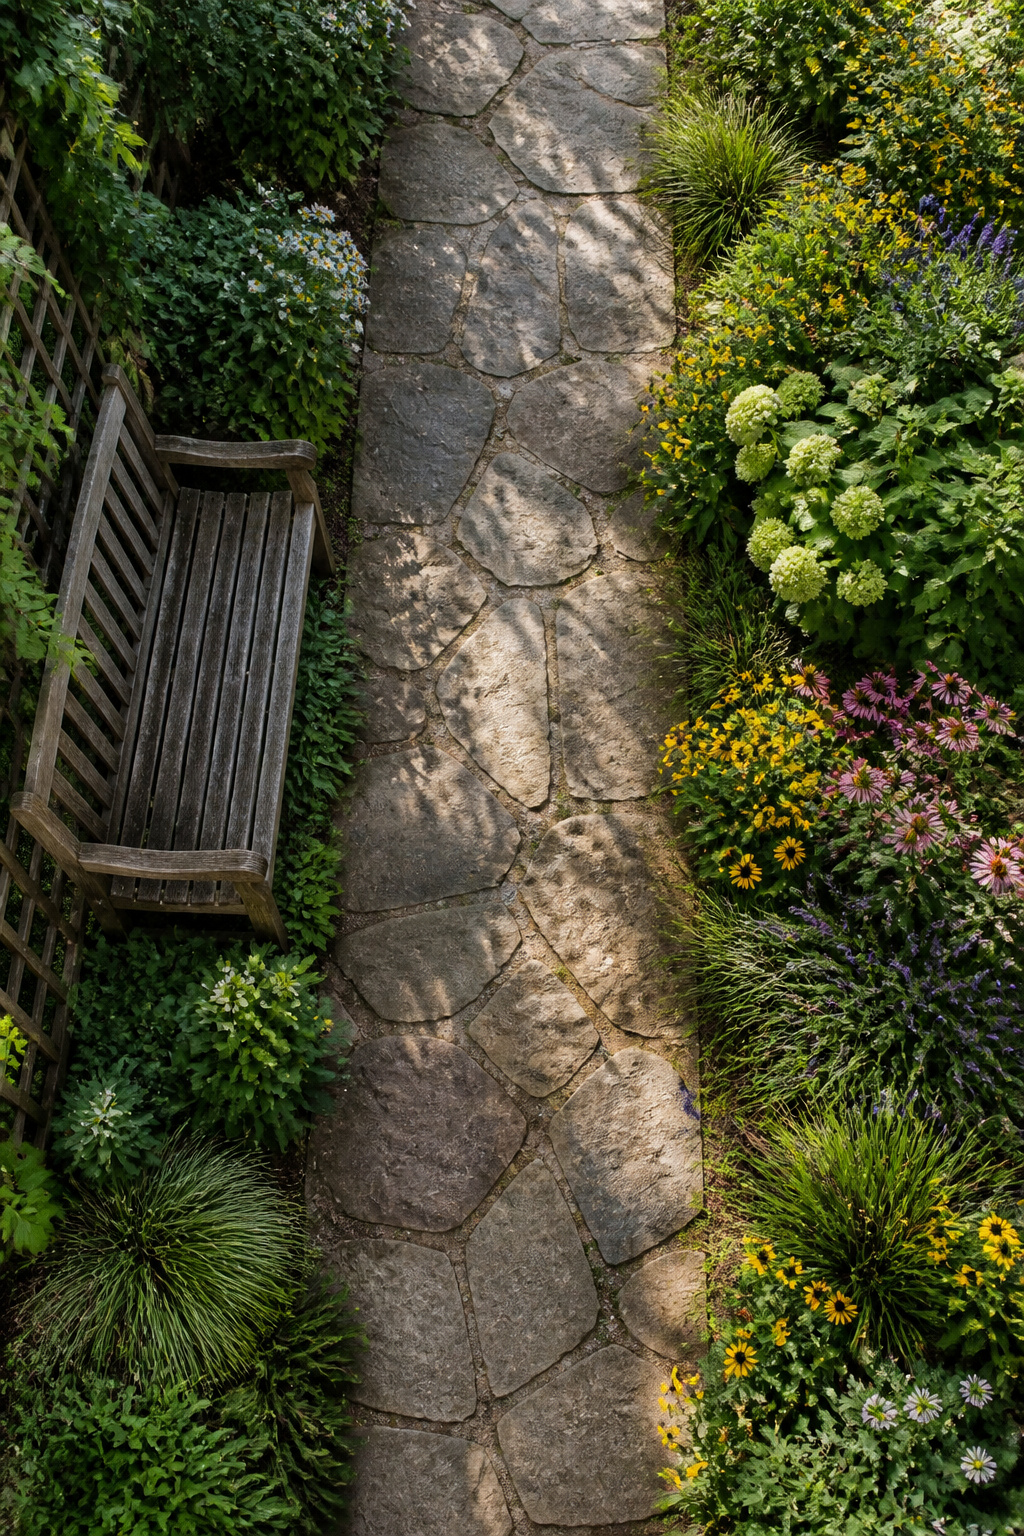
A path that is too narrow becomes a balance beam the second you carry a flat of plants out to the bed. A single-person walkway wants 30–36 inches; two people side by side needs 48–60 inches, which is the width where passing feels polite rather than choreographed.
I have laid all three of the common materials, and they age very differently. Pavers, whether concrete or brick, stay where you put them and handle wheelbarrows without complaint. The herringbone pattern I tried in one stretch has not shifted in five years, though the base prep was a Saturday I would rather forget. Gravel is cheaper and faster: pour, rake, done. It migrates, though. Every spring I find the stones have traveled two inches toward the lawn, and weeds settle in between. Mulch paths with wood chips or cypress bark are the softest underfoot and the kindest to knees during weeding, but they break down. Plan on refreshing them every other year, and accept that stepping stones help where the mulch washes out after heavy rain.
Rubber mulch lasts longer than wood, yet it reads more playground than garden to my eye. The choice comes down to how permanent the route needs to be and whether your budget stretches to the base layer that pavers demand.
5. Window Boxes
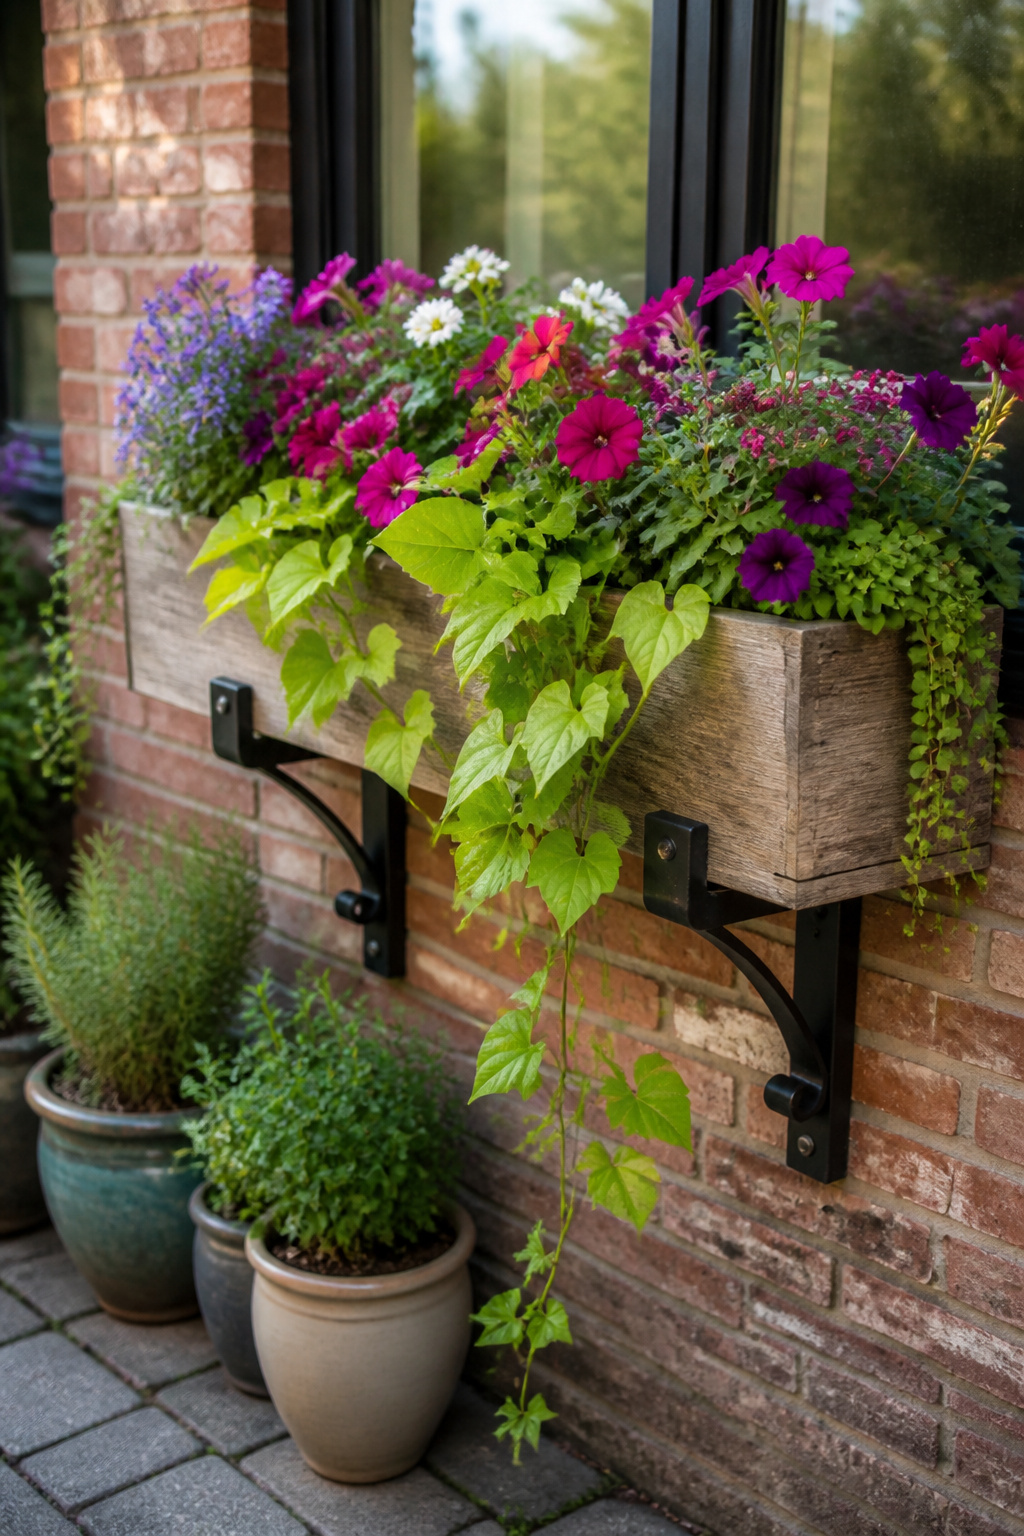
Window boxes look small until you try to lift one after a rainstorm. Mine hit thirty-two pounds wet, and the plastic brackets I trusted cracked clean through the first autumn. Switched to steel L-brackets rated for fifty pounds, lag-bolted into the wall framing rather than siding; three seasons now and no sag.
What lived: Profusion zinnias and trailing sweet potato vine through July, then a hard switch to ornamental kale and pansies for the cool months. What died: a dwarf lavender that looked perfect in the nursery pot but cooked against the south-facing brick by August. The soil depth matters more than the box width; six inches minimum for annual roots, and drainage holes you can actually see daylight through.
For mounting, forget the adjustable arms that hook over the sill. They shift in wind, and your box ends up hanging crooked or worse. A fixed bracket set an inch below the window line keeps the whole thing invisible from the street while the flowers read as growing straight from the wall. Paint the bracket black before assembly; touch-ups after installation never match.
6. Backyard Privacy with Greenery
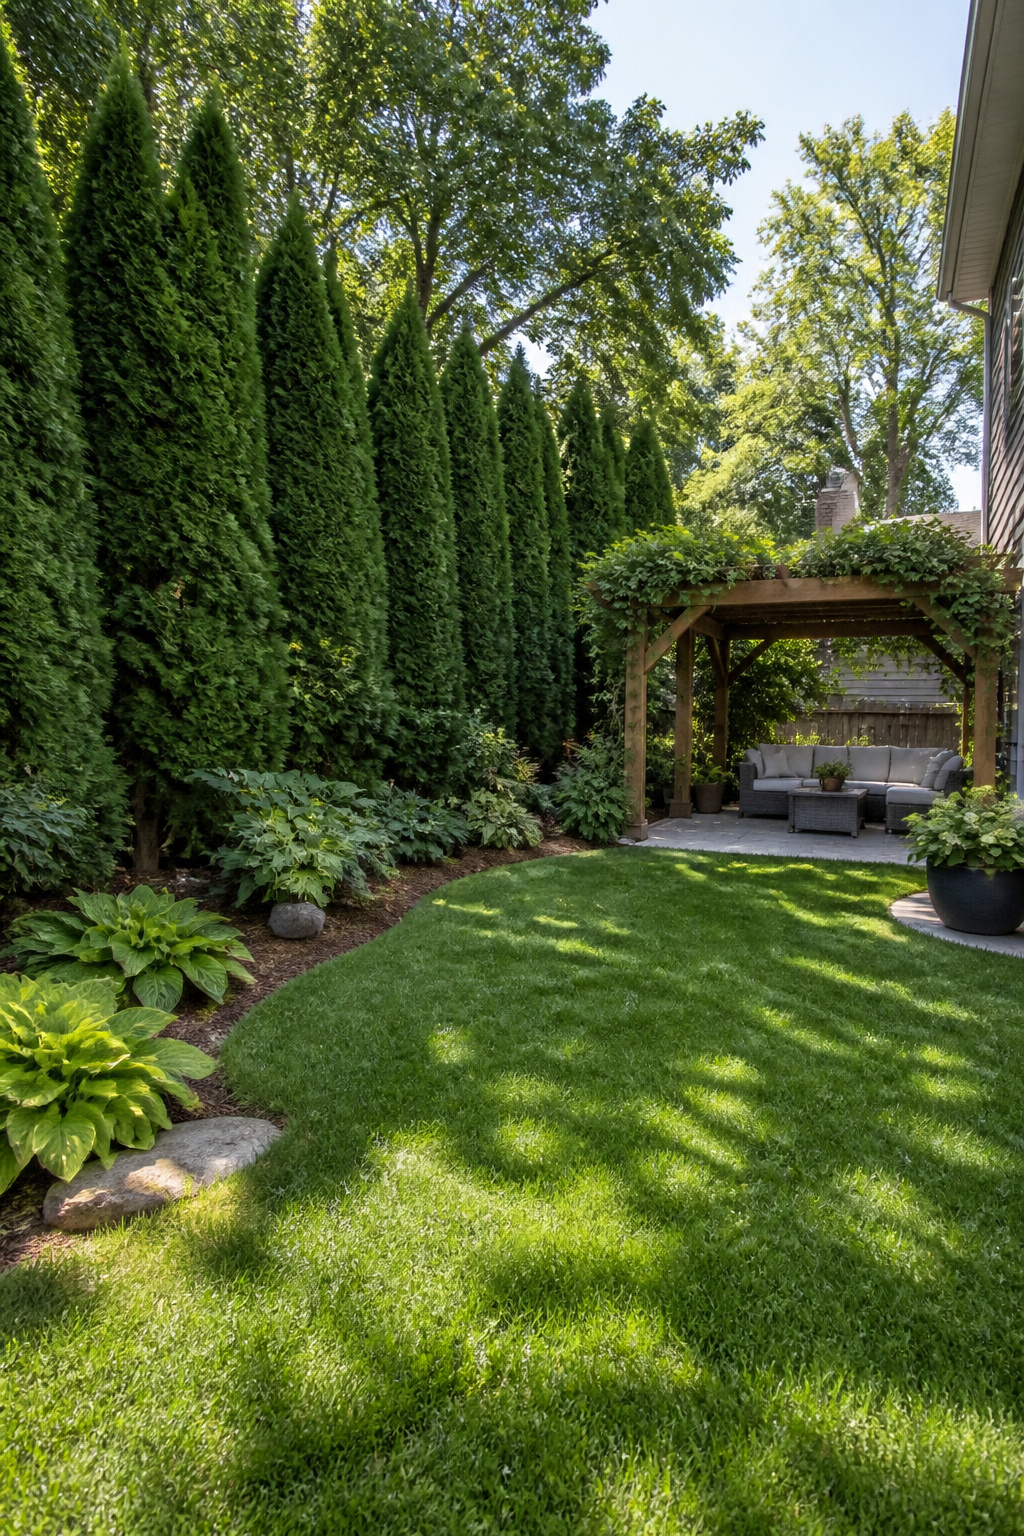
Tall shrubs can buy you privacy in a small yard where a fence is not an option or not allowed, but the mistake most people make is starting too small. Arborvitae, holly, and Japanese yew all work for this, and Italian cypress adds height fast if your zone allows it. The catch is timing. Most of these need three to five years before they give real screening, and that assumes you did not plant gallon-sized specimens hoping for instant results. I have made that error. The yew I bought in a one-gallon pot took four years just to reach shoulder height, by which point the neighbors had already built a deck. Bamboo grows faster but needs containing, and artificial hedges skip the wait entirely if you want less upkeep. Trees and major shrubs should go in first, even when you are doing the rest in stages year by year. They are the slow layer; everything else can wait.
7. Water Features
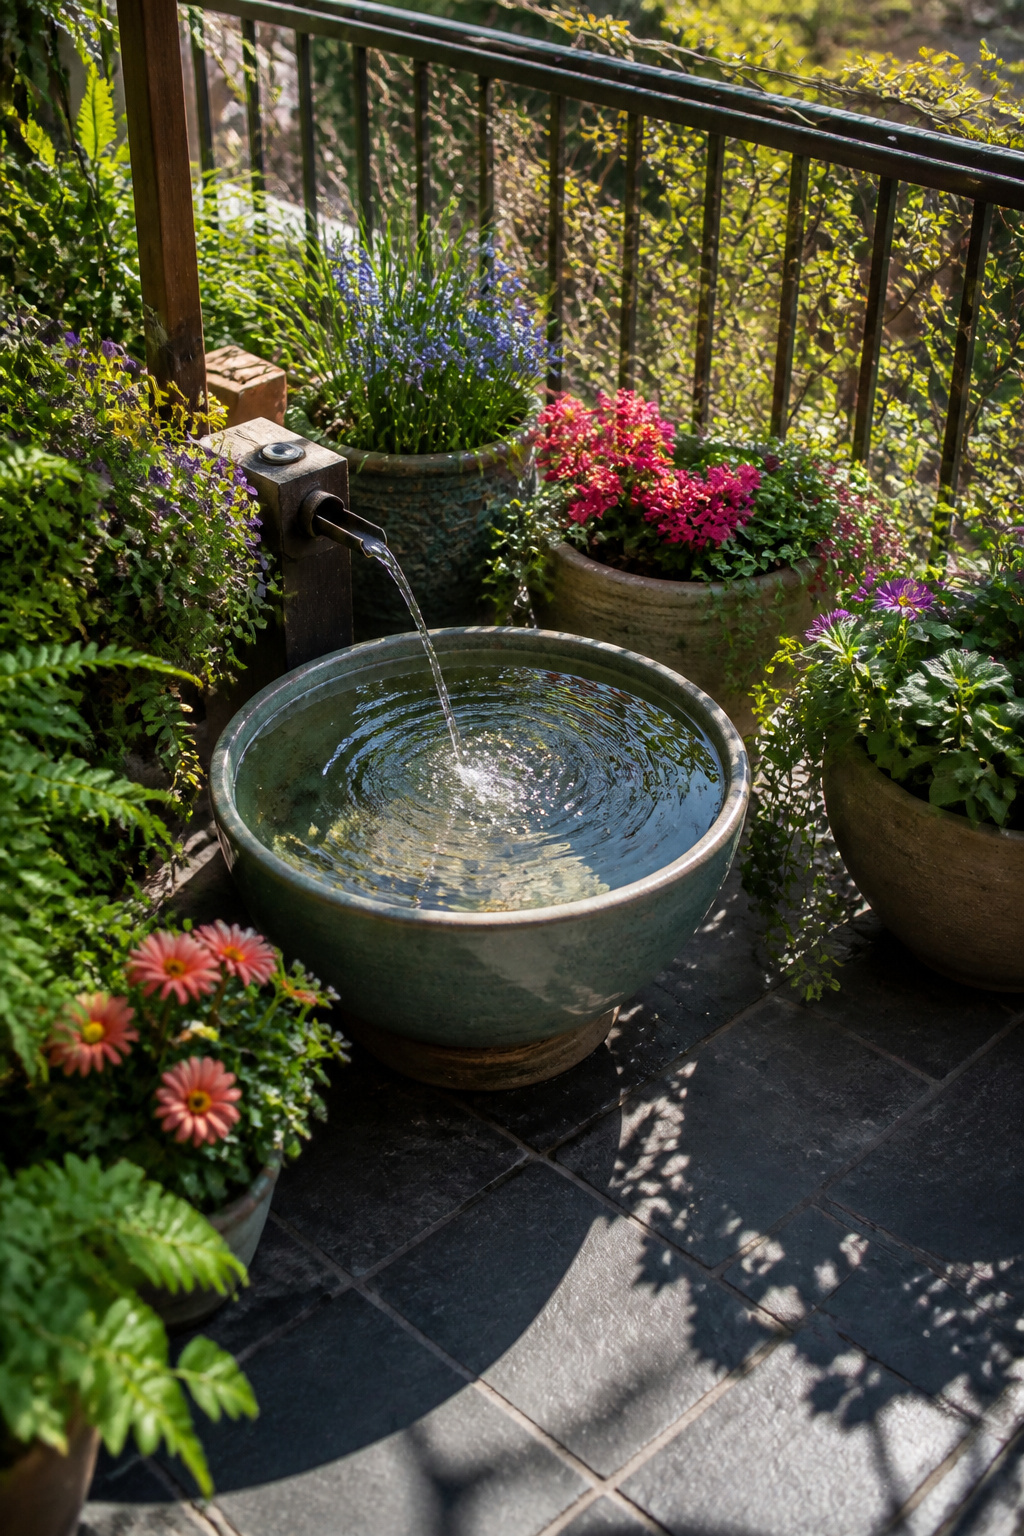
A water feature does not need a yard. The smallest patio or balcony can hold a self-contained fountain in a repurposed ceramic bowl or unused flower pot, and the sound alone changes how the space feels. I looked at this twice before committing, worried about the upkeep more than the install.
Container-scale fountains run on small recirculating pumps. Assembly is straightforward: bowl, pump, tubing, water. The trick is placement. Direct sun heats the water fast, and algae arrives within a week where the bowl sits unshaded. Morning light with afternoon shade solved it for me, though I still scrubbed green film off the pot monthly through July.
Birds found it immediately. That was the payoff I had not planned for, better than the noise. If you want the calm without the biology lesson, skip the open basin and go with a disappearing spout design. Water flows over stone or pottery and vanishes into a reservoir below. Nothing sits still long enough to bloom.
8. Lighting

Outdoor lighting does two jobs at once: it keeps you from tripping over a hose at dusk, and it turns a patio into a place you actually want to sit after dinner. String lights hung overhead give that immediate warmth for hosting, while solar-powered lights along a path or border add glow without the wiring hassle. The sources all point to solar as the easy-install option, and in my reading that tracks, though the reality is mixed. The cheap solar path lights are the ones that burn out first, fading to a dim blue after one rough winter while the fixture itself cracks at the base. Riser lights for stairs and front-facing solar spotlights aimed at trees or shrubs hold up better and actually throw enough light to navigate by. Ground-level lanterns look charming in product photos but often sit too low to illuminate anything but their own housing. For water features, underwater lighting is the move if you have one; otherwise, skip it and put that budget toward the path you walk every evening.
9. Rock Gardens
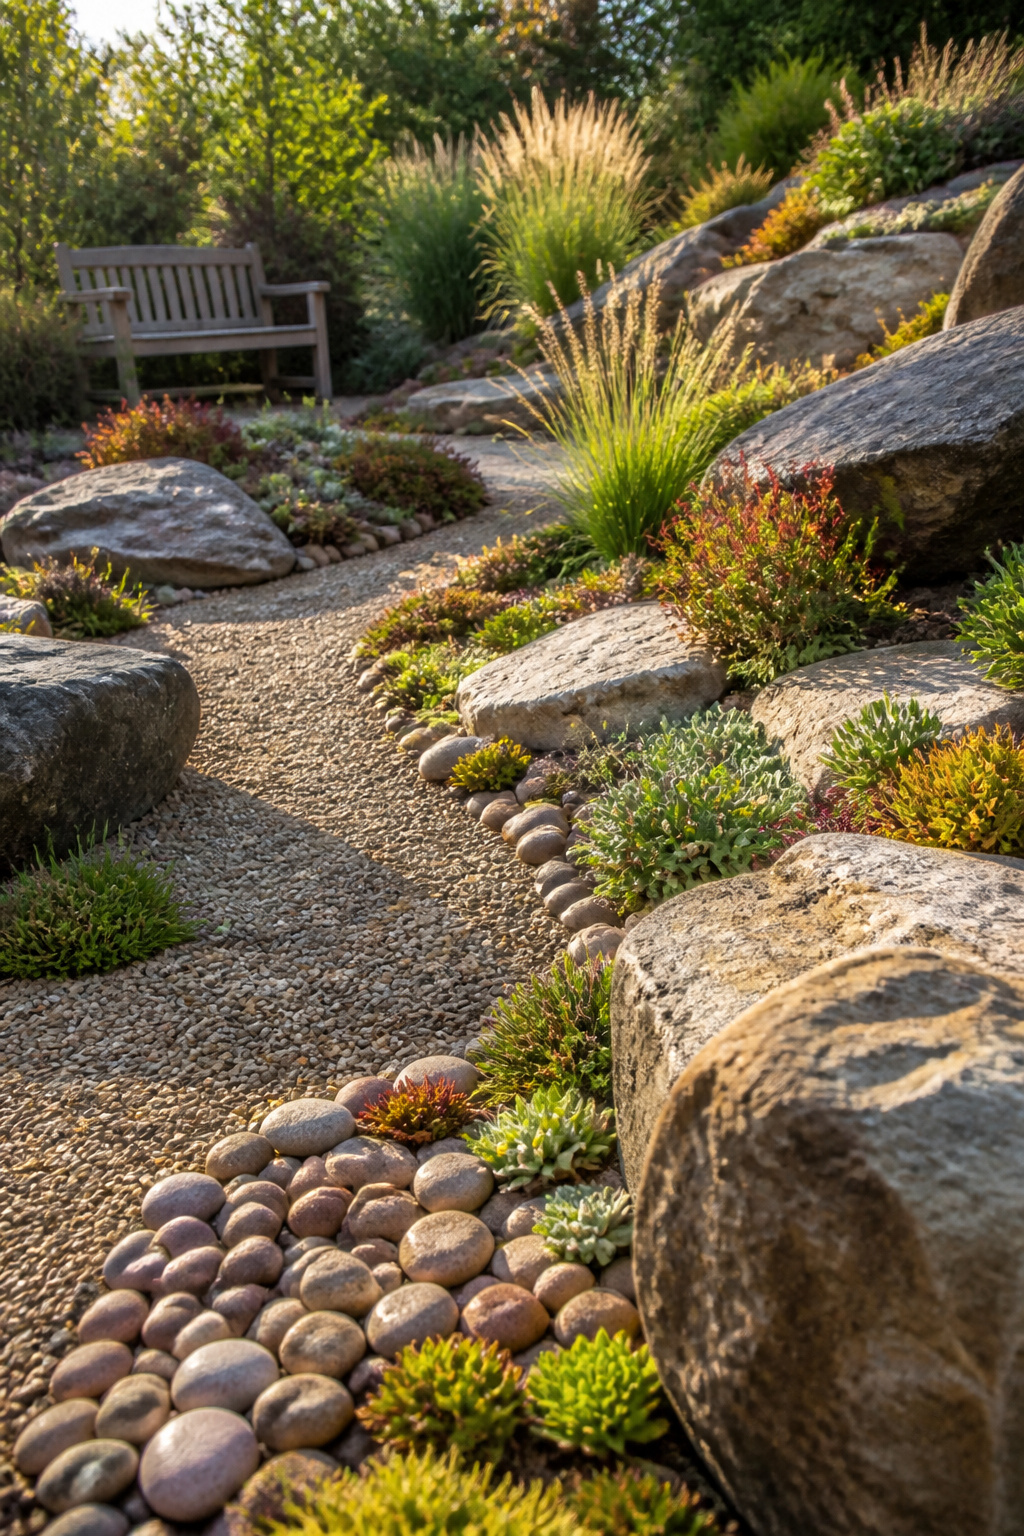
A rock garden turns out to be one of the lower-effort ways to cut down on weeding and watering once the structure is in place. The mix matters: large boulders, smaller stones, riverbed rock, and flat pieces together give enough variation in texture and angle that water actually diverts where you want it instead of pooling. In my zone, succulents, pampas grass, and wildflowers are the plants that actually settle in between the gaps without much fuss, though I still end up pulling stray grass out of the smaller crevices a couple of times each summer.
The rock itself is where the budget breaks or holds. Landscape delivery fees add up fast, especially on heavier stone. Free rock is often available locally if you are willing to haul it yourself, whether from construction sites with excess blast rock or from pits in the area. It takes sweat equity, but for a small yard or patio project, a few trips with a borrowed truck beat a delivery charge that can run a quarter of the annual garden budget.
10. Paver Patios
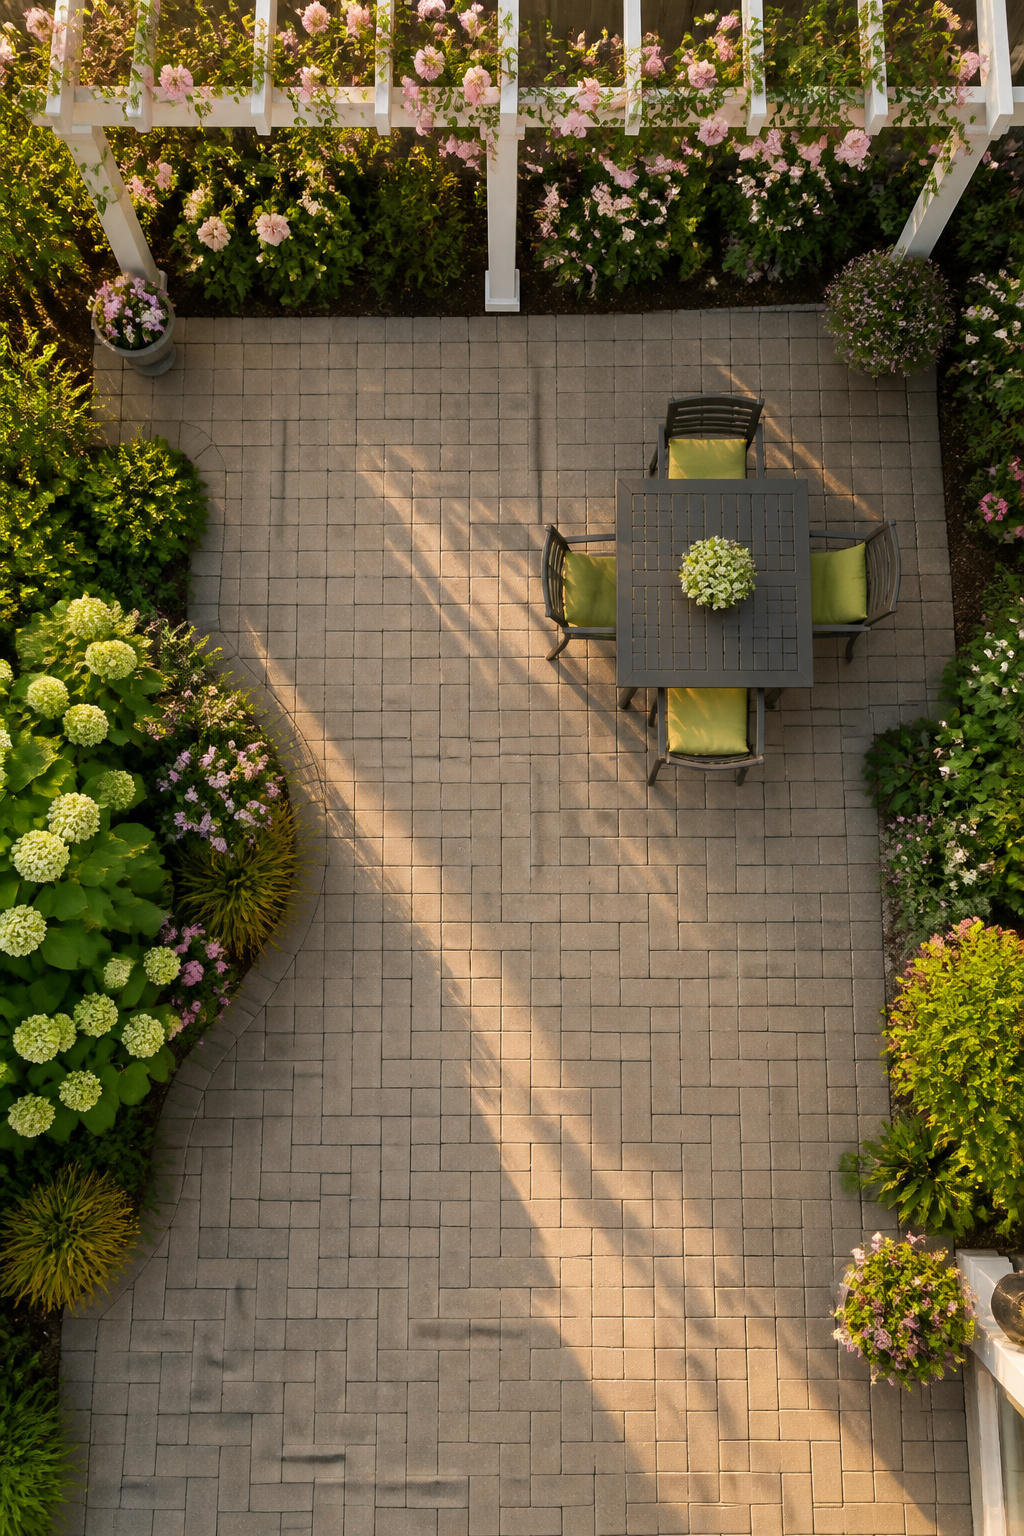
A paver patio turns the patch of grass you never sit on into the place you eat dinner outside. Mine is twelve feet by fourteen, which is the smallest size that still fits a four-top table and leaves room to pull chairs back without kicking gravel. That dimension cost me about six hundred dollars in concrete pavers and edging, well inside the yearly yard budget.
The sand base is where I tried to save thirty dollars. I put down two inches instead of the recommended four, figuring packed dirt underneath would do the rest. Two seasons later the center had settled enough to hold a puddle after every rain, and two pavers cracked when the ground froze and heaved beneath them. Pulling it up and redoing the base took a full Saturday I had already spent once.
Four inches of paver sand over compacted gravel is the number to remember. Renting a plate compactor for the base layer adds about fifty dollars to a job this size, which stings until you remember it once.
11. Pergolas
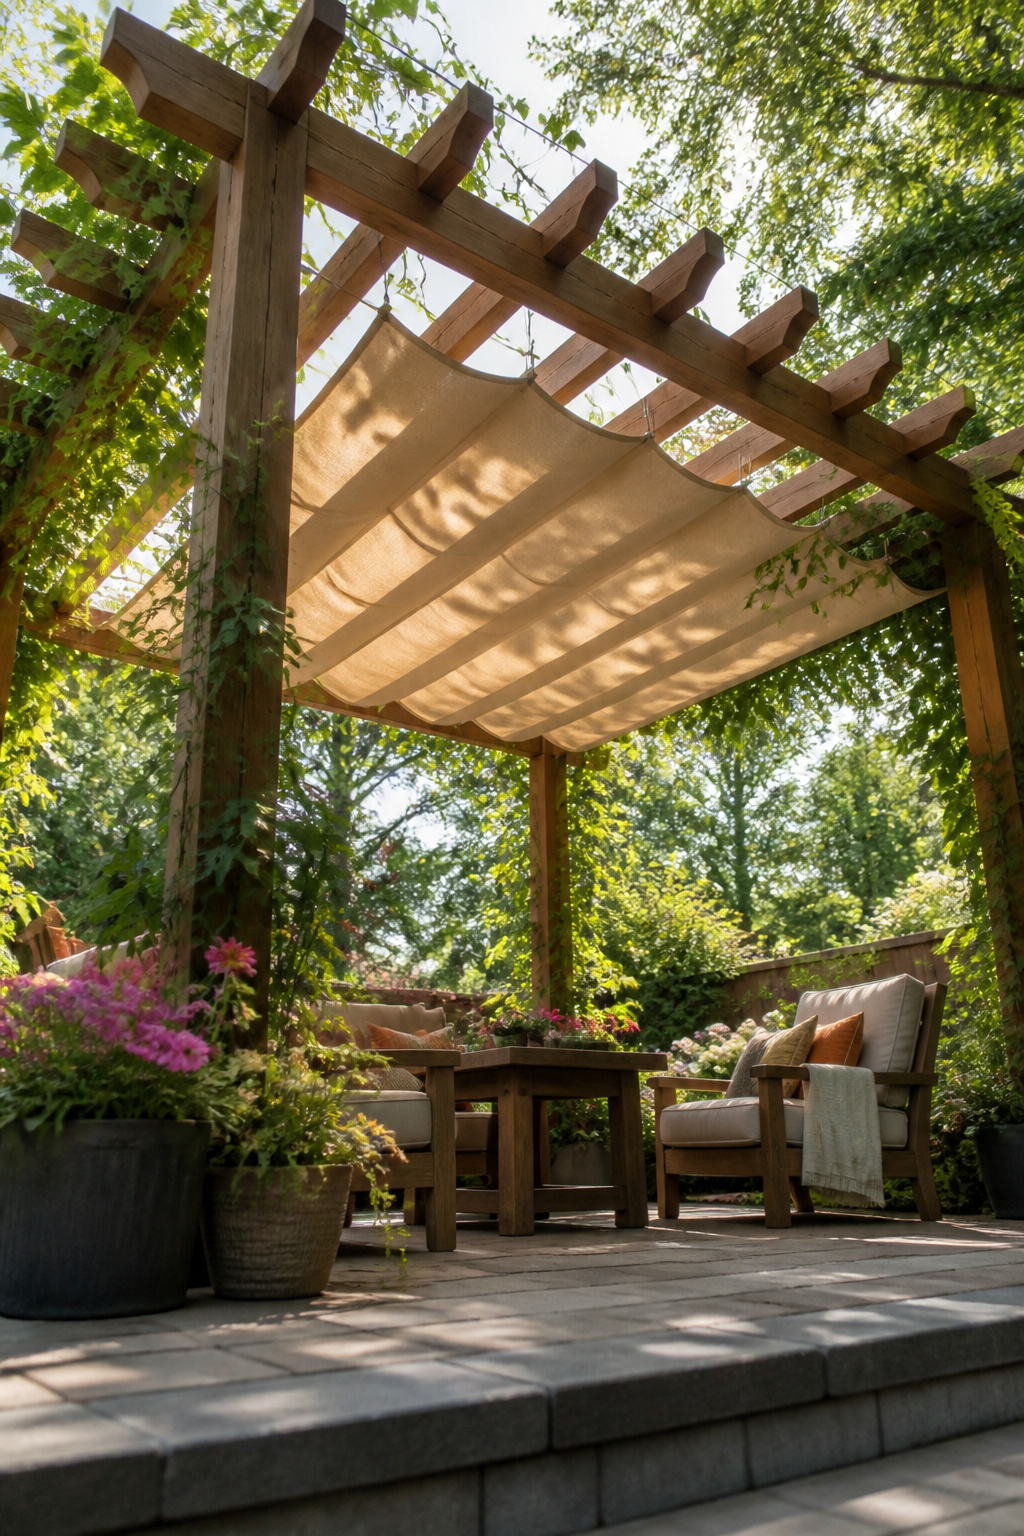
A pergola gives you structure without full enclosure, and the choice between a kit and a full build comes down to what you can actually move alone. Most aluminum or vinyl kits ship in boxes you can lift piece by piece, though the header beams still run 10–12 feet and need a second pair of hands or a rented dolly. I put a 10-by-10 cedar kit together solo over a weekend, but only after I accepted that the shade would shift with the sun; a fixed slat roof blocks direct overhead light from roughly 11 a.m. to 2 p.m. and leaves the rest diagonal. For more consistent cover, a fabric shade cover or retractable canopy bolts to the same frame later.
Anchoring into a paver patio demands concrete wedge anchors drilled through the base plate, not just weight or sand. Dirt footing lets you sink posts in concrete below the frost line, which is the safer bet in zones with real winter heave. My patio install held fine, but I check the bolts each spring; the ground-set posts in my old yard never budged in six years.
12. Outdoor Furniture

Pallet wood looks rustic until it warms, cracks, and starts pulling nails. I built two pallet chairs in spring 2022, sanded them smooth, and sealed them with exterior deck stain. By the second winter the seat slats had cupped enough to catch rainwater, and one back joint had loosened where the pine had checked. They still sit in my side yard, now holding pots instead of people.
What I bought instead, a basic acacia bench from a hardware store clearance rack, has survived the same two winters with only graying. The difference is the wood species and how the pieces join: manufactured furniture uses hardwoods or treated lumber with hardware rated for expansion.
Cushions were where I lost money twice. The first set, a budget polyester fill in a canvas-like cover, mildewed against the bench back after one humid July. Sunbrella-grade acrylic or solution-dyed olefin covers are the replacement standard worth paying for; my second set, bought used from a patio store clearance, has dried without staining after the same summer thunderstorms. The fill matters less than the shell.
13. Trellis Panels
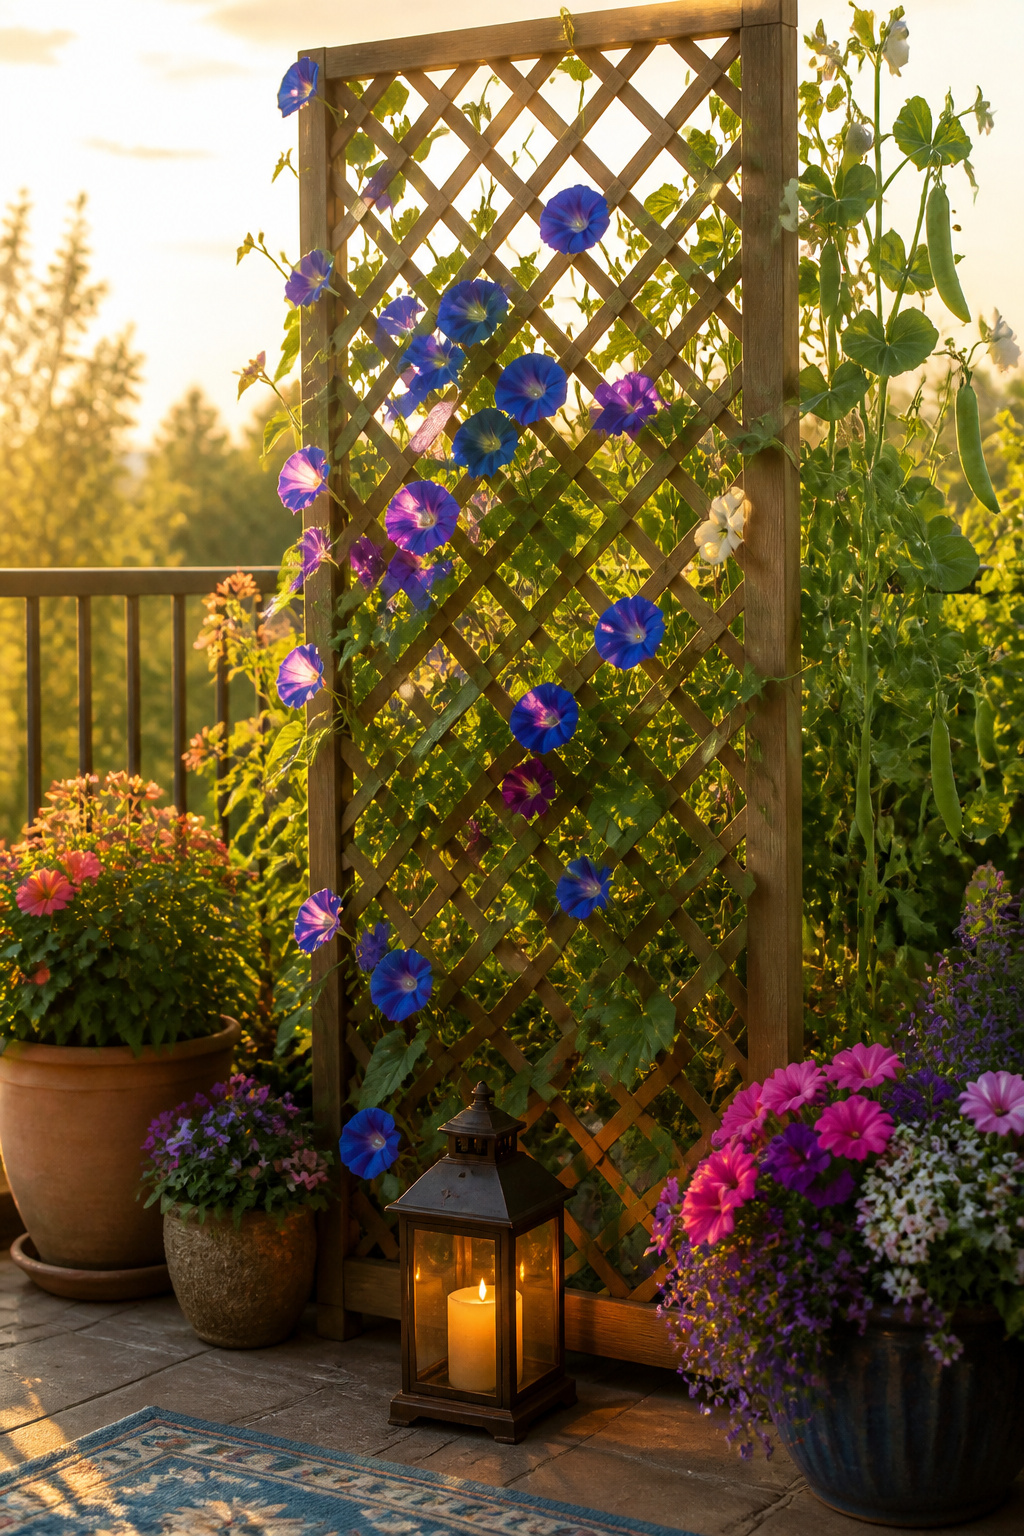
Vertical gardening with trellis panels saves the square footage most renters and small-yard owners do not have. I started with a 3-by-6 foot cedar panel zip-tied to a balcony railing, running morning glories and sugar snap peas up twine I spaced every six inches. The panel itself weighed maybe eight pounds dry, but soaked soil and mature vines pushed it past what the ties could hold in a wind gust one Tuesday in May. It tipped forward until the pot hooks caught the railing lip, which taught me to anchor the base into a weighted planter, not just the top.
Annual vines like those morning glories give full coverage from July through first frost and then leave you staring at bare lattice all winter. Perennial options such as clematis or English lavender build slower, often sleeping the first year and not filling the frame until year two or three, but they return without replanting. For a balcony you see from the kitchen window every morning, that trade is worth it. For a rental you might leave in twelve months, annuals are the smarter spend.
14. Planting Perennials
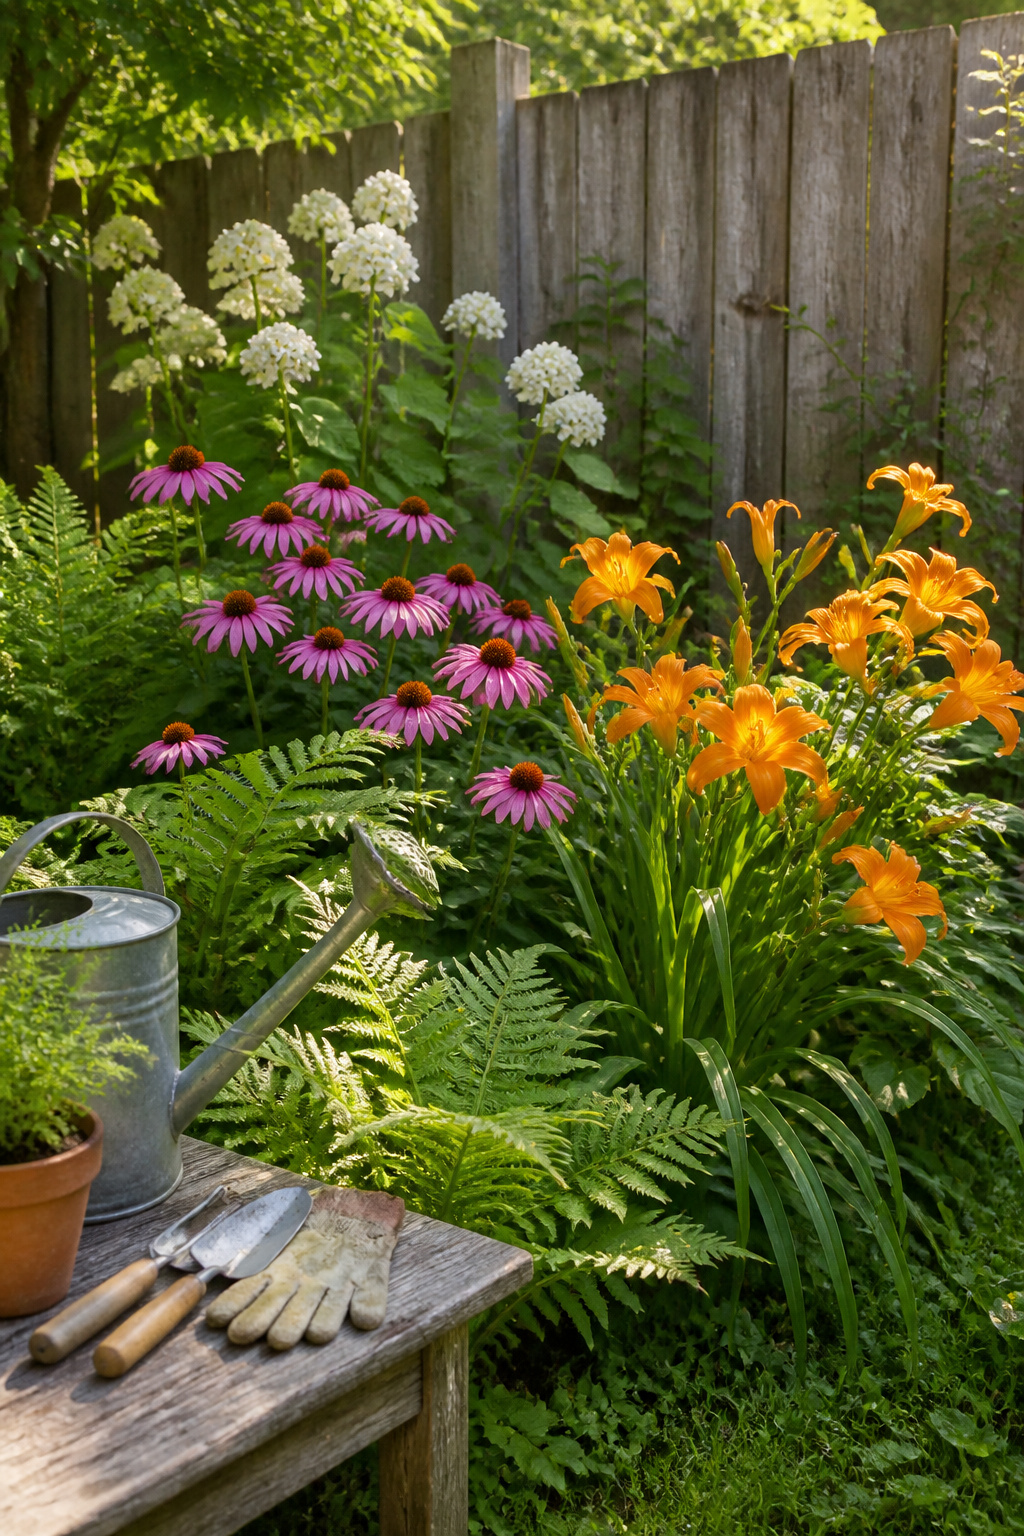
Perennials are the backbone of a low-maintenance yard because they return on their own once established. After two seasons of planting and losing a few, the difference between what survived and what did not came down to matching the plant to the actual conditions rather than the ones I hoped I had.
Coneflowers and daylilies came back without any help from me. Both handle heat and mediocre soil, and they do not mind if I forget to water during a dry week. Lavender, on the other hand, rotted out the first winter. The soil held more moisture than I realized, and lavender needs sharp drainage to survive cold, wet roots. Plants adapted to your local climate and soil are the ones that return year after year.
Hosta and ferns returned reliably in a shady corner where grass never grew, though they took until the third summer to look fully established. The ones that failed were almost always impulse buys with pretty tags that ignored how much sun that particular bed actually received. Now I walk the yard at different times of day with my phone’s compass app before I buy anything, and I save the receipt until I see new growth in spring.
15. Creating Berms
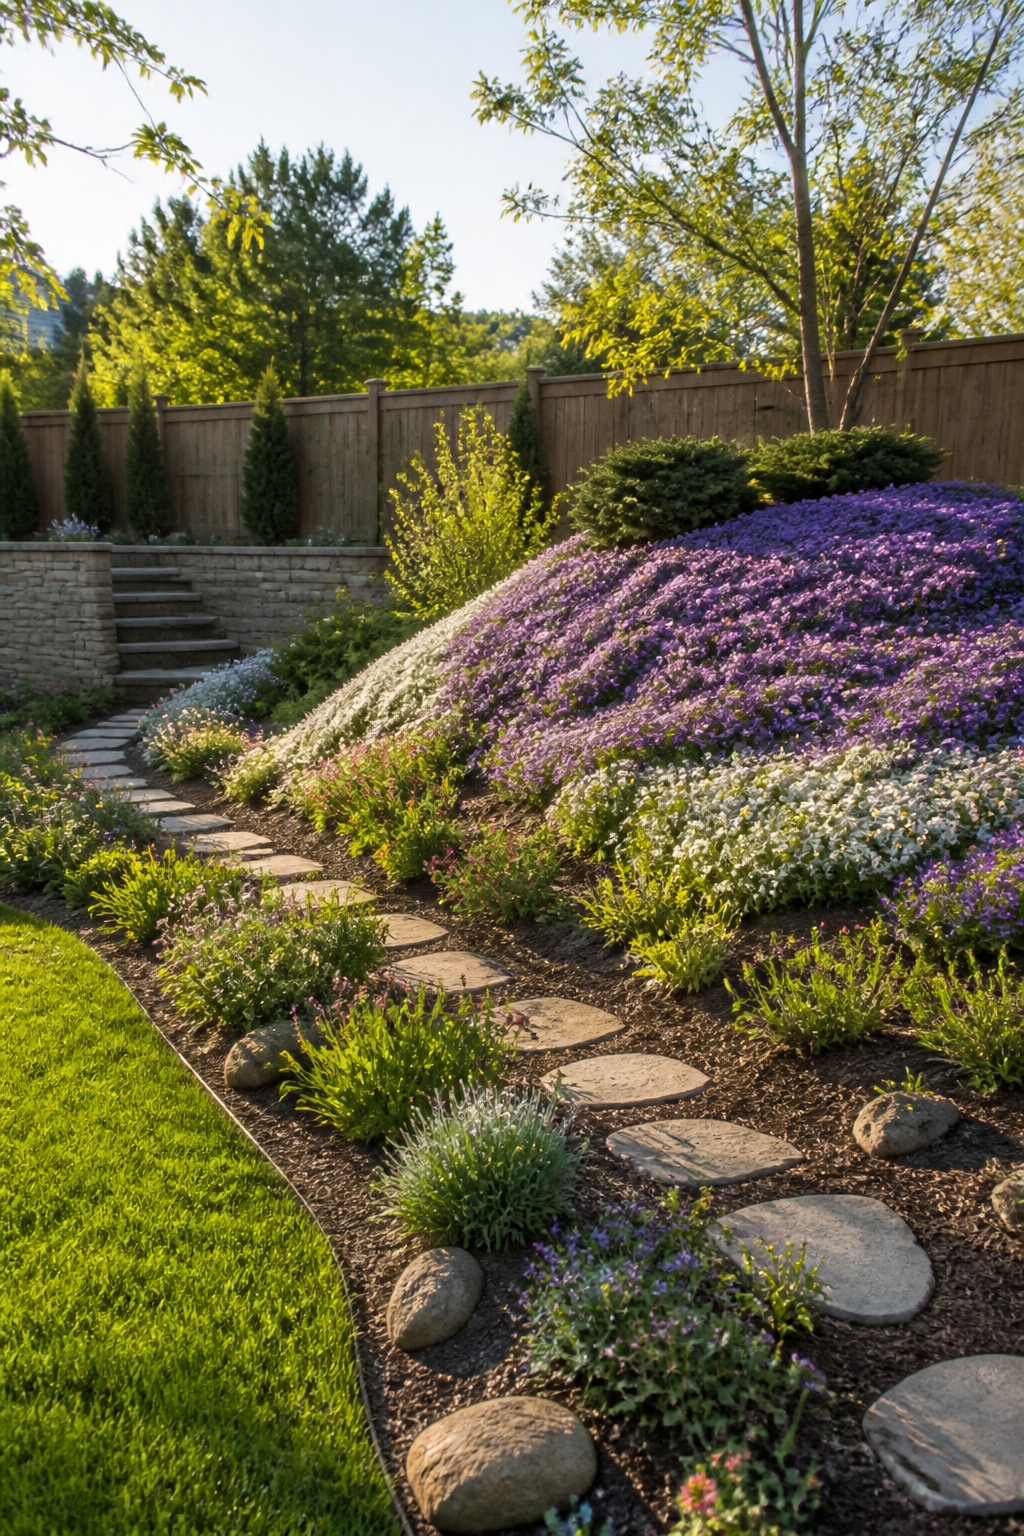
Flat ground reads as leftover space, and a berm fixes that in an afternoon. I built one last spring with soil and plant debris from a bed I was tearing out, moving roughly eight wheelbarrow loads to get a mound two feet high and maybe six across. The shape looked good the day I finished it, but I did not grade a channel for runoff, so the first hard rain left a puddle at the base that sat for two days.
Planting the slope was the fun part. Creeping phlox went on the sunny face, juniper at the back for structure, and creeping thyme along the edge where I did not want to mow. That last part mattered more than I expected. String-trimming around a curved mound every week is not difficult, but it is a separate task from the rest of the lawn, and skipping it shows fast. After the drainage fix, a simple swale to one side, the berm dried properly and the thyme filled in thick enough that I now edge with shears, not the trimmer.
16. Raised Garden Beds
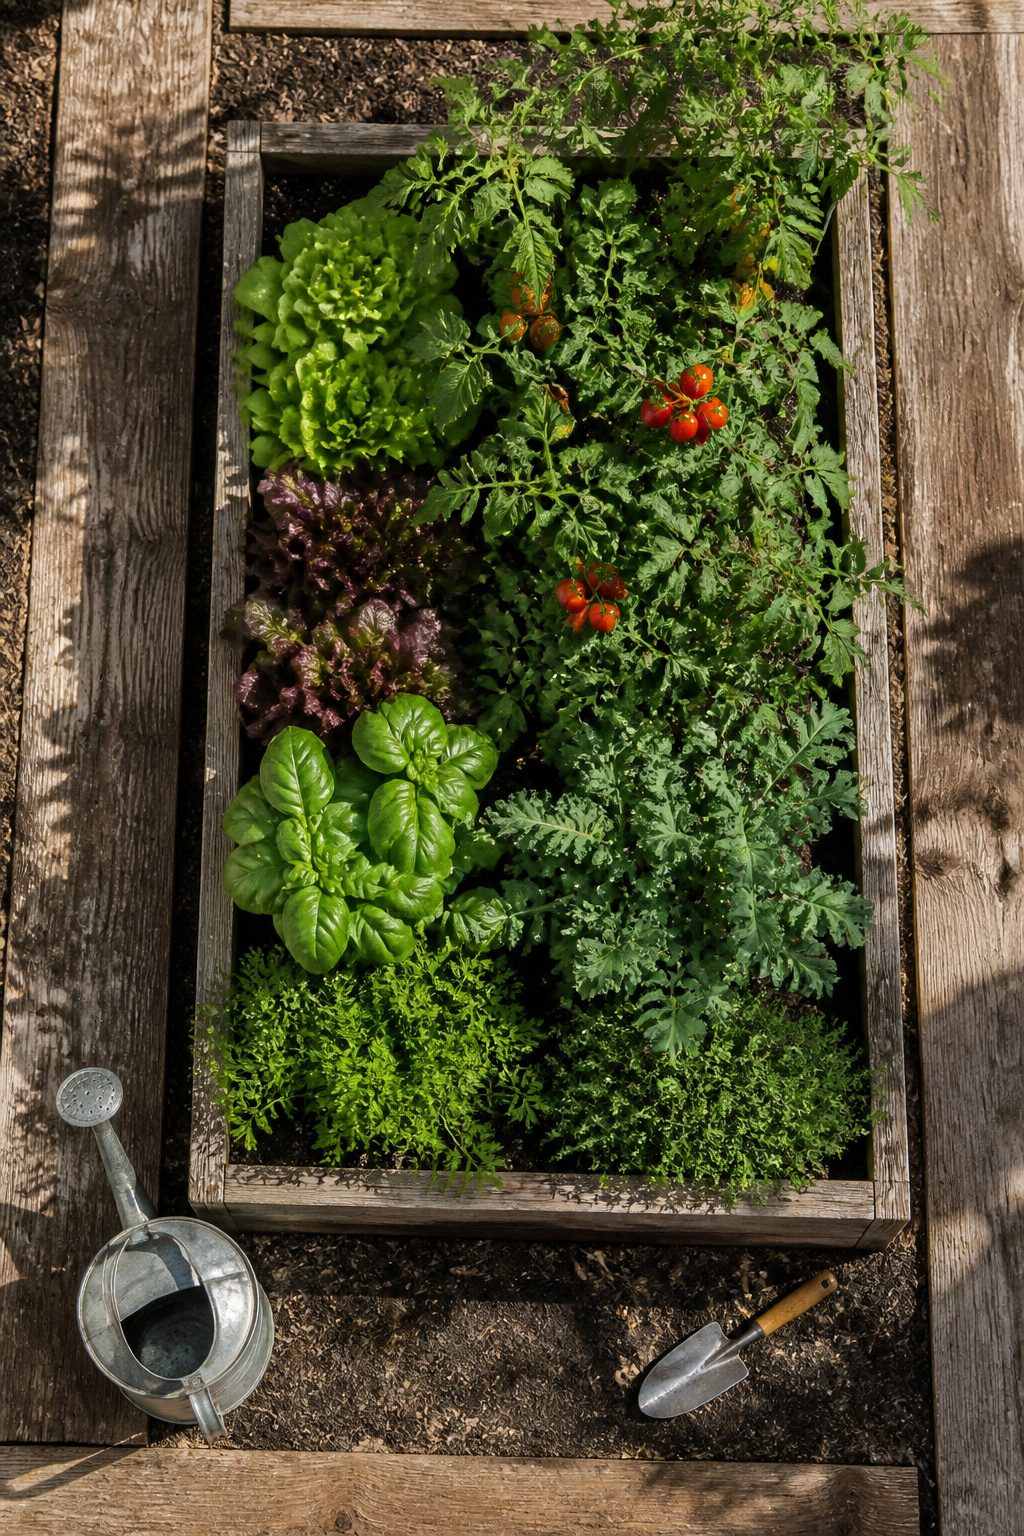
Raised beds change how you work a vegetable patch more than any other single structure. 3 to 4 feet wide and 6 to 18 inches high is the span that keeps every inch reachable from either side without stepping in, and the height range runs from a modest lift for greens up to a full sit-at edge for tomatoes and peppers. I built mine at 12 inches, thinking that would spare my back entirely. It helped, but harvesting the center rows still meant bending to reach; the edge is comfortable, the middle is not. Wood, brick, metal, or concrete all frame the box well enough, though wood rots fastest where soil meets the boards. What the height really buys is drainage and soil control, not ergonomics by itself. For true no-bend gardening you would need a table-height build, and that is a different project with different bracing and cost.
17. Landscape Edging

Stone or brick edging gives a garden bed the clean line that makes the whole yard look intentional, and the materials do not have to cost much. Bricks, rocks, stones, or pebbles all work, and the ones you already have on site cost nothing but the afternoon it takes to place them. I have found that a single row of standard bricks sunk halfway into the soil, tight against the grass, stops most runners better than the thin plastic strips that heave after one freeze-thaw cycle. The labor is upfront and physical: digging a shallow trench, leveling the base, fitting each piece. The result lasts years and gives you a hard edge to run a mower wheel against, so you are not creeping mulch back into the lawn every two weeks. Steel edging with a rubberized lip at the top is another option if you want a nearly invisible line, though that usually means hiring out the install or renting a bending tool. Concrete edging costs more than metal or plastic and cracks where the ground shifts; for a small yard on a $500–800 annual budget, scavenged stone or a pallet of cheap bricks wins.
18. Xeriscaping

Xeriscaping cuts outdoor water use by up to 80%, a figure that made me pause the first time I ran across it. Most gardeners hear "drought-tolerant" and picture cactus gardens in Phoenix, but the approach travels farther than that reputation suggests. In my own zone 7b yard, I planted Red Yucca, New Mexican Privet, and a small grouping of Sedum groundcover three seasons ago. None of them have seen a sprinkler since. The Red Yucca in particular has held its structure through two dry summers without irrigation, though it blooms less aggressively in the wet weeks of late spring than it does once the heat settles in. Gravel mulch, tan to match the local decomposed granite, keeps the root zone from baking and means I am not fighting weeds with a hose. The spacing matters as much as the plant choice: leaving two feet of open gravel between specimens lets each one read as an intentional accent rather than a sparse attempt at a border. For a small yard on a tight water bill, that rhythm of plant, gap, plant turns a limitation into the actual design.
19. Using Potted Plants
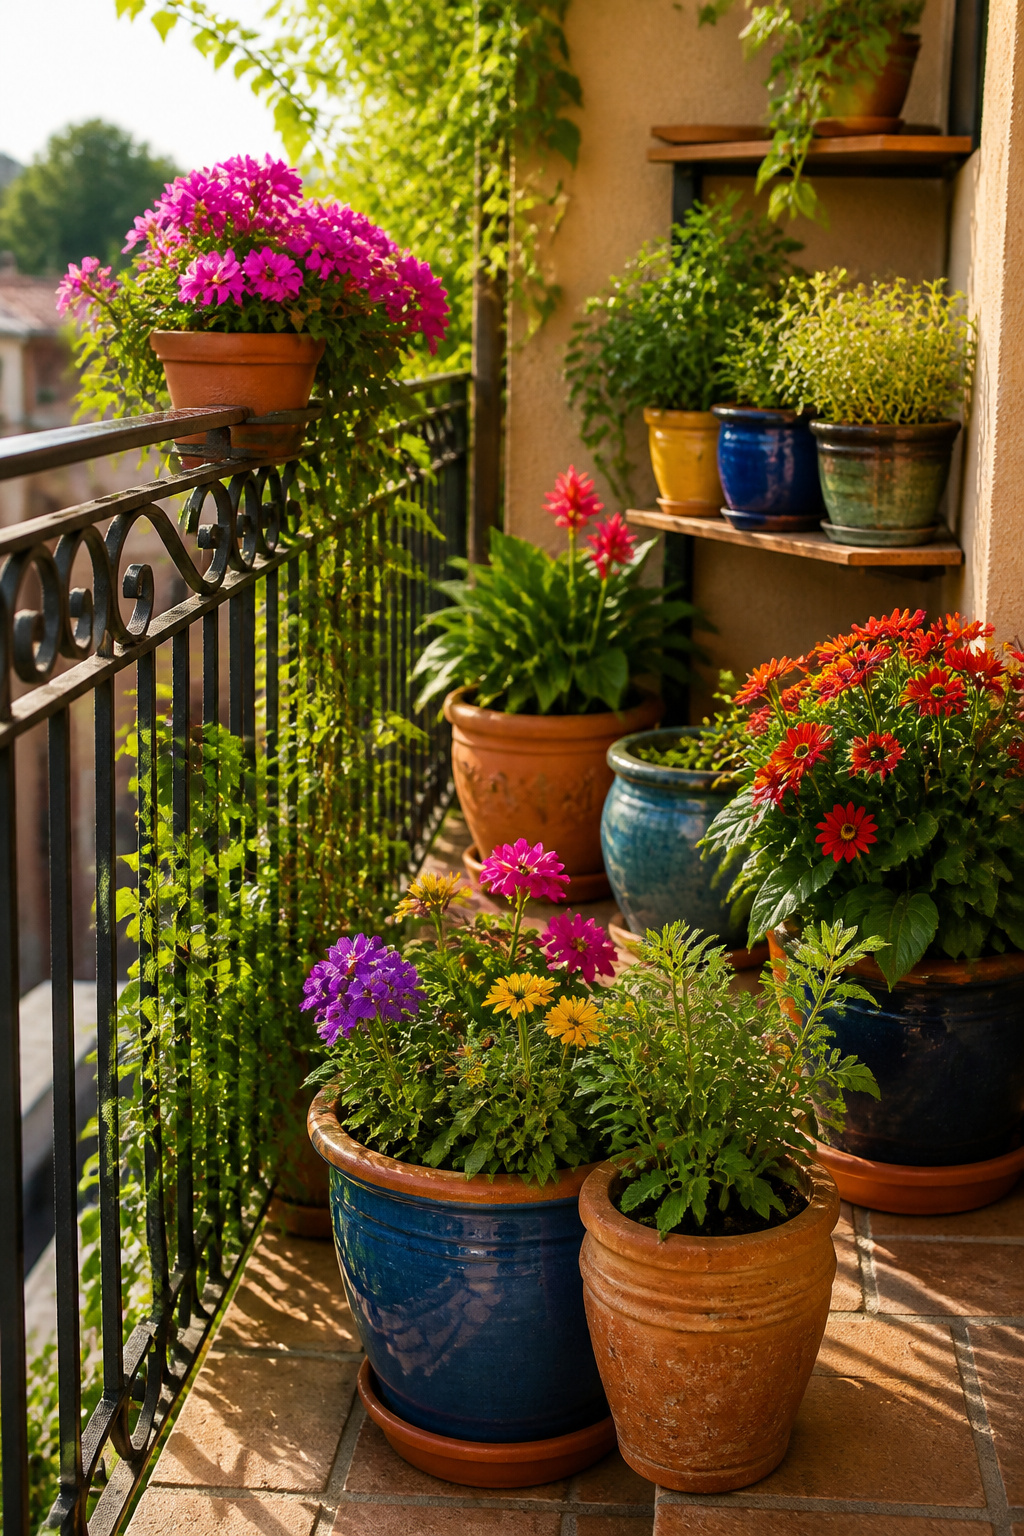
Potted plants are the fastest way to test a layout before committing to holes in the ground. Last fall I dragged thirty-two pots into the garage for winter, a job that took an evening and strained a shelf bracket. Seven terracotta ones cracked anyway, the freeze-thaw cycle winning where the glaze on my ceramic pots held. Soil for containers ran me about three times what the same volume cost for in-ground beds, since I was buying bagged mix rather than amending what I already had. For anyone working a balcony, the load adds up fast: a twelve-inch pot saturated after rain can push past forty pounds, and building specs vary enough that checking your lease or HOA docs beats guessing. I keep the heaviest containers on the ground slab and reserve railing space for lightweight resin or fabric grow bags.
20. Fire Pits
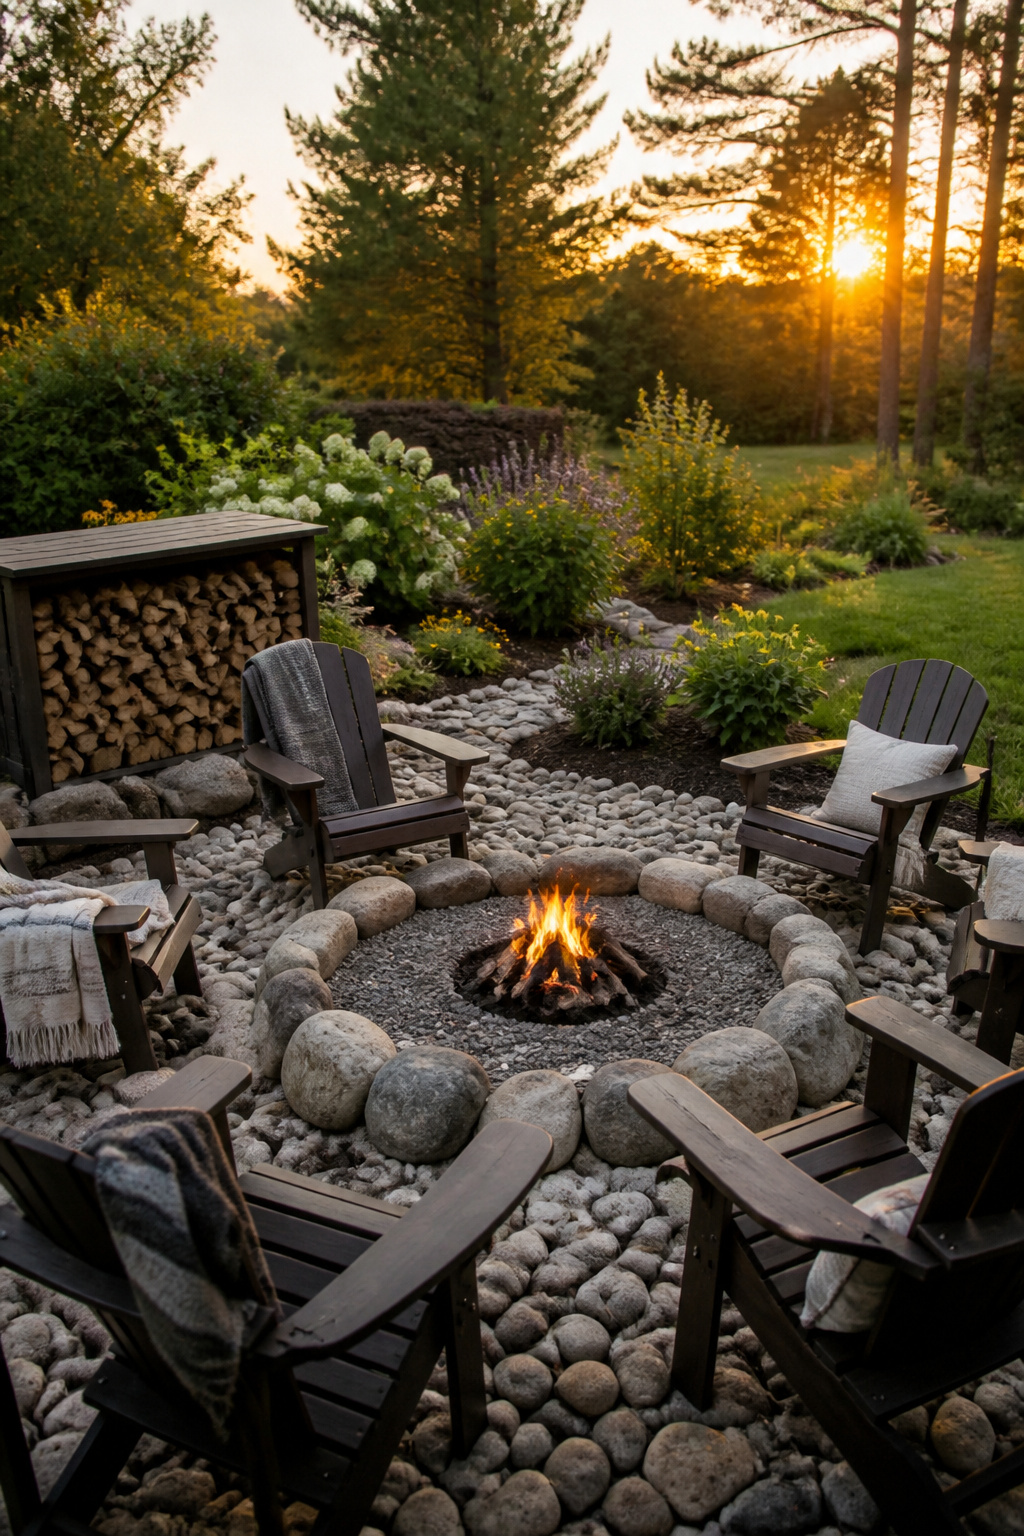
A fire pit needs a base that won’t catch, so gravel over compacted earth is the minimum. I stacked stone around a ring I dug myself, maybe eighteen inches deep, and filled the center with more gravel before the first burn. The county fire marshal’s office had a one-page checklist: ten feet clearance from structures, no burn on dry-wind days, and a hose or bucket within reach. I called to confirm, not assuming the rules I found online were current, and the permit was free.
Smoke direction matters more than the build. My first siting sent everything toward the neighbor’s screened porch, and the complaint came inside a week. I shifted the pit to the other side of the yard, where prevailing wind carried smoke over my own roofline. The gathering happened, though less often than I planned; mosquitoes in July and August drove us back inside unless the breeze was stiff. Adirondack chairs around the ring looked right but sat low, and getting up from them after two hours by the fire was harder at forty than I expected. A Wisconsin family I read about built theirs into a larger patio with raised wooden beds shaped like old fruit crates; that integration with the garden made the fire feel less like a lone appliance and more like a room.
21. Yard Art

Handmade decorations shift a yard from planted to personal, but a small space only has room for one or two pieces before it starts looking like a yard sale. Three years back, I welded a steel heron from corrugated metal scraps, stood it by the patio, and let the rust run. The metal flowers I bought at a craft fair that same summer already look like yard-sale finds, the paint chalking off in odd patches. One large piece at two-thirds your height is enough; anything more competes with the plants you already squeezed in. Painted rocks and mosaic stepping stones work if you keep them low and clustered, not scattered across every bed like breadcrumbs. I tried wine-bottle candles along the path once. They looked clever for about a month, then filled with rainwater and dead leaves.
22. Cottage Gardens

Cottage gardens trade the tidy line for a dense, informal mix of flowering plants that reads as charm rather than neglect. The style dates to the 1400s, and the trick is still the same: let plants rush up to paths and edges at shin to thigh height, keep paving humble with gravel or curving brick, and let weather-beaten furniture sit second to the planting itself.
My first attempt at dense interplanting taught me where the line sits. I packed cosmos, larkspur, and a few self-seeded annuals into a 4-by-6 bed off the patio, figuring the cottage look forgave crowding. By late July the cosmos had shouldered out the larkspur entirely. The remaining mix still bloomed, but the patch read as messy rather than ebullient; without the structural shrubs and perennials that anchor the style, it was just a traffic jam of stems. Stake early, and stake everything you intend to keep — the plants that survive the scramble still flop by August without support, and a cottage garden that lies flat stops reading as romantic and starts looking like a maintenance problem.
23. Edible Gardens

Vegetables and herbs do not have to live in a separate zone behind the garage. Over half the homeowners I see working through designs now want something edible in the mix, and the ones that look best are the ones placed where you actually walk.
Rosemary and sage grow in pots or in the ground among ornamentals without looking like they are trying to escape to a farm. Their silvery foliage passes for landscaping from the street. I keep those near the door, where brushing past them on the way out means herbs for dinner without a trip to the back corner. The compact habit helps; they stay neat where a tomato vine would look like a vegetable garden crashed the party.
Tomatoes and climbing beans I put where the harvest matters more than the view. They hit peak leaf in July, look ragged by August, and the fruit comes on a different schedule than any ornamental display. A trellis of snap peas against the fence is beautiful in May and finished by June, right when the roses open. The gap is the thing to plan for, not ignore. One year I left pea vines up through July hoping for a second flush; they browned, and the whole corner sulked until I cut them.
Raised beds make the family part work, especially with kids who will not kneel. Wood, steel, or corten all function; the material choice is how much rust you want to look at, not how many tomatoes you get.
24. Rain Gardens
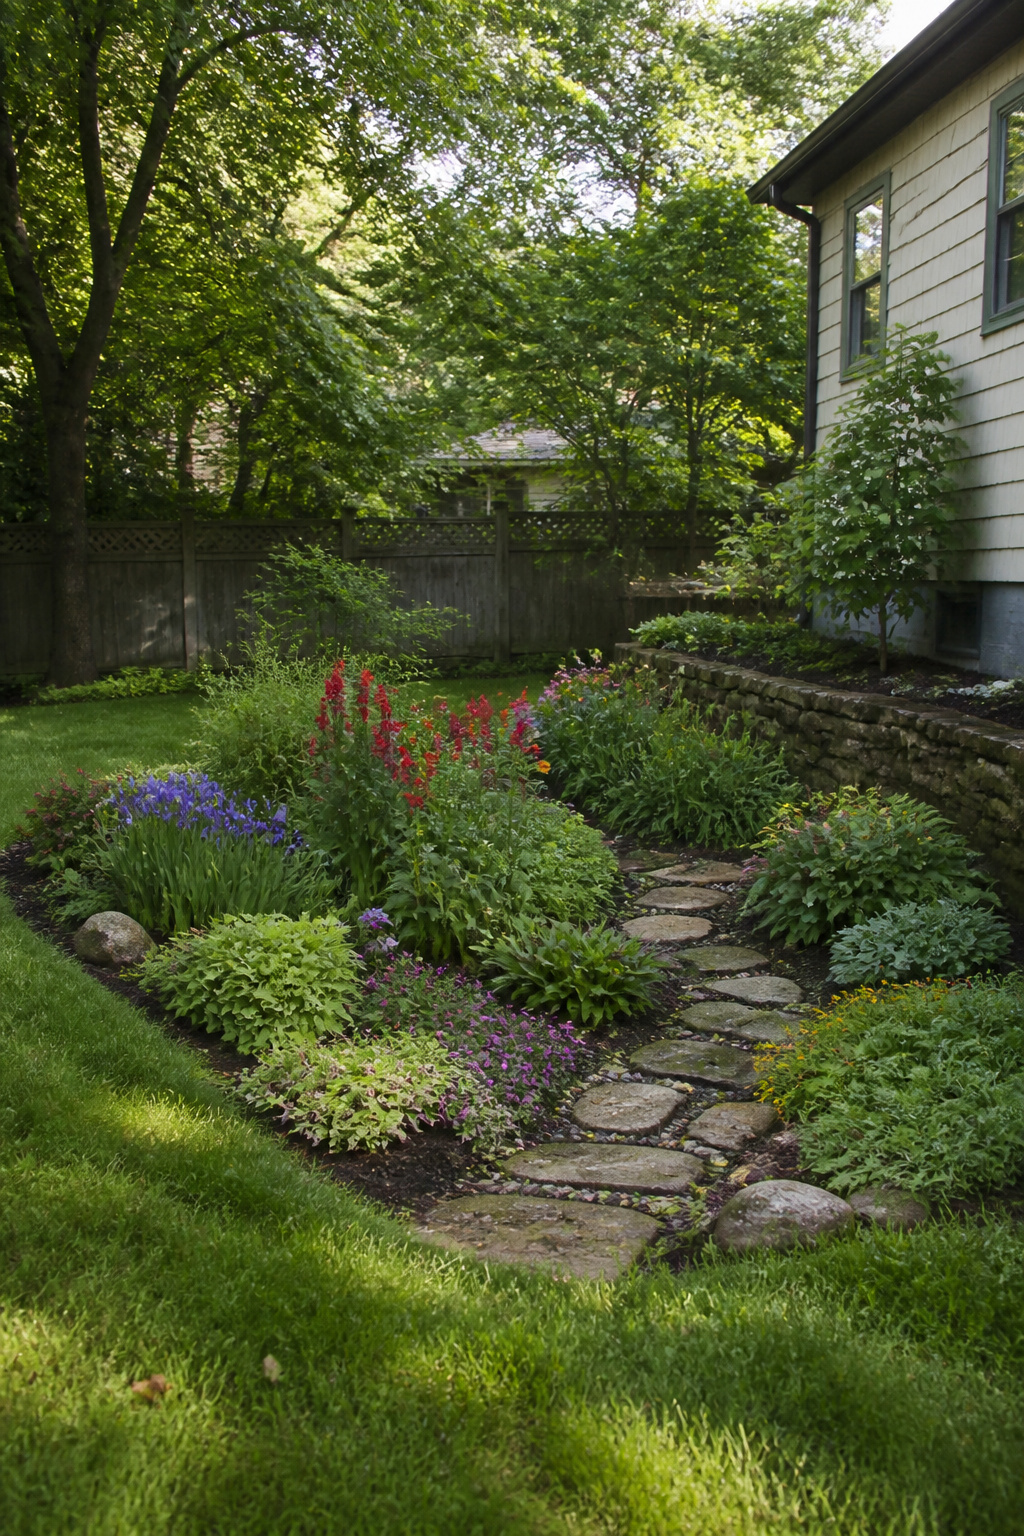
The lowest corner of my backyard collected runoff from the driveway and downspout, turning into a slick clay puddle after every storm. Three years ago I carved out a shallow bowl there, about six inches deep in the center and sloping gently to the edges, then packed the bottom with a mix of native soil and compost. I planted Siberian iris toward the back where water sat longest, cardinal flower along the sides for the hummingbirds, and tucked swamp milkweed near the front where it would stay damp but not submerged.
The garden handled four inches of rain in one July afternoon without a single overflow. Water that used to sheet across the lawn and pool against the foundation soaked in within hours instead of days.
The mosquito question came up immediately from a neighbor. Standing water breeds them, but a rain garden is designed to drain, not pond. Mine empties in under twelve hours, which is too brief for larvae to develop. I have never noticed a worse mosquito problem there than anywhere else in the yard.
One mistake: a dwarf conifer I tried as a structural element drowned in the second spring. The roots rotted within weeks. Moisture-loving means exactly that, and regular garden plants treated to occasional wet feet will not survive a rain garden’s sustained saturation. Stick to the specialists.
25. Ground Covers
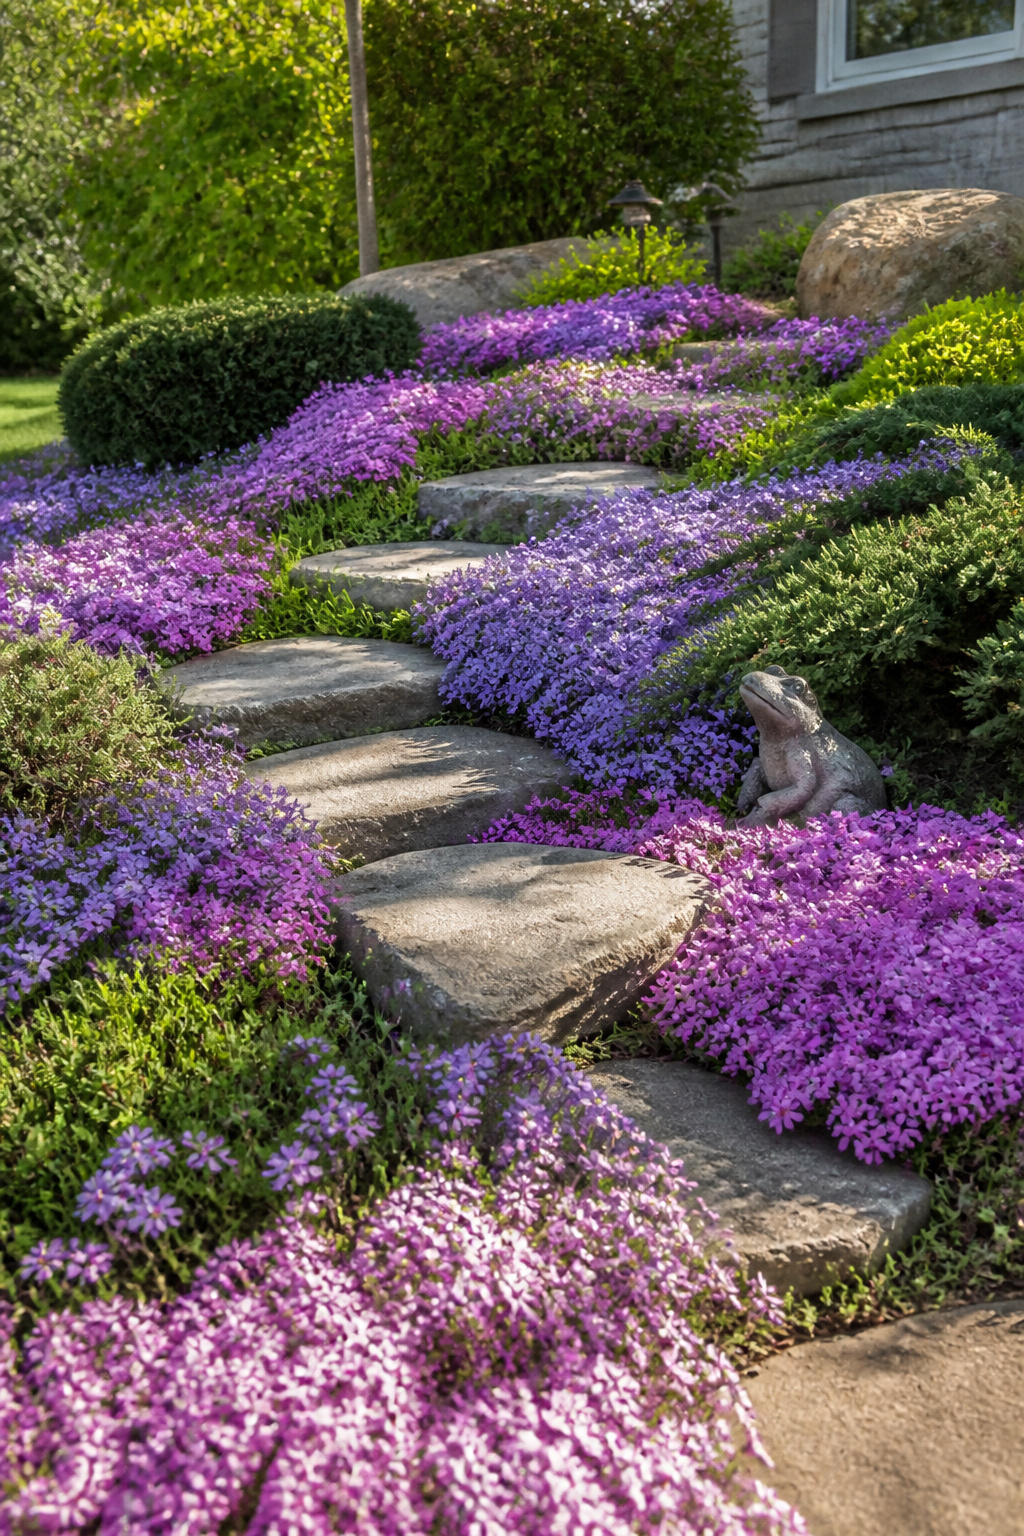
Low-growing plants solve erosion on slopes where turf struggles to hold and mowing is a hazard. Creeping phlox spreads fast enough to knit soil within a season, though that same speed means it can overrun slower neighbors if you plant it in mixed company. Creeping thyme stays more polite, filling gaps between stones without climbing them, but on open soil it takes two years to achieve full coverage and bare patches persist through the first winter. Juniper splits the difference, evergreen and steady without being invasive, though it wants the drainage that heavier clay rarely provides.
Stepping stones complicate the math. Set them before planting and you excavate around each one, disturbing roots and leaving compacted pockets where water pools. Plant first, let the ground cover establish its runners, then drop stones onto the mat and let growth swallow the edges until they sit flush. I learned that sequence the hard way after resetting a path of Pennsylvania bluestone twice in one summer, the phlox tearing where I had levered it up to level a wobble. The stones that went in after the second planting have not shifted in three years, their edges softened by thyme that crept under rather than around.
26. Symmetrical Designs
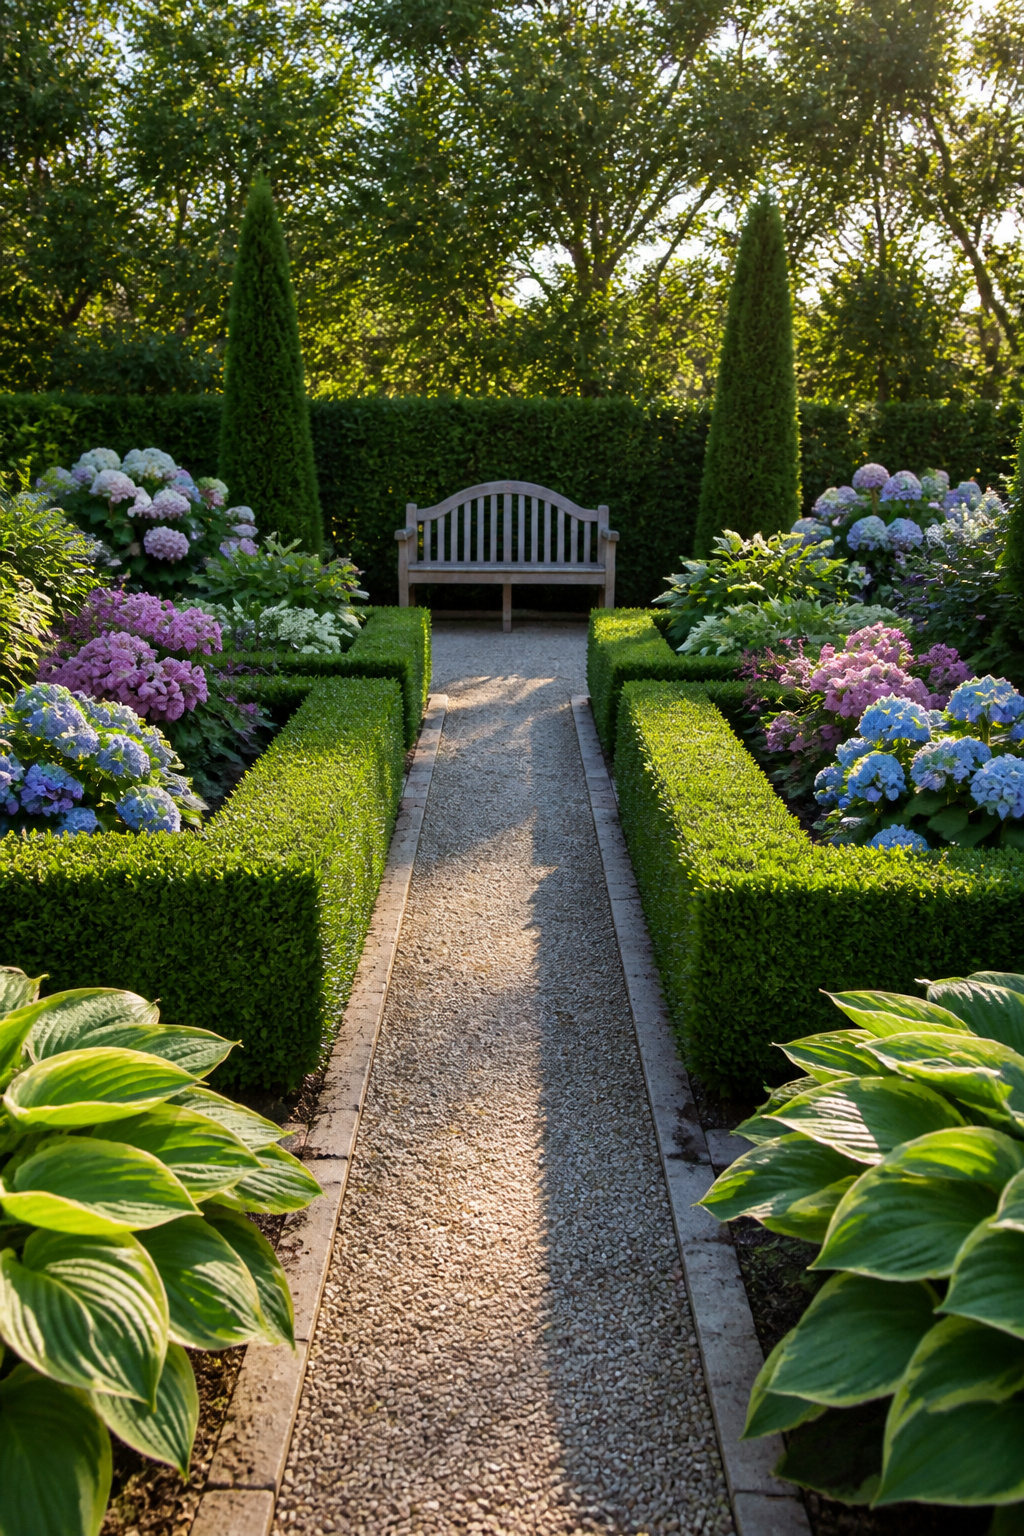
Formal gardens lean on geometry the way a kitchen leans on counters: the structure does the work. Crisp hedges, parallel rows, a clear central axis. Boxwood or Pittosporum give you that medium-to-dark green backbone, and letting them grow naturally saves the clipping labor later.
I tried mirroring two beds along my front walk one spring. Same three boxwoods on each side, same pale blue Hydrangea behind them, same chunky Hostas filling the front edge. The symmetry held about six weeks before a rabbit took out the left-center boxwood and I replaced it with a slightly different cultivar. The mismatch still catches my eye every time I pull in.
Buying in pairs ran my plant bill up roughly thirty percent that season. Worth it for the doorway pots and the corner anchors, where the eye goes first. Further out, where gravel paths turn casual and no one stands comparing sides, I stopped matching and never missed it.
Sustainable Practices

Xeriscaping cuts water use by up to 80%, which is why I started thinking about it even though I do not garden in the Southwest. The technique pairs naturally with the rock gardens and drought-tolerant perennials already in this list, but the water math is what makes it worth doing on its own. Succulents, pampas grass, and wildflowers handle the dry stretches without the sprinkler schedule that bleeds a summer budget.
Composting closes the loop on kitchen scraps and yard waste. Fruit peels, grass clippings, dry leaves: one bin turns what you are already throwing out into the soil amendment you would otherwise buy bagged. I built mine from scrap lumber after watching a season of grass clippings disappear into the city pickup. The return is slow, roughly a year to finished material, but the cost is zero once the bin is standing.
Native plants and perennials tie the two together. They are adapted to local rainfall patterns, so they need less supplemental water, and they come back year after year instead of dying off and demanding replacement. Spirea, salvia, and clematis are the ones I see repeatedly in established yards for exactly this reason: they survive the zone, they do not empty the wallet, and the maintenance drops to almost nothing after the first season. The upfront cost is real, but the payback is five to ten years of not rebuying annuals.
Budget-Friendly Options
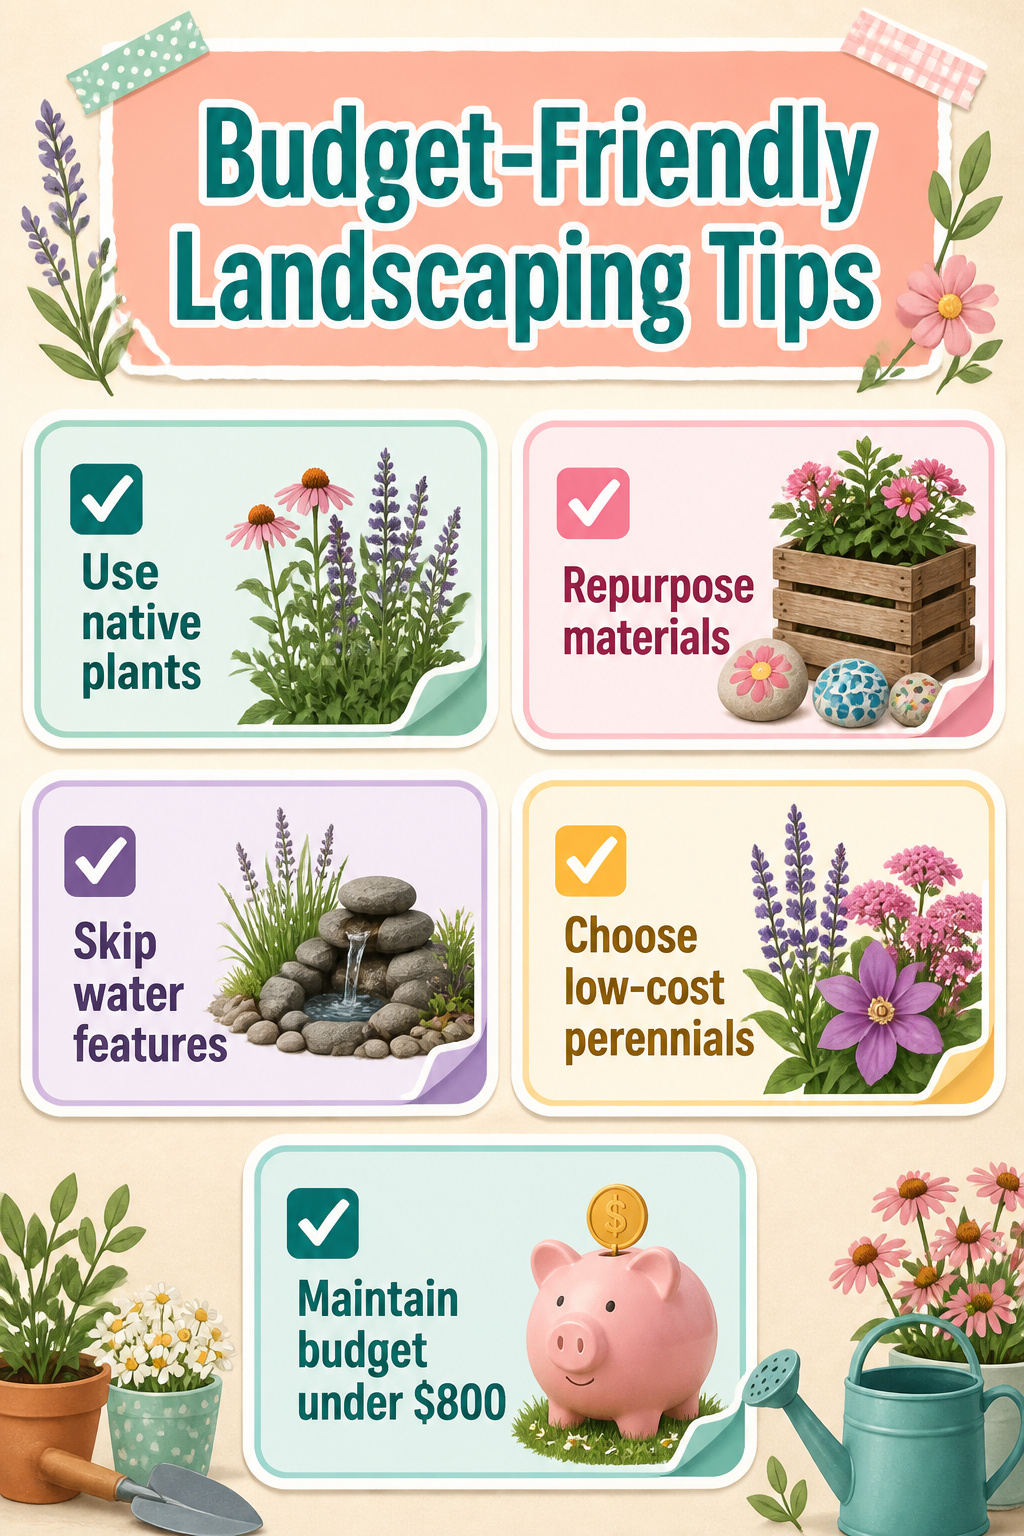
Native plants and low-cost perennials are the backbone of any budget-conscious yard. Spirea, salvia, and clematis have carried most of my early beds for exactly that reason: they survive the season, spread or return reliably, and run a fraction of what annual flats cost by June. Last spring I watched a neighbor’s three-year-old spirea hedge fill out while my impulse-bought annuals browned, and the lesson stuck.
Repurposed materials stretch the same dollars into hardscaping. Wooden crates become planters with a few drainage holes; painted rocks or simple mosaics give the bed edges a focal point without the garden-center markup. The family involvement helps too: my sister’s kids spent an afternoon painting stones for her front walk, and those odd, bright shapes draw more comments than the $40 solar lantern she nearly bought instead.
I skip water features entirely. A landscape designer neighbor keeps several running, so the sound carries; the rest of us get the effect free, minus the pump bills and the mosquito vigilance. That choice alone keeps my annual spend inside the $500–800 line I drew after my first overeager season.
Outdoor Living Spaces
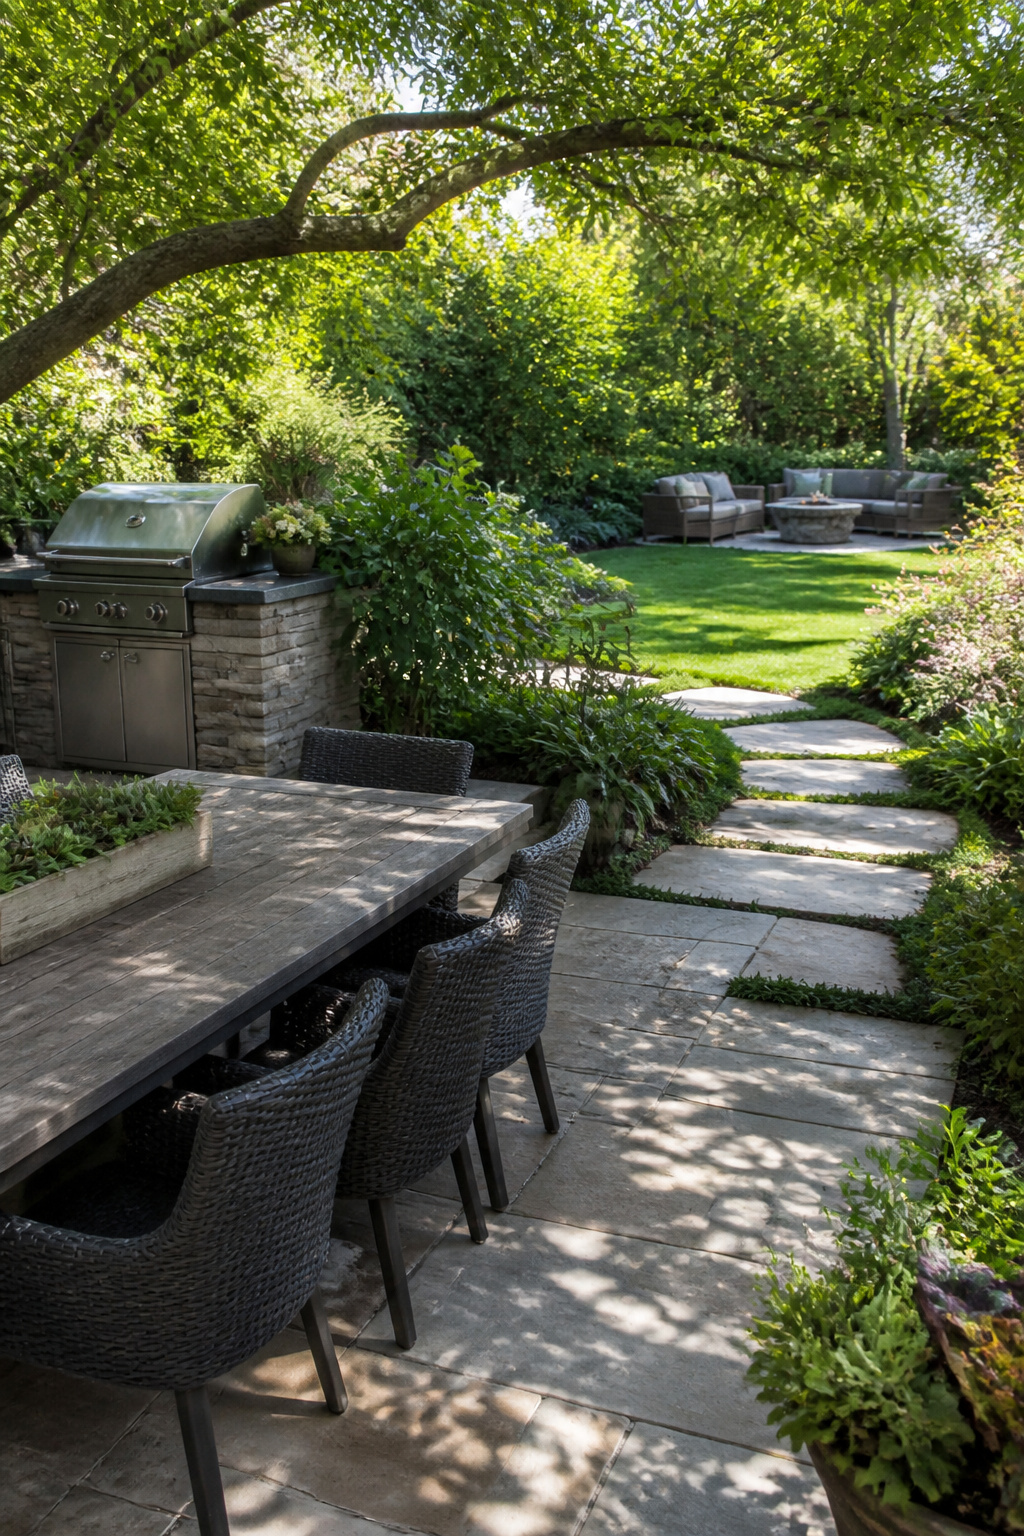
Outdoor living spaces only work when the path from your back door makes sense. A patio that forces guests to cut through the grill smoke to reach a chair, or a seating area walled off from the beds you spent Saturday planting, is a space that sits empty on weeknights.
What convinced me, reading through a dozen of these layouts, was how the best small yards treat the ground plane as three overlapping zones rather than separate rooms. The cook zone, the sit zone, and the planted edge each need about six feet of clear radius to feel functional, but they can share that space if you think in time slots rather than square footage. The grill faces the house so the cook stays in conversation; the seating backs up to a raised planter or a line of topiaries so the eye stops at greenery instead of the fence; the traffic line runs between them, wide enough for a tray but not so wide that it becomes a no-man’s-land.
A pallet-built bench or a rope-and-tire ottoman can anchor a corner without the bulk of a full outdoor sofa set. The paver base matters more than the paver pattern: leveling sand and gravel first, or you will relevel every spring. An outdoor rug under the seating defines the zone without walls, and it is the cheapest way to make a brick or concrete pad feel finished.
The mistake is buying the matching set before you know where people actually want to sit. Start with folding chairs. Move them for two weekends. Then build or buy what the use pattern proves you need.
Plant Selection by Condition
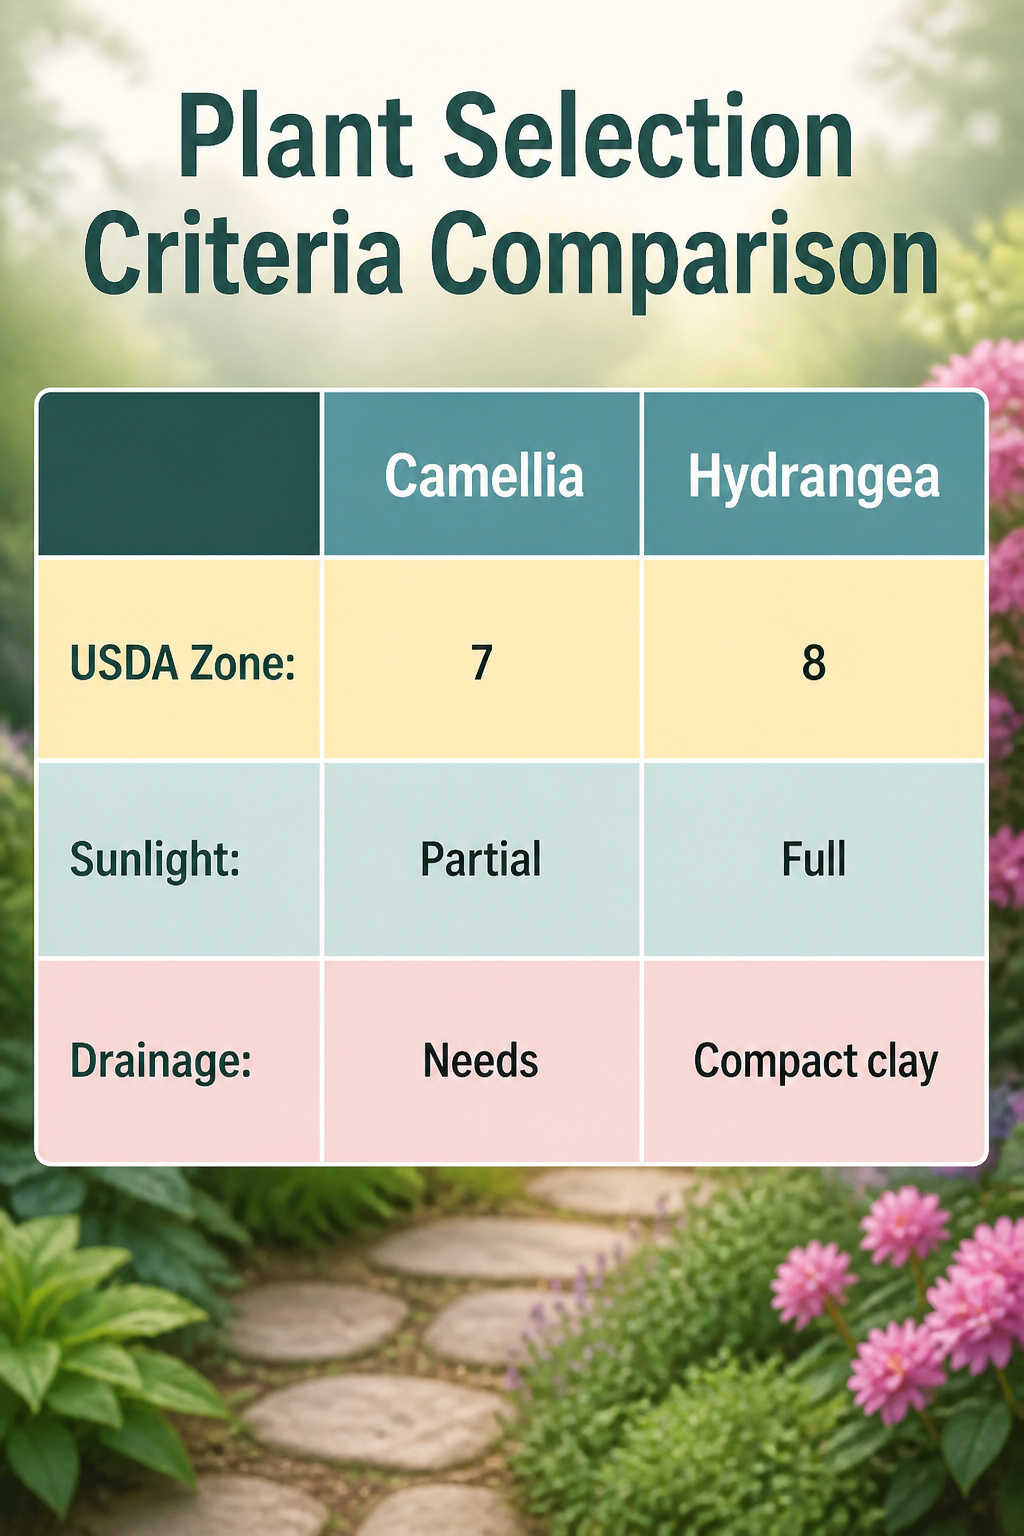
The tag on a ‘Zone 8’ camellia promised it would sail through winter at my Zone 7 lake house. It did not. Three hard freezes later, the browned stems taught me what the nursery label left soft: your USDA zone is a ceiling, not a suggestion, and plants sitting on the edge rarely survive the years you need them most.
Sunlight mapping matters just as much. I spent one Saturday with coffee and a notebook, tracking when each bed got light. The north wall that read "partial shade" to my eye turned out to be deep shade after noon. Hostas and ferns went there; the hydrangeas went where morning sun lasted four hours. The tags said "part shade to sun," but in practice that range collapses fast once summer heat arrives. Where I garden now, afternoon sun cooks anything not labeled heat- and drought-tolerant. Agapanthus and bluebeard handle that wall-side bake; camellias want the cooler roots and lower light they would find under a taller shrub.
Drainage is the condition tags skip. A stone path I laid through the backyard turned out to sit on compacted clay that pooled after rain. Shade-loving plants drowned where shade alone would have kept them happy. Now I check the hole after a storm before I plant, not after.
Landscape Styles
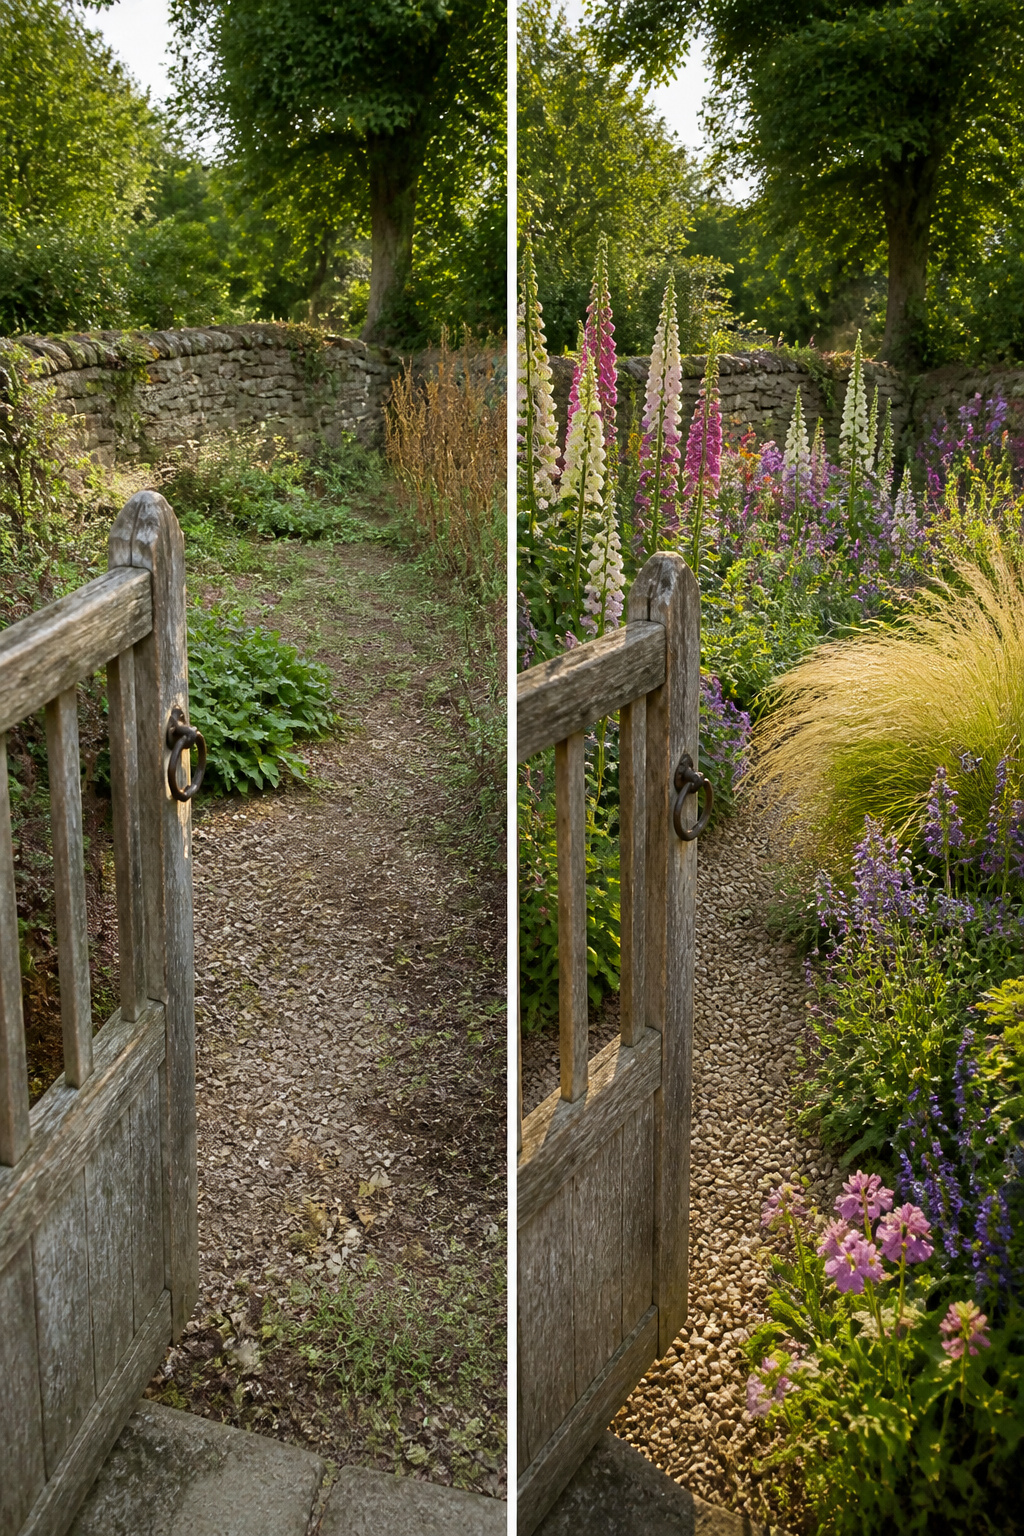
I started my last yard with a clear plan for a clean, modern look: straight lines, gravel, maybe a single ornamental grass repeating in blocks. What grew there instead was closer to a cottage mess, with self-seeded foxgloves popping up between pavers and a climbing rose I never planned swallowing the fence. The gravel lasted one season before mulch crept in to cover the weeds, and the grass blocks softened into drifts of nepeta and salvia that the bees took over.
The style you name at the start matters less than the conditions you actually garden in. My afternoon sun and clay soil had no interest in the sharp edges I sketched. A tropical plan would have met the same end: cannas might limp through August here, but they would not thrive enough to carry a whole design. What convinced me, reading through a dozen of these landscaping ideas, is that the sources pushing rigid style categories are usually selling a look rather than living with it. I stopped calling my yard anything specific and started choosing plants that filled the gaps the previous year had left open. The result reads as intentional now, though every choice was a correction.
Frequently Asked Questions
What are some cheap landscaping ideas?
Use native plants and low-cost perennials like spirea and salvia, repurpose materials such as free rock from local construction sites, and handle labor yourself instead of hiring out. Scavenged stone or a pallet of cheap bricks for edging costs only the afternoon it takes to place them, and a wire mesh compost bin runs about the price of zip ties.
How do I choose plants for my garden?
Match the plant to your actual light and soil conditions, not the ones you hope you have. Walk the yard at different times of day with a compass app to check sun exposure, and buy plants adapted to your local climate zone so they return year after year. Lavender needs sharp drainage; hostas and ferns need shade.
What are the best plants for low maintenance landscaping?
Perennials and native plants are the backbone of low-maintenance yards because they return on their own once established. Coneflowers, daylilies, and hostas handle heat, mediocre soil, and forgetful watering, while xeriscaping plants like Red Yucca and Sedum can cut outdoor water use by up to 80% and survive without sprinklers.