
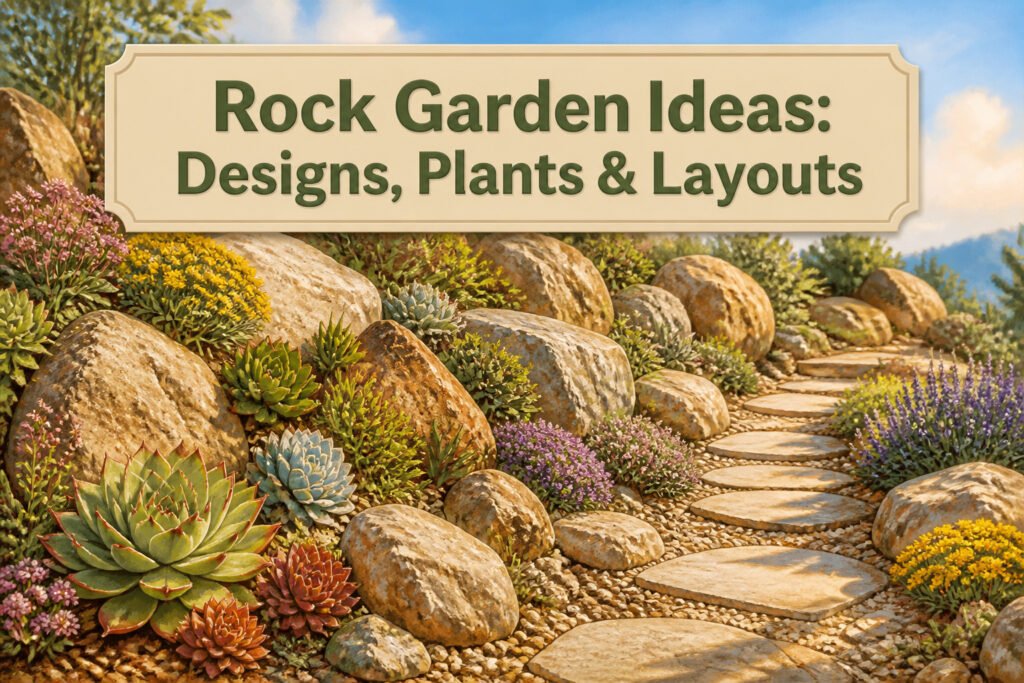
Rock gardens span from a single hypertufa pot on a balcony rail to a full front-yard slope stabilization, and the deciding factor is drainage, not space. The reflected warmth off a south-facing stone wall can open the growing season by two weeks, but that same heat dries soil fast enough to rot cacti in mix meant for flower beds. Pick your stone first, then match the plant to the geology: limestone demands alkaline-tolerant species, and granite suits acid lovers. A desert succulent on limestone is simply a slow failure.
1. Small Cactus Oasis

A desert cactus rock garden makes the most sense in zones 8–11, where winter lows rarely punish plants that hate wet feet more than they hate cold. I built mine against a south-facing garage wall, and the stone radiated heat back at the plants all afternoon. The reflected warmth actually opened the growing season by two weeks, though it also meant faster soil drying than I anticipated.
The soil mix is where this lives or dies. I use roughly two-thirds coarse grit or crushed pumice to one-third potting soil, and even that feels generous. Cactus roots need air around them more than they need organic matter. Water sits in regular garden mix and rots the core before you notice the skin going soft.
That softness is the warning most people miss. Sources agree on the irony: cold kills fewer cacti than kindness does. Overwatering, not frost, is the usual killer. In summer I let mine go three weeks between drinks, sometimes four if the sky stays gray. The stone mulch I laid between larger rocks buys me margin; it slows evaporation just enough that I am not out there with a can every weekend second-guessing myself.
2. Rocks as Natural Accents

A single boulder dropped into a bed of low perennials does more to anchor the space than a whole truckload of scattered stone. I learned this the hard way after watching a neighbor’s "accent" read like leftover foundation fill. One boulder per 10 to 15 square feet is the proportion that looks planned. More than that, and the eye stops seeing plants at all.
Placement matters as much as count. Set the stone so a third of it sits below soil line; it settles in and looks like it grew there. I group smaller stones in odd numbers, tight enough to read as one mass, never strung out like a border. Flat river rock can edge a bed, but that is a different job entirely, and mixing the two languages in one view usually muddies both.
Dwarf conifers or a single small tree near the stone give it scale and something to contrast against. Keep the planting lean; the rock is the punctuation, not the paragraph. A generous mulch ring around the base saves you from weeding between stone and soil later, and the whole thing needs about as much maintenance as the driveway.
3. Go for Grass

Stone stays still. Grass moves. That difference is what makes ornamental grasses worth threading between rocks that would otherwise look planted by a delivery truck rather than a person.
Sedums, alpine phlox, and creeping thyme handle the poor, well-draining soil between stones, but they hug the ground. For height that lasts through winter, feather reed grass, blue fescue, and little bluestem add the vertical structure a rock garden needs to read as intentional. Blue fescue in particular works as edging or massed in beds: steel-blue foliage, 10 to 12 inches tall, spreading 24 to 28 inches, tan flowers from late spring to summer. Drought tolerant and nearly maintenance-free.
The movement matters more than the color. On a balcony where everything is small and controlled, grass shifting in wind against fixed stone gives the eye something alive to track. The mix reads as deliberate: low creepers filling gaps, taller grasses catching light and bending with it. Winter structure means the bed does not flatten to a collection of rocks once frost hits.
4. Vertical Structures
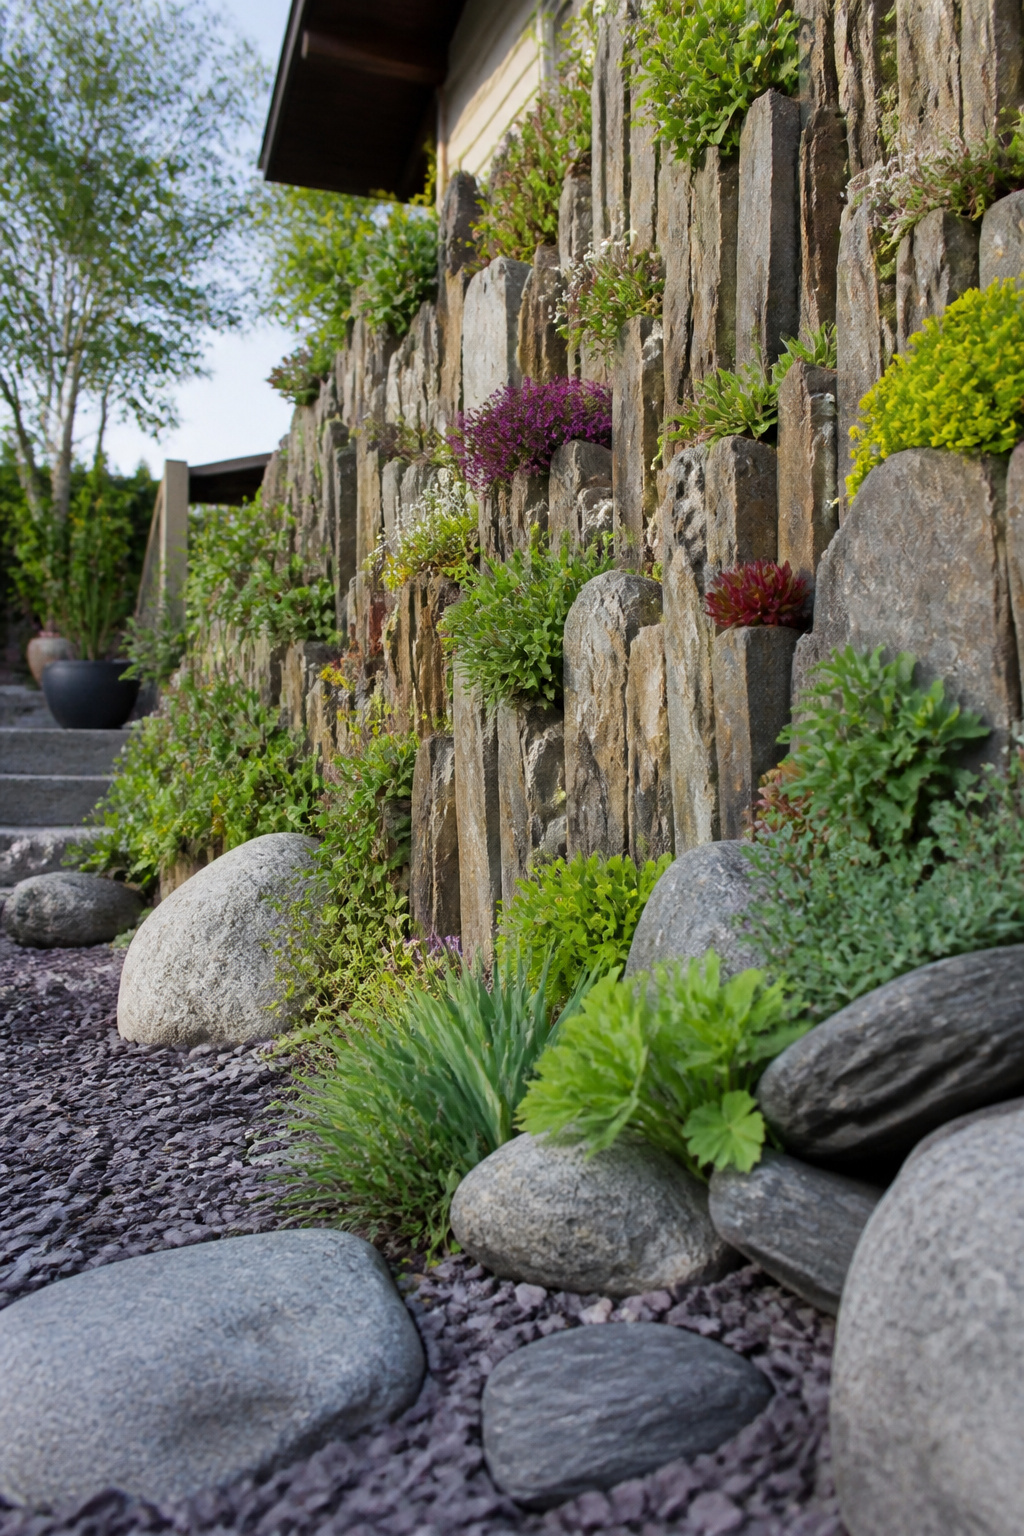
Flat ground is the enemy of a rock garden that reads as a landscape rather than a collection. Stacked stone walls, gabion cages, or dry-laid columns change that equation by introducing real elevation without the engineering a retaining wall demands.
Crevice gardening turns the technique vertical: flat stones dug upright into the soil like dishes in a rack, spaced tight enough that soil fills the gaps but roots find the drainage they need. The style came out of Czech practice and works especially well where square footage is limited, since the face of the wall becomes the garden bed. Alpines and small succulents, ice plants, woolly thyme, sempervivum, and Lewisia cotyledon all take to these narrow root runs where ordinary planting would rot them.
Gabion cages, the wire boxes filled with loose stone, read more architectural and can stand as freestanding columns or low privacy screens rather than earth-bound borders. The rock stays visible, which matters if you chose it for color or texture, and the structure goes up without mortar. Either approach, stacked or caged, gives a small yard the one thing rock gardens too often lack: a reason to look up.
5. Start with Succulents
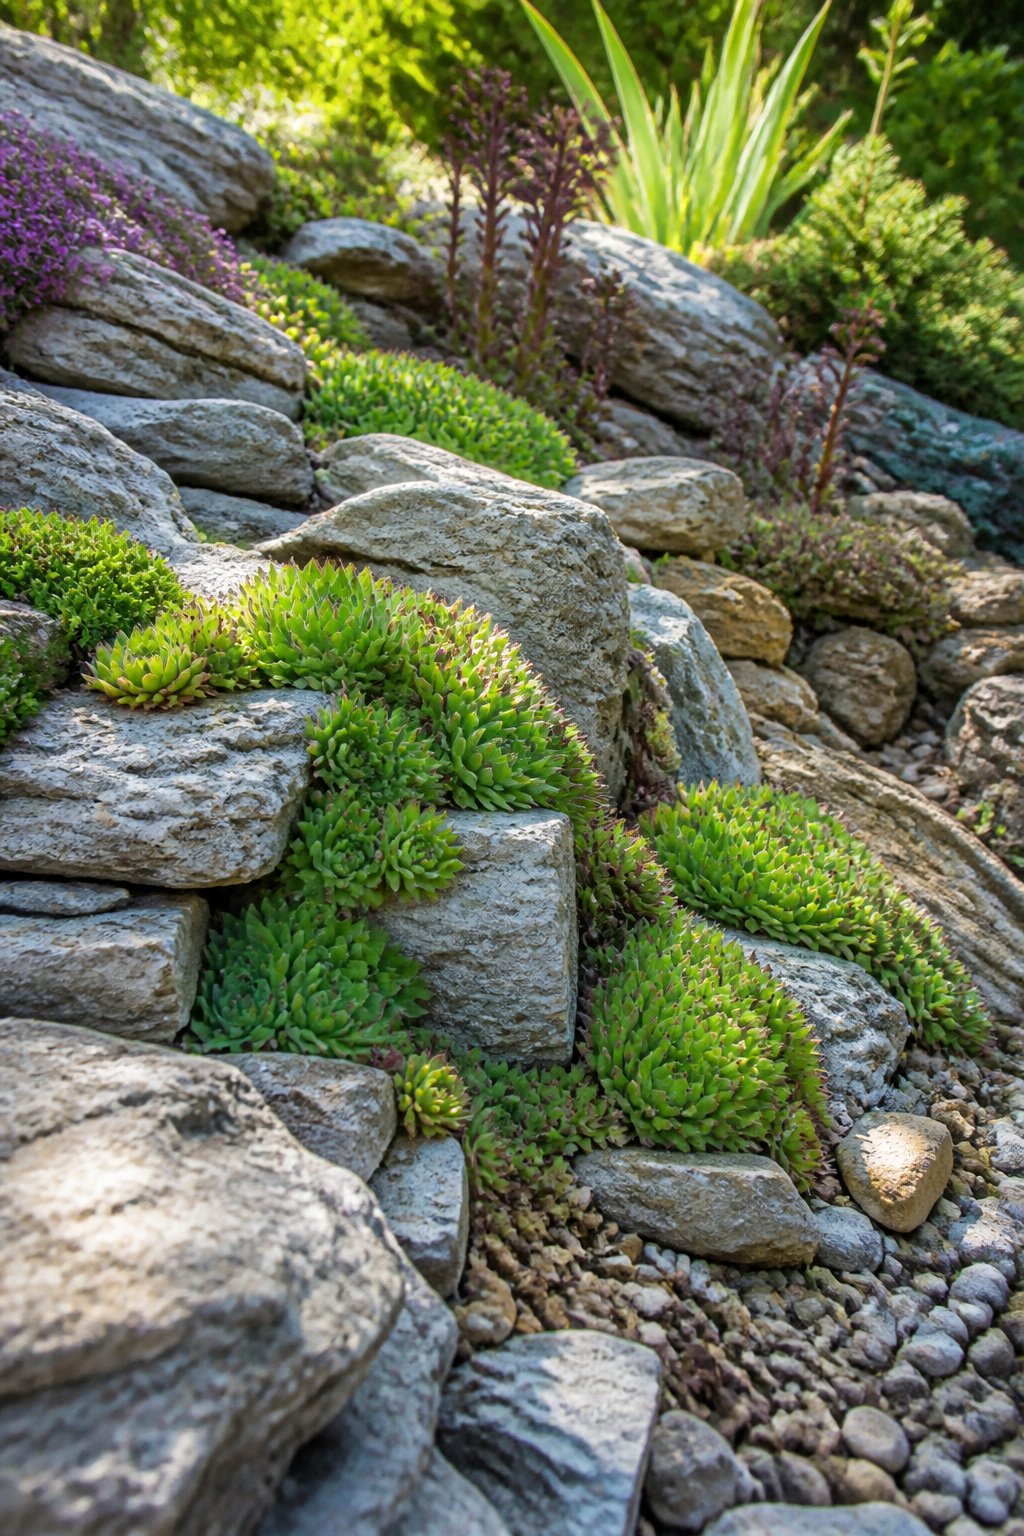
Succulents were my own entry into rock gardens, mostly because they forgave the weeks I forgot to water. Hens-and-chicks root so readily into gravel that you can tuck them into a crack with barely any soil and still find them spreading the next spring. Sedum and echeveria work the same way; their shallow roots grab hold fast and their leaves store what they need through dry spells.
The planting window matters more than fussing over soil amendments. Spring after your last frost date gives succulents a full season to anchor before winter, or aim for early fall with at least six to eight weeks before your first expected frost so roots set before cold arrives. I lean toward spring in zones 3–6 where the growing season runs shorter, though zones 7–9 have enough warm stretch on both ends to make either timing work. Container-grown plants establish better in rocky, fast-draining ground than bare-root specimens, which tend to desiccate before they can take hold.
6. Keep It Simple
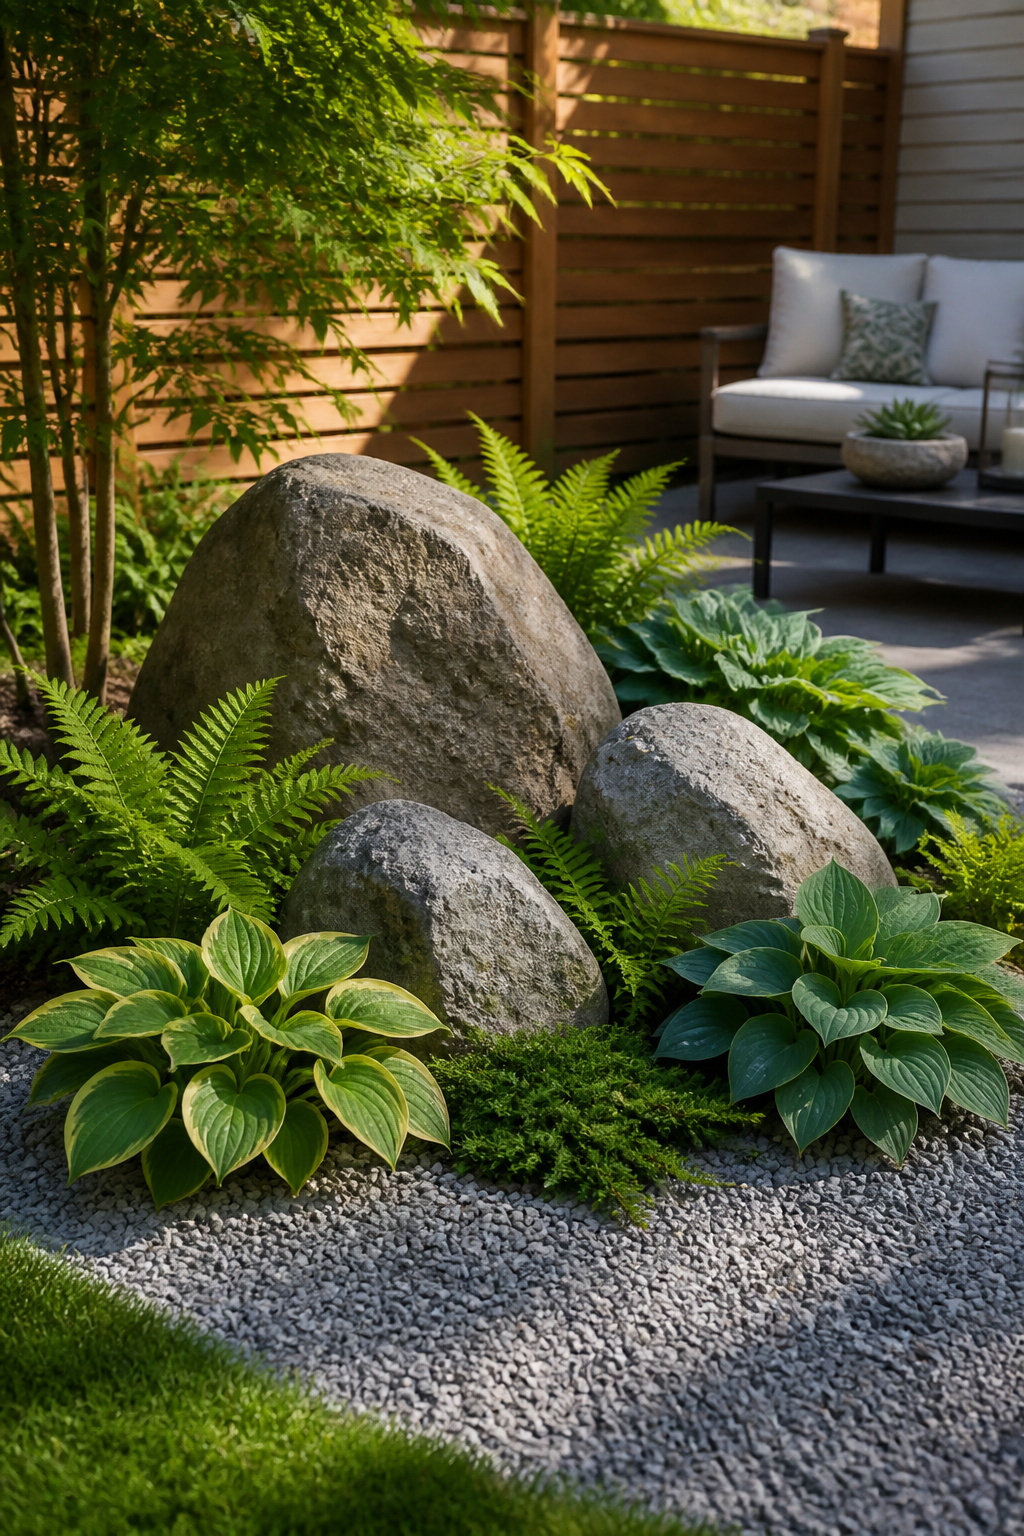
The rock gardens that survived my yard were the ones built in an afternoon and left alone. The ones I killed, I kept adding to: another stone size here, a third plant form there, until the whole thing looked like a clearance shelf at the garden center.
Three rock sizes maximum, two plant forms, one color family of stone. That is the limit. A big boulder for weight, a mid-size stone for structure, pebbles or grit for the modern mulch look. Pair something low and spreading with something upright, like ferns against hostas in shade, and stop. The passages all point to the same trouble spot fix: a small, round raised bed over whatever part of your yard refuses to grow lawn. North-facing sites work best for the woodland version, since less intense sun keeps the soil cool and the ferns happy.
I have learned to buy every stone in the same color family even when the supplier calls three different names. Warm gray, cool gray, and bluish gray in the same bed read as chaos from the driveway. One afternoon of placing, one season of letting the plants settle, and the thing actually looks intentional.
7. Use Native Species

Plants already adapted to your region handle rainfall, pests, and temperature swings without the guesswork. That reliability matters in a rock garden, where stressed plants between stones only invite weeds and bare patches.
The sources point two ways on pairing stone and plant. One path goes xeric: agaves, cacti, or lavender where grass is unsustainable and water is scarce. The other keeps it minimal with dwarf conifers like ‘Winter Gold’ Scots pine, mulched heavily to suppress weeds. Both approaches lean native, but the geology should match too. Limestone beds call for plants that tolerate alkaline soil; granite suits acid-tolerant species. Planting a desert succulent on limestone is a slow failure, and I have watched enough gardeners learn that the hard way.
For a small start, a 4-by-6 foot area planted in spring after the last frost lets you test what thrives before committing more ground. Zones 3–9 cover most rock garden candidates, but local stone and local flora still beat a generic planting every time.
8. Scale It Down
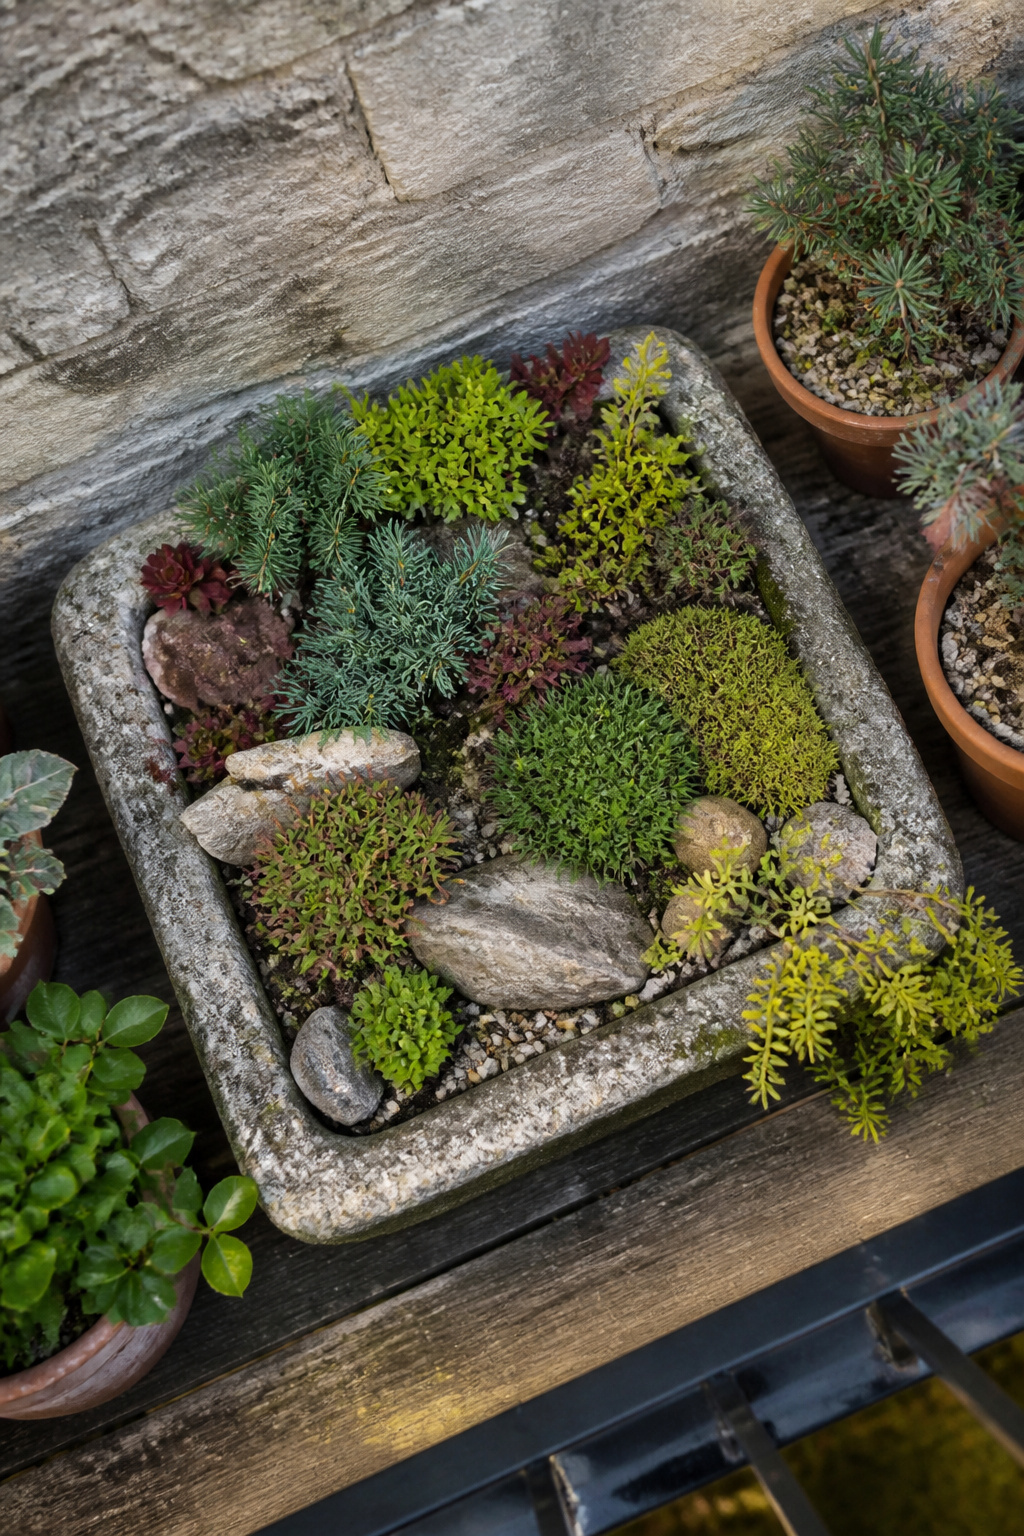
A trough or hypertufa pot 18–24 inches across holds a complete alpine scene on a balcony rail or apartment stoop. That width matches standard container practice for giving rock garden plants the sharp drainage they need without the mass becoming unmanageable.
The strip between sidewalk and foundation, often too narrow for conventional beds, works the same way. I set a single container there last season rather than fighting the soil compaction, and the portability turned out to be the real advantage; moved it six inches east after two weeks when the afternoon heat proved too much for the dwarf sedum. Container rock gardens scale to whatever footprint you actually have, and the whole assembly lifts out when the lease ends or the experiment fails.
9. Add Sculptures

A single piece of garden art set among stone reads as something you found on a walk. Two pieces read as a collection you meant to assemble. Three pieces read like a yard sale that hasn’t been cleaned up yet. One sculpture is the limit in a rock garden, maybe two if they share a material and scale and sit far enough apart that a visitor encounters each separately.
Placement matters more than the piece itself. Morning light coming in low from the east will throw a long shadow across the gravel and make the form legible. Late western light does the same. Flat overhead sun at midday erases shadow and turns most sculpture into a silhouette you can’t read. The same piece can look like a considered object or a forgotten lump depending on the hour you see it.
Set it where you pass in early morning or evening, not where you stand at noon. A terrace corner that catches dawn light, or the far end of a path that faces west, gives the sculpture the light it needs to participate in the garden rather than clutter it. I have moved pieces three times before I found the hour when they earned their spot.
10. Add a Sundial

A sundial does the one thing most garden ornaments forget to do: it earns its keep by telling you something true. The shadow crossing the dial plate marks actual solar noon, not clock noon, and watching it shift through the seasons divides the garden day into real morning, real afternoon, real evening. That function justifies the space it takes.
Cast iron or brass left to weather goes the color of something you might have dug up; the patina takes five or six years but looks like fifty. Polished brass, kept shiny, reads as new money every single season. The choice matters more than the price point. I have seen a verdigris-caked iron dial look perfectly at home against limestone, and a gleaming one look like a trophy set out by mistake.
Set it level, align the gnomon to true north, and place it where it catches open sky. Under tree cover the shadow breaks up and the reading turns approximate, which defeats the purpose. A sundial that cannot tell time becomes merely a plate on a stick, and there are cheaper ways to achieve that.
11. Sprawling Ground Covers

Creeping thyme was the first ground cover I actually trusted to live between stones. Thymus serpyllum spreads 12 to 24 inches wide and stays under 4 inches tall, which means it fills gaps without swallowing the path. It handles zones 3 to 9, so most of us are covered, and the pink summer flowers are a side benefit to the real win: it tolerates being stepped on where paths cross.
For tighter cracks, elfin thyme squeezes into spaces the regular kind won’t. Woolly thyme, Thymus pseudolanuginosus, is the choice for drier spots where the soil drains fast and stays lean. Both stay in that same low, creeping habit.
Mazus and dwarf campanula fill a similar role with different textures. Mazus mats down hard enough to take occasional foot traffic, and dwarf campanula threads its bell-shaped flowers through the stones in late spring. Neither spreads as aggressively as thyme, which can be the point in a small yard where you want control more than speed.
The mistake I made early was planting these in soil that was too rich. Rock garden ground covers want the lean conditions their name implies; good garden soil makes them leggy and weak. Pack the root zone with grit or coarse sand, not compost, and let the stones do the work of holding heat and reflecting light back into the foliage.
12. Classic Zen Garden
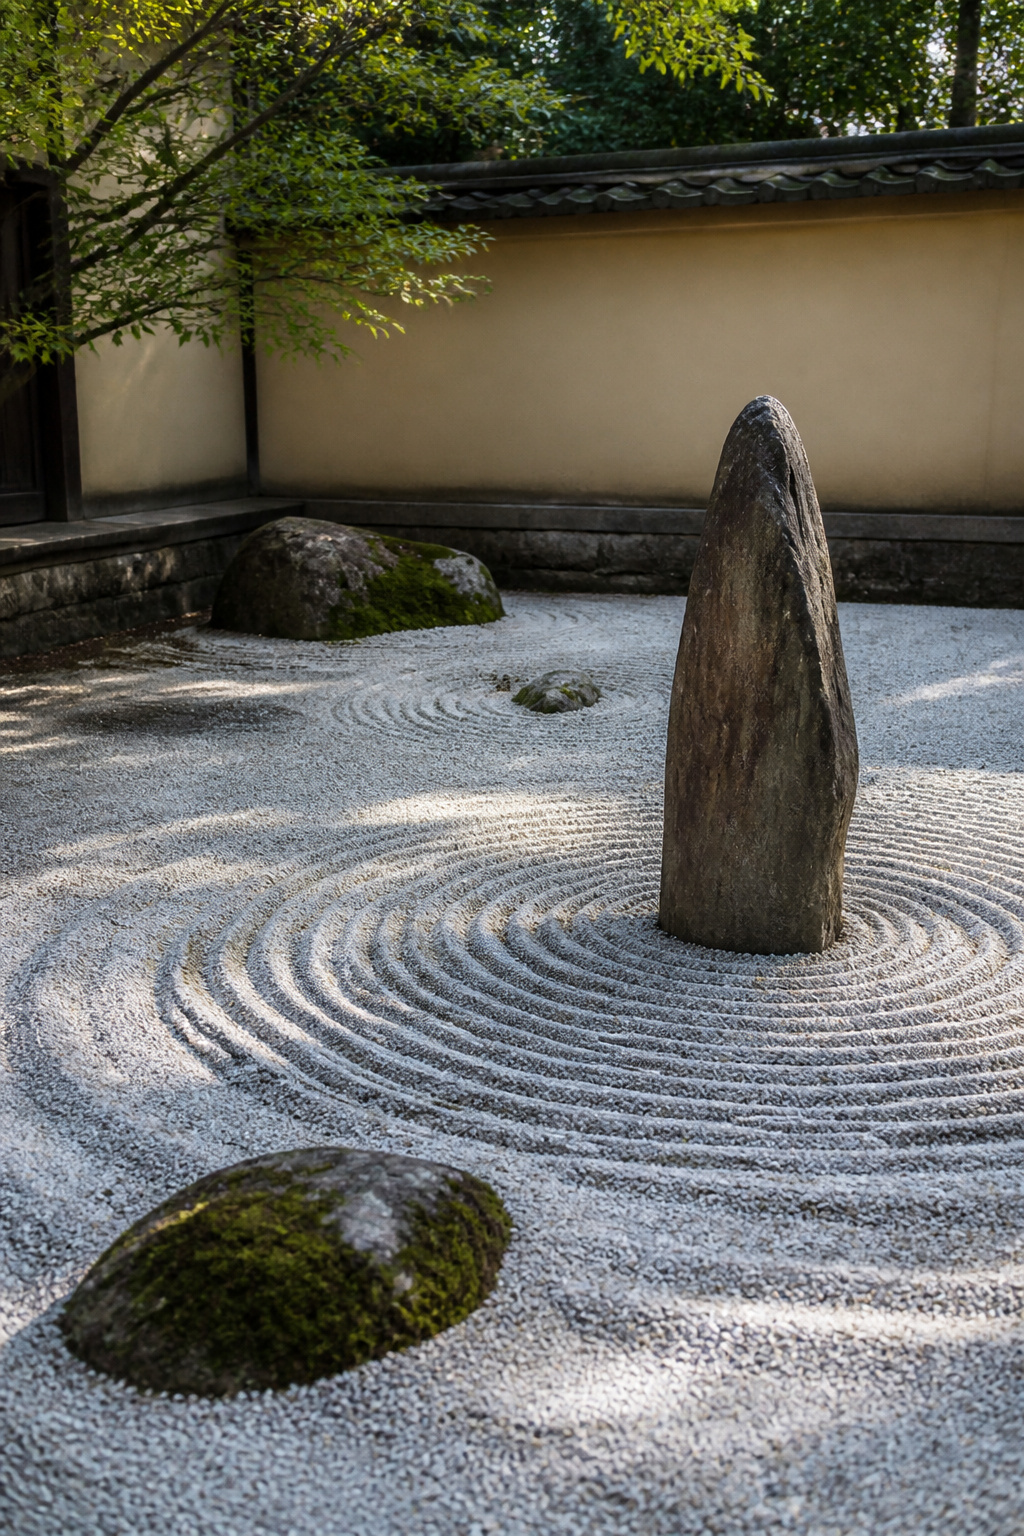
Raked gravel and standing stones do the work of color in a Zen garden, which is why flowers are left out entirely. The design comes from Chinese and Japanese monastic traditions where the arrangement itself was the meditation, not something you walked through but something you sat before and looked at. Gravel raked into ripples around a single upright stone reads as water without water, and that substitution matters in a dry corner where the hose never reaches and time for deadheading does not exist.
The absence is the point. No blooms means no season of failure when the heat arrives, no staking or cutting back, no color clashes to solve. What you maintain is pattern, which takes ten minutes with a rake on Saturday morning and otherwise lets you alone. I have steered renters and new homeowners toward this version more than once when they describe a narrow side yard or the strip against the garage where nothing else has survived their neglect. The stones cost more than plants upfront, but they do not die when you travel for two weeks in July. Scale it to what you can rake in one pass, maybe eight by ten feet, and let the rest of the yard go to whatever wants to grow there.
13. A Yard-Sized Waterfall

A recirculating pump tucked behind stacked slate turns a sloped corner into the one part of the yard where traffic noise disappears. The water falls, collects, and runs back up in a closed loop, so no plumbing connection is needed beyond a weatherproof outlet. I spent longer than I care to admit leveling the first course of stone so the cascade would sound like a brook rather than a hose.
Rock gardens already slow runoff by breaking the flow across bare soil. A waterfall does that work actively: the basin at the bottom catches water that would otherwise sheet downhill, and the rough slate surfaces give every drop somewhere to grip before it gathers speed. On my own slope, the difference between wet and dry seasons turned out to be whether the pump ran six hours or ten. The pump itself draws about as much as a desk lamp, and the only maintenance worth mentioning is pulling leaves from the intake grate after storms.
14. Wise Use of Color
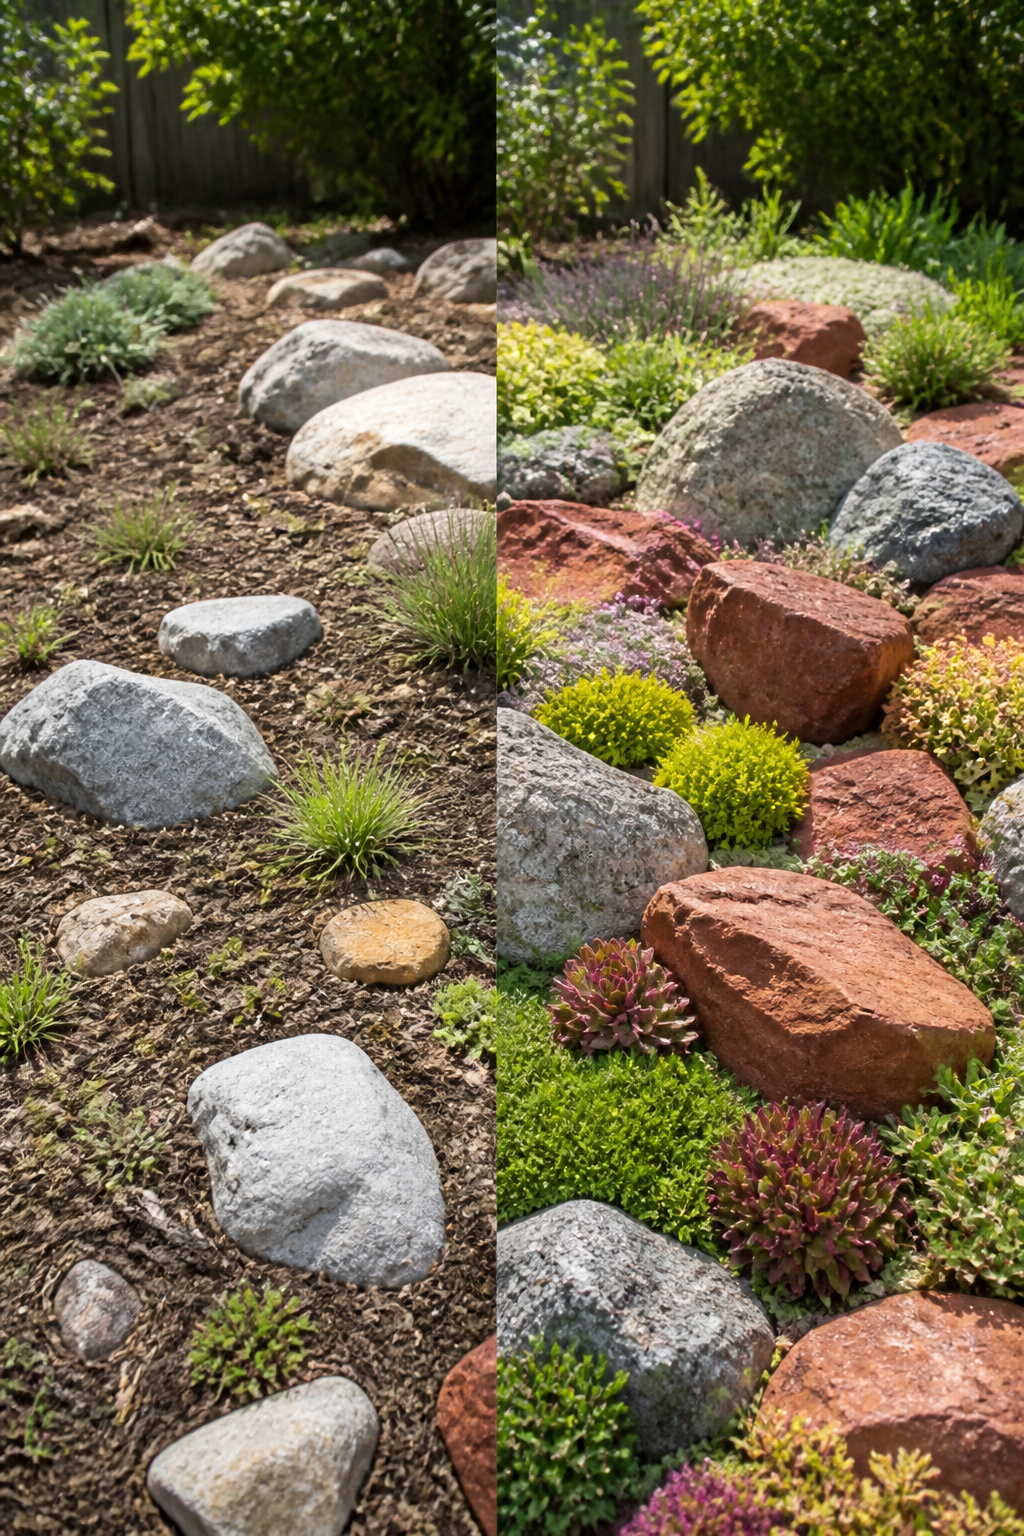
Stone comes in more than gray. Red sandstone, black basalt, green slate, white quartz: each carries its own temperature, and that temperature matters more than the color itself. Pair one warm tone with one cool tone and you get contrast that looks intentional. Add a third and the eye starts to hunt for a reason it is there.
The rule that saved my first rock garden was simple: repeat each color at least twice. Three colors scattered once each read as leftover stone from three different projects. Two red sandstone outcrops with a single black basalt boulder between them looks like a choice. The same boulder alone looks like a delivery mistake. Spacing matters less than count: a matching stone at the far end of the bed ties the whole thing together even if you never notice the repetition directly.
I learned this after hauling home a pale green slate that fought every gray rock already in place. Rather than return it, I found a second piece half a county away and set them at opposite corners. The garden looked planned for the first time.
15. Retaining Wall Garden

A mortared wall and a dry-stacked wall grow two different gardens. The first gives you tidy planting pockets, neat rows of soil between courses where creeping thyme can cascade and a tucked-in pot of something trailing adds variety. Mortar seals the gaps, so drainage becomes your job: without weep holes or a gravel backing, that soil stays wet and rots anything succulent.
Dry-stacked stone leaves its own gaps. Fieldstone or flagstone laid without mortar creates crevices you fill with soil, letting plants gain a foothold naturally. The bottom of the wall holds moisture for plants that want it; the top stays drier, suited to drought-tolerant choices higher up. Stack flat stones with deliberate gaps between them, not random ones, so soil has somewhere to sit and roots have a path to follow.
Boulder walls sit somewhere between. Large rocks leave bigger voids, enough for established perennials to soften the transition from stone to lawn, but those voids also let soil wash through until plant roots finally bind it. Start with smaller, tougher plants in the gaps rather than expecting a full crevice garden right away.
16. Display the Home
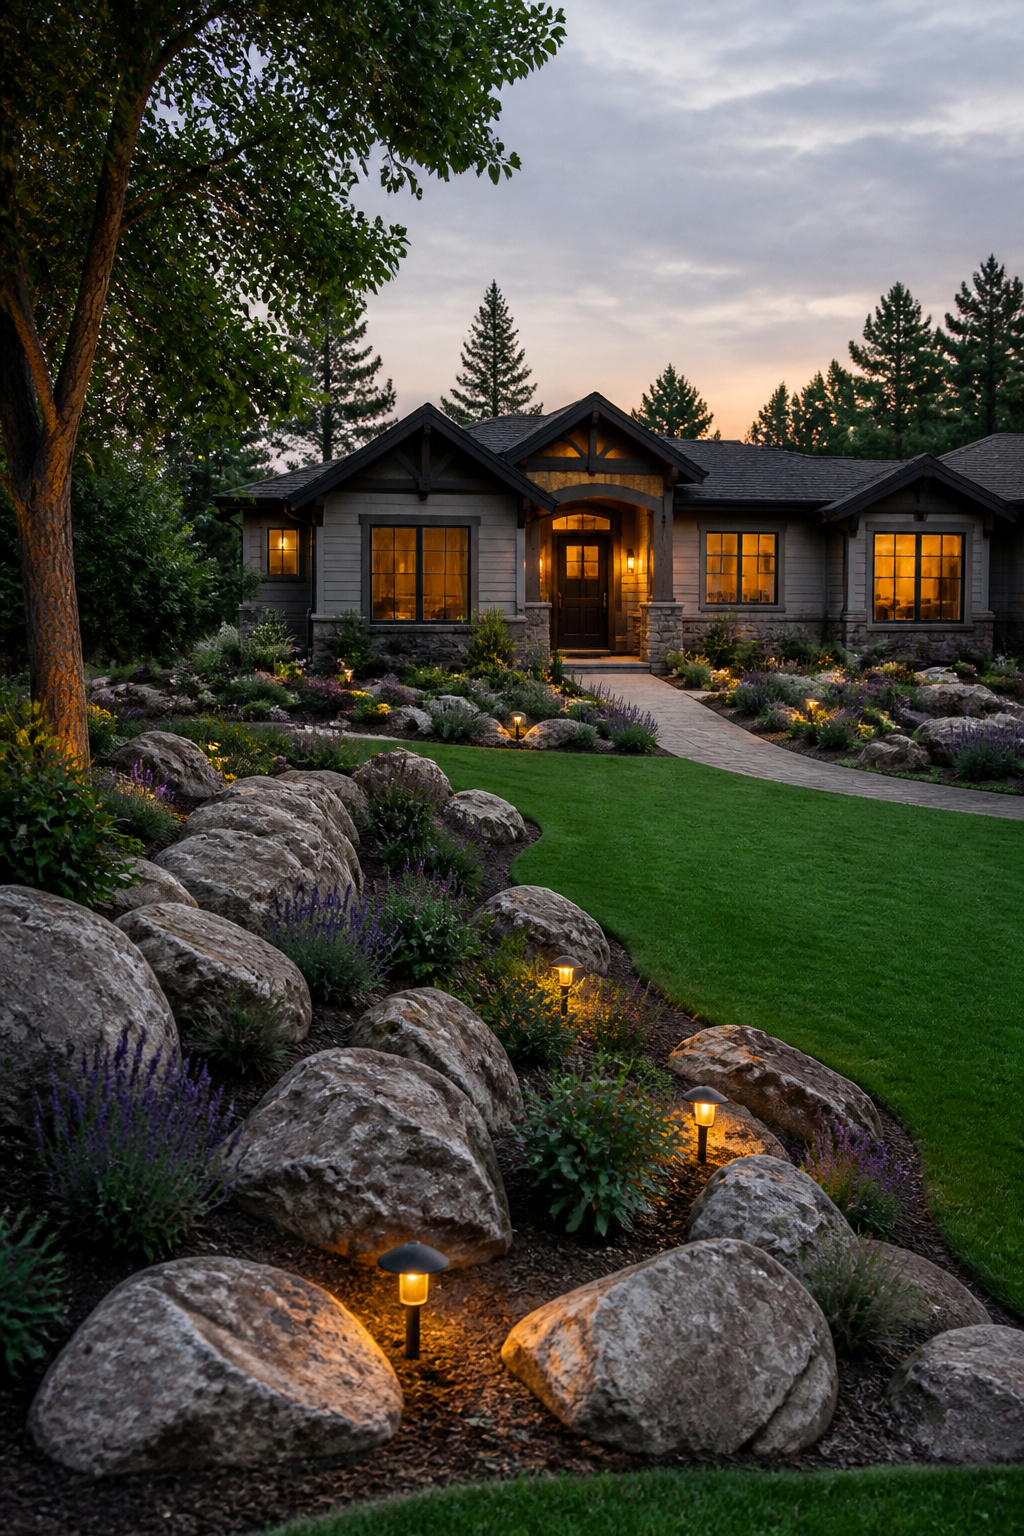
A front yard rock garden works best when it frames the house instead of swallowing it. Low mounds set directly in front of the facade keep sightlines open, while taller stone groupings anchored at the corners add weight and draw the eye outward. Nothing at the center should rise above the windowsill; the goal is to lead attention toward the architecture, not compete with it.
Solar lights lining the walk or tucked against a specimen plant extend the effect into evening without adding height. The stones themselves supply texture and color variation that a shrub border or flat lawn never quite achieves, and the dry-climate plants that suit this setup demand far less water than turf. Keep the center line low enough that someone walking up the drive still sees the front door first. Gravel between groupings locks the composition together and keeps maintenance minimal.
17. Sloped Rock Garden

Rock gardens on flat ground already do the quiet work of holding soil against wind and rain. Tilt that same ground a few degrees and the structure becomes the whole strategy: stones placed to slow water on its way downhill, plants rooted to grip whatever soil the water still reaches.
I learned this the hard way watching a backyard washout after one spring storm. The fix was not one big retaining wall but a series of larger stones set like speed bumps across the slope, each one catching debris and letting water seep through instead of carrying soil away. Between them I tucked low sprawling ground covers, the kind that mat down rather than stand up, so their roots could knit the top layer together while the rocks handled the rush underneath.
The almanac photo that stuck with me showed this exact logic scaled to a suburban front yard: no lawn to mow, no bare dirt sliding after every downpour, just stone tiers softening into green. A smaller slope works the same way. Mulch between stones keeps the look clean while the plants establish, though I would not trust mulch alone on anything steeper than a gentle grade.
18. A Patio for Relaxing
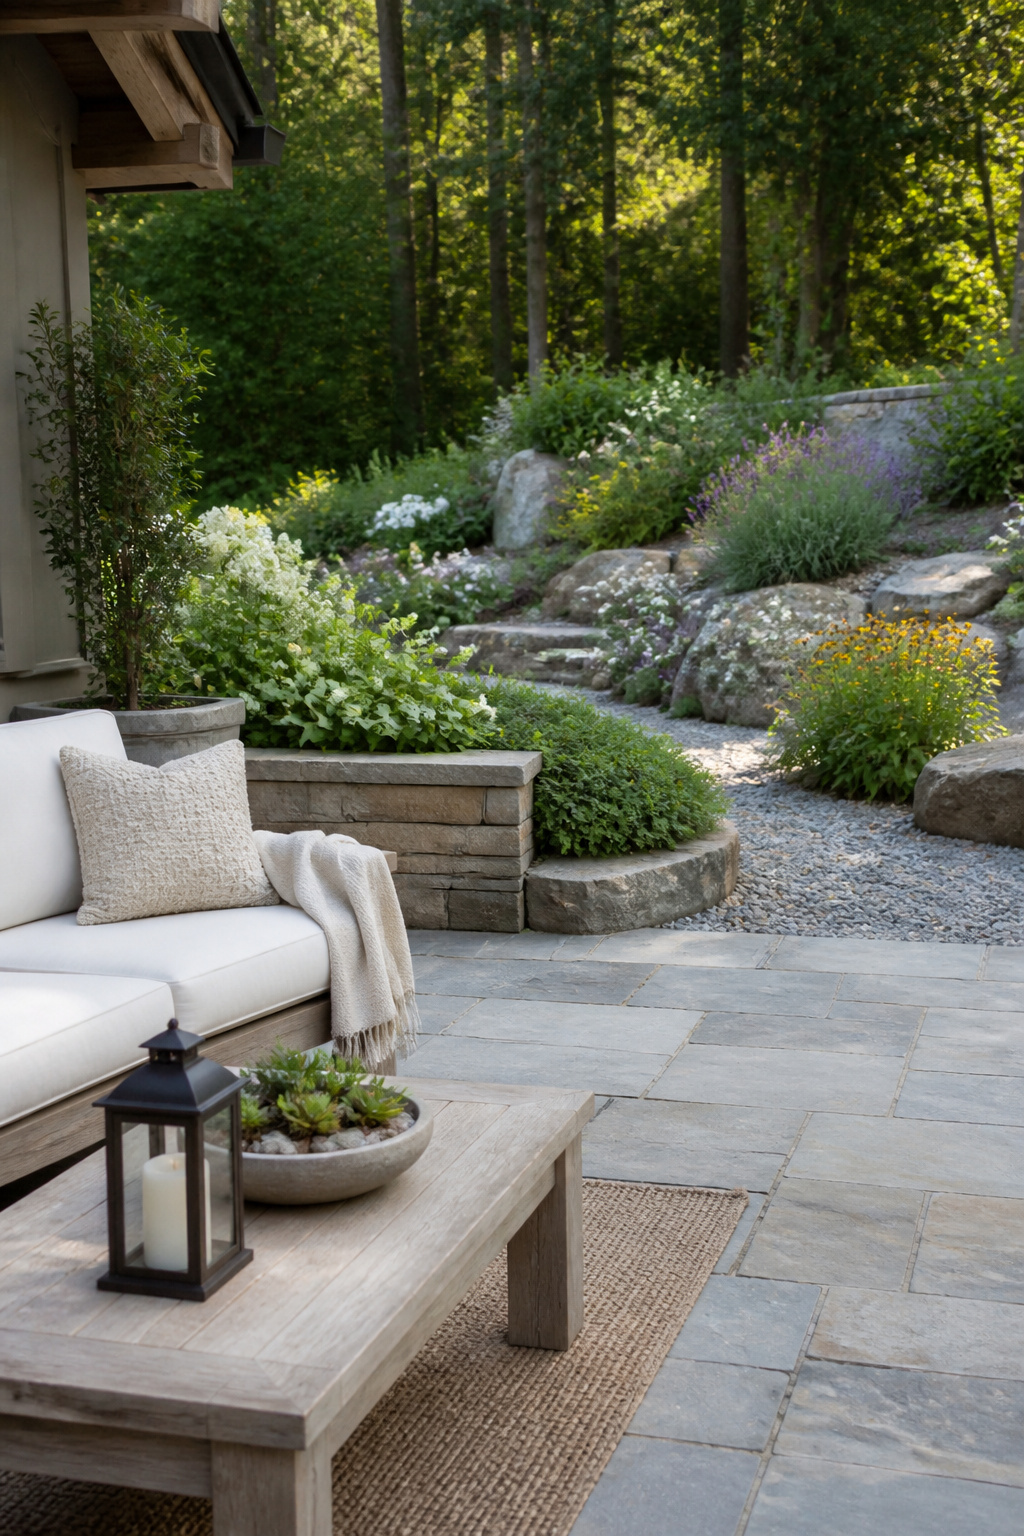
Stone patio pavers and rock gardens share the same visual language, so the transition between them can be nearly invisible. Raised stone borders keep the planting bed neat and contained while the same stone carries straight onto the seating surface. The edge where hardscape meets soil is the moment that matters: let plants spill slightly over the stone to soften the line rather than drawing a hard boundary.
A sheltered conversation area gains from this blending. Arbors wired with lanterns and covered in greenery overhead turn the patio into something that reads as a room carved out of the garden, not a platform dropped beside it. White or light upholstery against pale stone keeps the palette earthy and cohesive rather than competing with the planting.
Smaller inlaid rocks can add pattern without breaking the calm. A radiating design set into the patio surface echoes the natural variation in the rock garden wall behind it, so the two areas feel like one continuous decision rather than separate projects budgeted apart. The function is double: a place to sit with morning coffee, and the same spot drawn inward by lantern light after dark. The rock garden does not sit where you look at it from the patio; it wraps the patio and becomes the reason the seating faces the direction it does.
19. Bring the Mountain to You
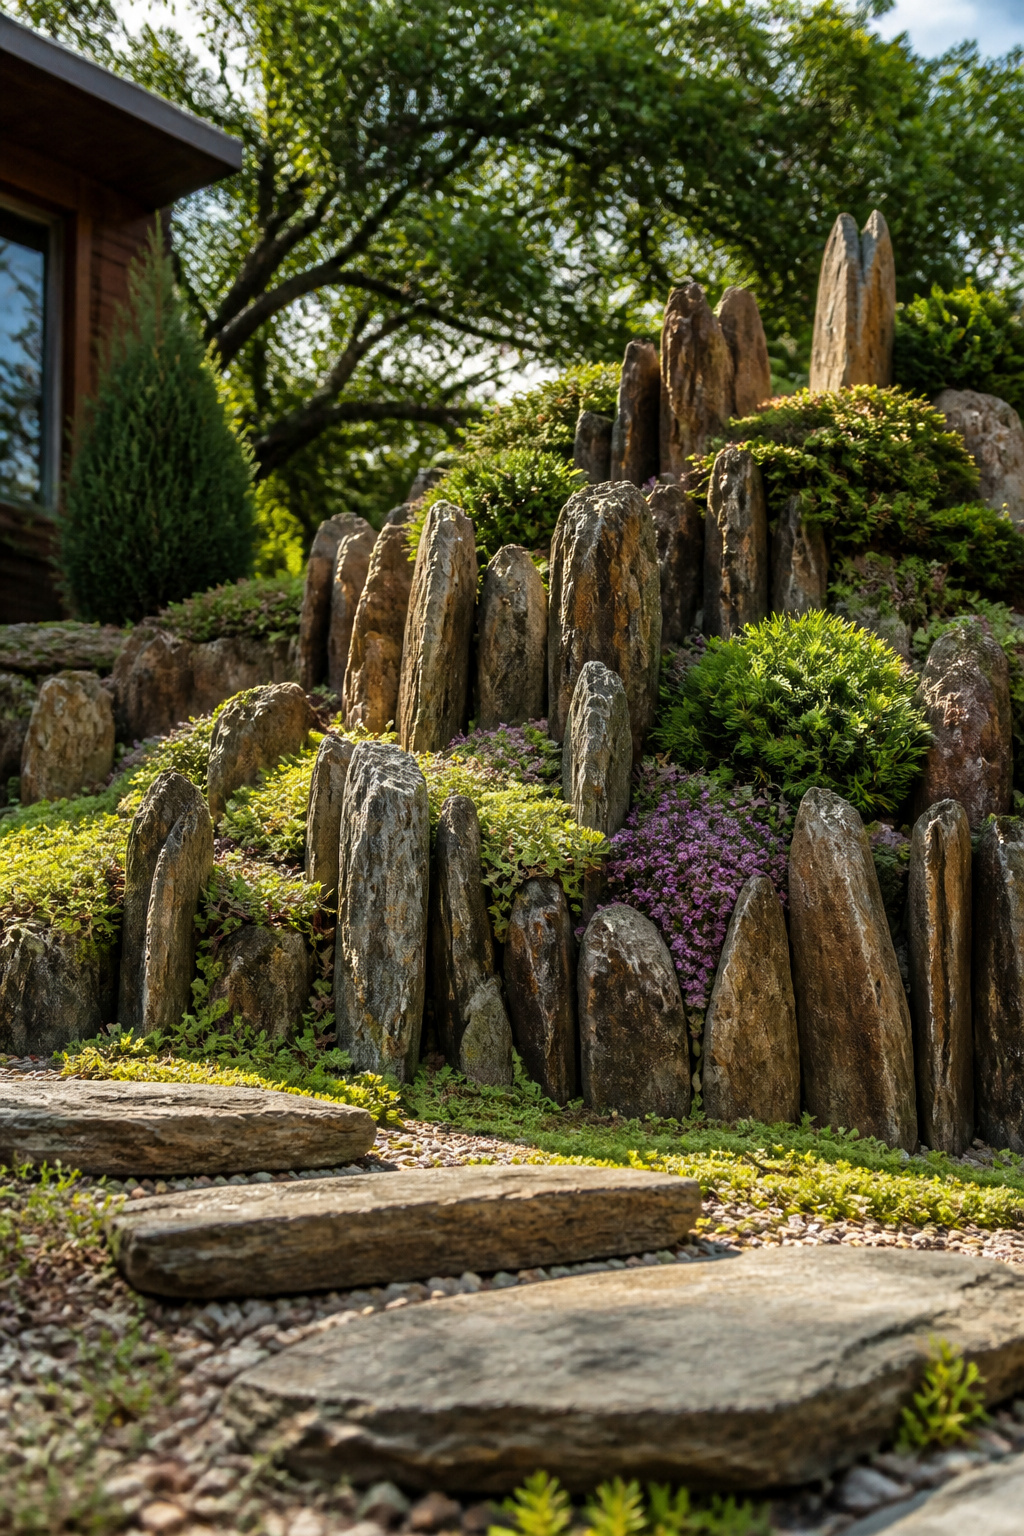
Flat stones read like paving. Set them on edge, long side vertical, and the same rock suddenly suggests strata pushed up by pressure you cannot see. That angle is what separates a rock pile from a slope.
For the planting, alpine species do the real work of elevation. Creeping thyme and dianthus grow above the treeline in nature, and they carry that same spare, wind-scoured look into a yard that is flat as a parking lot. Small spruces reinforce the fiction if you have room. The soil underneath needs to drain fast yet hold enough moisture that roots do not desiccate; a mound of mixed grit and topsoil, roughly knee-high, usually manages both. Afternoon shade matters more than you expect: these plants want sun, but not the baked, reflected heat that radiates off stone in July. I learned that the hard way with a south-facing strip where thymes cooked by August.
The illusion holds from a distance and dissolves up close, which is exactly the bargain. You are not building a mountain. You are suggesting one just well enough that the eye completes the rest.
20. Go English

Weathered limestone tumbled soft at the edges gives this look its backbone, the kind of stone that already looks settled when you set it down. I wanted that cottage abundance where no bare soil shows anywhere, stone framing the planting rather than the other way around. The opposite of Zen restraint: catmint, creeping thyme, and small sedums spill over every edge until the rocks read as accidental stepping stones in a sea of growth. Soft planting hides the structure underneath, so the garden looks older than it is by the second season. Cost stays manageable because tumbled limestone is common enough to source by the pallet, and the plants are ordinary ground covers that root easily from cuttings once you have the first few established. The trick is setting the stone low enough that soil level meets the top surface, leaving no lip for weeds to colonize and no visible gap where mulch would sit.
21. Circular Rock Path and Garden

A circular path turns the walk itself into the garden, with planting pockets between the stones so you loop back to where you started without ever stepping out of the planting. Flat, irregular stones carry that earthy charm the best, and gravel between them locks the walk in place while keeping the whole thing low-maintenance. Leave the pockets at least 6 inches deep so roots have room to spread below the stone line; anything shallower and the plants bake or starve.
The same stones that carry your feet become the edges of the beds, so the path and the planting are one continuous surface. Drought-tolerant bloomers like blanket flower or coreopsis work here because they handle the reflected heat off the rock and do not mind the lean soil. Taller plants go on the pocket’s inner curve, shorter ones on the outer edge, so nothing blocks the walk or the view across it. A tipped ceramic pot with something creeping out of it, placed where the loop turns, gives the eye a reason to keep moving.
Shade changes the plant list entirely. Ferns, hostas, and phlox spread between the stones in a north-facing loop, with taller plants sheltering the shorter ones beneath. The structure stays the same; only the light and the moisture decide what lives in it.
22. Rock Garden Design and Patio

A flagstone patio with a river-rock path running through it reads as one continuous stone surface rather than two competing ideas. The trick is keeping the material consistent while varying the scale so the eye knows where to walk and where to linger. Large flat slabs under the chairs signal "room"; smaller rounded stone in the planted strip beside them signals "garden." Raised stone borders between the two keep the garden neat and contained without introducing a third material that would break the visual line. I have watched friends lose this effect by matching color but not size, ending up with a patio that bleeds into the beds and a path that disappears. Mulch between the rocks can work if it is a sharp contrast, but the cleaner move is letting the stones themselves carry the interest through gradation alone. Where the patio ends and the rock garden begins should feel like a shift in texture, not a change in subject.
23. Stepping Stones and Boulders

Flat stones laid into grass or gravel make a path that feels like it grew there. The irregular shapes keep the eye moving, and the surface stays walkable even when the lawn turns muddy in spring. I set mine closer than I probably should have the first time, and the stride felt cramped until I pulled two stones back out.
Boulders beside the path do the heavy lifting visually. A single medium or large stone at a turn or a planting cluster gives the eye somewhere to rest, and the height difference keeps a flat yard from reading like a tabletop. One boulder can anchor a group of plants that would otherwise look scattered.
Stones 18–24 inches across, spaced 24 inches center to center, match a comfortable walking stride. That spacing is the standard rule of thumb, though no source I found called out exact numbers. Wider gaps work if you want the path to feel more like scattered punctuation than a proper walkway, but much narrower and you are hopscotching.
24. DIY Rock Garden Takes the Place of Grass
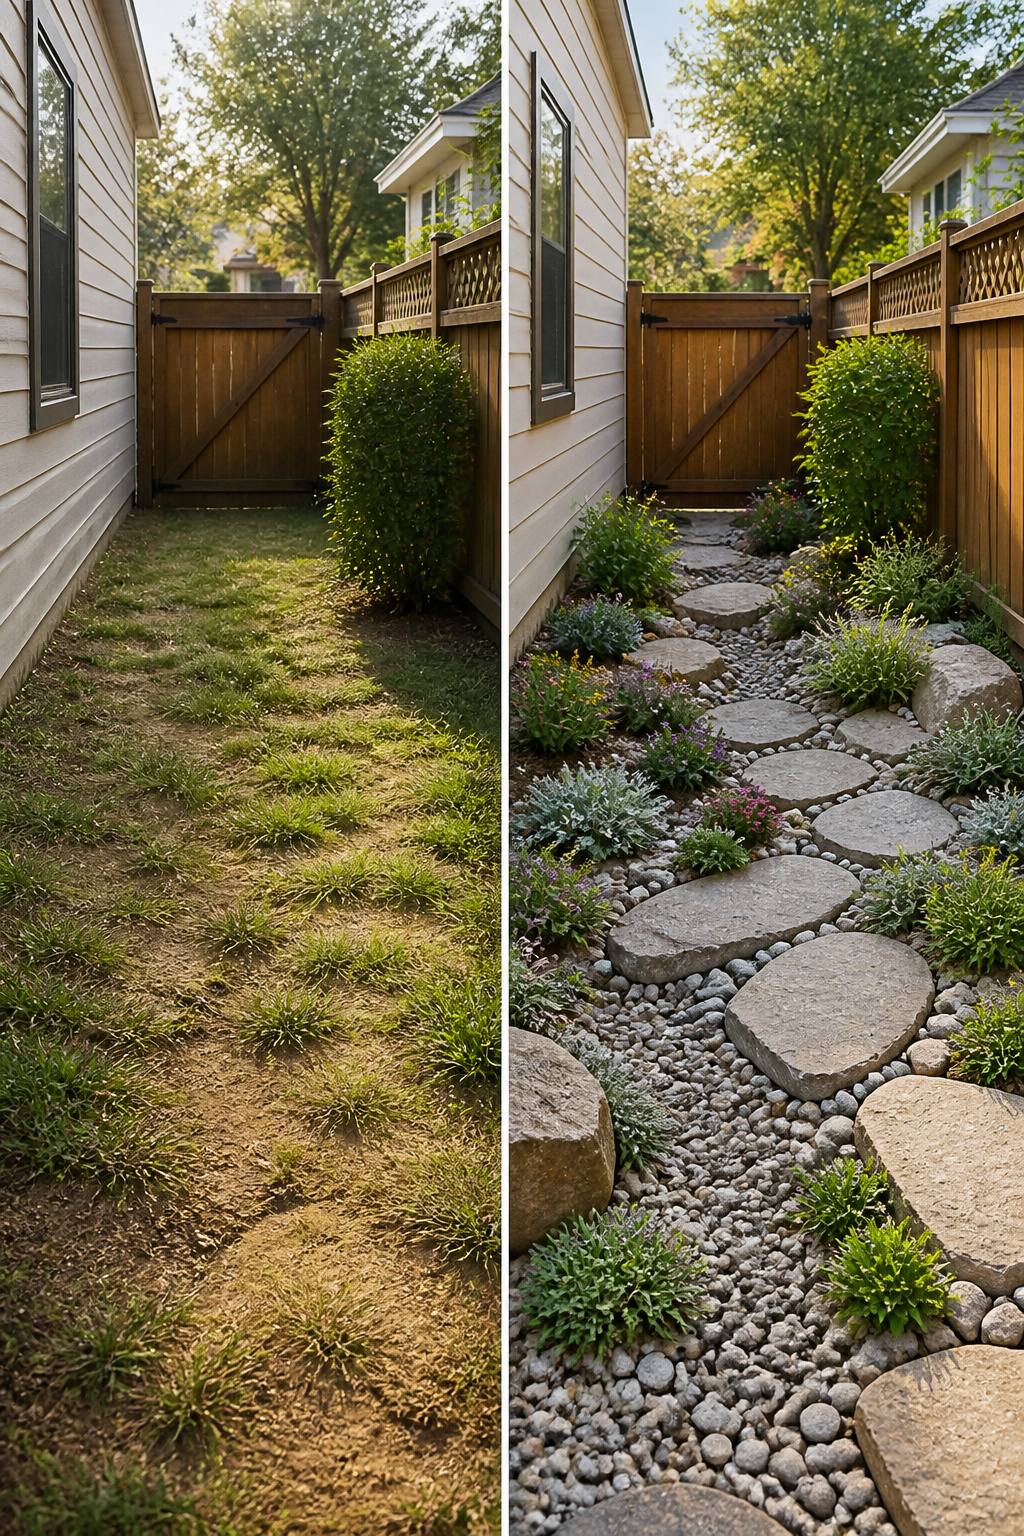
Grass dies in the narrow strip between my house and the fence every August, no matter how much I water it. The same thing happens under the maple in back, and on the slope that angles down to the driveway. Mowing that slope feels like a risk I take for no reward.
Replacing those struggling patches with rock and low plants turns a maintenance problem into the easiest ground in the yard. Rocks hold soil on a steep grade without the fight of laying sod. Under trees, a few boulders with drought-tolerant ground cover skips the battle for light and water that grass always loses. A side yard too tight for a mower becomes a narrow bed of gravel and stone, maybe three feet across, that needs nothing but occasional weeding.
The work is front-loaded: stripping sod, laying landscape fabric, placing the largest stones first so they look settled rather than dropped. After that, the garden runs on rainfall. Rock garden plants from alpine regions expect lean soil and dry spells, so they thrive where lawn fertilizer and sprinkler timers would be wasted effort.
I started with the strip by the fence, using stone I hauled in a wheelbarrow from a local yard. Two weekends of heavy work, and five years later it still looks the same without my help.
25. Enchanted Rock Garden
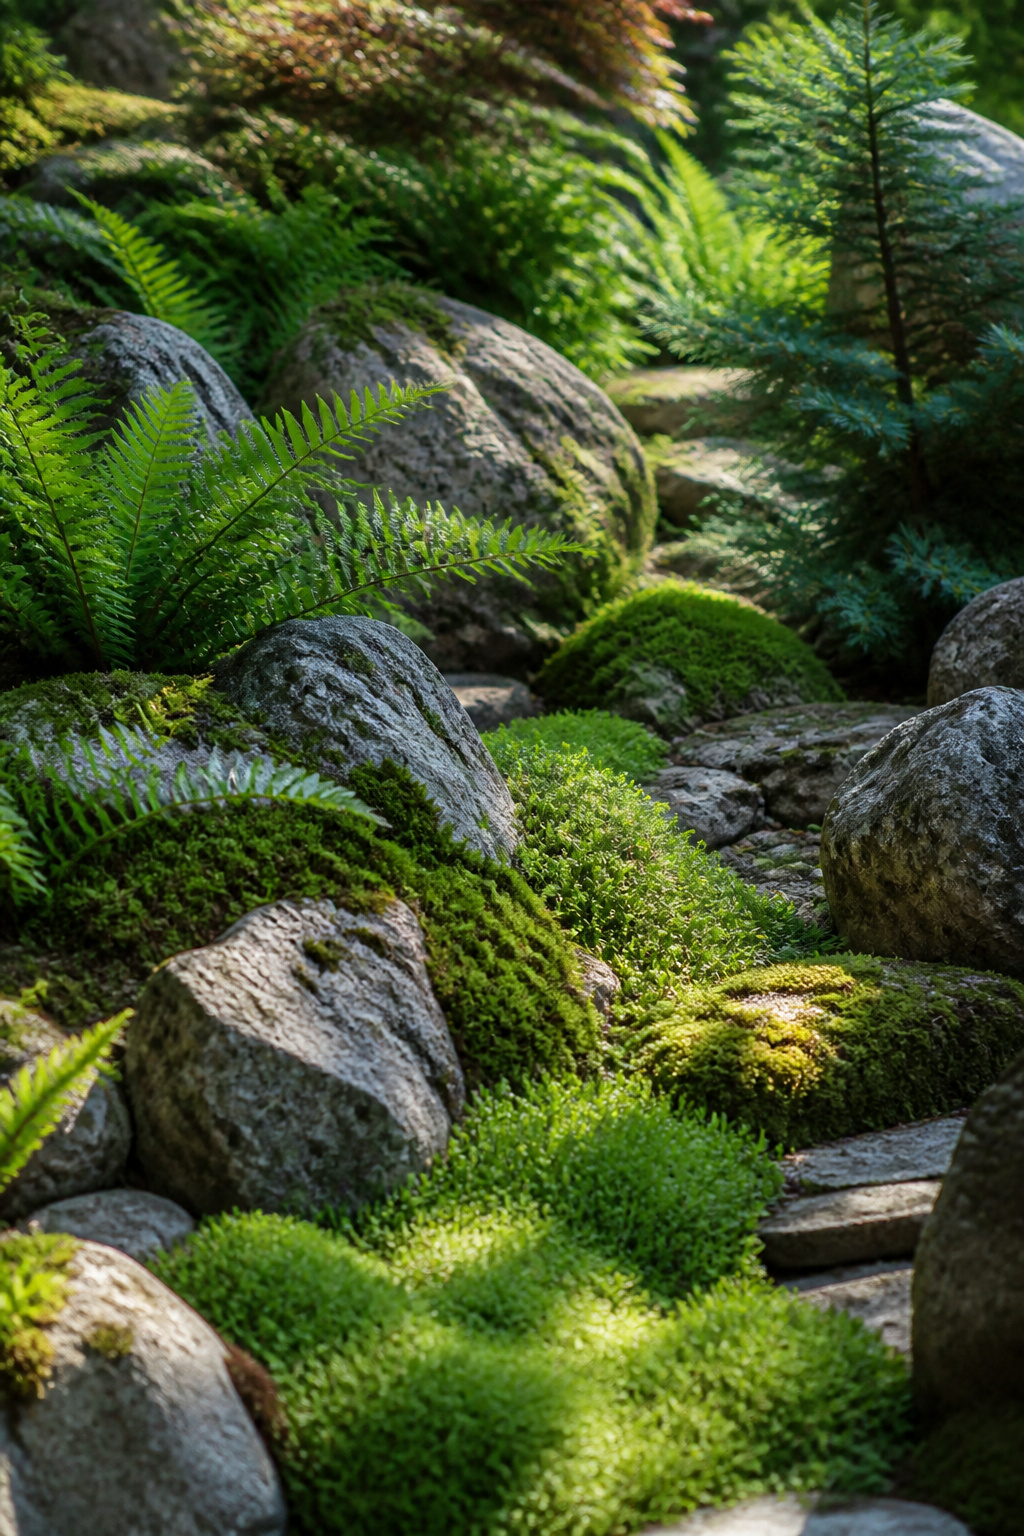
Moss needs moisture and time, not sun. A north or east exposure keeps the stone cool and damp enough for ferns and moss to colonize the cracks. Irish moss, the dense green carpet that hits just 1 to 2 inches tall and spreads 6 to 12 inches wide, works between stones where true moss has not yet taken hold. It tolerates the light foot traffic of a path and fills the gap while the real thing establishes.
The patience part is non-negotiable. True moss on stone can take two or three seasons to look like anything, and dry weeks will set it back hard. A soaker hose tucked behind the rocks helps, or a spot where runoff naturally collects. Shade-loving plants like ferns and hostas need the taller stones to create pockets of deeper shadow for the smaller ones underneath.
The north-facing site wins here because afternoon sun will crisp the whole scene into something closer to a desert rock garden, which is the opposite of what this is going for. Keep the soil lean and gritty; the moisture should linger on the surface, not pool in the roots.
26. Succulent Rock Garden

Sempervivum was the first succulent that ever survived a winter in my yard, tucked into a crack between two limestone slabs where nothing else would stay put. Hen and chicks will take full sun to partial shade, spread 6 to 18 inches, and handle zones 4 through 10 without fuss. The rosettes send out smaller offshoots that root themselves in narrow crevices, so the colony keeps moving outward until it hits a gap too wide to cross.
For zones 5 through 7, cold-hardy opuntia is the bolder choice. Prickly pear cacti native to the northern plains will survive down to -20°F and flower in late spring if the drainage is sharp enough. Sharp drainage matters more than your zone number; a sempervivum in soggy soil rots where an opuntia in grit thrives.
Zones 9 through 11 open up echeveria and aeonium, which want the same fast-draining mix but cannot take a hard freeze. I group tender succulents on the south face of a raised mound where winter water runs off fast, and I keep them separate from the sempervivum beds so I do not confuse their tolerances when the weather turns.
A succulent rock garden built on slope or mound drains better than any flat bed. Start with the structure, match the plant to the drainage it actually gets, and the zone becomes secondary.
27. Contemporary Rock Garden

A contemporary rock garden lives or dies on restraint. One stone type, one plant texture, repeated until the pattern holds. The sources point to dwarf conifers like "Winter Gold" Scots Pine against a single boulder, or a wall of uniform stone backing lit plantings in an Asian-inspired scheme. In both cases, variety would break the effect.
Keep the plantings minimal to let the geometry read. The rock does the visual work; the green is punctuation, not prose. A generous mulch layer keeps weeds from interrupting the lines, and neither the stone nor a well-chosen conifer asks for much after installation.
Urban settings suit this approach because the clean edges answer built structures rather than fighting them. Large rocks can serve as steps to a low raised deck, but the timbers should match the rock’s scale and the stair’s rhythm. The point is continuity: one material language from hardscape through planting.
The temptation is to add a second stone color for contrast, or a flowering accent for season-long interest. That impulse undoes the calm. Better to accept the quiet and let the single palette do what repetition does best, which is settle the eye.
28. Boulder Retaining Wall

A dry-stacked boulder wall does two jobs at once: it holds back the slope and turns the face of that work into a vertical garden. The trick is leaving gaps between stones large enough to pocket soil, not so wide the wall loses its grip. I stack uncut stone without mortar, letting each rock’s weight do the holding and the crevices handle drainage. Water moves through rather than pooling behind, which is what lets you plant directly into the wall instead of fighting rot.
Moisture settles toward the base while the top dries fast, so the bottom pockets suit thirstier plants and the upper ones want drought tolerance. Thyme and sedum work the middle and top; something like Bellflower or Germander can handle the lower, wetter slots. Fieldstone or any flat-faced local boulder layers more cleanly than rounded river rock, giving you steadier planting shelves. Perennials spilling over the edge soften the line where stone meets lawn, and after a season the wall reads as garden feature rather than engineered structure.
29. Decorative Lawn Rocks

A single stone dropped into turf reads as a mistake unless you commit to the isolation. The grass has to grow right up to it, or the thing looks like yard debris. That means mowing around it, not over it, which slows the weekly pass and demands a string trimmer for the edge. I tried wedging a flat boulder level with the soil once, thinking I could ride the mower deck across. The blade hit anyway, and the noise still makes me flinch.
Small groupings work better than lone sentinels, three stones of slightly different sizes forming a loose triangle. Space them far enough apart that grass fills the gaps, close enough that your eye reads them as one gesture. The maintenance reality never goes away: every two weeks you are hand-trimming or angling the weed whacker to keep the grass neat against stone. If that rhythm already annoys you in existing beds, turf placement multiplies it.
The payoff is subtle texture in an otherwise flat plane of grass, a visual pause that needs no watering, no seasonal planting, no mulch refresh. It is the cheapest rock garden move there is, and the one most likely to fail from neglect.
30. Sculpted Lava Rock with Black Mulch

Dark surfaces store heat differently than light ones, and this pairing leans all the way into that. Red or black lava rock alongside black mulch creates a sharp visual contrast, but the real story is what happens to anything growing there. The rock radiates warmth back onto the mulch, and the mulch absorbs rather than reflects it. That combination speeds breakdown noticeably, so the crisp dark layer you started with turns patchy faster than it would in open shade.
What convinced me, reading through a dozen of these projects, is that the gardeners who stick with it all reach for the same plant palette: things that tolerate reflected heat and root-zone warmth without demanding constant moisture. Sedums, certain ornamental grasses, low euphorbias. The mulch still matters for weed suppression and soil cooling, which means refreshing it becomes part of the annual rhythm, not a once-every-two-years task. Skip that maintenance and the contrast dulls, but worse, the exposed soil between rocks bakes hard enough to stress even heat-tolerant choices.
31. Smooth Pebbles
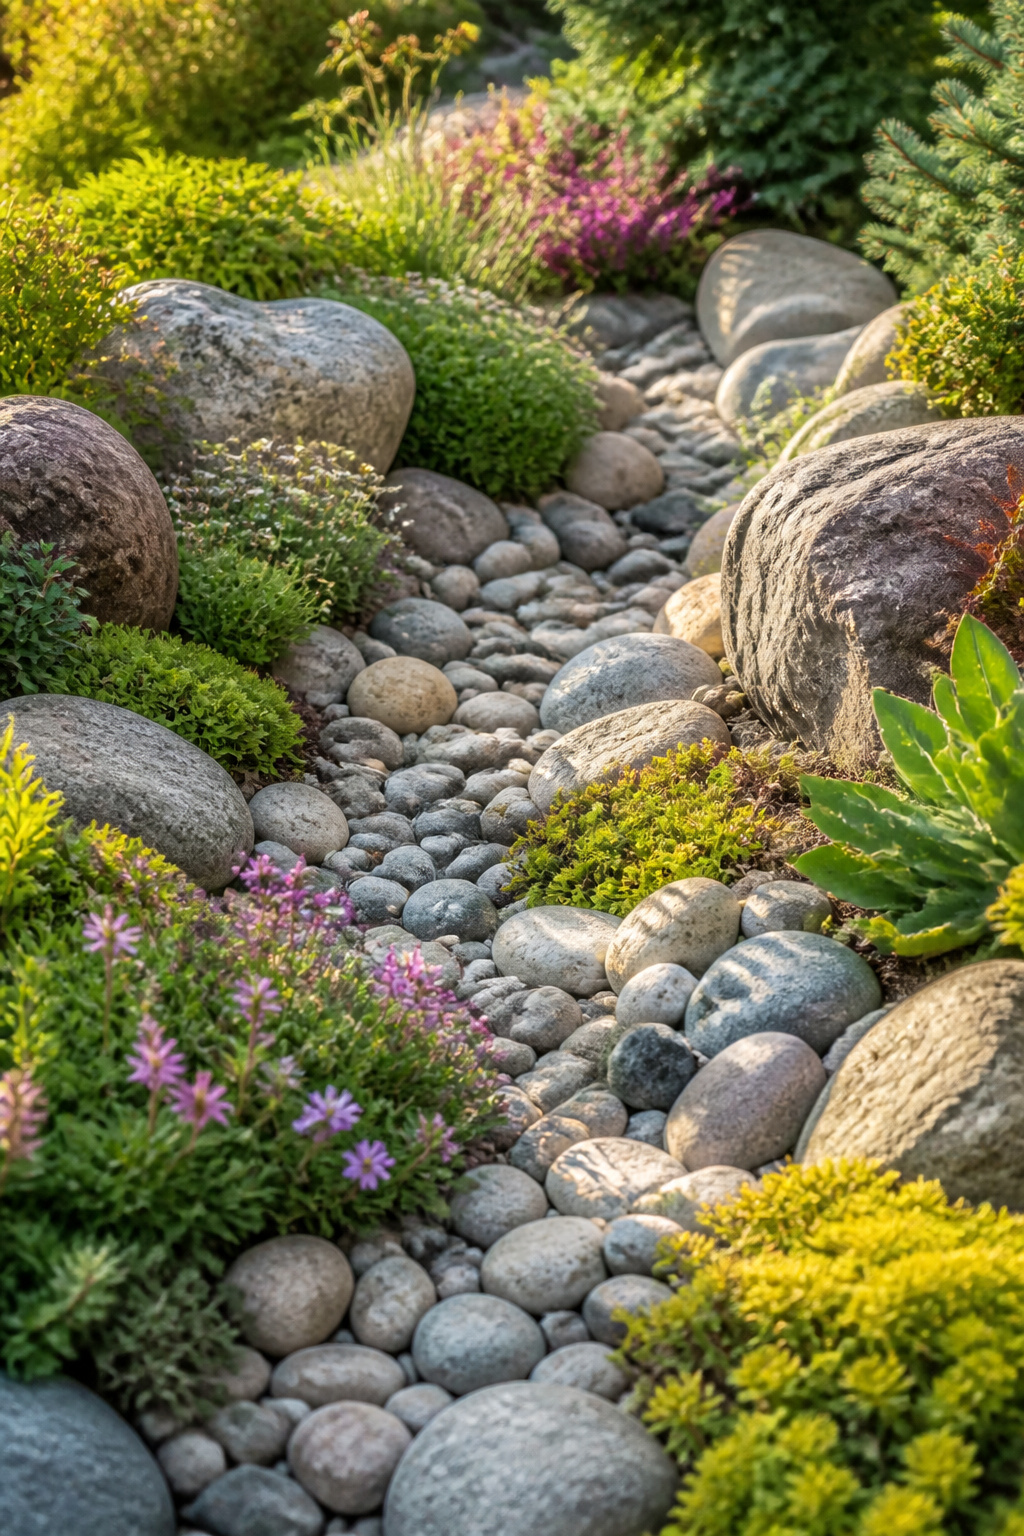
Smooth pebbles read as water-worn even when they are not, which is the whole point of using river rock or tumbled stone in a dry stream bed. The rounded edges let you suggest moving water without plumbing anything. I laid a shallow channel through a side bed last spring, about three inches deep, filled it with mixed-size beach pebbles from ½ inch up to 2 inches, and the garden immediately looked like it remembered rain.
As a mulch alternative, smooth stone has one clear advantage over bark: it does not float away in a hard downpour. Water passes straight through to the soil instead of sheeting off. That same drainage matters when pebbles serve as a top layer over compacted ground or heavy clay. Roots stay drier, which suits the lean conditions rock garden plants already prefer. Hostas and ferns in shade, alpine species in sun, both tolerate the sharper drainage once they are established.
The tradeoff is heat. Dark stone in full afternoon sun will warm the root zone more than wood mulch would, so pale gray or tan pebbles work better on south-facing beds. In my own yard, the white-veined river rock stays noticeably cooler to the touch than the charcoal tumbled batch I tried first. The hostas beneath it looked less stressed by August.
32. Blue Rocks and Green Landscaping

Blue-gray stone reads cooler than the usual brown or tan, and that temperature shift is what makes this pairing work. Slate or blue river rock laid as a ground layer gives you a muted base that still registers as deliberate color rather than default gray. Against it, blue fescue at 10 to 12 inches tall and 24 to 28 inches wide carries the same steel tone through the foliage, so the plant and stone feel like one continuous idea rather than two separate choices. That harmony needs breaking, though, or the whole bed flattens into a single note. Chartreuse sedum does the work of contrast; the acid green jumps forward against the cool ground the way a light wall pops against dark floors. For the transition, silver artemisia splits the difference, gray enough to belong with the stone, bright enough to keep the sedum from looking like an accident. The rock itself suppresses weeds while it holds this palette, which matters if you are working a small space and do not want to spend your season managing what grows between stones. Drought tolerance runs through all three plants, so the bed survives the stretches between rains that send thirstier gardens into decline. I would mass the fescue in clumps rather than dotting it, letting it read as a single texture at a distance, and keep the sedum toward the front edge where the chartreuse gets the light it needs to stay vivid.
What Rock Gardens Actually Do

A rock garden earns its keep by solving problems traditional planting creates. Low-maintenance and drought-tolerant plants like succulents, cacti, and certain grasses store water in their leaves and thrive in lean, well-drained soil where lawns would struggle. That same drainage structure stabilizes sloped ground against erosion from wind and rain, holding soil in place without engineered solutions.
The visual payoff comes from texture rather than constant bloom. Boulders, gravel, and varied stone sizes create depth year-round, softened by alpine flowers, ornamental grasses, or native species that need little water or fertilizer once established. Pollinators arrive too; birds, bees, and butterflies shelter and feed among the stones and plants.
Property value moves with execution. A well-designed rock garden signals a sustainable, water-wise landscape to buyers, particularly in dry climates where lawn upkeep runs high. The win is practical as much as aesthetic: less water, less weeding, less pruning, and a garden that still reads as intentional and cared-for through seasons when other beds look spent.
Plants That Survive the Stone
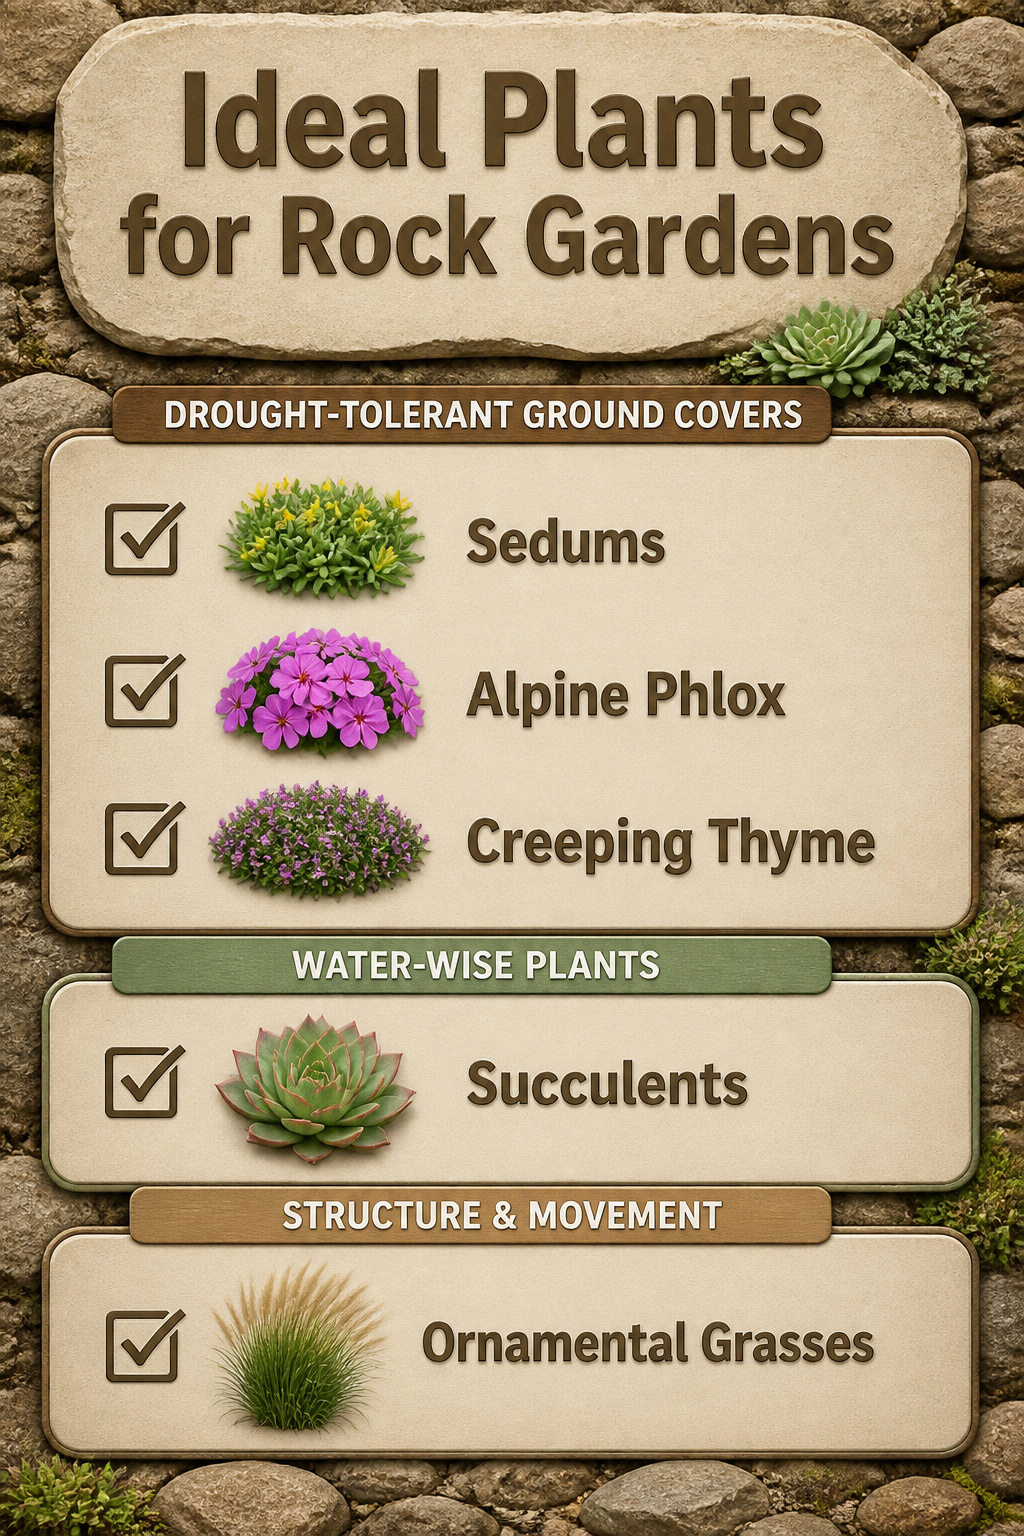
Stone holds heat and sheds water fast, so the plants that live with it need to be the ones built for abuse. Sedums, alpine phlox, and creeping thyme are the trio I keep seeing work across zones 3–9, and that range matters because it covers most of the yards readers are actually standing in. Creeping thyme spreads 12 to 24 inches wide but stays under 4 inches tall, which means it can tuck into gaps where soil barely exists without drowning the rocks.
Succulents store water in their leaves and can go two to three weeks between drinks, though overwatering kills them faster than drought. Alpine plants are different: they want moisture but demand drainage sharp enough that standing water never touches their roots. The mix of fast-draining soil and some afternoon protection is what separates a living alpine garden from a cooked one.
Ornamental grasses and native wildflowers fill the space without asking for irrigation systems most small yards cannot fit or afford. A 4-by-6 foot starter bed lets you test which camp your conditions favor before committing the whole slope.
Drainage and Weed Control

Rock gardens fail when water sits where roots need air. I learned that the year my first attempt turned into a mossy swamp, every stone half-buried in mud that never dried. Slope the base layer 2–3 inches toward the lowest point so runoff escapes instead of pooling behind the largest boulders.
Weed control starts before the first rock goes down. Woven landscape fabric with a 20 to 25-year warranty goes under everything, not the cheap stuff that tears when you shift a stone. Cover it with 2–3 inches of gravel or crushed stone mulch between plantings, and refresh that gravel each early spring before weeds find footing. Dense ground-covering perennials like creeping phlox or sedum finish the job by crowding out what survives.
Hand-pull whatever breaks through, ideally after rain when the soil still holds moisture. The fabric and gravel do most of the work if you keep the layer thick; skipping the refresh is how a rock garden becomes a weeding project.
When Rock Gardens Began

The earliest rock gardens trace back to first-millennium China, where stacked stone formed the centerpiece of designed landscapes. Gardens in Suzhou still carry that lineage today. Japanese practice followed, though it shifted toward meditative space and away from plants as the main event. That distinction matters now: choose the Chinese lineage and your rock garden stays layered with planting; follow the Japanese path and stone itself becomes the statement, with greenery playing backup.
What we mainly call rock gardening in the West arrived later, a response to industrialization’s damage across Europe. The aim was to rebuild a connection to nature inside blighted surroundings. That origin explains why the form still works best when it reads as found landscape rather than built display. A rock garden convincing enough to look discovered, not installed, carries the same impulse those early makers had: nature brought back into view.
The industrial-era start also means rock gardening carries no requirement for antiquity. It is a modern practice dressed in old clothes, which is why a new installation beside a 2026 patio does not need to pretend it has aged in place. The honesty of fresh stone and chosen plants, arranged to read as habitat, beats the affect of false time.
Frequently Asked Questions
What is a rock garden?
A rock garden is an area of landscaping that combines rocks, pebbles, or boulders with plants to create well-drained conditions that mimic different plant habitats. Functionally, it is a low-maintenance way to work within the parameters of your outdoor space, and aesthetically, rocks serve as durable, permanent features against more ephemeral plantings. The design can range from Zen-inspired retreats and modern desert landscapes to rustic mountain-style gardens, often incorporating succulents, alpine flowers, ornamental grasses, and native species.
How do I create a rock garden?
Select a well-draining location, arrange larger rocks first as anchor points, then fill in with smaller stones to create natural-looking groupings. Plant drought-tolerant perennials like sedums, ornamental grasses, and alpine plants in spring or fall, spacing them according to mature size. Mulch around plantings with gravel or small stones to suppress weeds and retain moisture. Start small with a 4-by-6 foot area to master the technique before expanding.
What plants are best for a rock garden?
Succulents, alpine flowers, and ornamental grasses thrive in the lean, well-drained soil and minimal water conditions typical of rock gardens. Specific choices include creeping thyme, sedums, hen-and-chicks, blue fescue, feather reed grass, little bluestem, dwarf campanula, and Mazus. Many of these plants originate in alpine regions and mountainous areas where they adapted to require less water, fertilizer, and maintenance than traditional garden plants.