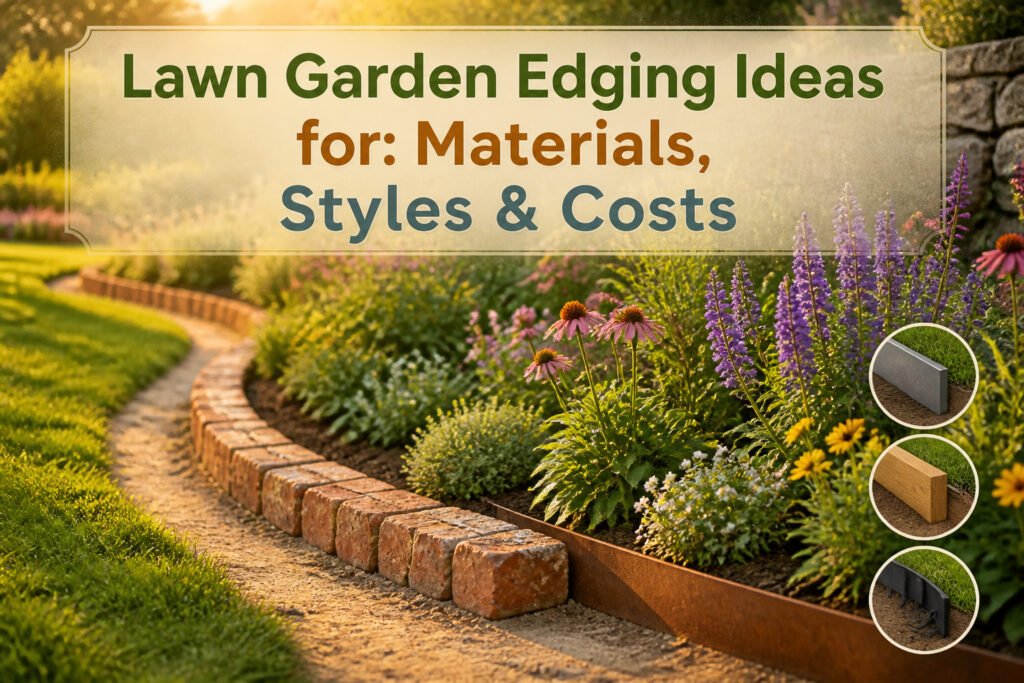
The right lawn garden edging idea depends on whether you want to install once and forget it, or refresh something cheaper every few years. Metal strips and Corten steel stay crisp with almost no attention, while untreated wood and plastic will shift, split, or fade on a predictable timetable. Reclaimed bricks from salvage yards run cheaper than new and age in rather than looking factory-fresh, though a half-inch dip in the sand base becomes a tripping hazard by year two if you don’t level twice.
1. Brick Edging
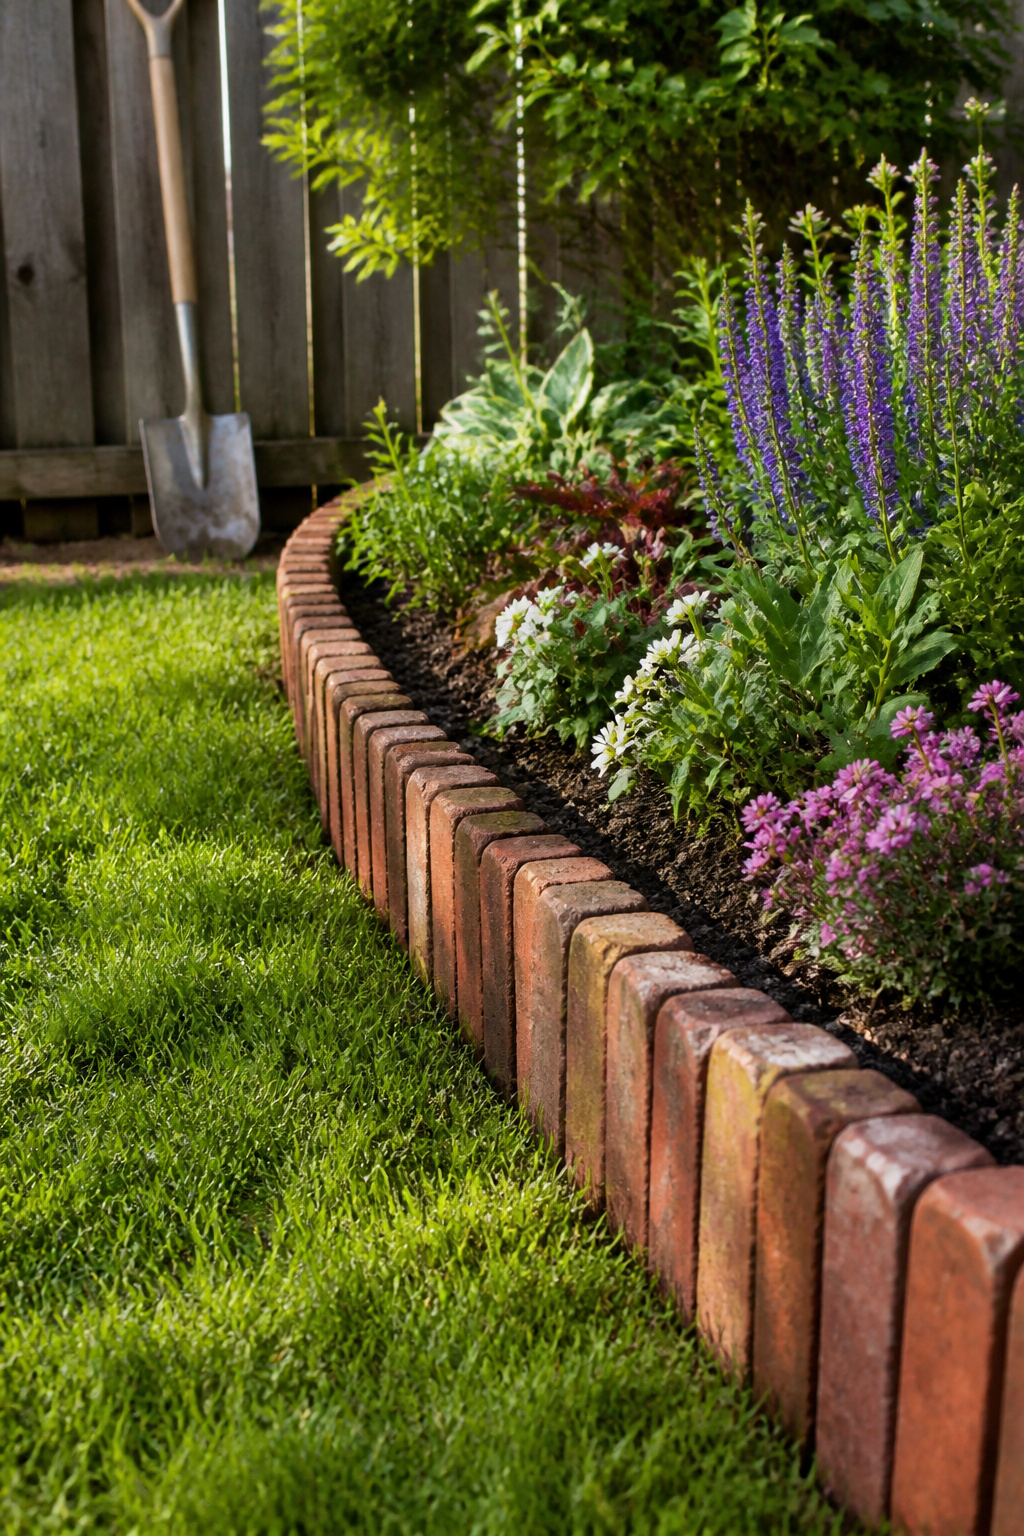
Brick carries a warmth that fits almost any garden style, which is why it has stayed one of the most traditional easy garden edging materials for decades. The color ages in, and the lines stay crisp enough to separate lawn from bed without looking industrial.
Installation starts with a shallow trench and a sand base for leveling. That part is straightforward, though I have learned to check the sand twice: a half-inch dip in the base becomes a tripping hazard by year two.
Pattern choice is where brick gets interesting. A soldier course (bricks standing vertical, tight in a row) gives you height and shadow. Laid flat, the edge stays low-profile and easier to mow against. Basket weave reads more formal, and it eats more bricks per foot, so count before you buy. Reclaimed bricks from salvage yards usually run cheaper than new, and the weathered surface looks like it belongs in a garden rather than fresh out of a box. Either way, the material handles freeze-thaw cycles well enough to last years without replacement.
2. Stone Edging
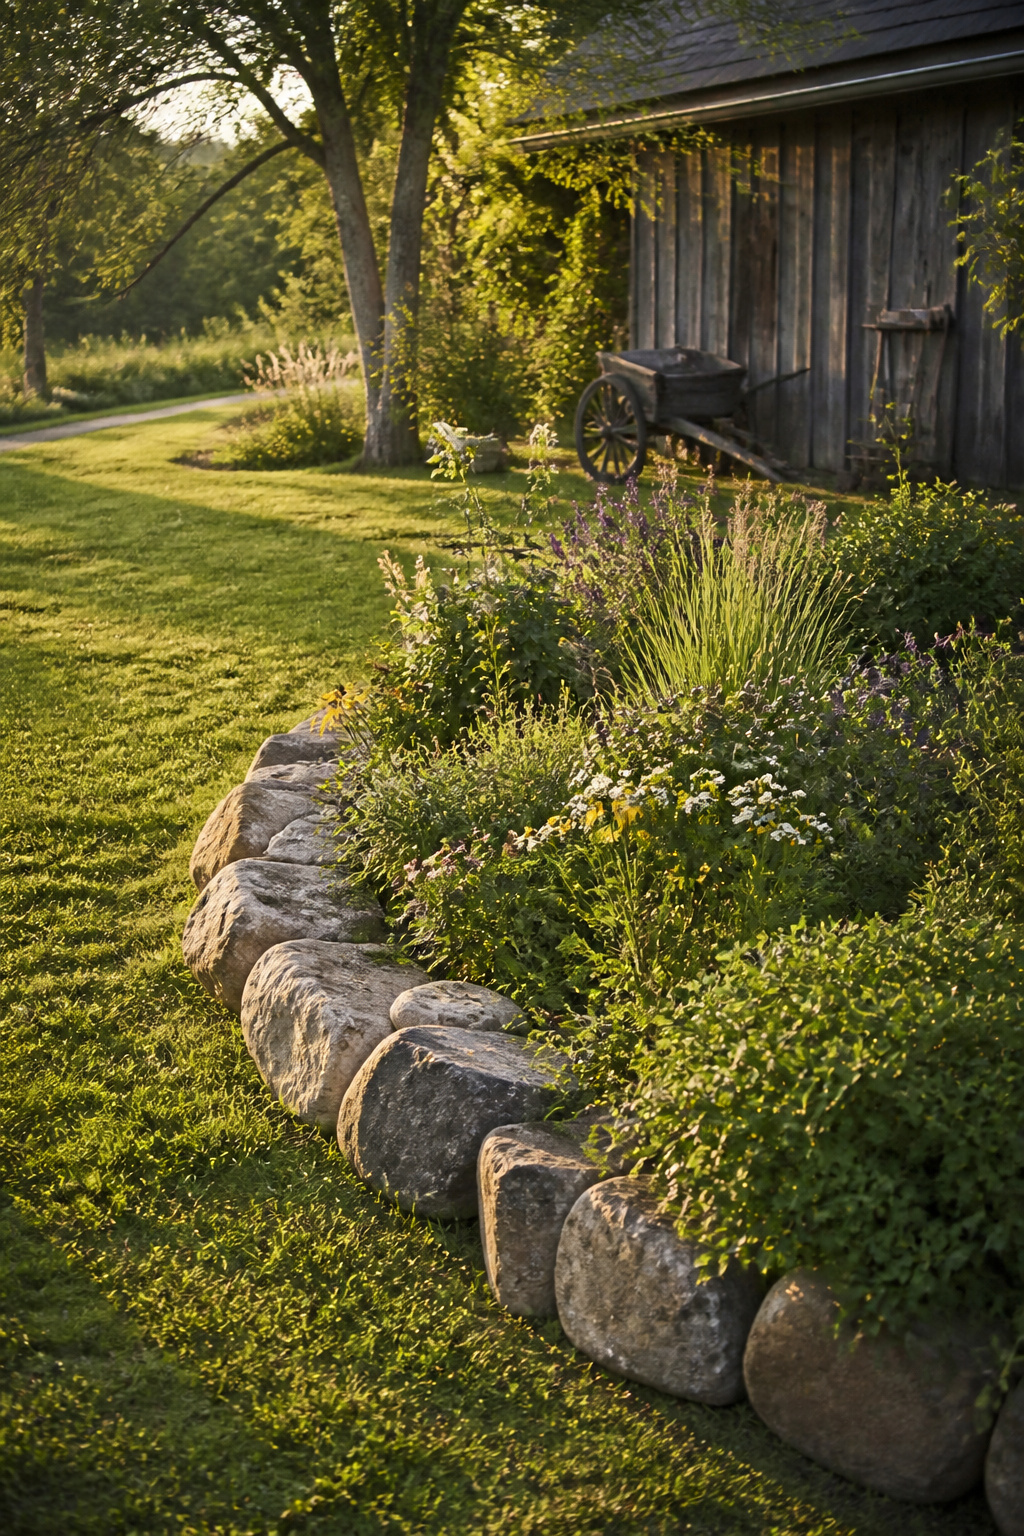
Stone brings a gravity to garden edges that lighter materials never quite match. I keep coming back to it for beds that need a boundary without a borderline, something that looks settled rather than installed.
Dry-laid stone is the path most weekend gardeners take, and for good reason. You set each piece into the soil, let the irregular shapes find their own balance, and the result reads as found rather than forced. The method works especially well in cottage gardens or any informal landscape where straight lines feel out of place. Larger, flatter stones stay put better than small round river rock, which tends to shift underfoot and after rain.
Mortared stone is the second option, and the choice between them comes down to permanence versus flexibility. A dry wall can be lifted and reset when a plant outgrows its space or when the line needs tweaking. Mortar locks the geometry in place, which suits high-traffic edges or dining areas where you do not want stones jogging loose.
What stone costs depends heavily on where you live. Regional availability matters more than almost any other material in this list: limestone in one part of the country, granite or fieldstone in another. Collecting from your own property or a friend’s land keeps the price minimal, while trucked-in stone climbs fast. The durability is the payoff either way. A stone edge properly laid will outlast the gardener who installed it, and that is not something you can say for every option here.
3. Metal Edging
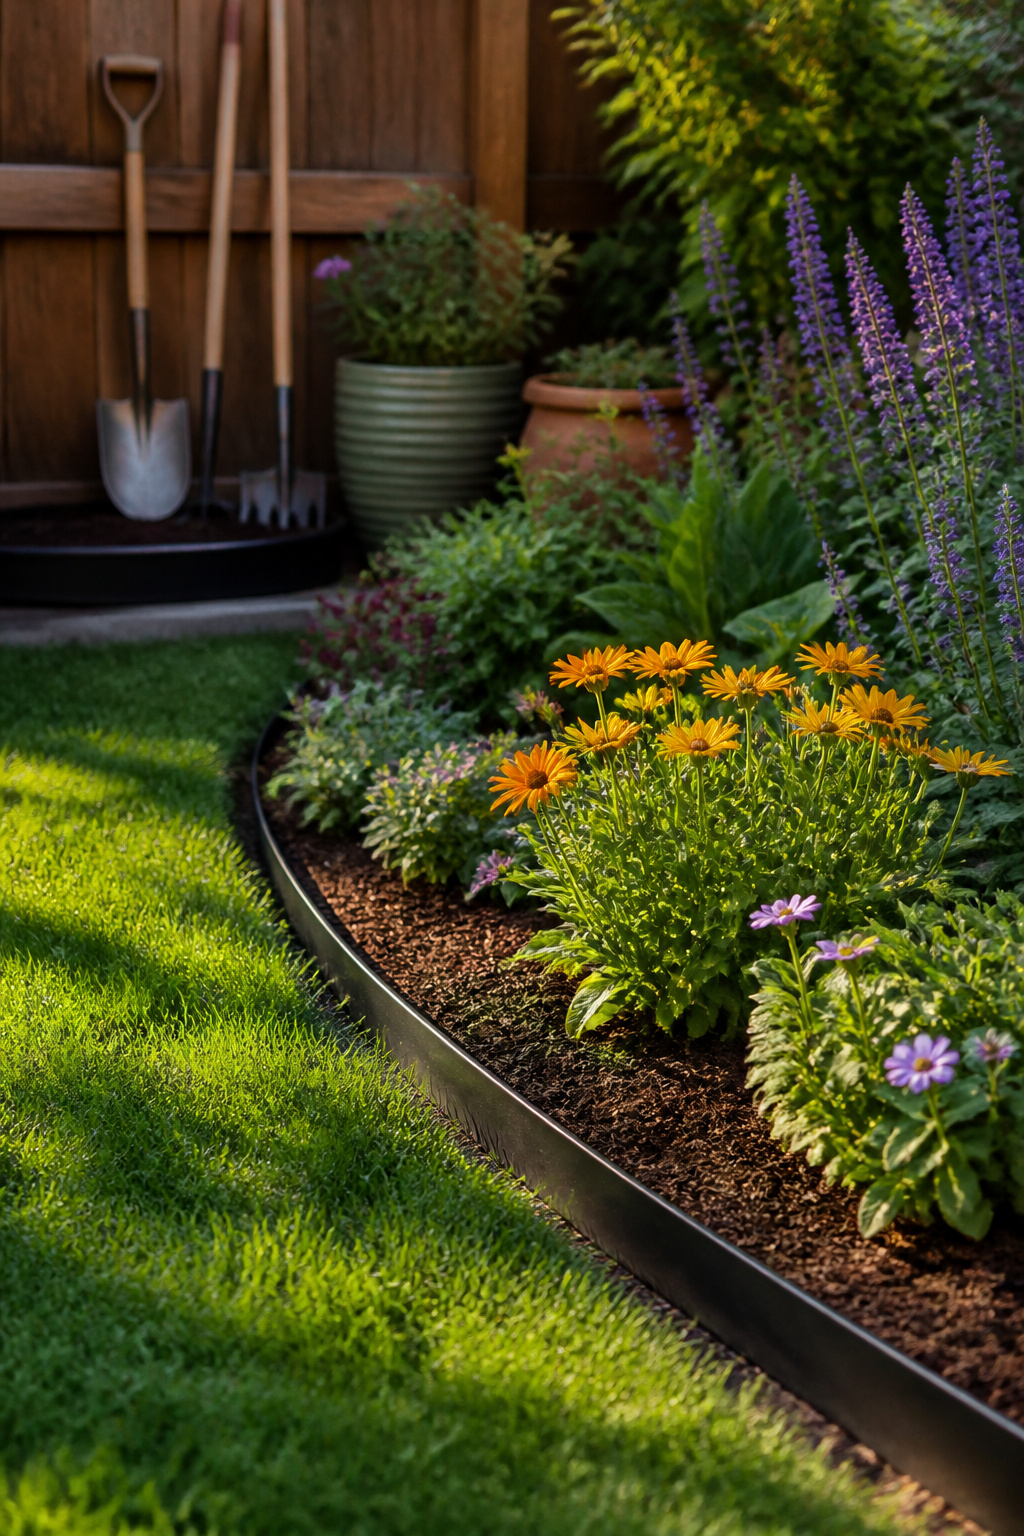
Steel and aluminum strips create the thinnest, most precise line of any edging material, and once installed they nearly disappear. That thin profile is what gives the neat, professional finish you see in high-end landscaping at a fraction of the cost.
I went back and forth between the two metals for a border I ran last spring. Steel will darken into a rust patina over time, which can look intentional in a naturalistic setting. Aluminum stays bright but is lighter, so it shifts more easily in loose soil unless you anchor it properly. Both come in long strips that bend into smooth curves, and both install with stakes pounded along a trench line.
The stability depends on depth. Push the strip low enough that the top sits nearly flush with the ground, then drive the stakes on the garden side so lawn traffic can’t lever the edge upward. Powder-coated versions keep their color; corrosion-resistant steel lets the weathering happen. Black, brown, bronze, and green finishes are available if you want the metal to recede even further.
4. Wood Edging

Wood edging carries a warmth that concrete or metal rarely matches, and the texture softens the line between lawn and bed in a way that reads as intentional without trying too hard. Pressure-treated timber sits at the practical end: it cuts cleanly, lines up straight, and costs less than brick or stone. The treatment buys you time against rot, though "durable" is relative to your climate and soil. Cedar moves upmarket with natural oils that resist decay longer, and its color weathers to a silver-gray that suits cottage gardens or informal borders. Reclaimed timber, whether salvaged from a demolished fence or a neighbor’s fallen tree cut into rounds six to eight inches tall, gives you the uneven, bark-on edge that looks like it grew there. The tradeoff is lifespan. Untreated wood in ground contact rots; softwoods go faster than hardwoods, and depending on your zone you may be replacing sections every few years. A crisp, thicker board reads modern. A weathered low line reads rustic. The same material, two different gardens.
5. Plastic Edging
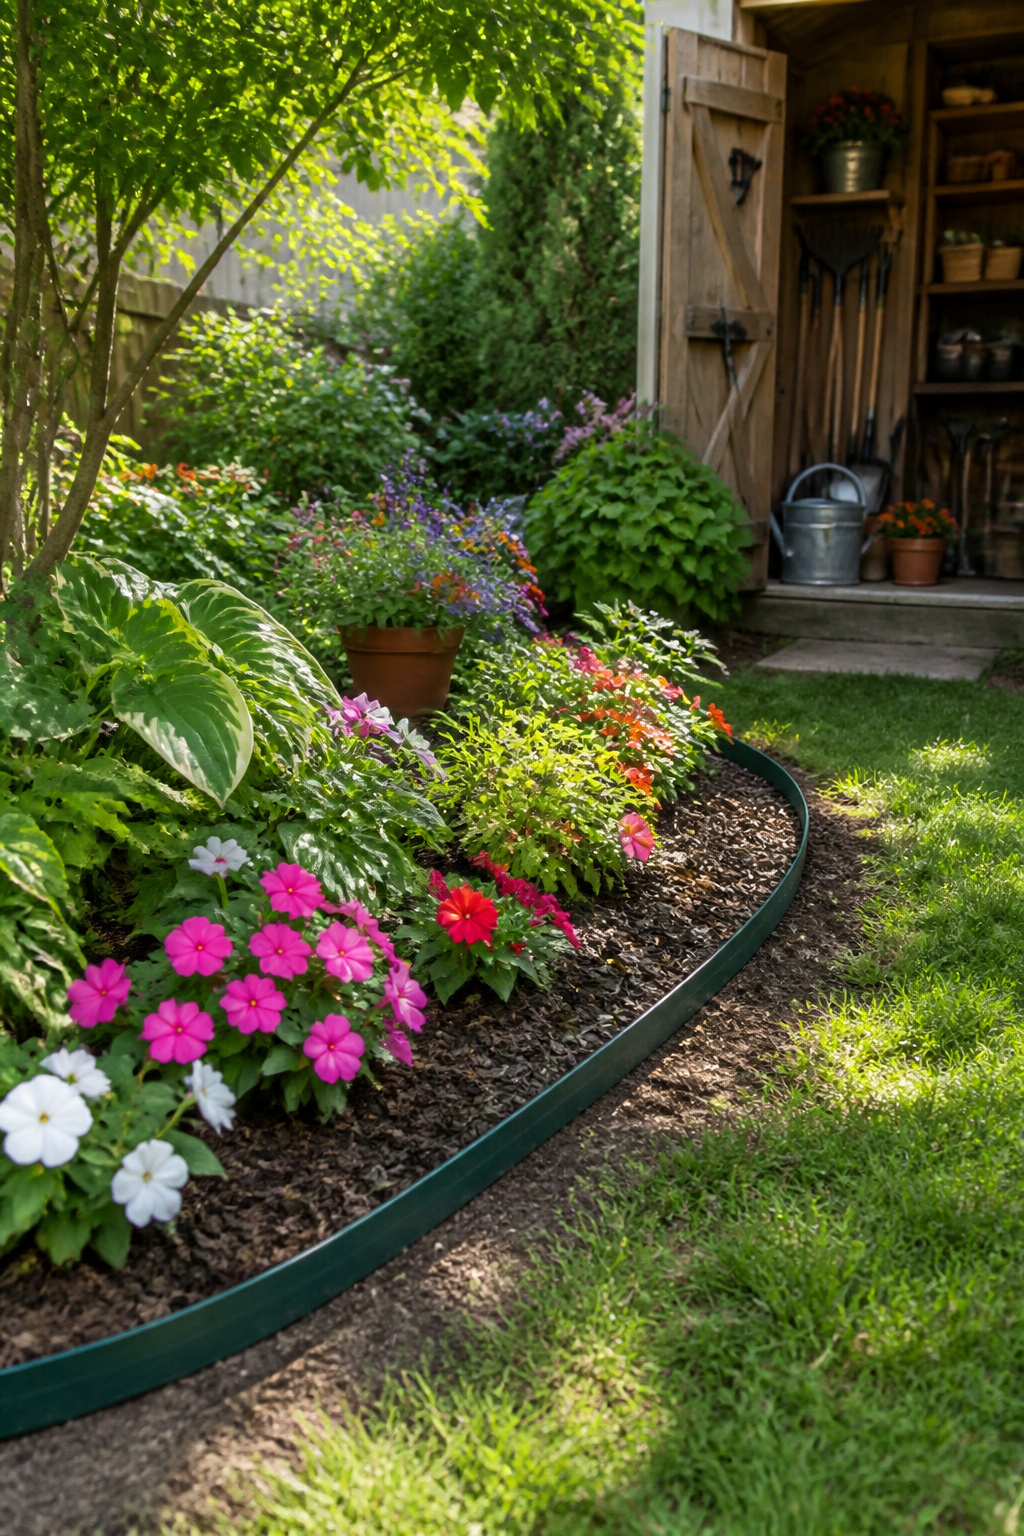
Plastic edging arrives in long rolls or pre-formed panels, and either format runs cheap enough to fit a single-season budget. I like that it bends into curves without snapping back, which matters when your bed line has to wrap around an existing tree or an awkward corner of patio. The install is straightforward: dig a narrow trench, set the edge, and backfill with mulch or soil so only a thin lip shows above grade. A rubber mallet seats it the last half inch.
The tradeoff is in the years. Plastic holds shape and resists rot, but UV and ground movement eventually fatigue it. Expect to replace or reset it sooner than stone or metal, though at this price that is often acceptable for a first garden or a rental you may not keep long term. For pairing with mulch beds it does the job quietly; the edging stays visible enough to block grass runners but low enough that the mulch reads as the border, not the strip holding it.
6. Mulch Borders

Extending your mulch layer a few inches past the planting area gives you a soft, gradual edge that costs nothing extra if you are already buying mulch. It is the least formal option here, but it suits relaxed garden styles well and needs topping up once or twice a year as it breaks down.
The real limitation is that mulch does not stop grass from creeping in the way a physical barrier does. A shallow trench cut underneath the mulch line fixes this, giving you the visual softness above with a cleaner separation below the surface. Hand-edging with a spade helps here, especially if the bed sits slightly higher than the lawn so the cut creates a natural dip at the edge.
Weed suppression and moisture retention are where mulch earns its keep even without hard edging. The refresh cycle is the trade you make for that softness, and in a small yard the extra bags each season still run well under the cost of stone or metal.
7. Corten Steel Edging
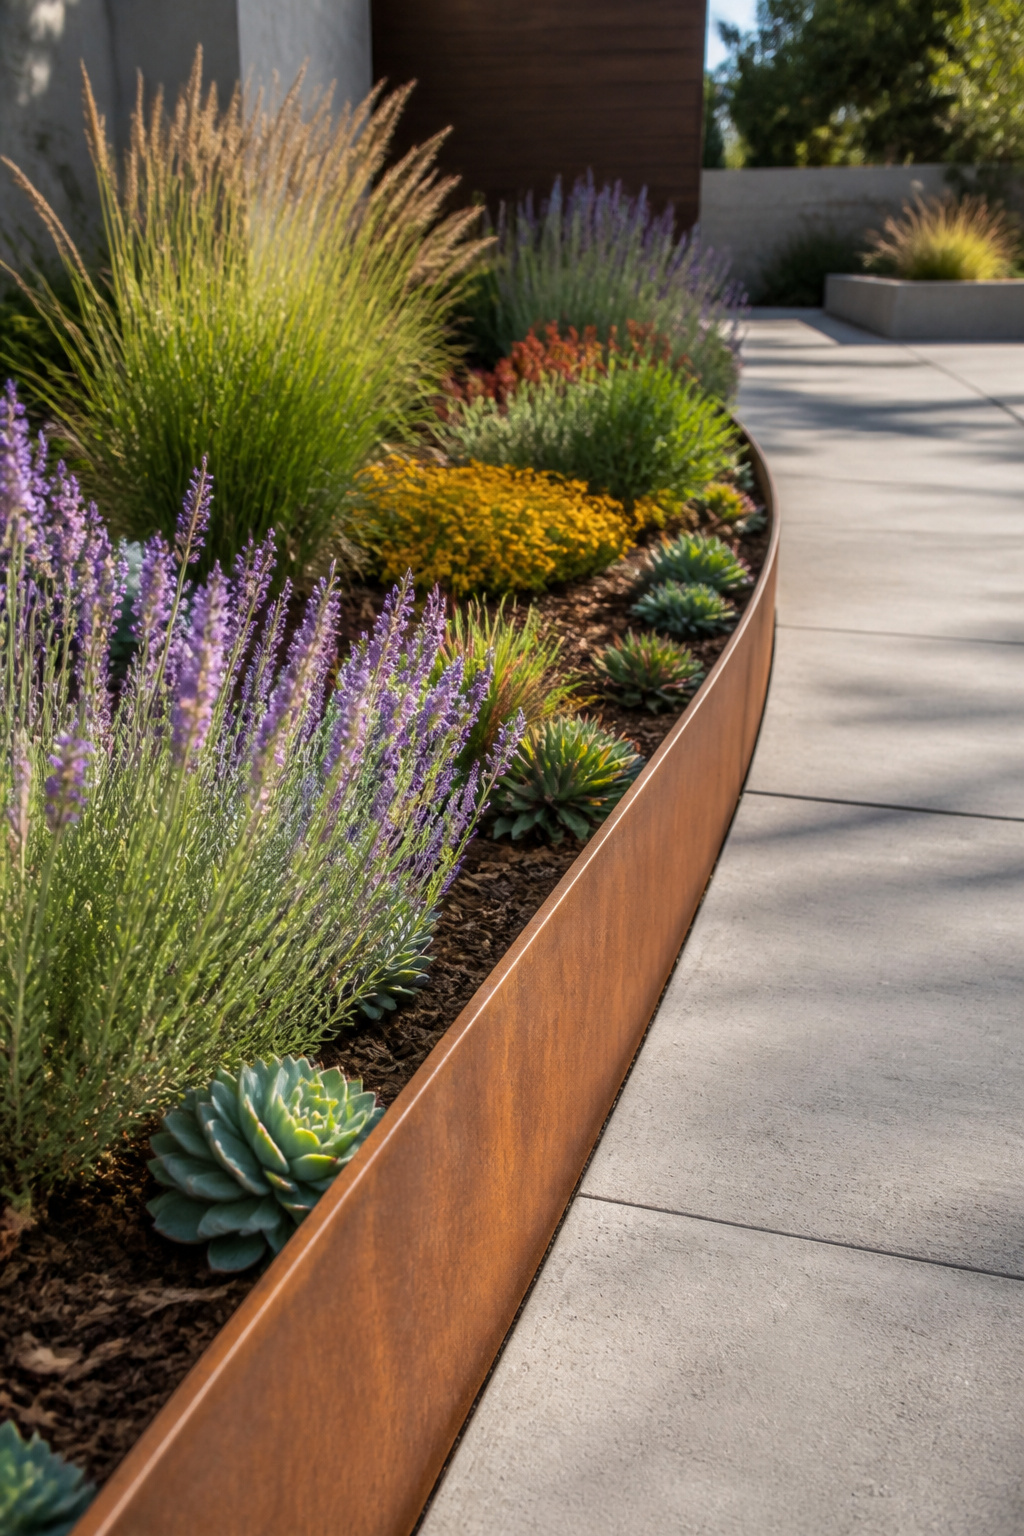
Corten steel edging carries a warmth that shifts as it ages, which is exactly why it works so well against cool concrete or soft planting. The surface starts out gunmetal gray and, over the first year or two, develops that rust-colored patina everyone recognizes. What matters is that the weathering stabilizes: the oxidation forms a protective layer that stops the corrosion from eating deeper, so the color holds without the metal weakening.
The material bends easily into curves, which makes it practical for shaping beds or sweeping alongside pathways. I have seen it used to echo the loose gravel beside it, and also to cut a sharp line against turf where the geometry wants to feel deliberate. In dry regions especially, where native stone and soil already run warm, the tone fits without trying.
Cost runs higher than plastic at the start, though the longevity closes that gap over time. For anyone weighing the investment, mild steel treated to mimic the patina exists as a cheaper entry point, but it will not stabilize the same way. The real thing is a great finishing touch to a modern garden, and it ages into belonging there.
8. Natural Plant Borders

Low-growing plants planted in a tight row along the front of a bed serve as a living border with an organic look no hard material matches. The plants define the edge while adding color and texture brick or stone simply cannot.
This approach takes longer to establish than installing a hard material, since the plants need time to fill in. It also requires trimming and occasional replacement, and it will not stop grass from creeping the way a physical edge does. A living border works better along an existing path than right up against a lawn.
Suitable species depend on your sun and your patience. Alyssum stays low at about six inches with white, pink, or purple blooms in full sun to partial shade, though it is an annual and needs replanting. For something that returns, Lucerne Blue Eyed Grass reaches eight to ten inches with blue flowers and yellow centers from late spring through summer. Boxwood is the classic evergreen choice, natural or sheared formal. Coreopsis hits roughly twelve inches with daisy-shaped flowers from late spring to late fall in sunny spots. Heuchera, or Coral Bells, offers low-growing foliage in colors from lime green to near-black, with small bell-shaped flowers held above on fine stems.
The maintenance reality is real: trimming to keep the line, seasonal cleanup, and replacing plants that fail. A mature plant border is one of the best-looking edging options for a natural garden, and the plants become features in their own right.
9. Bamboo Edging

Bamboo garden edging sells itself on two things that rarely show up together: a price low enough to experiment with, and a look that reads as deliberate rather than cheap. The material handles rain and extreme heat without the warping you get from softwoods, and the staggered-top sections most stores stock come with their own stakes, so installation is mostly a matter of pounding them in level and calling it done.
The sustainability angle is real, though it helps to know what you’re buying. Bamboo is a grass, not a timber, and it regenerates fast enough that harvesting it does not clear forests. For a gardener trying to keep a $500 annual budget in check, that matters less immediately than the upfront cost, but it does mean one less PVC product in the ground.
Roll formats exist too, longer strips you stake at intervals rather than section by section. These work better on gentle curves, whereas the rigid sections fight you on anything tighter than a lazy bend. In cold-winter zones, expect three to four years before the stakes loosen or the canes start splitting; in milder climates, five is common if you move the line back from where a string trimmer hits it weekly. The tropical aesthetic pairs naturally with hostas, ferns, or anywhere you want a soft edge rather than a hard border.
10. Recycled Materials

Old wine bottles buried neck-down make a garden edge no one else on the block will have. The trick is filling each one with sand before setting it, which keeps the glass from shattering when the weed trimmer comes through. I like the way the light catches different bottle colors at different hours, though I will admit the look is not for everyone.
Shells work the same way if you are near a coast. Whelks or whatever washes up local to you, laid in a single row between lawn and bed. The edge stays low and the white reads clean against dark soil, but it is fragile. A hard rain shifts them, and squirrels treat the hollows like a buffet line.
What draws me to these approaches is exactly what limits them. A recycled edge is a one-off, shaped by what you have on hand and where you live. That makes it personal. It also means you are building something no tutorial can fully map out for you. The materials are free or close to it, which suits a $500-800 annual garden budget, but the labor is front-loaded and the result is only as sturdy as your patience for resetting stones or shells after every storm.
Installation Tips That Keep Edging Straight
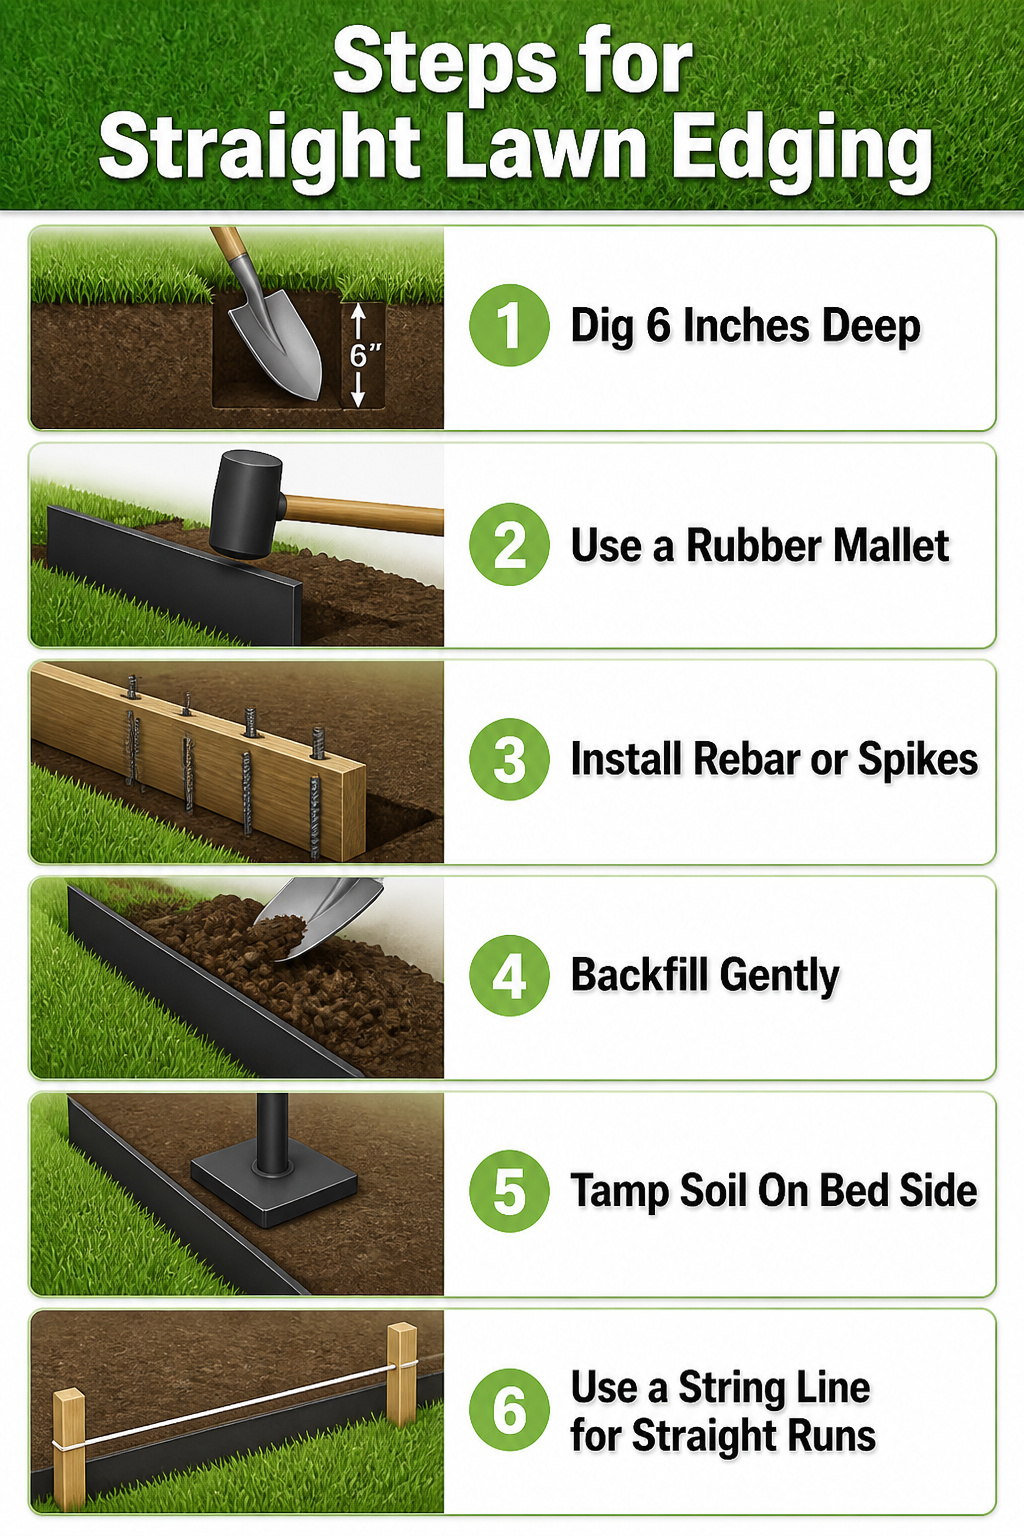
Trench depth matters more than whatever material you slide into it. A shallow edge tilts, heaves in frost, and lets grass creep underneath within two seasons. I dig about six inches down and wide enough for the edging plus a couple of inches of packed soil behind it.
For plastic or recycled edging, a rubber mallet seats the lip flush with the lawn surface. Timber needs rebar or spikes through pre-drilled holes, spaced close enough that the plank doesn’t bow. Metal strips with integral stakes pound straight in; wrought-iron sections link and anchor with their own base spikes. The mistake is skipping the backfill: loose dirt settles, and your crisp line sags.
Stakes and rebar should sit below the top edge so they don’t telegraph through or snag a mower. After backfilling, I tamp the soil on the bed side harder than the lawn side, creating a slight tilt that sheds water away from the wood or metal.
Straight runs need a string line, not eyeballing. Curves with metal edging flow best when you stake the start and end points, then bend the strip in small increments. Timber won’t bend, so save it for right angles and long runs where the factory edge stays true.
Pressure-treated timbers last, but the treatment choice matters near vegetables. Untreated wood rots faster; the install has to be tighter and checked more often.
What Each Material Needs for Upkeep

Some lawn garden edging ideas ask more of you than others, and knowing which ones before you install saves the regret that comes three seasons later.
- Living plant borders need trimming to keep their shape and occasional replacement when a plant fails. The payoff is the softest line in the garden, though grass will creep through because there is no physical barrier.
- Trench edging, cut about four inches deep with a flat spade or half-moon edger, softens within weeks. Re-cutting a few times per season keeps it crisp, or you can top the trench with mulch to slow the blur.
- Brick, stone, and paver edges stay neat longer but settle or shift with freeze-thaw cycles. Resetting a shifted stone is a ten-minute job once a year, if that.
- Metal strips and edging systems are the closest to install-and-forget. The line stays exact with almost no attention after the first week.
- Logs or rustic wood splits and rots on a predictable timetable. Plan on replacement every few years, or treat it as a temporary look you refresh intentionally.
Matching Edging to Your Garden’s Look

The material you choose for lawn garden edging ideas does more than hold soil in place; it sets the tone for everything planted behind it. Brick reads warm and orderly, the kind of edge that suits a front bed kept tight with boxwood or structured perennials. Landscape architect Janice Parker calls it her favorite for exactly that flexibility: laid in running bond it feels formal, staggered or set unevenly it softens into something more casual. I like that you can reverse the same decision with pavers, too, flipping scalloped ones upside down for a flat, straight top when you want cleaner lines than the garden center display suggested.
On the other side, willow wattle edging carries the English cottage look without trying hard, though the woven sticks will show wear sooner than you’d hope. That tradeoff is the whole point. Stone or metal gives you permanence and a sharper silhouette; wood and woven materials relax into the planting and ask less of the architecture around them. Your house style matters less than what you actually like looking at from the kitchen window. A farmhouse with a vegetable patch out back can still carry a crisp brick edge if that is what pleases you, and a modern patio can soften with willow if the contrast feels right. Budget and climate still rule, start there, but once the practical boxes are checked, let the material follow your eye rather than a rulebook.
Budget Finds and When to Spend More

Reclaimed bricks give a garden instant history without the premium of new materials. Salvaged dealers like Historical Bricks clean and sort old stock, including Old Detroit Reds they ship nationwide, so the hunt is less messy than pulling them from a demolition site yourself. A single row laid flat keeps the look sharp and the cost down; stood on end, the same bricks read as a taller, more deliberate border that eats more of your $500–800 annual budget but needs no mortar to stay put.
Mulch sits at the opposite end of the spending spectrum, acting as edging almost by accident. Wood chips or stone separate bed from lawn visually, and a strip of plastic edging tucked underneath adds structure for little extra. The tradeoff is lifespan: organic mulch breaks down and bleeds into the lawn, while stone eventually sinks into soil and needs refreshing.
Corten steel is where you spend once and wait. The alloy forms its own rust-colored skin that stabilizes against further corrosion, and pliable strips bend into curves that would fracture concrete or snap timber. The upfront hit stings compared to mulch or reclaimed brick, but the maintenance ledger stays nearly blank for years. For a small yard you plan to keep, that math can work. For a rental balcony or a space you might redesign next season, it probably does not.
Frequently Asked Questions
What is the easiest edging to install?
Recycled plastic edging is the easiest to install. It is lightweight, easy to cut, and holds its shape over time. You simply dig a trench, position the edging, and tap it into place with a rubber mallet. No professional help or special tools are needed, which keeps both labor and cost down.
How do I choose the right edging for my garden?
Choose based on what you like looking at and what your space demands. Start with budget and climate, then match the material to your garden’s style: brick for warmth and order, stone for permanence, metal for crisp modern lines, wood or bamboo for softness. Your house style matters less than what pleases you from the kitchen window.
What materials can I use for garden edging?
Brick, stone, metal, wood, plastic, Corten steel, bamboo, mulch, living plants, and recycled materials like glass bottles or shells all work. Each brings a different look, lifespan, and price point. Regional stone is often cheapest where it is local; plastic and bamboo run lowest everywhere but need replacing sooner.
How do I maintain my garden edging?
Living plant borders need trimming and occasional replacement. Trench edging cut with a spade softens within weeks and needs re-cutting a few times per season. Brick, stone, and paver edges may need a stone reset yearly after freeze-thaw cycles. Metal strips need almost nothing after the first week. Logs and rustic wood split and rot on a predictable timetable, so plan on replacement every few years.