

Fairy garden ideas run from a chipped teacup on a windowsill to an old wheelbarrow planted as a cottage lane, and the right one depends on how much sun your spot actually gets. Shade forces you toward moss and ferns; six hours of direct sun opens the door to succulents that thrive on neglect. A broken terracotta pot with two good shards gives you three distinct levels, but only if you wedge the largest piece first and lock it with wetted clay before soil goes in.
1. Mini Fairy Garden in a Pot
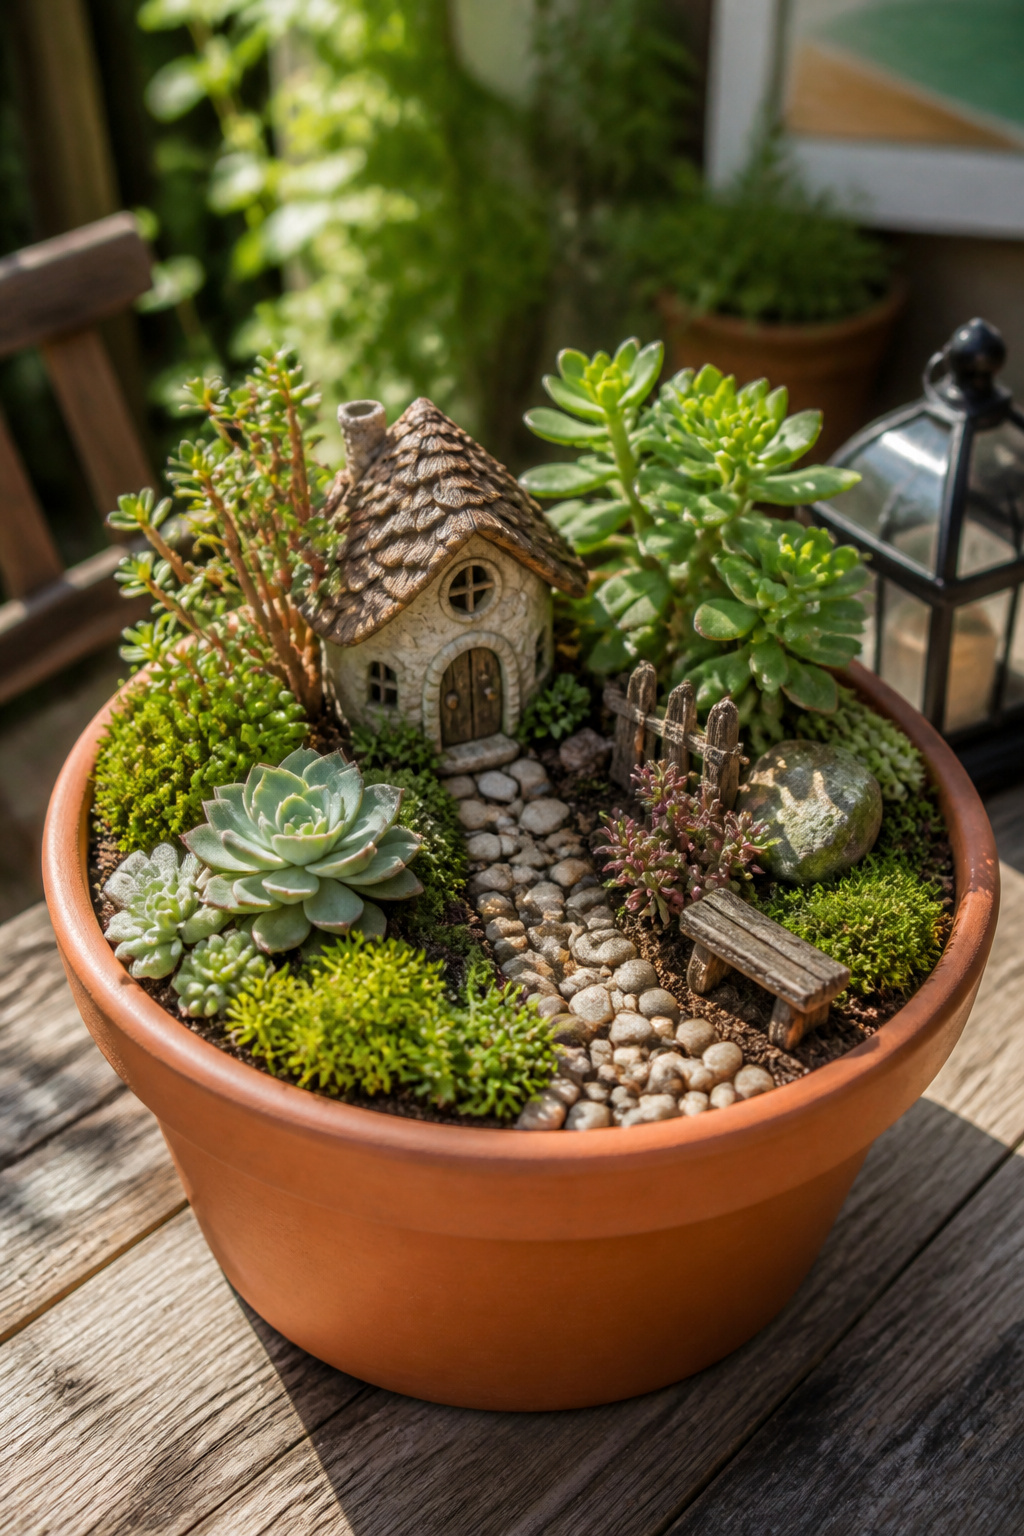
A wide, shallow container with drainage holes makes the most forgiving starting point for a portable fairy garden. 8–12 inches across gives enough surface for a winding path and a tiny house without the project ballooning into something that feels like work. I like that scale because one hand can still lift it when the afternoon sun gets brutal and the succulents need shade.
Terra cotta, an old galvanized tub, even a forgotten bowl from the kitchen; anything that holds soil and lets water out the bottom will do. If the vessel runs deep, plastic bottles stuffed in the bottom save potting mix and keep the weight manageable. Standard potting mix works fine, no special blend required.
The real advantage here is mobility. Morning sun on the patio, afternoon shade by the back door; a pot that size moves with the light and comes under cover when heavy rain threatens to float your accessories down the driveway. That flexibility matters for beginners still learning what "part sun" actually looks like in their own yard.
2. Broken Pot Fairy Garden
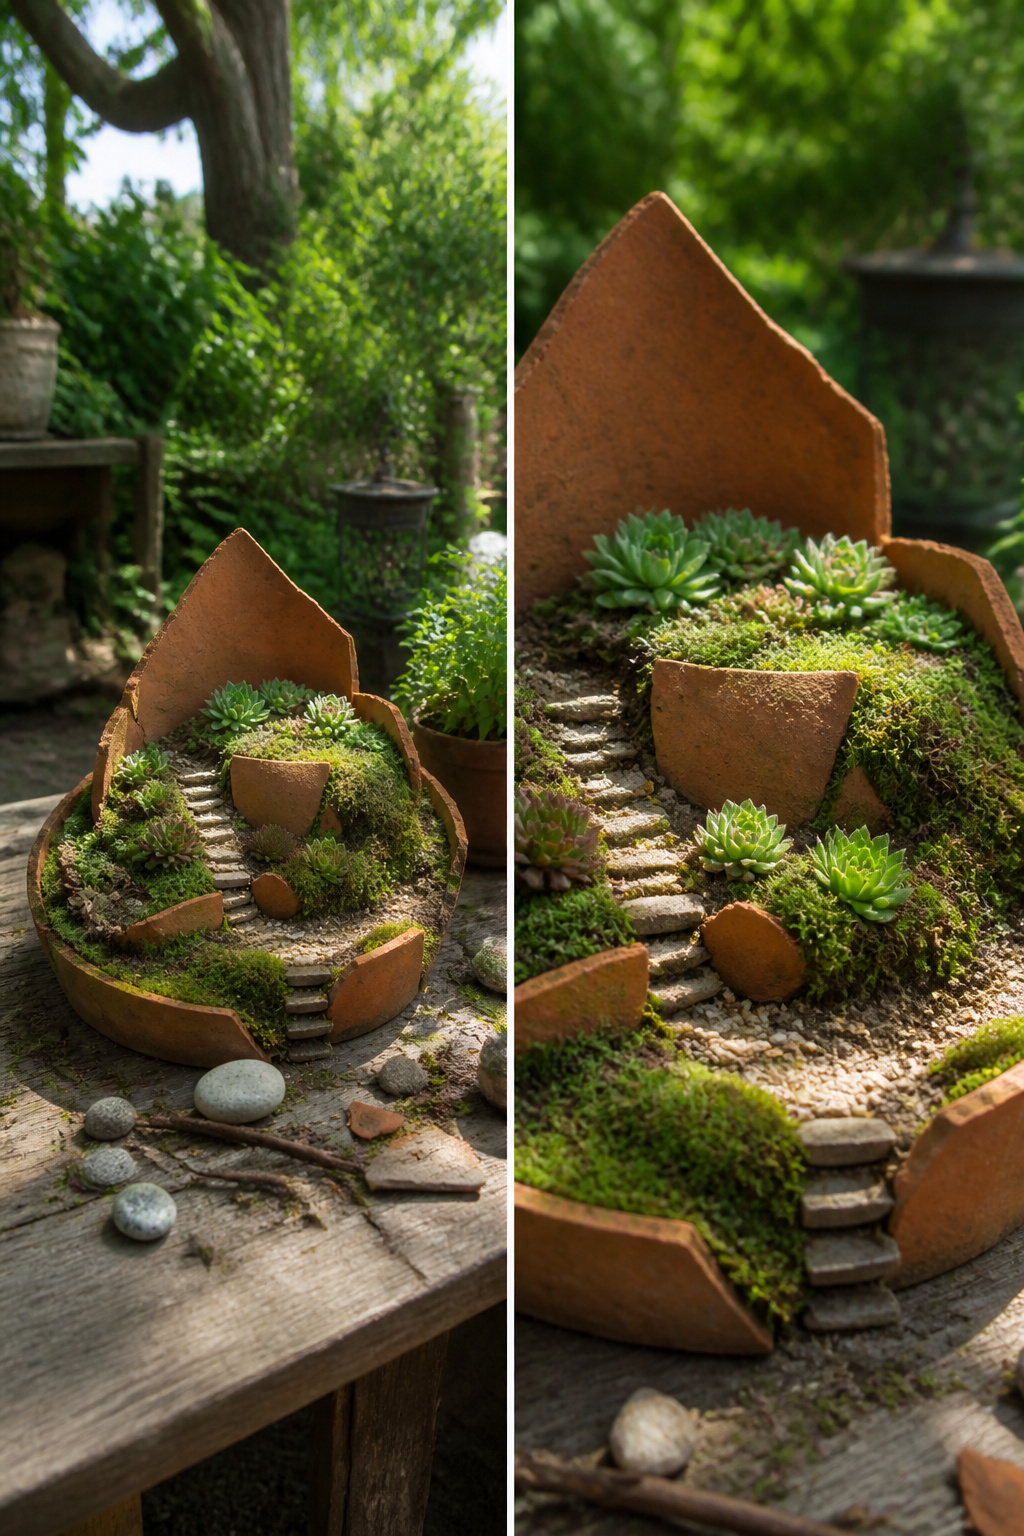
A cracked terracotta pot that would normally go in the trash becomes the bones of a layered fairy garden with real depth. The broken pieces work as retaining walls, stacked to form tiers that hold soil at different heights. I wedge the largest shard first to create the middle wall, then fit smaller fragments into the gaps like a puzzle. Clay-heavy dirt, wetted until it sticks, acts as mortar to lock river rocks and broken tile in place; once it dries, the structure holds up to years of watering. Soil goes in last, packed behind each wall so the tiers stay put. For planting, moss and tiny groundcovers tuck into the crevices between rocks where their roots can grip, while a small jade or sedum sits up top as the canopy tree. Flat stones pressed into the slope make stairs between levels, and a dusting of sand or fine gravel swept smooth with a stick defines the paths. The whole thing stays under control in a pot that already has a drainage hole, which matters more here because water runs through layers instead of soaking evenly. A broken pot with at least two good-sized shards gives you enough wall to build three distinct levels; anything smaller and you are really just planting around a crack.
3. Succulent Fairy Garden
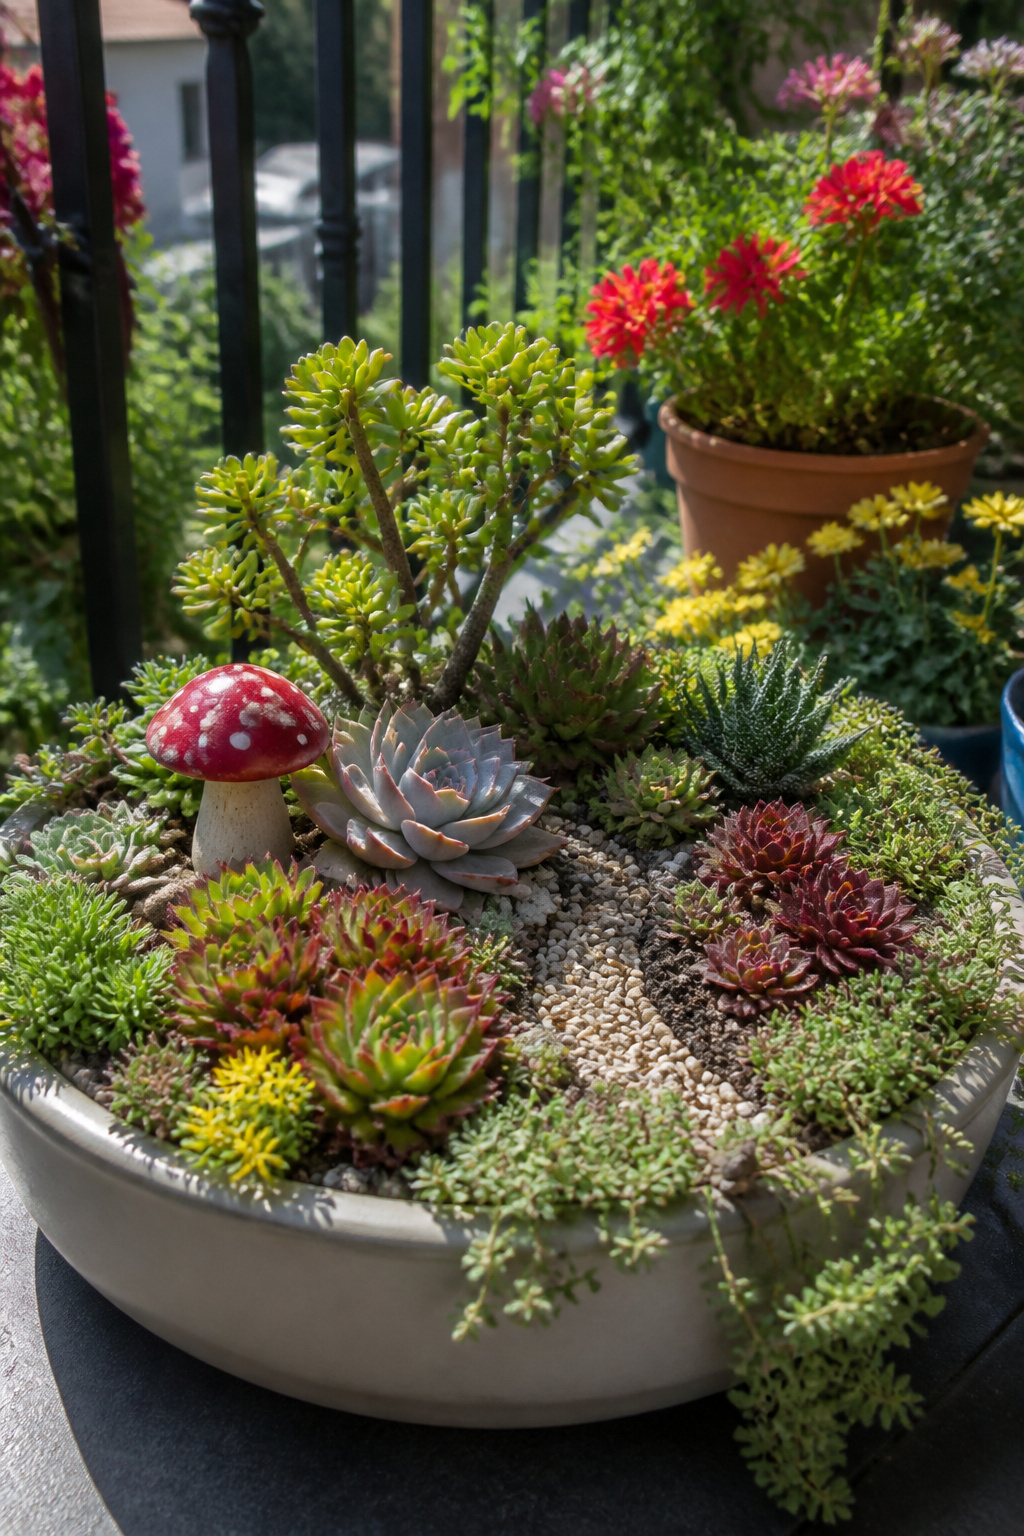
A succulent fairy garden is the most forgiving project you will try on a hot balcony or a strip of concrete that bakes all afternoon. The plants that survive it want at least six hours of direct sun and soil that dries fast enough to starve root rot.
Sedum, hens and chicks (Sempervivum), and creeping thyme are the workhorses here. Sedum stays low and spreads like a ground cover, Sempervivum stacks into tight rosettes that read as miniature shrubs or alien cabbages depending on the scale you pair them with, and creeping thyme softens edges into fairy lawns and paths. All three handle the same gritty, fast-draining mix: think more gravel and sand than potting soil, with drainage holes you cannot skip.
Watering is where most beginners kill these. Established succulents want a deep soak, then nothing until the soil is dry to the touch. On a July balcony in full sun, that rhythm might mean once a week, sometimes less. The plants store water in their leaves; they do not want it sitting around their roots. If you travel or simply forget, they will lean into the neglect rather than collapse from it.
The catch is spacing. A two-inch echeveria looks perfect at fairy scale until it shoots up a flower spike and towers over the cottage. Stick to the smallest varieties, plant closely enough that bare soil disappears, and pinch or swap out anything that outgrows the scene. Propagation is almost accidental: a leaf knocked loose by a hose or a dog will root where it lands, and baby plants fill gaps for free.
4. Beach Theme Fairy Garden

Sand reads instantly as shoreline, so a beach fairy garden starts with the material itself. I layer it over standard potting mix in a shallow dish or old glass canister, but drainage fails fast if sand sits more than half an inch deep. Water pools underneath, roots rot, and the whole scene turns sour. I keep sand to a top dressing, maybe a quarter inch pressed firm, with the real growing medium below and holes drilled if the vessel allows.
Shells and driftwood are free if you gather them yourself; otherwise thrift stores and beach-town gift shops carry bags for a few dollars. One builder I read about painted a miniature Adirondack chair aqua so it would stand out against pale sand, a simple move that makes the color pop without fighting the neutral palette.
Plants need to match the lean, gritty conditions you’re staging. Small succulents, sedum, and fine ornamental grasses handle it best. Elijah Blue Fescue stays about a foot tall if kept outdoors, or try hens and chicks in a protected indoor version where summer humidity won’t cook them. Blue glass pebbles tucked between plants read as lagoon water without the engineering a real pond demands.
This works as a patio centerpiece through July and August, or year-round on a bright windowsill where sand and shells never freeze.
5. Farm Theme Fairy Garden

A farm-themed fairy garden trades wings for weather vanes and builds its charm around a red barn, split-rail fencing, and the small animals you probably already have in a toy box somewhere. The barn itself is the easiest anchor: one source describes painting a simple birdhouse barn-red and tucking moss around the base for ground cover. Plastic farm animals, toy tractors, or even small dinosaurs from a child’s collection work as occupants, so this theme costs less than most.
The vegetable patch is where the detail happens. Seed beads pressed into soil make believable crop rows when you vary the colors: cream for corn, orange for carrots, deep red for tomatoes. For living texture, microgreens seeded in tight lines grow real miniature fields you can harvest and replant. Sempervivum and echeveria succulents, arranged in ordered rows, read as tiny cabbages and root vegetables with almost no watering once established.
Farm miniatures turn up in unexpected places. Craft-store floral sections and dollhouse aisles carry fences and wheelbarrows, but dollar stores stock plastic animals and barns seasonally at lower prices. Thrifted toy wagons or old wheelbarrows make natural containers that already fit the story.
What makes this theme last is who it draws in. Grandparents building with grandchildren get the nostalgia of a barn they might have known, while the child supplies the animals and the imagination. The project becomes collaborative rather than directed, with each generation adding what the other does not have on hand.
6. Fairy Garden in a Teacup
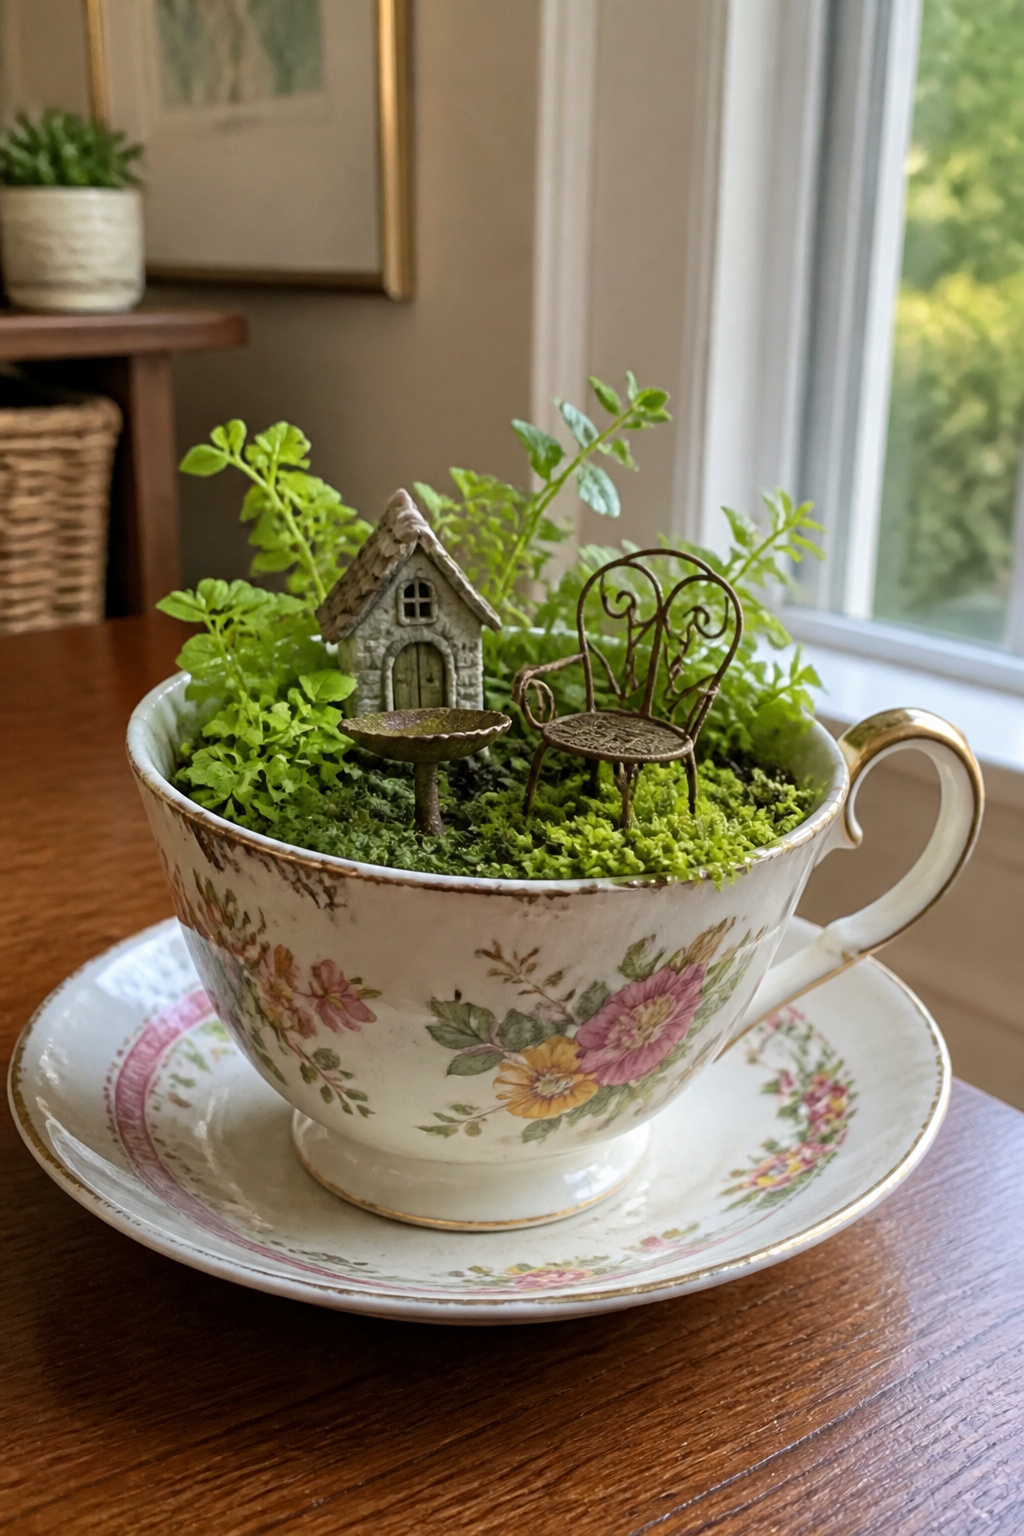
A chipped Royal Albert cup from the thrift store makes a better vessel than you’d guess. Leave the bottom intact and skip the drainage hole; the pebble and activated charcoal layer underneath the soil does the work instead. I use aquarium gravel for the base layer, then a thin scatter of horticultural charcoal before the potting mix goes in.
Scale is where these fail. A teacup gives you maybe three inches of soil depth and the same in width, so the plants cannot be merely small; they need to stay miniature. Baby tears outgrow the rim in six weeks. True miniatures like Soleirolia soleirolii ‘Aurea’ or the smallest club mosses hold under three inches for a year or more. For lower light away from a window, a piece of live moss pressed over the soil surface needs almost nothing and reads instantly as a forest floor.
The saucer underneath is non-negotiable if you are watering on a windowsill or a desk. I learned that the second time the ring stained the paint.
7. Woodland Fairy Garden
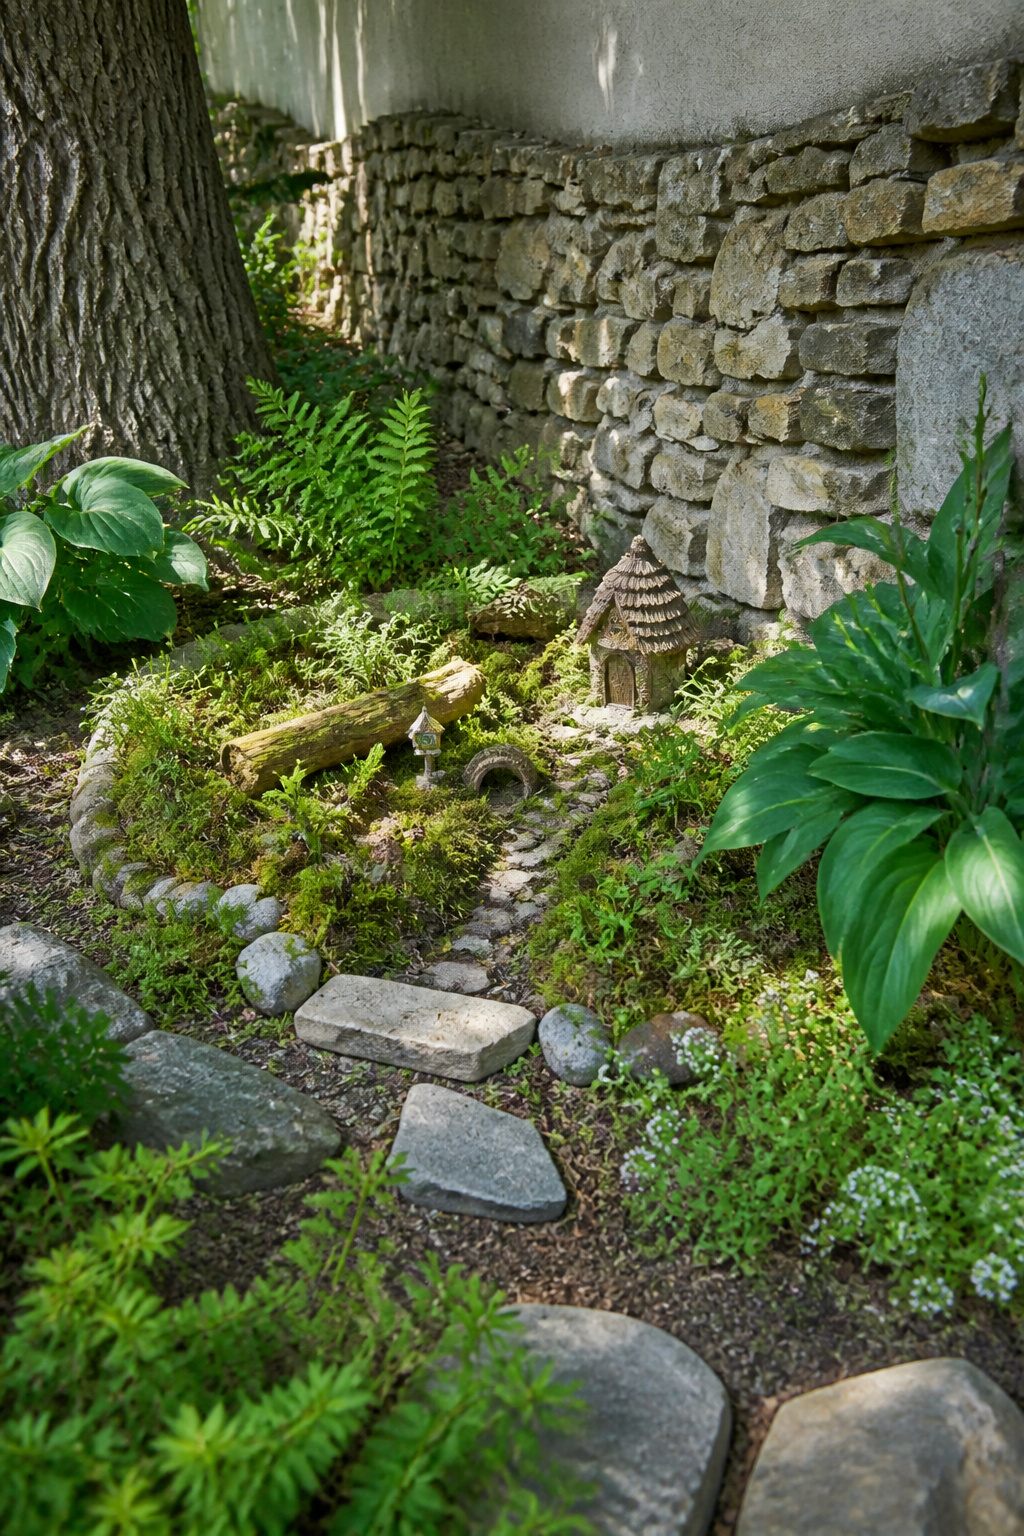
A woodland fairy garden works with shade, not against it. The north side of a house, under a tree, or any spot that gets dappled light or bright shade becomes your forest floor. Moss, small ferns, and miniature hostas form the living carpet; they already want damp soil and protection from drying out, so the setup asks less of you through the season.
Bark pieces, smooth stones, and twigs serve as logs, paths, and tiny architecture. Scatter pine cones and acorns for texture that breaks down naturally and gets refreshed just by walking outside. A twig bench or rope swing tucked near a moss clearing gives the scene its story without requiring purchased miniatures.
The real advantage is intervention. These plants thrive where the light is already low and the soil stays moist; you are not forcing sun-lovers to adapt or fighting to keep soil from baking. Sourcing is nearly free. Fallen twigs, collected bark after storms, and moss from your own property, transplanted in handfuls, build the whole structure. The garden ends up looking more convincing for it, as if the fairies assembled it themselves from what was already growing there.
8. Enchanted Cottage Garden
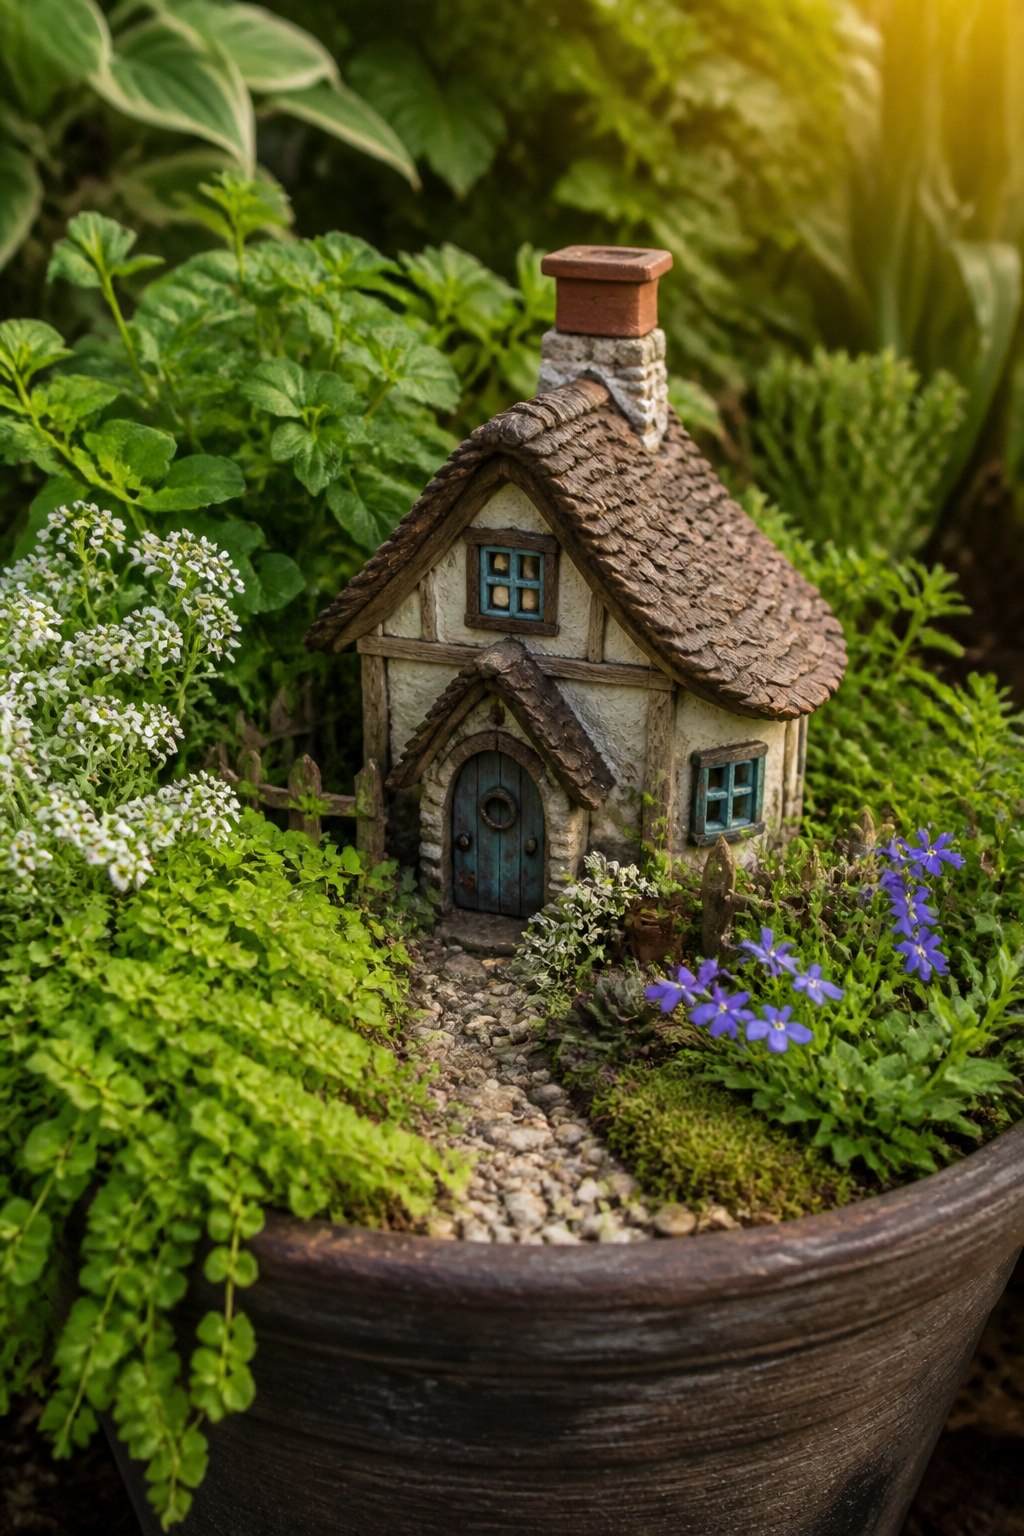
A miniature cottage is the anchor that makes a fairy garden feel like a place someone actually lives rather than a tray of random objects. I learned this the hard way after crowding my first attempt with a cottage, a well, a bench, a wheelbarrow, and a tiny bicycle; the eye had nowhere to land and the whole scene looked like a yard sale. One statement piece wins over clutter every time. The cottage sets the scale, so everything else, a picket fence, a garden gate, a gravel lane, should relate to its door height and window size.
For plants, the cottage garden look means soft, small leaves rather than bold succulents. Baby tears spill over edges like mossy ground cover, and small-leafed herbs such as creeping thyme give the same dense, English-border feel. Alyssum and lobelia add low flowers that keep the scale believable without overpowering the architecture. A tiny mailbox or a short washing line can finish the story, but only if the cottage has already done its job.
9. Fairy Garden with Twinkling Lights

Battery-operated fairy lights turn a miniature garden into something you actually want to walk past after dark. The strands marked indoor use only will corrode fast outside, so waterproof or outdoor-rated strings are the only sensible choice for anything exposed to dew or rain.
The battery pack is always the eyesore. Tuck it behind a larger rock, bury it under moss with the wire trailing up through a bush, or wedge it behind a miniature house where the casing reads as just another foundation stone. Thin copper-wire strands wrap neatly around twig branches or disappear into leaf litter; the stiffer coated cords need more deliberate looping to look natural.
Most battery sets run about 4–6 hours on a fresh set of cells or a full charge, then go dark. Timer functions help stretch that window, but replacing or recharging is a regular chore. Solar strands eliminate the battery math entirely if your spot gets decent afternoon sun, though the small panel needs its own hiding place.
10. Seasonal Fairy Gardens

A fairy garden that sits unchanged year-round misses half the fun. I rotate mine with the calendar, and the key is finding plants that bridge more than one season so you are not starting from scratch every three months.
Rosemary, thyme, and sage carry from late spring well into summer; boxwood and dwarf mondo grass hold structure through fall. Pansies fade when heat arrives, but petunias or marigolds slide into their spots without disturbing the hardscape. For indoor gardens, jade, hens and chicks, and miniature ivy stay put all year if light stays steady.
The miniatures are what mark the shift. In October I swap in a foam pumpkin house carved with a tiny door, set dried moss and mini mushrooms around it, and tuck a few faux gourds beside the path. Come December, white gravel or cotton batting laid over the soil reads as snow, with clipped evergreen sprigs and a string of warm white fairy lights for the glow on dark evenings. The fall pumpkin stores in a shoebox; the winter pieces fit in another.
Off-season miniatures need dry storage. A plastic bin with a tight lid keeps resin pieces from yellowing and fabric leaves from collecting dust. I label mine by season so I am not digging through July’s seashells to find January’s bead-string wreath.
Containers and Drainage

Almost anything hollow and roughly horizontal can hold a fairy garden. A cracked terracotta pot laid on its side, a chipped teacup, the galvanized tub that held last summer’s petunias, even a driftwood hollow soft enough to scoop wider with a spoon. I have seen an old wheelbarrow planted so the rusted bed became a cottage lane, and the only cost was the soil.
Drainage holes are non-negotiable. Without them, roots sit in water and rot in days. If the vessel has none, a masonry bit through ceramic or a few hammered nail holes through thin metal fixes it. Indoors, pair that with a saucer or plastic liner, because the seepage will find your windowsill otherwise.
Depth matters more than width. Shallow containers leave no room for roots to anchor, while something too deep wastes soil and stays wet at the bottom. Plastic bottles stuffed in the lower third solve that without adding weight, turning a deep bowl into usable space. Low sides help too, especially if children reach in; the scene stays visible and the pieces stay where you put them.
Plants for Sun and Shade
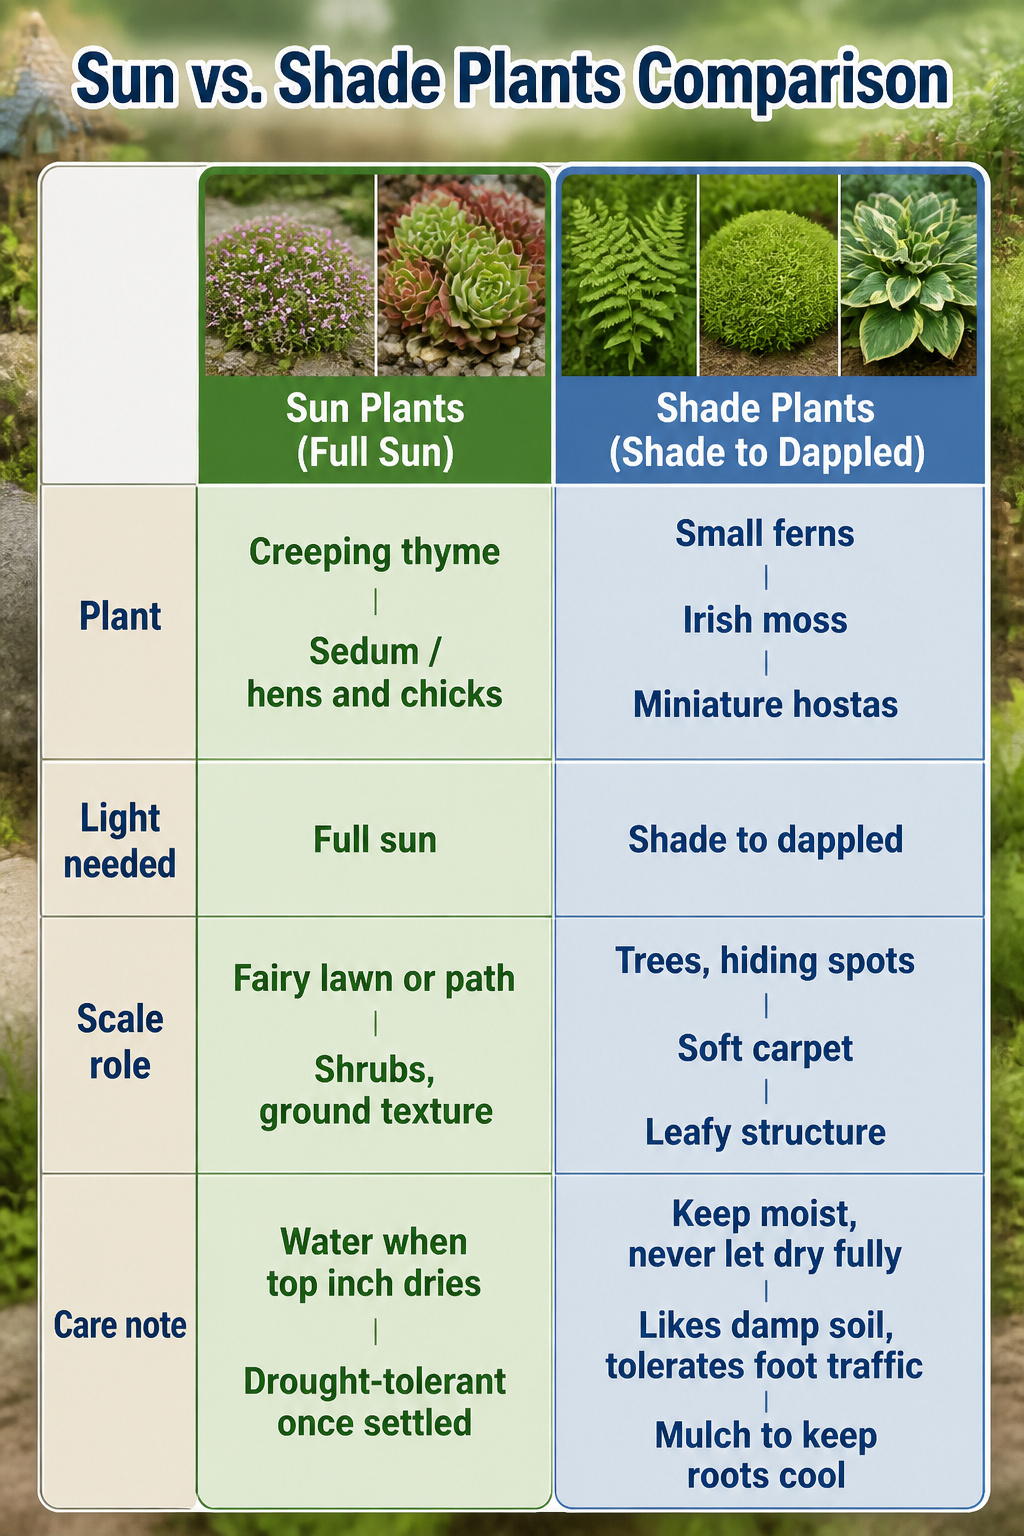
The plants that survive in a fairy garden depend almost entirely on how much sun the spot actually gets, not on how much you wish it got. Last spring I placed a pot of sedum on a porch that looked bright enough to me. Three weeks later the stems had stretched toward the light and the compact rosettes I wanted for scale were gone. Sun plants pushed into shade do not adapt; they etiolate, which is the technical word for growing thin and ugly while they starve.
For full sun, meaning six hours or more of direct light, creeping thyme makes a flat green carpet that can read as lawn, while hens and chicks and other succulents hold their tight geometry without demanding water every afternoon. Sedum works the same way. These are the plants for a container that sits on an open patio or a south-facing balcony rail.
Shade or dappled light calls for a different set. Small ferns, Irish moss, and miniature hostas want moisture and will crisp in afternoon sun. Bark pieces or flat stones can cover any bare soil between them, which keeps the miniature scene neat and protects the dampness these plants prefer.
| Plant | Light needed | Scale role | Care note |
|---|---|---|---|
| Creeping thyme | Full sun | Fairy lawn or path | Water when top inch dries |
| Sedum / hens and chicks | Full sun | Shrubs, ground texture | Drought-tolerant once settled |
| Small ferns | Shade to dappled | Trees, hiding spots | Keep moist, never let dry fully |
| Irish moss | Shade to dappled | Soft carpet | Likes damp soil, tolerates foot traffic |
| Miniature hostas | Shade to dappled | Leafy structure | Mulch to keep roots cool |
Before buying anything, spend one day tracking the light on your chosen spot. A corner that looks shady at 9 a.m. may blaze from noon to three. Match the plant to the hours you measured, not to the theme you imagined.
Miniatures and Scale
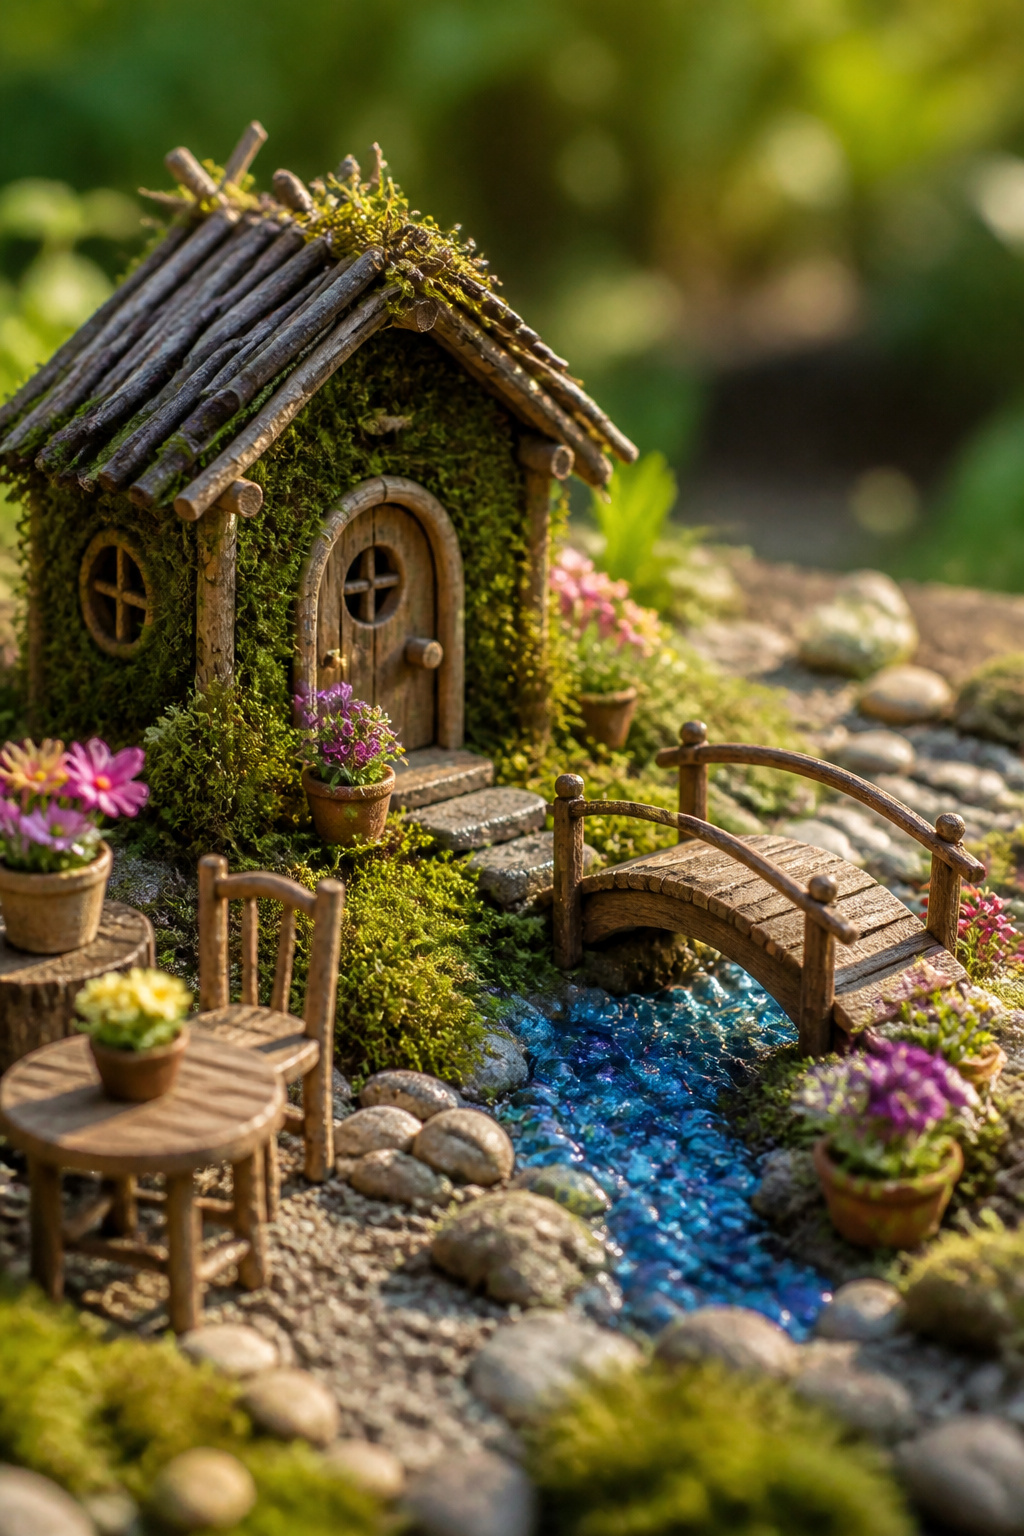
The 1:12 scale rules most fairy garden miniatures, with one inch representing one foot of real life. A 1:24 alternative halves that again, and the two systems do not mix. One oversized bench or doorway beside properly scaled pieces throws the whole scene into a dollhouse accident, so I choose one ratio and build around it.
Fairy houses, furniture, bridges, and decorative items all establish this scale together. A bridge over blue glass or a stream needs railings kept low to fit the proportion, not human height shrunk down. Twig fences, wire pieces, or cut popsicle sticks outline yards or animal pens at the right visual weight.
Manufactured accessories often arrive without any consideration of scale at all. The house I love determines what else belongs beside it. Less invites curiosity; clutter reads child-like.
Sources for miniatures run through craft stores, garden centers, online marketplaces, and hobby shops specializing in dollhouse or model-train supplies. Estate sales turn up vintage pieces that fit 1:12 exactly. I match the accessory I already own, then hunt companions to that size rather than assembling random charm and hoping it coheres.
Watering and Pruning

The smallest pots dry out fast, but that does not mean they need water every morning. I killed two early fairy gardens by treating them like houseplants on a schedule. Stick a finger into the soil to the first knuckle; if it still feels damp, wait. Moss that looked emerald in March will brown by August. Peeling it off and pressing in fresh sheets takes five minutes and revives the whole scene more than any new miniature ever could.
Plants in a fairy garden do not stay fairy-sized without help. A creeping thyme that hugged the path in May will send up woody six-inch stems by July, and a sedum meant to look like a shrub turns into a cauliflower. Pinch those stems back to a leaf node, or snip spent blooms the moment they finish. If something outgrows its spot entirely, move it to a larger pot elsewhere and replace it with a smaller plant that still fits the scale. The garden stays tidy, and the plant gets to keep living.
DIY Miniatures from Household Scraps

Twig fences cost nothing and take about ten minutes once you figure the scale: cut sticks to the height of your thumb, press them into the soil in a line, and lash the tops with thread pulled from unraveled twine. Mine leaned the first try; the second row I drove the sticks deeper and the fence held through a wet spring.
Pebble paths are the same idea. Flat stones laid in sand read as stepping stones; a single line of gravel reads as a road. Acorn caps, pressed stem-down, make believable bowls for the price of a walk under an oak tree. The caps fill with rain on their own and look like something a borrower left behind.
Polymer clay is where the honest limits start. Small rounded shapes, a pumpkin or a toadstool, bake hard and survive outdoors if you seal them with acrylic spray. A miniature door with working hinges and believable grain takes more skill than most posts admit; two winters in, my first attempt swelled and cracked because I used hot glue instead of E6000 or wood glue. Cheap wood and popsicle sticks last one season outside, which is fine if you treat the garden as temporary, but plan the replacement or paint them with outdoor acrylic and seal the result.
Frequently Asked Questions
What plants are best for fairy gardens?
Match the plant to your light. Full sun spots want sedum, creeping thyme, and hens and chicks; shade calls for moss, small ferns, and miniature hostas. Getting this wrong, like placing a sun succulent in shade, makes stems stretch thin and ugly rather than thrive.
How do I maintain my fairy garden?
Check soil dampness with your finger to the first knuckle before watering; damp means wait. Pinch or snip plants back to leaf nodes when they outgrow scale, and swap in fresh moss when the old browns. A little tending keeps the scene tidy and the plants alive.
What containers can I use for a fairy garden?
Almost anything hollow and roughly horizontal works: old wheelbarrows, galvanized tubs, broken terracotta, even chipped teacups. Drainage holes are non-negotiable; without them roots rot in days. Drill or punch holes if the vessel has none, and stuff plastic bottles in deep containers to save soil and cut weight.
Can I create a fairy garden indoors?
Yes, with shallow dishes or low glass bowls on bright windowsills, coffee tables, or sideboards. Pick compact, low-light plants like mini ferns, jade, live moss, or air plants. Protect furniture with trays or liners, and skip the drainage hole by layering aquarium gravel and activated charcoal under the soil instead.