
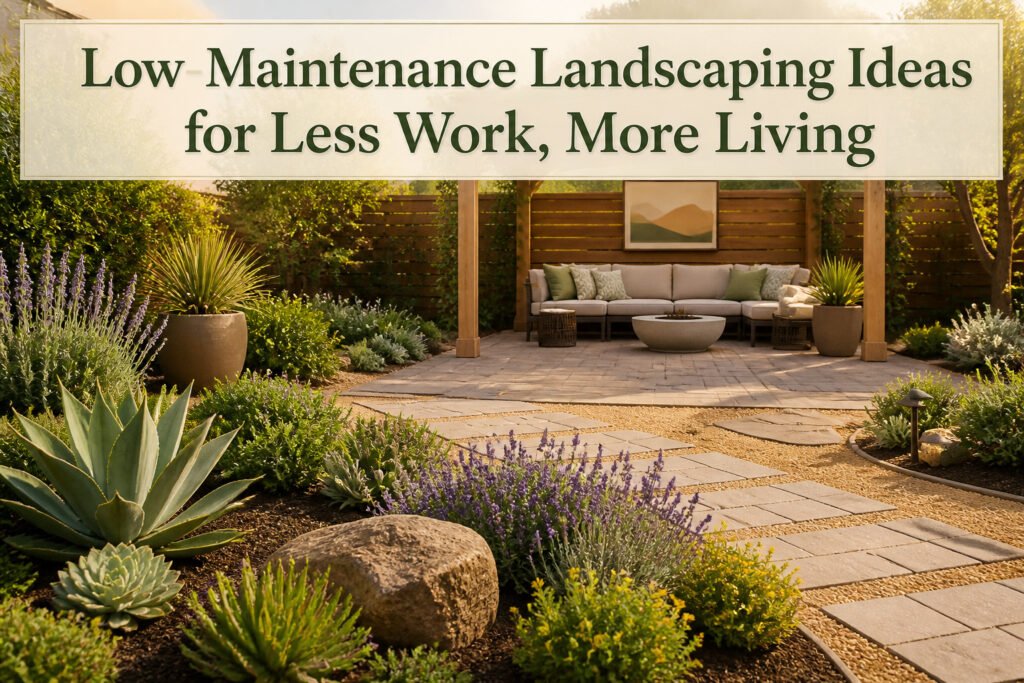
The right low maintenance landscaping idea depends on how much lawn you are willing to remove and what your soil actually does when it rains. Most of the savings come from hardscaping and plant selection, not from buying the most drought-tolerant species on the shelf. One homeowner cut mowing from weekly to twice a season by replacing two-thirds of a small backyard with a paver patio and decomposed granite.
1. Shrink the Lawn With Hardscaping
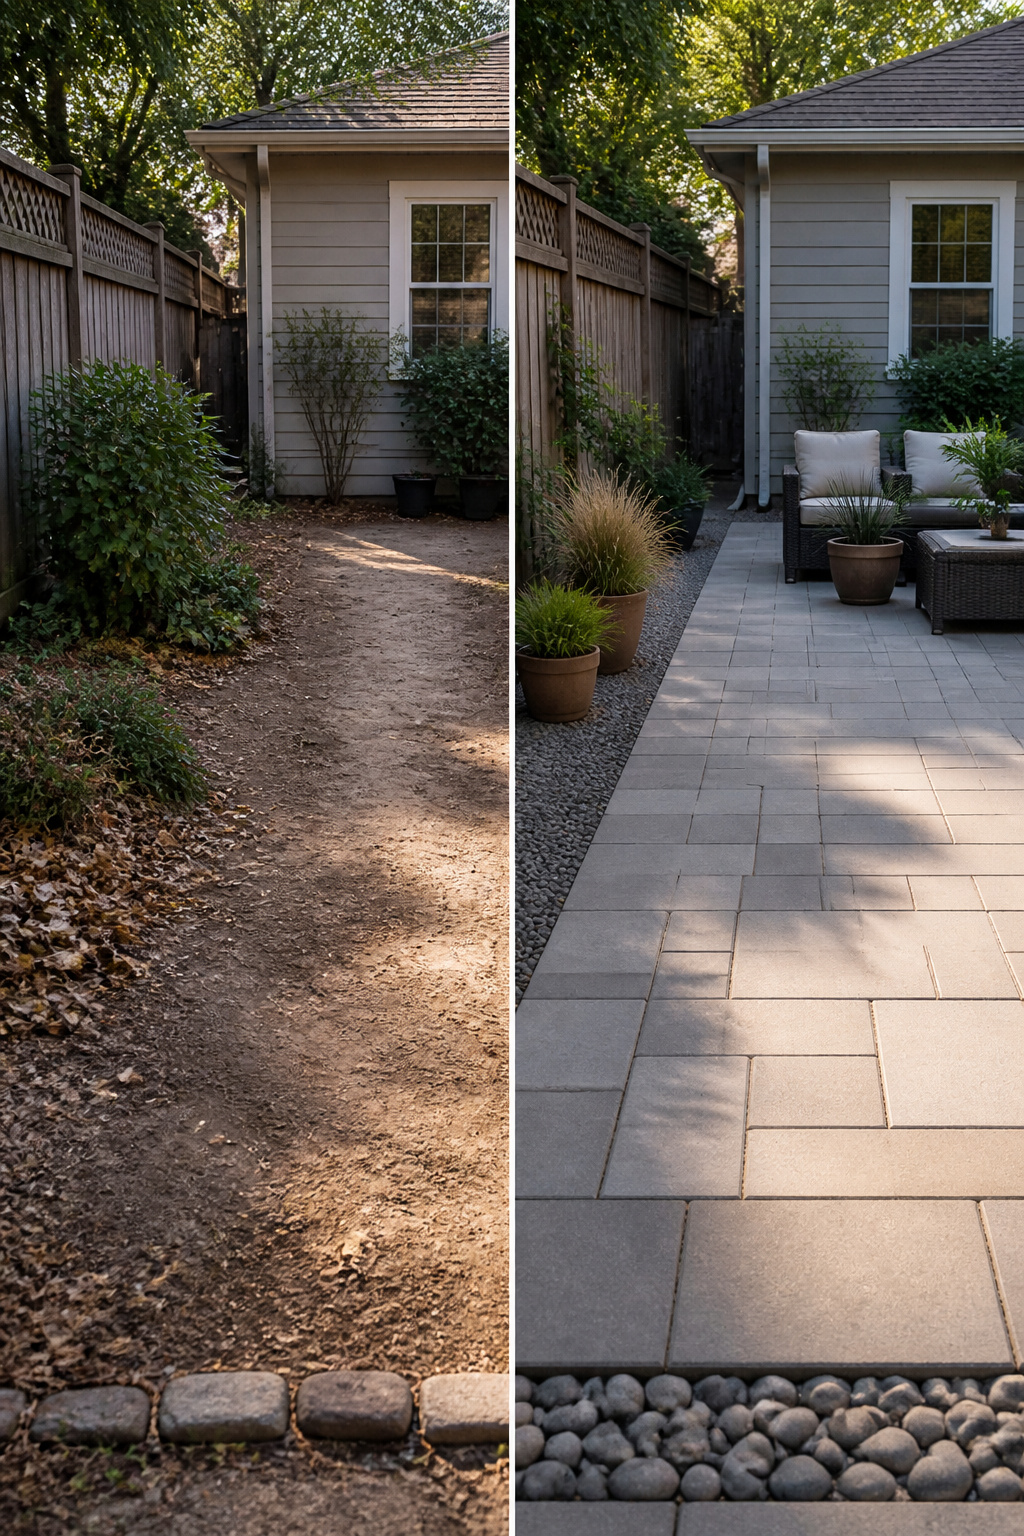
The fastest way to cut yard work is to cut the grass itself. Patios, gravel beds, and stone paths replace living ground cover with surfaces that need nothing more than an occasional sweep. I went from mowing weekly to twice a season after swapping roughly two-thirds of my small backyard for a paver patio and a strip of decomposed granite along the fence.
Materials run the usual range: poured concrete, brick, natural flagstone, pea gravel, or basic pavers laid dry. Gravel and basic pavers usually land well below the cost of artificial turf, which runs $5.45 to $20 per square foot installed. A cottage-style house tends to read better with natural stone or pea gravel; cleaner lines suit large-format concrete or pavers. Either route, the lawn you remove quits demanding water, fertilizer, and your Saturday mornings.
2. Plant What Already Grows There

Native species already know how to live where you live. They evolved for your rainfall, your soil, your pests, and your winters, so they ask for less water, less fertilizer, and far less rescue work than anything bred for a different climate.
Finding the right ones takes about five minutes. Search your state name plus "native plant society" or check your cooperative extension’s list. Both will give you species matched to your zip code, not just your hardiness zone. That distinction matters more than I understood when I started.
My first summer, I planted a cultivar bred three zones south of me because the nursery tag said it was "hardy to zone 6." It survived one mild winter, then turned to brown sticks after a normal February. The replacement I chose from my state’s native plant list, a species that actually evolved here, needed no coddling through the same cold snap and filled out without any fertilizer. The difference was not subtle. Two years in, the native is twice the size and has needed nothing but mulch.
3. Let Succulents and Grasses Carry the Dry Spots

Sedum, agave, and ornamental grasses can survive weeks without water once their roots settle in. Three weeks of August neglect left my ‘Autumn Joy’ sedum and a blue fescue clump looking ragged but alive; the echeveria in the same bed actually plumped up. These drought-tolerant plants overlap with native selections in toughness, but they differ in origin and flexibility. Native plants are already adapted to your region’s climate and generally skip pest issues, while succulents like hens-and-chicks or agave come from drier climates worldwide and store water in their leaves. That storage lets them handle container life and poor soil where a strict native might struggle. Drainage matters more than origin here: shallow-rooting succulents in heavy clay need raised beds with porous, well-aerated soil or they rot. Ornamental grasses add structure and movement that succulents alone lack, and mixing the two covers more ground with less watering than either group managed solo in my experience. Lavender, yarrow, or black-eyed Susan fill the gap if you want flowers between the spikes and rosettes.
4. Put Water on a Timer

A battery timer on the hose bib takes the daily guesswork out of watering for about thirty dollars. The one I like has a digital panel with override buttons, so a sudden downpour means pushing "cancel" instead of sprinting outside in socks.
Drip lines run under mulch and send water straight to roots, which cuts evaporation and keeps foliage dry. Spray heads are cheaper to rig up but lose more to wind and afternoon sun; shallow watering from spray also trains roots to stay near the surface, and surface roots bake fast in July.
In-ground systems with moisture sensors do the math for you, though the upfront cost sits at a different tier. For a small bed or a row of tomatoes, the hose-end timer and a soaker line are usually enough.
The dial timers look simpler, but the old wheel-style ones can drift or get bumped to "daily" when you meant "every third day." I found that out three July days too late with a bed of paste tomatoes. The soil never dried, the roots rotted, and I pulled black vines on the fourth morning. Digital timers cost a little more, but one misread dial pays for the difference.
5. Mulch Two to Four Inches Deep

Bare soil is an invitation for weeds and a fast track to watering twice a day once July hits. A 2- to 4-inch layer of mulch blocks the sunlight weeds need, locks moisture into the ground, and buys back entire Saturday mornings. Bagged mulch runs $2 to $13 per bag, so even a modest bed stays within a single trip’s budget.
Two to four inches is the range that actually works. Less than two and light slips through; more than four and you risk suffocating shallow roots. I learned the material matters as much as the depth. Cedar mulch smelled sharp and did keep slugs off my hostas, but every hard rain sent it floating across the walkway to collect against the fence. Hardwood stayed put through the same storms, and the difference in maintenance was the difference between touching up once a season and raking after every downpour.
6. Choose Perennials Over Annuals
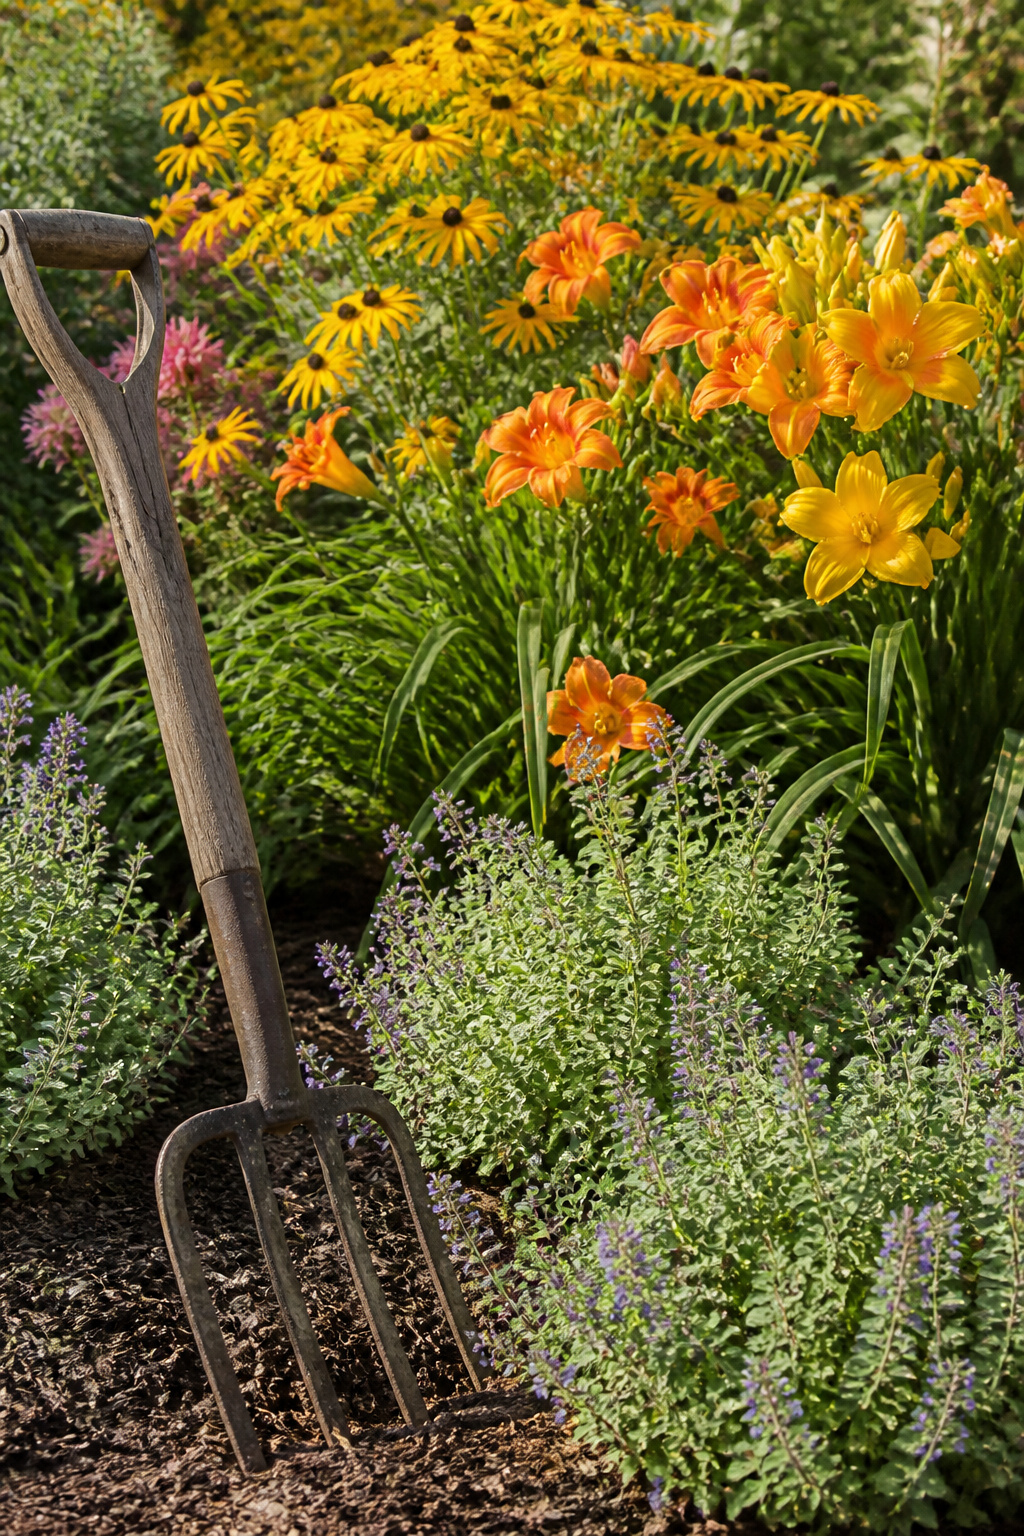
Petunias taught me the labor of annuals the hard way. Every Memorial Day weekend, flat after flat went into the ground for a display that died with the first frost. The replanting cycle cost three weekends each spring, plus the money for new stock.
Perennials return each year, and the right ones settle in with almost no attention beyond an occasional division. Coneflowers, hostas, and daylilies have bloomed in my yard for five-plus years now with exactly that: one afternoon every few seasons to split the clumps, and they carry on. Black-eyed Susans and salvia have done the same, shrugging off average soil and skipping the disease problems that would send me back to the nursery.
Catmint spreads politely into soft mounds that bloom for months and ask for nothing. Coral bells keep color in the shade without flowers at all. The coreopsis I added later flowers all summer on stems that barely need deadheading.
The tradeoff is patience. That first season, perennials mostly build roots while annuals shout with color. By year two, the perennials fill their space and the work drops to almost nothing. The petunias were prettier for exactly twelve weeks. These have outlasted them by half a decade.
7. Let Ground Cover Do the Weeding For You
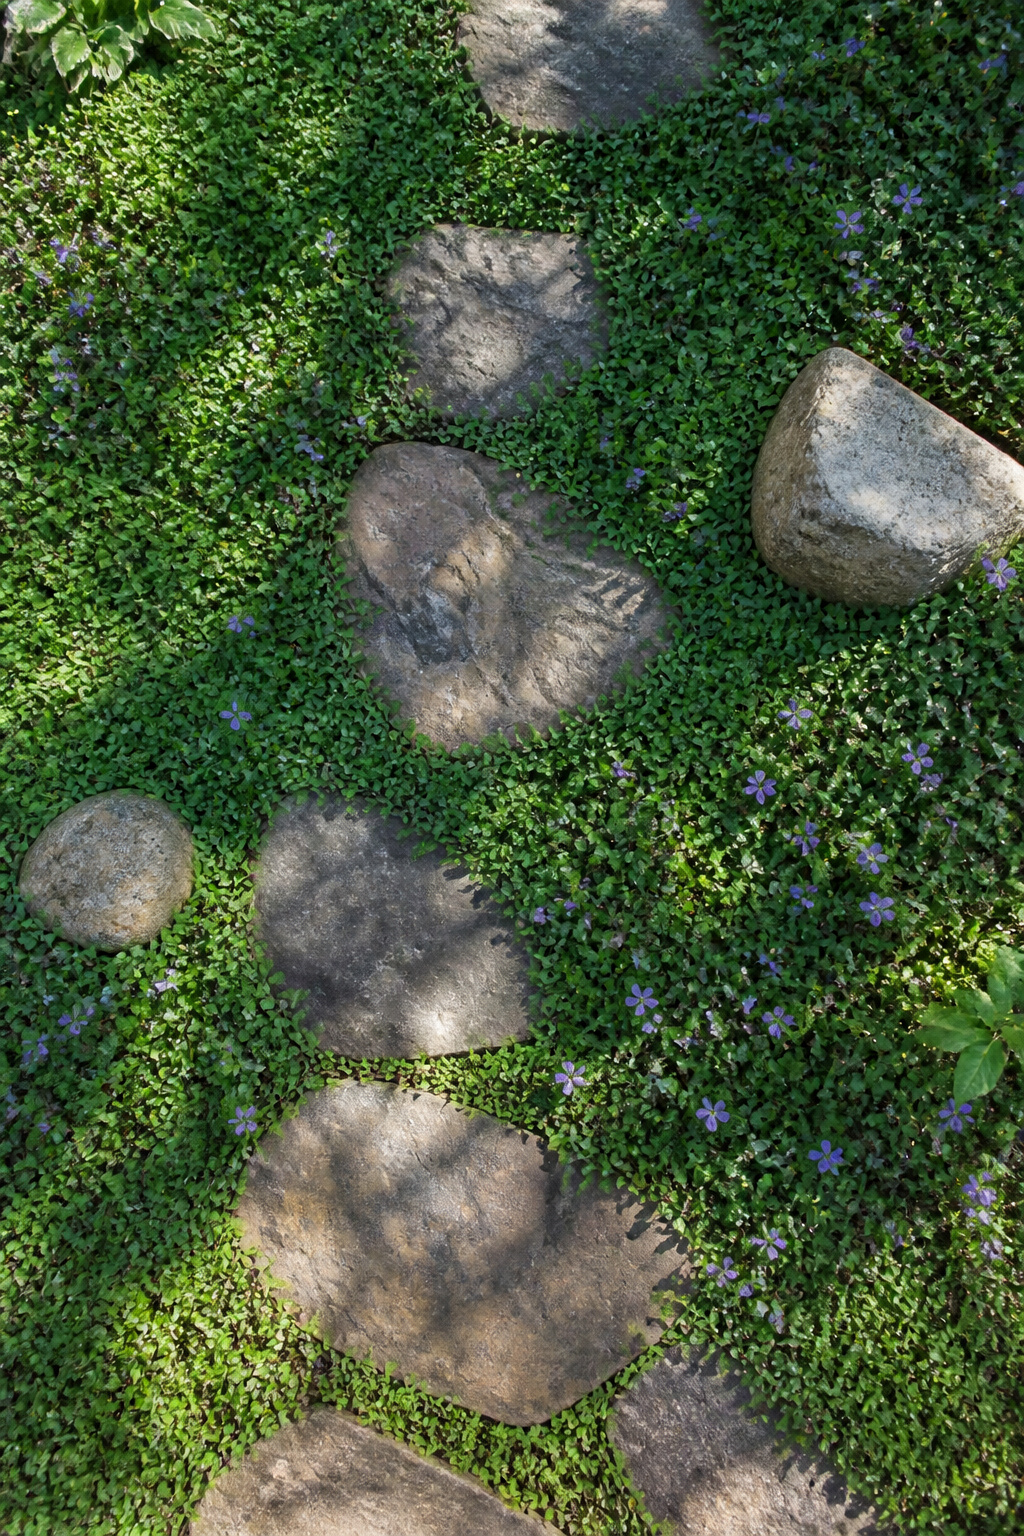
Creeping thyme and vinca minor do not ask for much once they settle in, but the first two years are where most people quit. These low-growing spreads knit together into living mulch that leaves nowhere for weeds to root, provided you give them about two growing seasons to fill in and resist the urge to pack them tight.
I learned that density rule the wet way. My first spring with creeping thyme, I planted plugs six inches apart across a slope that catches runoff from the driveway. By May the mat looked lush, but the roots had no air space between them. When three straight days of rain hit, the center of that patch turned to slime. Half the plants rotted at the crown because I had treated spacing like a race to coverage.
Foot traffic separates the survivors from the pretenders here. Creeping thyme takes light stepping once established, enough for a path edge or the strip beside a patio where you set down a hose. Vinca minor shrinks from any regular walking; it belongs on slopes or under shrubs where the only traffic is your eyes. Neither will choke out weeds in year one, so plan on hand-pulling the gaps until the canopy closes. The payoff starts in season three and runs for years after, which is the actual definition of low maintenance, not zero work upfront.
8. Use Ornamental Grasses for Structure

Ornamental grasses earn their place in a low-maintenance yard by doing almost everything shrubs do while asking for a fraction of the care. They add texture, movement, and seasonal color, and the whole maintenance calendar boils down to one annual cutback, usually in March. I set aside a single afternoon for this job: gloves, hedge shears, and a tarp to drag the dried stalks to the compost. Done by dinner.
The distinction that matters is cool-season versus warm-season. Cool-season grasses like blue fescue start growing early, flower by late spring, and often go dormant or look ragged in summer heat. Warm-season grasses such as switchgrass and fountain grass wait until soil warms, then peak in late summer and hold their form well into winter. For upright winter structure that survives snow load, I’ve had consistent luck with Miscanthus sinensis and Panicum virgatum, specifically the ‘Cheyenne Sky’ cultivar, which tops out around 3 feet tall and stays standing through wet, heavy snow that flattened my feather reed grass.
Pennisetum alopecuroides works well too, though treat it as an annual in colder zones. If you want something lower and more ground-hugging, Carex pansa handles foot traffic and needs even less intervention. The mistake to avoid is planting a warm-season grass in a spot where you expect early-spring green-up; the bare patch will test your patience for weeks while the soil warms.
9. Build Retaining Walls and Paths That Stay Put

Hardscaping cuts the planted area that needs watering, weeding, and mowing, and it gives the yard zones that make sense: a path to the shed, a wall that holds the slope, a patio that stays clean with a broom. The materials fall into three groups. Poured concrete is the cheapest upfront and lasts decades, though it cracks where the ground shifts. Natural stone, flagstone especially, costs more and needs a skilled hand to lay flat, but it weathers into the garden instead of looking dropped onto it. Segmental block, the interlocking concrete units, splits the difference: a homeowner can stack a low wall dry, no mortar, and pull a crooked one apart to reset it.
I learned the slope lesson on a side yard that pitched toward the house. My first thought was pressure-treated timber: fast to cut, light to lift, and it looked warm against the planting. Four years in, the boards were cupping at the joints, the deadmen ties had loosened where the soil settled, and one wall section was leaning two inches out of plumb. Water had wicked into the end grain every season, and no amount of sealer would have stopped it in a wall that stayed damp. I pulled the whole run out in an afternoon, loaded it for the landfill, and rebuilt with segmental block that same fall. The block wall has sat flat through six winters now. The face weeps water through its joints instead of trapping it, and if a course settles, I pull one block, scrape the base level, and set it back in. The timber looked friendlier at first. The block turned out to be the lower-maintenance choice by a wide margin.
10. Keep Plants in Pots
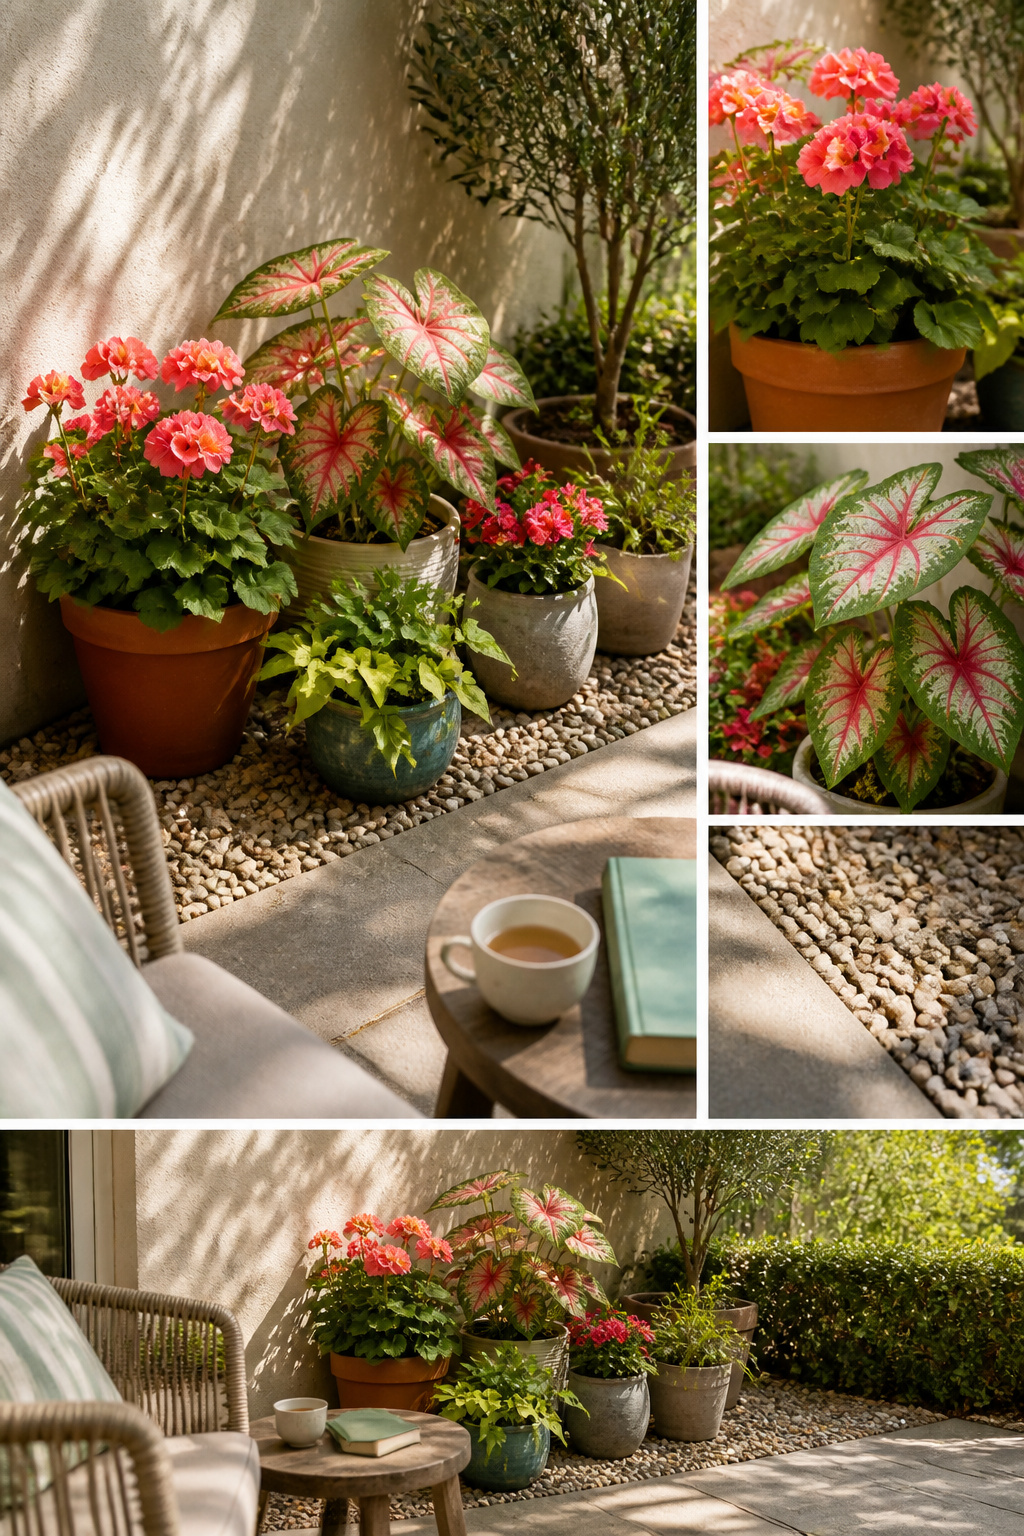
Container gardens shrink the weeded footprint down to a few square feet, and the pots move when the season demands it. Last August, my tomatoes and a dwarf pepper had outgrown their 14-inch pots by midsummer, roots circling the bottom, soil drying out before noon. Potting mix, not garden soil, is what belongs in those containers; garden soil compacts too tight, drains too slow, and the whole thing turns to concrete after a few hard rains.
The saucer underneath each pot is where I slipped up. Water sat for days, and by late June the mosquitoes had found it. Emptying saucers after every rain, or skipping them entirely on a covered porch, fixes that. Durable containers in terracotta, ceramic, or metal handle the weather without fuss, and lining a front porch with low-care potted plants like geraniums or caladiums builds curb appeal you can rearrange until it looks right.
11. Swap Lawn for Gravel and Rock

Rock gardens and gravel beds need no water, no mowing, and almost no weeding once they settle in. The real decision is how to stop weeds from the start. Landscape fabric underneath lets water drain through while blocking the sunlight that germinates seeds, though a thick enough stone layer can do similar work without the fabric. Aim for 2 to 4 inches of rock, with the thinner layer reserved for small-particled gravel and the thicker one for larger stones. My own 120 square feet of river rock looked sparse and unfinished at two inches deep; at four inches, it finally read as a deliberate surface rather than a thin sprinkle. Either way, a leaf blower every few weeks keeps soil and plant debris from accumulating in the gaps, because any dirt that settles is an invitation for the next weed crop.
12. Add a Water Feature You Can Ignore
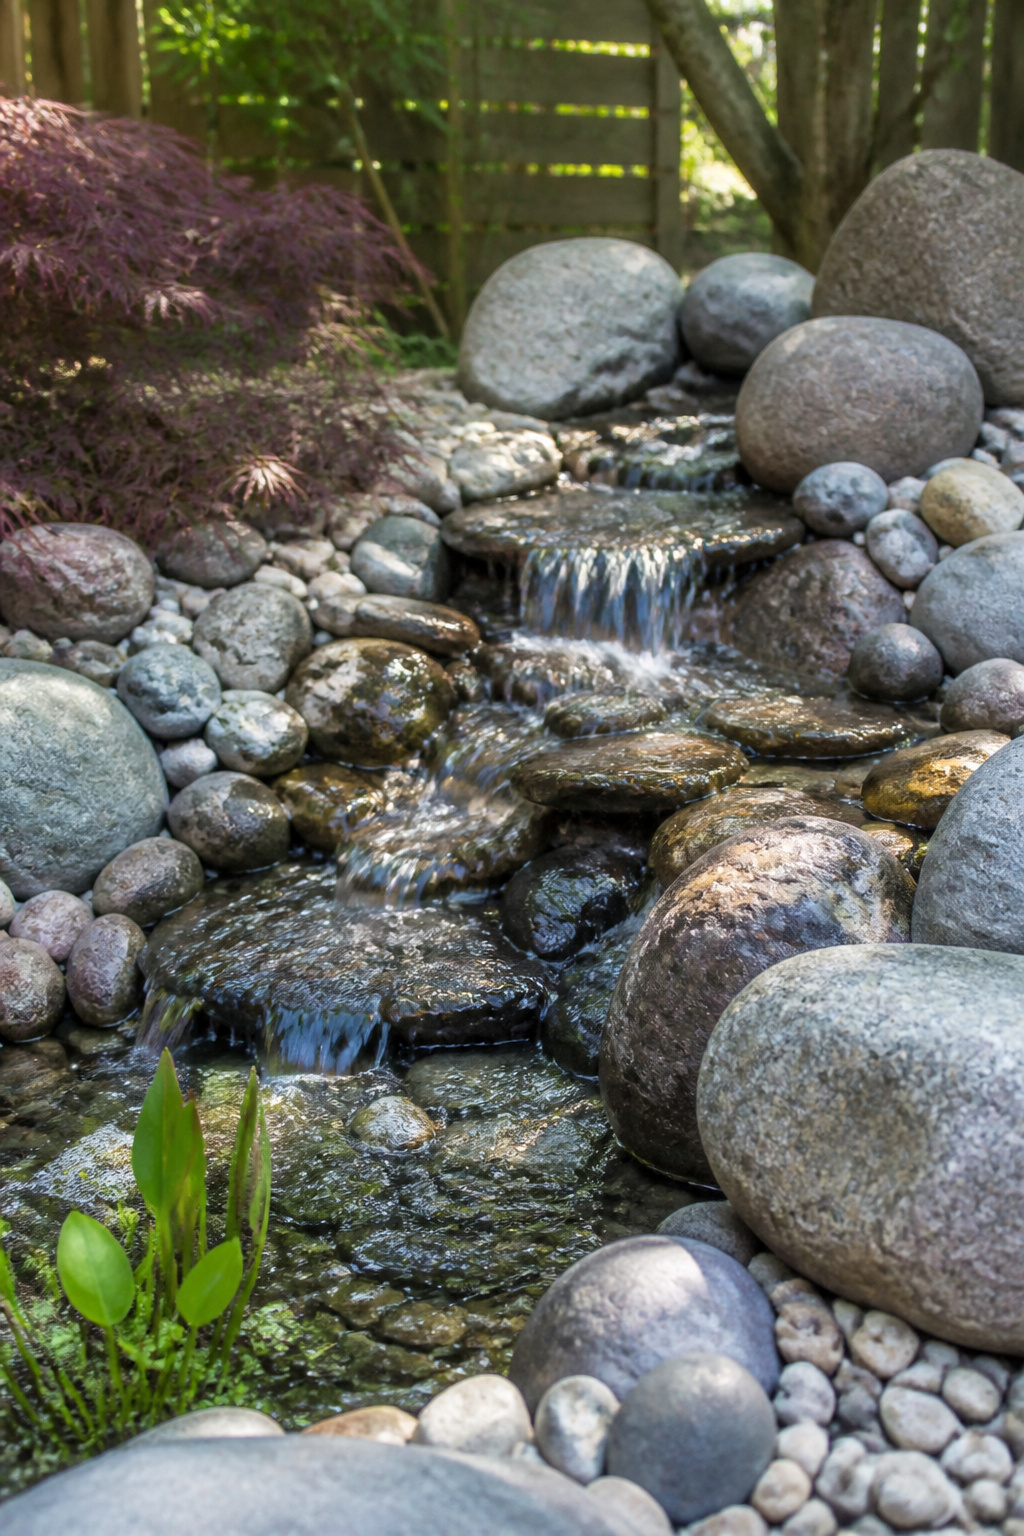
A small recirculating fountain or pondless waterfall runs on a pump and asks for almost nothing after it is plugged in. The water cycles through itself, so there is no plumbing to trench in and no standing basin to breed mosquitoes. I clean the pump once a season, usually when I shut it down for frost, and that has been enough.
Solar pumps cost nothing to run, but their flow drops by late afternoon and stops entirely on gloomy weeks. An electric pump on a timer stays consistent and draws less power than a porch light. I ran the numbers on my own bill and stopped worrying about it.
My first setup was a barrel fountain in full sun, and within two weeks the water had turned thick with algae. The fix was moving it to partial shade and adding a few mosquito fish. The fish grazed what grew, and the shade slowed what they missed. I have not scrubbed a barrel since.
13. Design for Dry Conditions From the Start

Xeriscaping can cut outdoor water use by 50–75%, but only if you actually follow all seven of its recognized principles. The full list runs from planning and design through soil amendment, efficient irrigation, plant zoning, mulch, turf reduction, and maintenance. In my first attempt I treated it as a plant-shopping trip: I bought drought-tolerant species, laid drip lines, and called it done. The savings never showed up.
What I skipped was soil testing and turf reduction. Without testing, I did not know my clay held water like a basin; the lavender rotted and the yarrow went yellow. Without cutting grass, the remaining turf drank the same old volume and the overall drop barely reached 15%. The two principles I thought I could abbreviate turned out to be the ones that make the arithmetic work.
Grass is a real water-guzzler. Reduce the amount of lawn you have, and you’ll spend less time behind the hose and less money on your water bills.
— HGTV
For the reader with a small yard and an $800 ceiling, this means the xeriscape budget goes first to removing grass and amending soil, not to buying the most interesting succulents on the shelf.
14. Pick Trees and Shrubs That Behave

Woody plants that stay in bounds without constant shearing are the backbone of a yard you can actually enjoy. A compact inkberry holly like Gem Box®, topping out at 2 to 3 feet both ways, holds a tidy ball shape with no disease issues and none of the bare legs older cultivars develop. Upright hornbeam ‘Fastigiata’, serviceberry, and red maple ‘Columnare’ all stay narrow enough for tight spaces, while ‘Emerald Green’ arborvitae and juniper ‘Skyrocket’ give vertical structure without the spread. Deer will strip ‘Emerald Green’ to popsicle sticks in some neighborhoods; ‘Green Giant’ arborvitae handles that pressure better.
I learned the hard way about checking mature spread. A dwarf lilac I planted without reading the tag now blocks my walkway after six years, and moving an established shrub that size means losing it. For small yards, the real work of low maintenance is done at the nursery: read the label, picture the plant at full size, and believe the numbers.
15. Let Flowers Deadhead Themselves

Some flowers save you the trouble of clipping spent blooms by dropping them on their own. Self-cleaning varieties like certain calibrachoas, begonias, and melampodium keep a neat look through summer without the weekly patrol standard petunias demand. I learned that second part the hard way: by late June my old petunia beds had turned into sticky seed-pod factories, and the plants looked spent even when they were not. The calibrachoas I swapped in after that held their color until frost without a single snip. Knock Out roses work the same way, dropping petals cleanly enough that deadheading never enters the schedule. Annuals with this habit cost about the same at the garden center as their high-maintenance cousins; the savings show up in hours, not dollars, which is the whole point of low maintenance landscaping ideas that actually hold up past midsummer.
16. Group Plants by What They Need

One summer I lost a lavender and an astilbe in the same bed, which made no sense until I dug into why. The lavender had rotted at the root from soil that stayed too wet; the astilbe had crisped to straw by August because that same spot dried hard as brick. I had planted them together for the color pairing, not for what they actually needed.
Hydrozoning means grouping plants by water and sun requirements so you can treat each zone as one unit. Drought-tolerant species like lavender, succulents, and ornamental grasses go where drainage is sharp and supplemental water is occasional. Thirsty plants such as astilbe sit in a separate zone, reachable by hose, where keeping soil moist is not a fight against the site.
After that season I split the bed. The lavender moved to a slope near the patio where runoff passes through fast. The astilbe went to a low corner that holds morning dampness. Both survived the next year with almost no attention from me. Lawns usually use the most water in a landscape, so limiting turf and grouping the remaining plantings by their real needs multiplies the savings.
17. Zone the Yard by How You Use It

Defined areas for sitting, growing, and storage cut maintenance sharply because untrampled ground stays put. My first season, I planted edible borders along every path, figuring I’d harvest on my way to the compost pile. The kale lasted two weeks before foot traffic flattened it to mud, and I spent the rest of that spring replanting what should have been a one-and-done job.
A fenced vegetable corner solved it. One 8-by-10 bed against the garage wall, framed with stone and mulched paths, gave me more produce with zero replanting. The fence kept dogs, kids, and my own shortcuts out. Hardscaping the routes between functions, gravel where I walk, raised beds where I grow, meant I stopped fighting my own habits and started working with them.
18. Weed Fabric and Its Limits
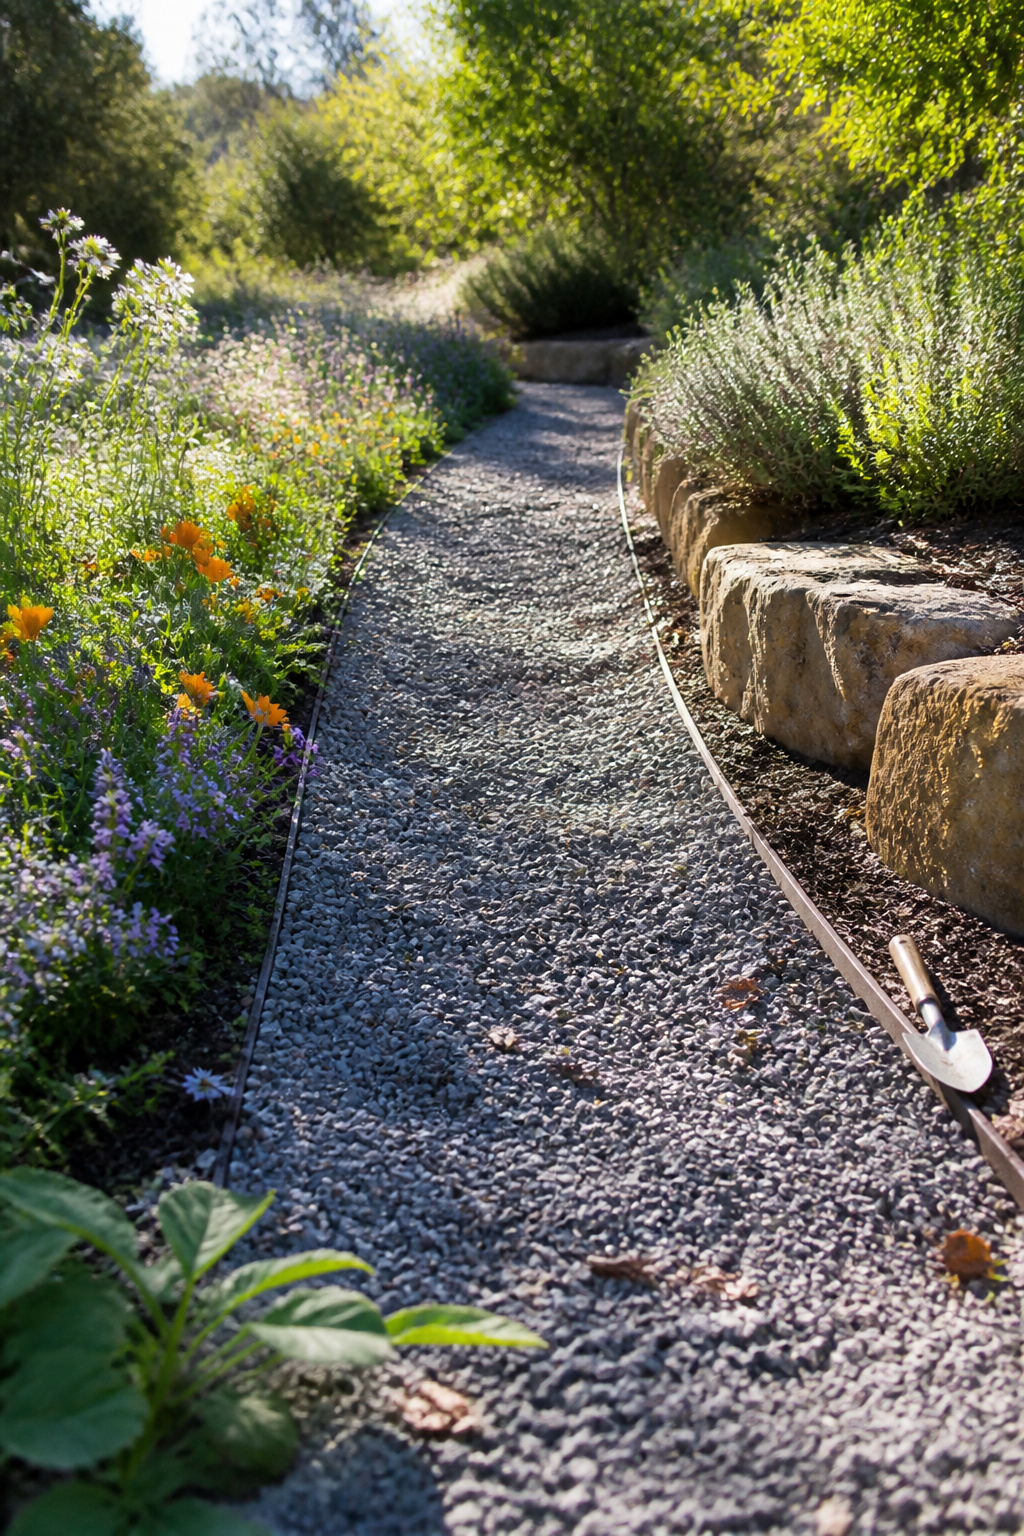
Landscape fabric buys you time, not a permanent holiday from weeding. I learned that the hard way with a gravel path that still looks clean after three seasons. The fabric underneath keeps the stones from sinking into clay and blocks light well enough that only the occasional dandelion pokes through. A leaf blower now and then clears debris before it can compost.
Bark mulch was a different story. Organic matter settled on top, broke down, and turned into soil within two years. Weeds rooted straight through the fabric into that layer, and the roots locked into the mesh so tightly that pulling them tore the fabric into fragments. What started as a shortcut became a weekend of cutting out shredded material with a utility knife before I could refresh the bed.
The real cost is removal labor later. Under gravel, fabric lifts out in one piece if you ever change the layout. Under organic mulch, it degrades into confetti you pick out by hand. For the path, the tradeoff was worth it. For planting beds, a 2- to 4-inch layer of mulch without fabric lets you turn the soil and lets worms do their work.
19. Choose Hardscape Materials That Age Quietly
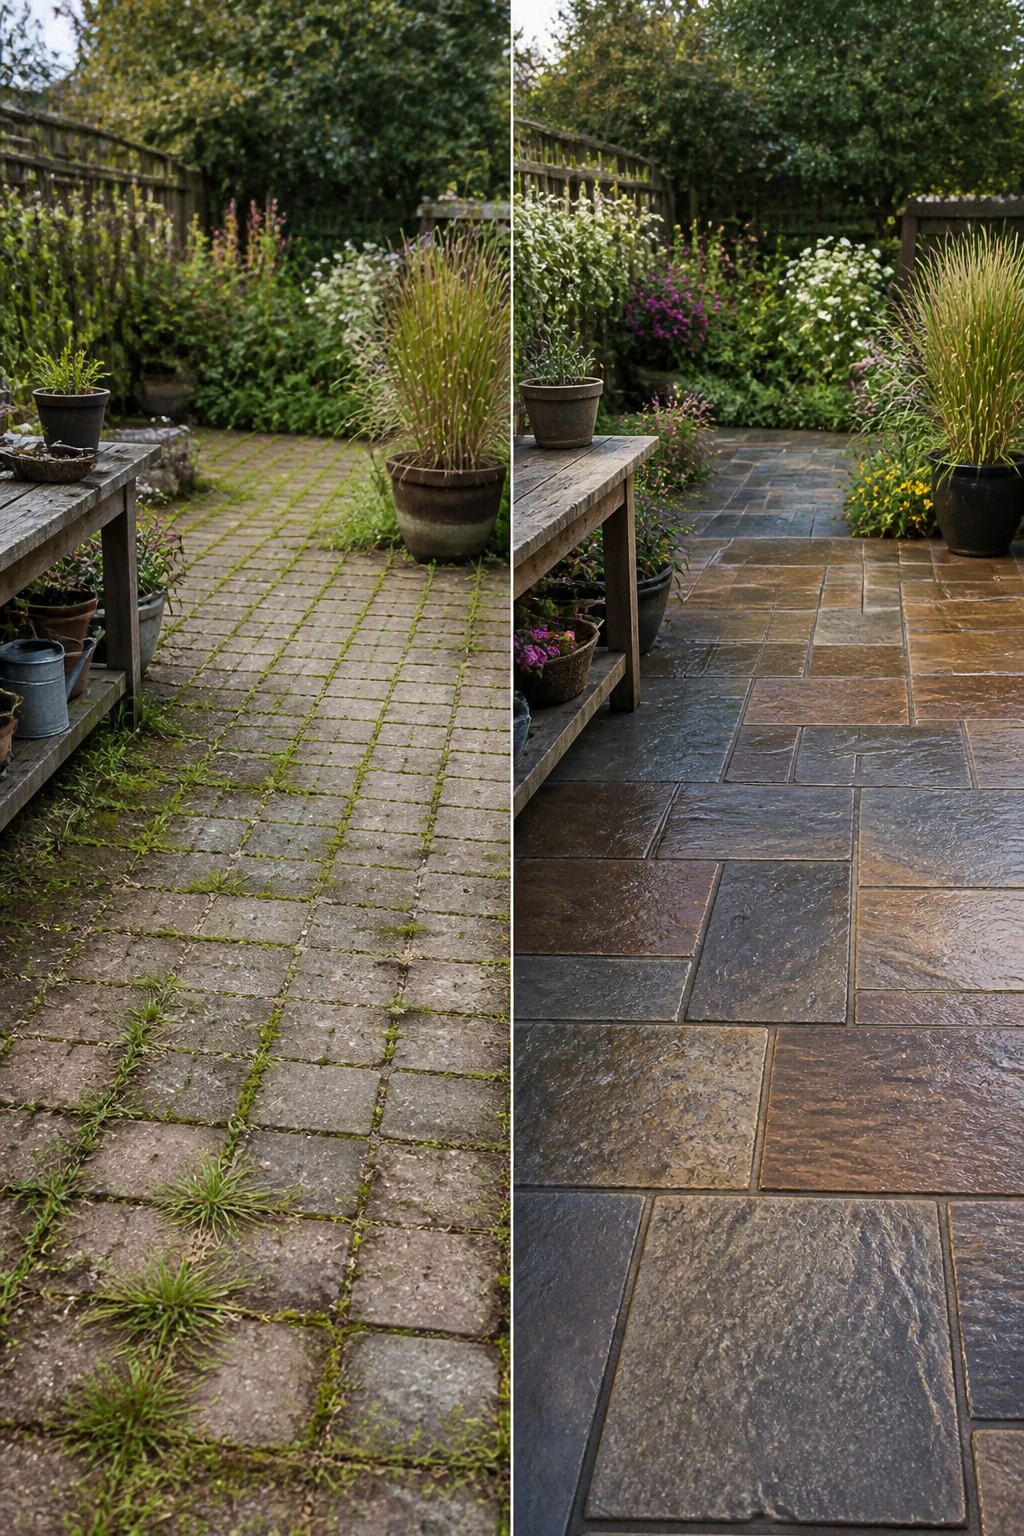
Concrete pavers, natural stone, and quality composites hold up with less ongoing repair than wood or thin plastic. For a 10-by-12 patio I planned, that difference became the whole budget conversation.
The first run I went cheap. Standard concrete pavers from a big-box store, roughly an inch thick, went down fast in spring. By the second winter the freeze-thaw cycle had started the damage: edges chipped, the surface scaled where water sat, and two pavers cracked clean through after a hard February freeze. Replacing individual pieces was possible, but the color match had shifted at the factory and the new ones looked patched in.
I pulled the whole surface the following spring and switched to 2-inch-thick natural stone. The weight alone told the story: each piece handled the heave without shifting, and the deeper bed we laid underneath let water drain instead of pooling and expanding. The stone cost more upfront, but the math worked once I counted the hours of pulling and resetting the old patio, plus the second load of base material. For a space you walk across every morning, the material that ages quietly wins.
20. Plant Where Puddles Form

A rain garden turns the wettest spot in your yard into the part that needs the least attention. The idea is to excavate a shallow basin where water already pools, amend the soil so it drains within a day or two, and plant species that tolerate both soaked roots and dry spells. Black-eyed Susans, sedges, and native ferns handle this swing reliably once their roots establish.
Depth matters more than width. Eight to twelve inches of depression across the basin floor gives runoff room to collect and percolate without becoming a permanent pond. I dug one below a downspout two seasons back after watching the same lawn patch stay soggy for days after every heavy rain. The soil there was mostly compacted clay, so I worked in compost to roughly one-third of the volume to speed absorption rather than seal the bottom.
That garden took a three-inch summer storm last year and held it without overflow. The old lawn spot would have pooled for the better part of a week. Now I do not touch that corner from April through October except to cut back the previous year’s growth in late winter.
21. Invite the Bugs That Eat the Bad Bugs

The year I stopped spraying, aphids took over my dill by late June. Leaves curled, stems went sticky, and I almost reached for the bottle twice. Then the lady beetles arrived. Within two weeks the colony collapsed. By July the plants had recovered enough to seed.
Yarrow and mountain mint drew the real workhorses: lacewings and the smaller native wasps I used to swat at blindly. These insects do not sting like yellow jackets. They hover, they hunt, they lay eggs inside pest larvae. The mint spreads aggressively, which I now treat as a feature; I hack it back once in fall and let it reclaim the edges in spring.
Three plants, zero schedule. I do not introduce lady beetles from packets anymore. The ones that find the yard on their own stay and breed. The dill I let bolt early specifically for this. Aphids still appear, but they never win the summer.
22. Raise the Beds for Easier Reach
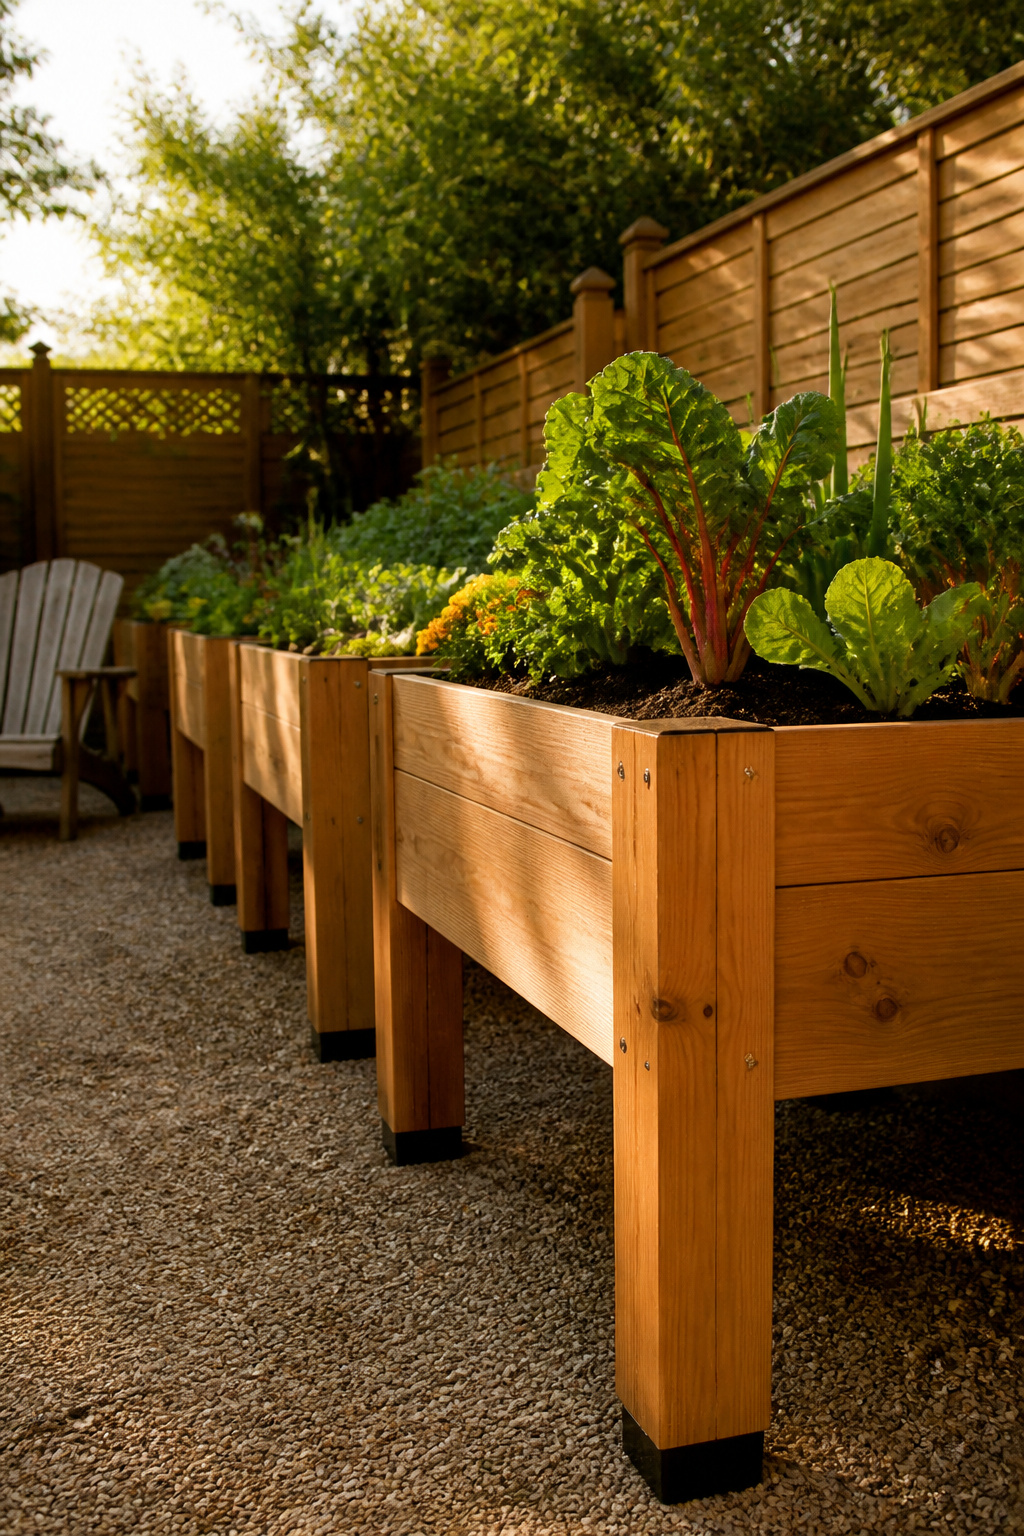
Raised beds cut the bending in half, and that alone is worth the lumber. Soil drains faster in a box, too, and the sun warms it earlier in spring, so you gain a couple weeks on tomatoes or lettuces. The question is how high to build. Six inches keeps costs down and still gives you the drainage benefit; two feet or more lets you garden from a chair but needs more soil to fill and more lumber to hold. I went to thirty inches once, thinking the height would solve every reach problem. The beds looked great in April. By July they were baking. That extra elevation lets air circulate underneath, which dries the mix faster than ground-level soil ever would. I was out there with the hose every other afternoon while my in-ground peppers sat fine on rainwater. Now I keep beds at eighteen to twenty-four inches, tall enough to save my back, short enough that I am not running irrigation like a farm. Cedar or a rot-resistant composite costs more up front than pine but pays back in years before replacement. Pine will do three to five seasons if you line the inside with plastic; cedar often doubles that. Eighteen inches is the height that saves your knees without turning July into a watering job.
23. Use Decorative Rock With Purpose

Stone does the work plants cannot. It adds structure without watering, pruning, or replacement, and in a small yard the scale matters more than the size of the stone itself.
My dry corner needed an anchor. A single boulder, roughly the height of a garden stool, settled the whole space. The trick was burying it deep enough that it looked planted, not dropped. Half the mass sits below grade, which changes how the stone reads against the soil line and keeps it from skating when the ground freezes.
Three smaller rocks taught me the same lesson the hard way. Grouped on the surface, they looked like a scattered pile, the kind of accident left by a delivery truck. Once I buried half their mass and shifted them until each one seemed to lean into the slope rather than sit on it, the grouping held. Clean rock in the 2- to 4-inch range works for ground cover, but the larger interruptions, the outcropping boulders, break up what otherwise reads as rock mulch. Bury half the mass is the rule I took from both mistakes.
24. Light Paths Without Wiring
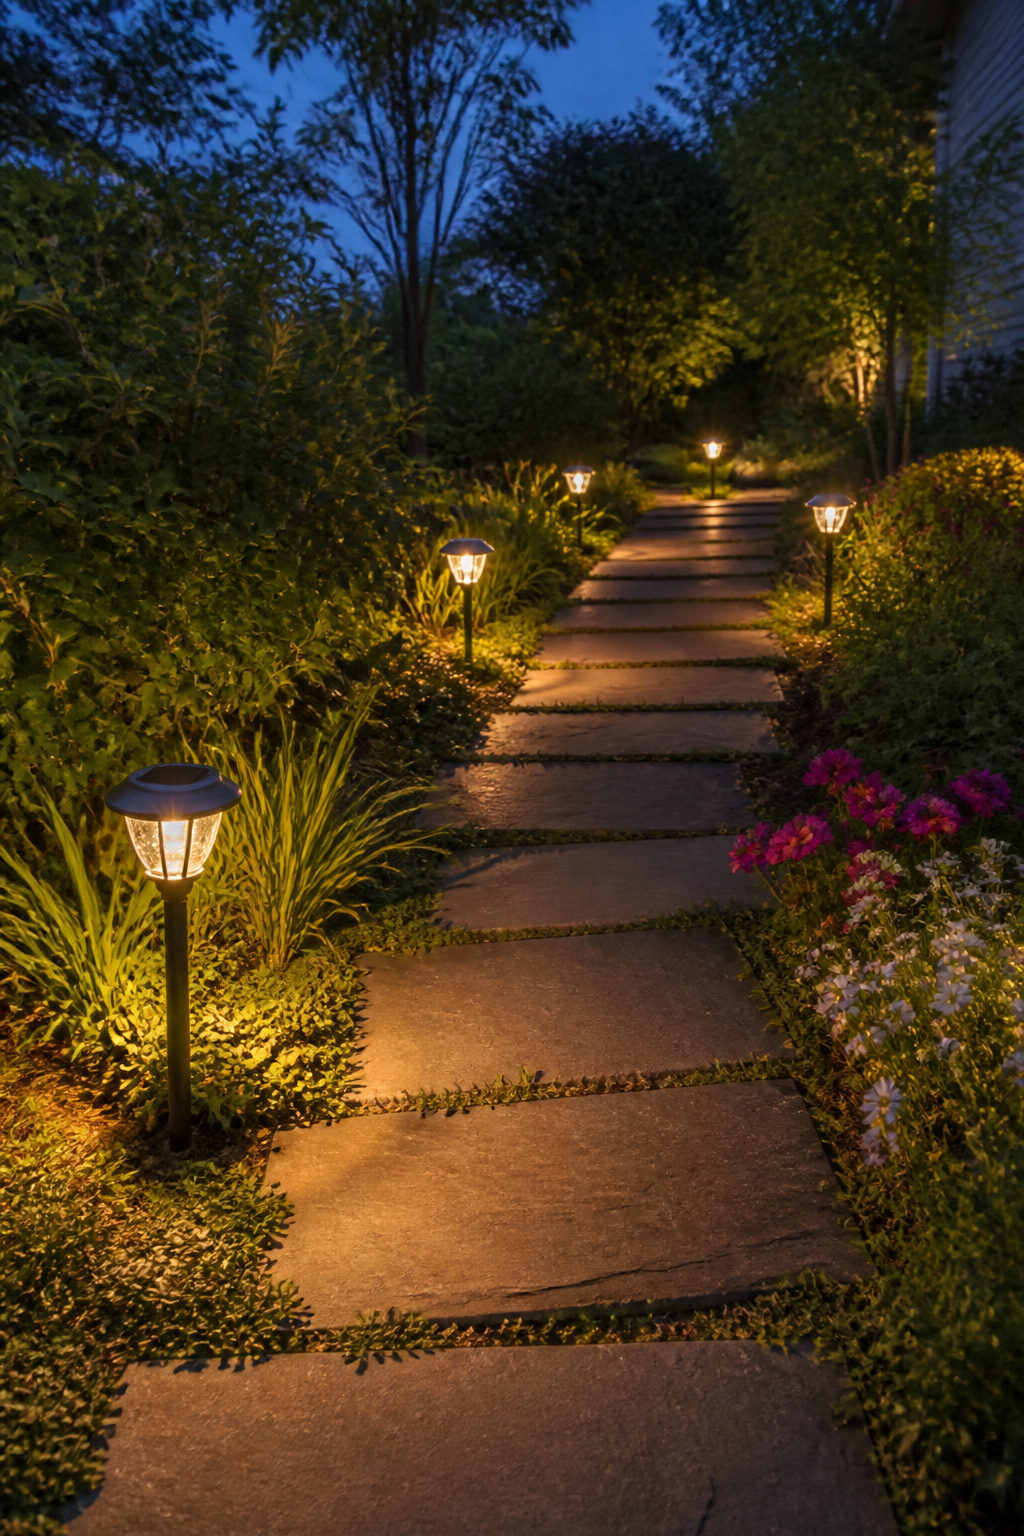
Solar-powered path lights and spotlights install without trenching and run without switches or timers. The panels need direct sun for at least four hours to charge fully, and anything planted nearby will outgrow that requirement faster than expected. I learned this the hard way with a set placed along a bed that filled in with a dwarf hydrangea by year three. The lights still worked in June but were dim by August, and by September they barely flickered on at all.
The 2019 set I paid roughly $80 for still holds four hours of charge in December, while a cheaper $30 set from the same season faded to forty-five minutes by year two and died entirely by spring of year three. The difference seems to be panel size and battery capacity, not the housing. For spotlighting a tree or architectural feature, a separate solar panel on a cord lets you mount the light in shade while the panel sits in sun. The cord lengths vary, so measure the run before ordering.
25. Measure Lawn Reduction by Hours Saved

The fastest way to cut weekend yard work is to shrink the lawn itself. I started with roughly 2,000 square feet of turf that ate an hour and a half every Saturday from April through October, plus edging and the inevitable spot-seeding where the dog wore paths. When I finally mapped where we actually walked versus where we just mowed, the waste was embarrassing.
Now the grass sits at about 400 square feet, enough for the dog and a patch of green to look at from the kitchen window. Mowing takes twenty minutes. The rest became a gravel strip along the driveway where the tires always killed grass anyway, a raised bed for tomatoes and cutting flowers, and a section of creeping thyme on the sunny slope that used to scalp every time I turned the mower. Gravel needs raking after storms and the occasional hand-pulled weed. The thyme gets nothing. The raised bed takes work in March and again in July, but it does not care about Saturdays.
The math is what sold me: ninety minutes a week across thirty weeks is forty-five hours, versus six or seven hours now on the remnant lawn. That is a full workweek of summer evenings returned, traded for one hard weekend of demolition and a few hundred dollars in base rock and soil.
What Low Maintenance Actually Costs

A $500-800 annual yard budget disappears fast when most of it feeds a lawn. My $340 each year went to mower fuel, blade sharpening, spring fertilizer, and grass seed for a corner that stayed patchy no matter what I tried. The patio I built there cost $800 once, and that spending stopped entirely. Hardscaping runs $5-15 per square foot, so the math flips quickly if you pick the right spot. Mulch at $2-13 per bag is cheaper still, though it returns yearly. For a small yard, one hardscaped corner plus mulched beds leaves enough budget for plants that survive without you.
When I Call Someone In

Some jobs on a low-maintenance yard will quietly take more from you than they ever give back. Grading and drainage was the one that taught me the expensive way.
I spent a weekend digging what I thought was a French drain, sloping it by eye toward a river birch that needed the water. The soil settled, the trench held water, and six months later I had a muddy strip where grass used to grow. The fix cost $1,200. A contractor told me the grade was off by less than an inch across the run, which sounds like nothing until you watch water ignore your work and pool exactly where you sleep. Calling someone first would have saved that money outright.
Large tree work is the second place where enthusiasm stops being useful. I have trimmed branches I could reach from a ladder. Anything involving the canopy, the root plate, or a trunk leaning toward the house goes to an arborist now. The speed matters less than the judgment about what will fall where.
Retaining walls under four feet, built from interlocking block on level prep, stay in my range. Over that height the lateral load multiplies fast, and most municipalities want engineered plans and permits. I have poured the footing for a short garden wall and felt competent. I have also stopped a wall project at three feet when the slope behind it told me the math was no longer friendly. The line between low-maintenance and liability sits right there.
Three Yards That Changed My Mind

My own corner lot measures 40 by 60 feet, and for years I treated it like a bigger version of a suburban lawn: mow, fertilize, repeat. The turning point came the summer I tracked hours. Three hours every Saturday went to grass that looked no better in August than in May. Swapping the sun-baked center for a gravel seating circle and a skirt of black-eyed Susan and purple coneflower cut that to forty minutes, mostly sweeping leaves.
My sister works a 12-by-20 patio on roughly $600 a year, a budget that sounds tight until you stop fighting your conditions. She bought three native grasses in one-gallon pots, split a flat of sedum with a neighbor, and let a local stone yard’s scrap pile supply the stepping stones. Two seasons in, the space reads as planted rather than decorated, and her water bill dropped enough to cover the next spring’s mulch.
The steepest lesson came from a neighbor’s sloped strip between sidewalk and street, maybe 8 feet at its widest. Mowing it meant fighting a trimmer on an angle, so she stopped. A no-mow native meadow mix went in over cardboard, no irrigation after the first month. The first year looked weedy. The third year, California poppy and ceanothus held the slope against winter rain with zero intervention from her.
The same principle scales up or down: replace what fights you with what belongs there, and the maintenance gap opens immediately. A $600 patio and a free roadside strip both run on it.
Start With One Bed This Season
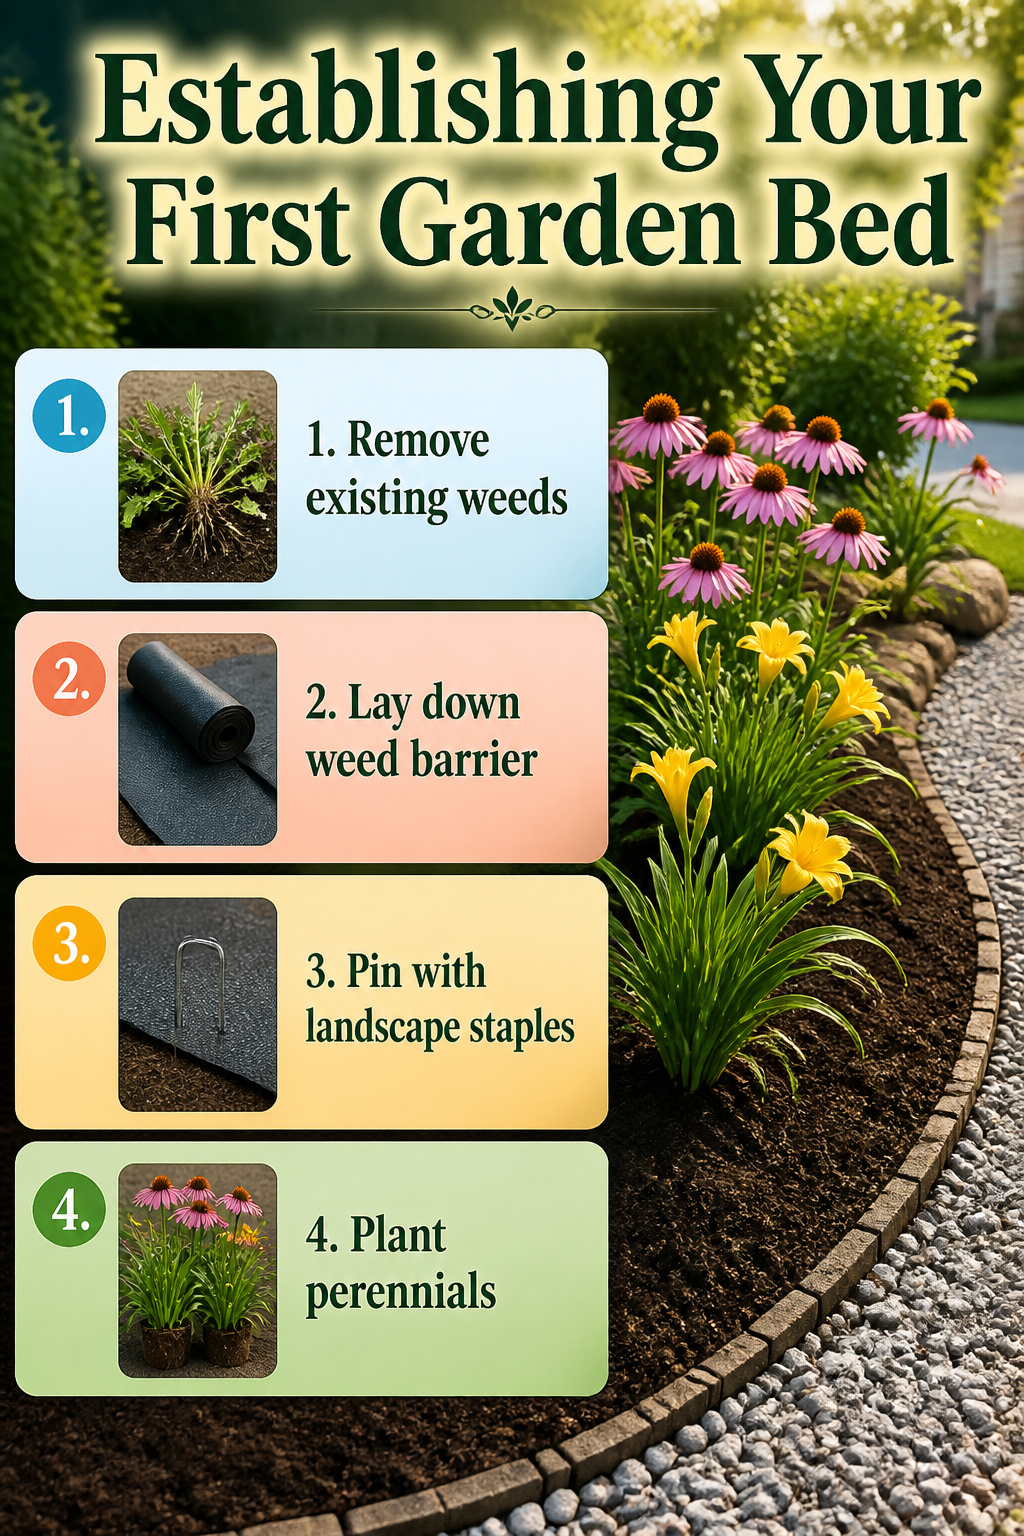
The patch of weeds beside my driveway used to greet every visitor before I did. That gravel corner, roughly 8 by 10 feet, became my first bed because I could not stand looking at it anymore. I pulled what I could, laid down a weed barrier cut to fit, and pinned it with landscape staples. Coneflowers and daylilies went in, plants that return on their own and do not ask for replanting. The curved edge I shaped made mowing simpler; the blade follows the arc instead of catching a corner.
Two principles carried everything that came after: work with what you already see every day, and choose perennials that handle your zone without fuss. Those first plants taught me what "established" actually means, which is mostly leaving them alone. Year two, I added a second bed along the fence using the same method. By year five, the layout had grown to what I tend now, but it started with one visible spot and the patience to let it settle before expanding. The mistake would have been tackling the whole yard at once, dividing attention until nothing thrived.
Mistakes I Made and Fixed

The first summer in this house, I planted a bed of coral bells and astilbe against the back fence because the colors sang together on the nursery tag. By August both were crispy brown, and the soil was cracked hardpan. Those plants wanted steady moisture; I had chosen them for how they looked on the rack, not for the dry baked clay they would actually live in. Now I check the water icon before the bloom photo, and that bed is sedum and Russian sage that shrug off July.
Gravel paths were supposed to be the easy answer to muddy side-yard traffic. I spread two inches of stone over landscape fabric and called it done. Within a season the gravel had sunk into mud, weeds punched through the fabric, and the whole thing looked like a neglected driveway. Four inches of compacted base plus two to three inches of gravel on top is the minimum that stays put; anything less is just expensive decoration.
"Native" once meant set-it-and-forget-it in my head. A swamp milkweed in the driest corner of the yard proved otherwise fast, dying back to a stick while the same species thrived down by the downspout. Native plants still need the conditions they evolved in; matching species to site matters more than origin.
A Japanese maple went in six feet from the foundation, charming at five feet tall. I never checked its mature spread. By year seven it was scraping siding and blocking a window, and removing it cost more than the original plant. Now I pace out the listed width with a tape measure before any tree goes in the ground.
Solar path lights along the north side of the garage glowed for maybe an hour after dusk, then flickered out. The panels sat in shadow most of the day, charging almost nothing. Lights need sun to work; obvious in retrospect, but I had placed them for where I walked, not where daylight reached.
Frequently Asked Questions
What are some low maintenance landscaping ideas?
Shrink your lawn with hardscaping like patios and gravel beds, plant native species that evolved for your climate, and swap annuals for perennials that return each year. Add a 2- to 4-inch layer of mulch to suppress weeds and lock in moisture, and put water on a timer so you are not hand-watering every bed.
How can I reduce yard maintenance?
Replace high-maintenance turf with hardscaping, choose plants that already grow in your region, and group them by water and sun needs so each zone gets one uniform treatment. A digital hose timer and drip lines cut daily watering chores, and self-cleaning flower varieties skip the deadheading routine entirely.
What plants are best for low maintenance landscaping?
Native species matched to your zip code need less water, fertilizer, and rescue work than imports. Drought-tolerant succulents like sedum and agave, plus ornamental grasses such as blue fescue and switchgrass, handle neglect once established. Perennials including coneflowers, hostas, daylilies, and catmint return yearly with little more than occasional division.