
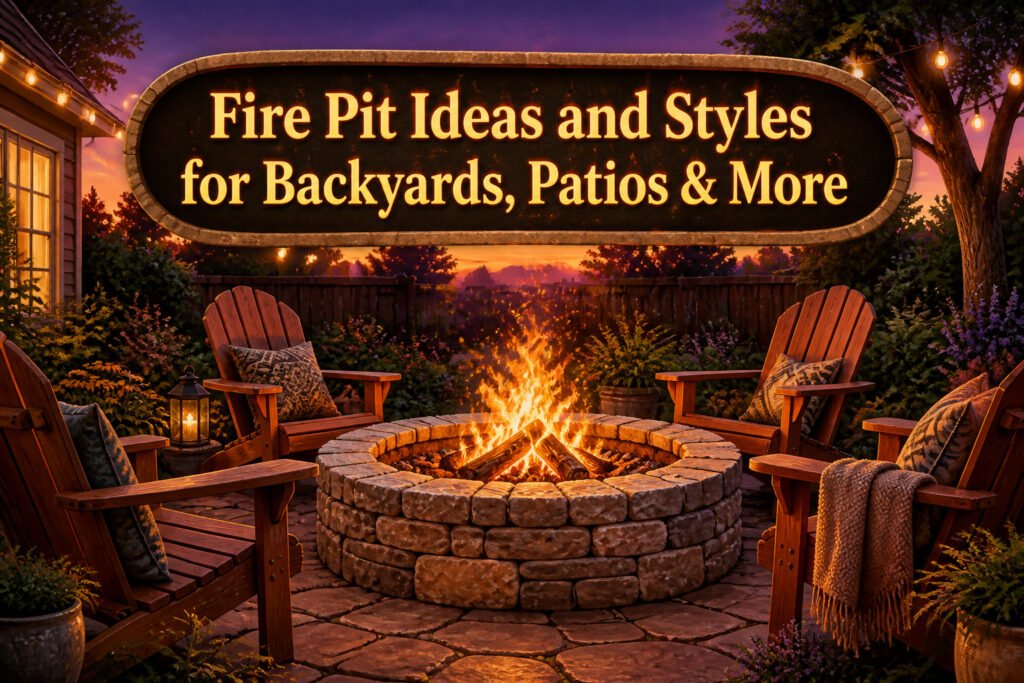
The right fire pit idea depends on whether you own the yard or might need to move next spring. A dry-stacked stone ring anchors a permanent gathering spot for under $250, while a steel bowl on legs keeps your options open but demands a heat shield on anything except gravel or concrete. What separates the projects that last from the ones rebuilt in a year is the base: the first course of stone or block has to sit dead level on a compacted, non-combustible surface, because every course above it only amplifies whatever tilt you started with.
1. Classic Stone Circle
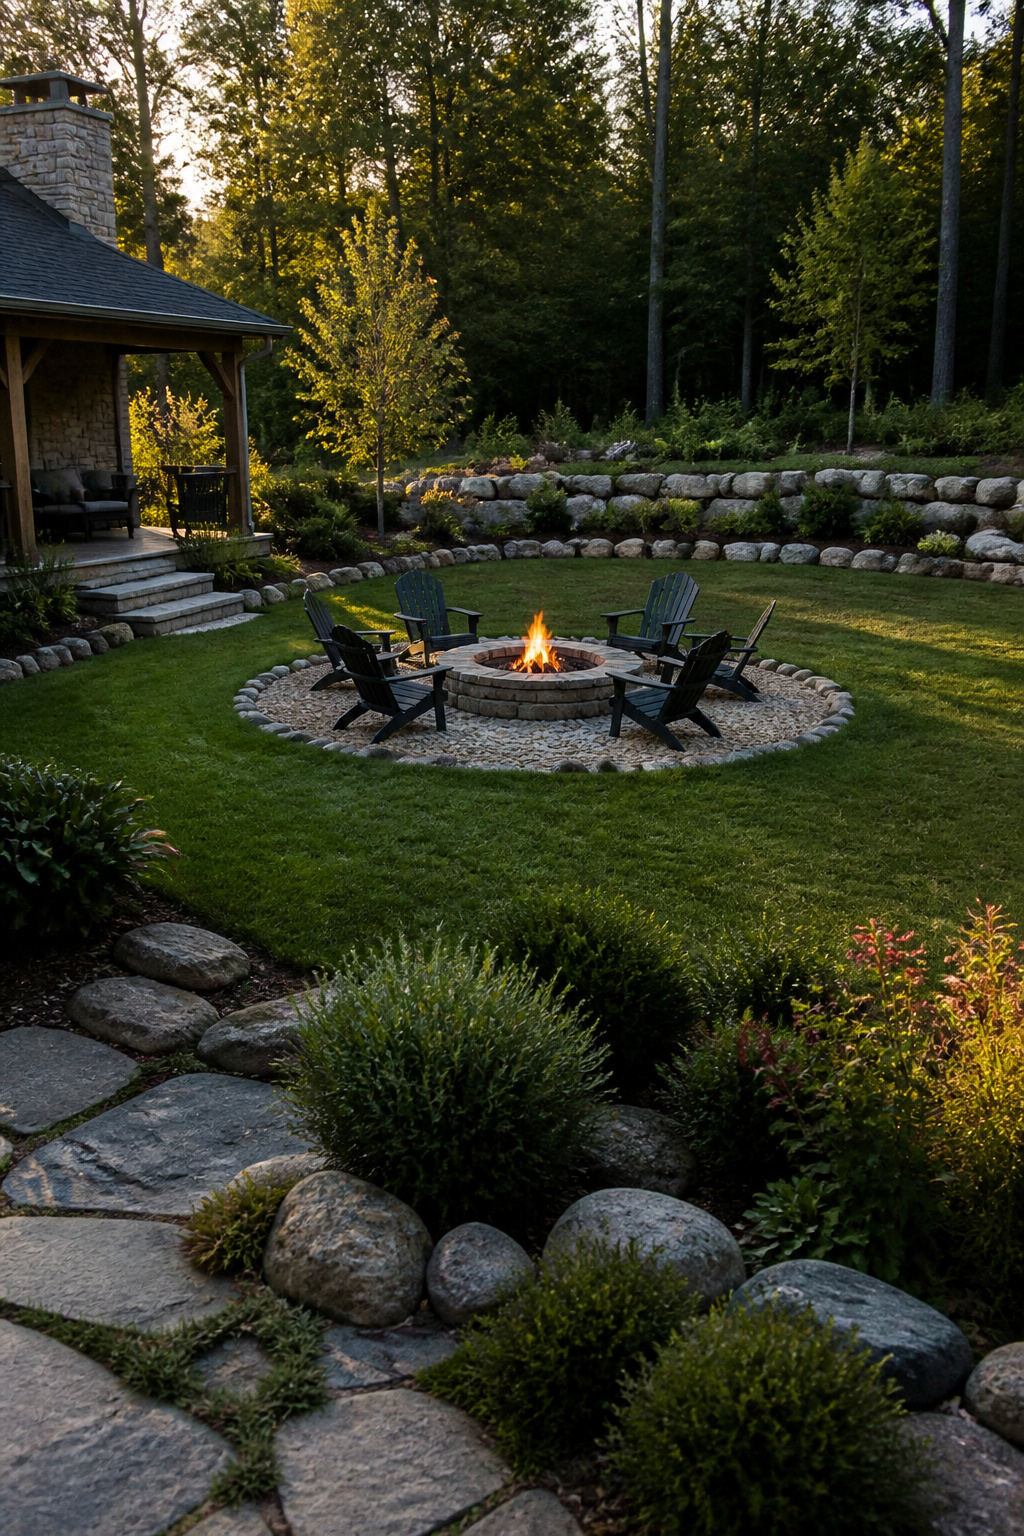
A dry-stacked ring of natural stone is the oldest fire pit form still in common use, and it stays reliable because the circle itself does the work. Chairs settle naturally around the focal point, and the shape sheds heat evenly without the stress points you get from corners.
Setting the first course dead level matters more than any stone above it. Every course after rides on that base. Excavate to a firm, non-combustible surface, compact it, and check with a long level in several directions. A slight tilt here becomes a visible lean by the third row.
I skip mortar entirely for the wall, and for good reason. Fire-rated stone expands and contracts with heat cycles; rigid mortar joints crack and let water in, which turns to steam and spalls the face. Dry-stacked walls breathe. Leave the joints slightly open, stagger them between courses, and the wall handles the thermal swing without drama.
Landscape pavers are not automatically fire-rated, so confirm the stone and any metal insert are rated for direct flame before you buy. A quiet palette, one stone color and one gravel tone, keeps the build looking deliberate rather than accidental. Budget runs $75–$250 and half to a full day for a beginner, best suited to an open yard with seating for four to six.
2. Built-In Fire Pit Areas
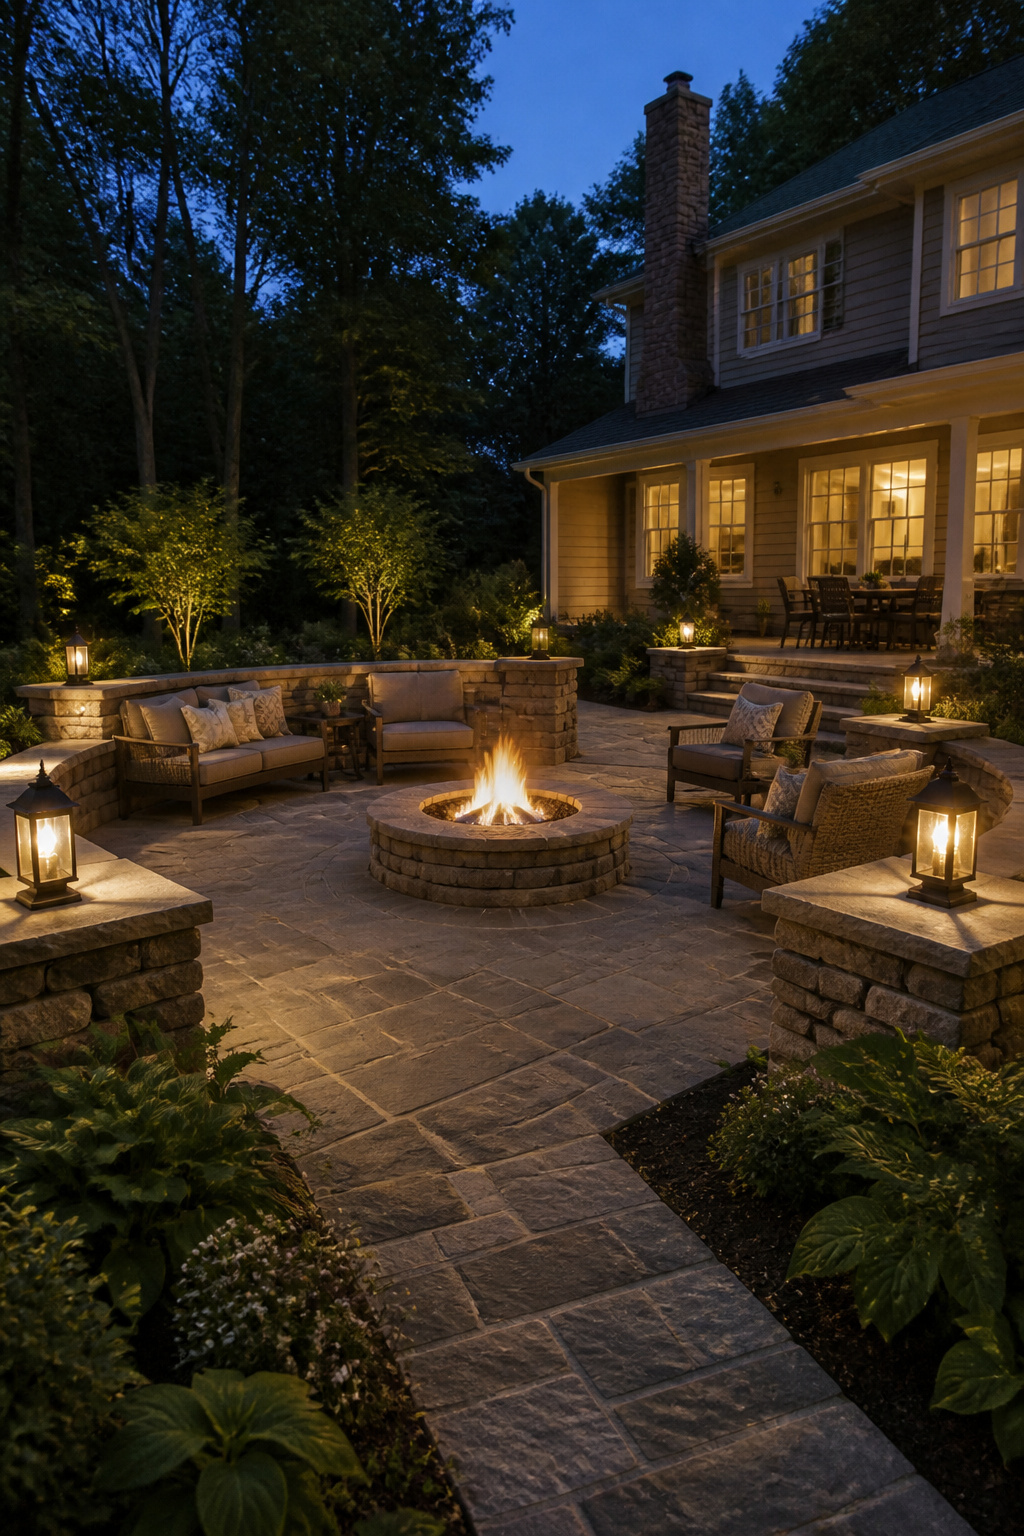
A built-in fire pit is the moment the patio stops being a slab and starts being a room. The pit sits at grade with the surrounding pavers or decking, and the seating follows its edge in a low wall or bench cap that defines the space without stealing it. What convinced me, reading through the layouts that actually get built, is how much the circle matters: the shape pulls chairs inward and keeps conversation from drifting, even when the chairs themselves are simple lawn furniture dragged over from the garage.
Non-combustible material underneath and around the pit is not optional. Excavate for a compacted base of gravel or sand rated for the insert, then build with fire-rated masonry blocks around an approved metal ring. Landscape pavers alone will not survive direct flame; the block and insert need to be specified for fire-pit use, with joints staggered and air openings left clear. The classic build runs $75 to $250 and half a day for someone who has handled a level before, but the cost of skipping the rated materials is a cracked ring and a reset the following spring.
Built-in seating walls finish the job by removing the question of where chairs go. They cost more than loose furniture, and they commit the space to one layout, but for a yard that hosts the same four to six people most weekends, that permanence is the point. The hardscape anchors the gathering, the fire anchors the hardscape, and the evening organizes itself around both.
3. Repurposed Brick Fire Pit
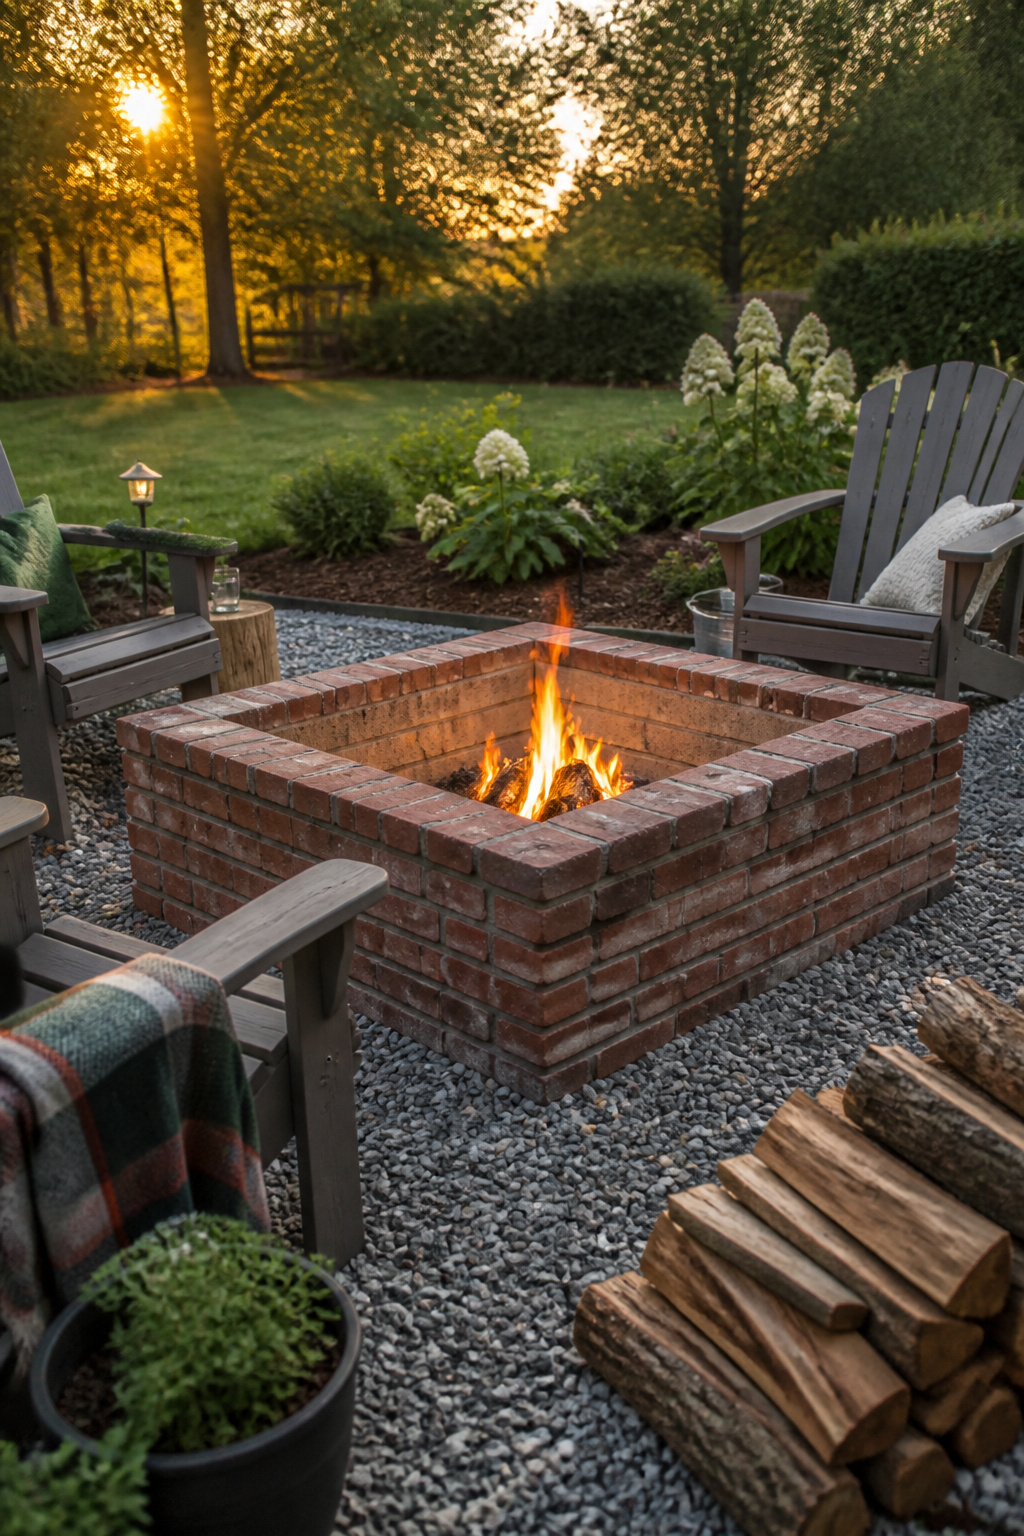
A square or circular brick fire pit looks timeless against grass or gravel, and the material is easy to source from demolition sites or leftover patio projects for well under $200. The catch is that standard clay brick can crack under repeated high heat, so the inner wall needs protection. Fire brick rated for thermal cycling is the straightforward fix; a metal ring insert works too and costs less if you find one sized to your plan.
I like the square build for patios where space is tight, since the corners give you four distinct seating angles without wasting the gaps a circle leaves against a straight edge. Either way, a 2-inch gravel base under the first course handles drainage and keeps frost heave from shifting your work over winter. Lay the first ring dry, check it with a level, then stack two or three more courses with a thin mortar bed if you want permanence or dry-stacked if you might rebuild later. The firebrick or metal liner goes in last, flush to the inner face so flames never lick directly at the standard brick.
4. Fire Pit Tables
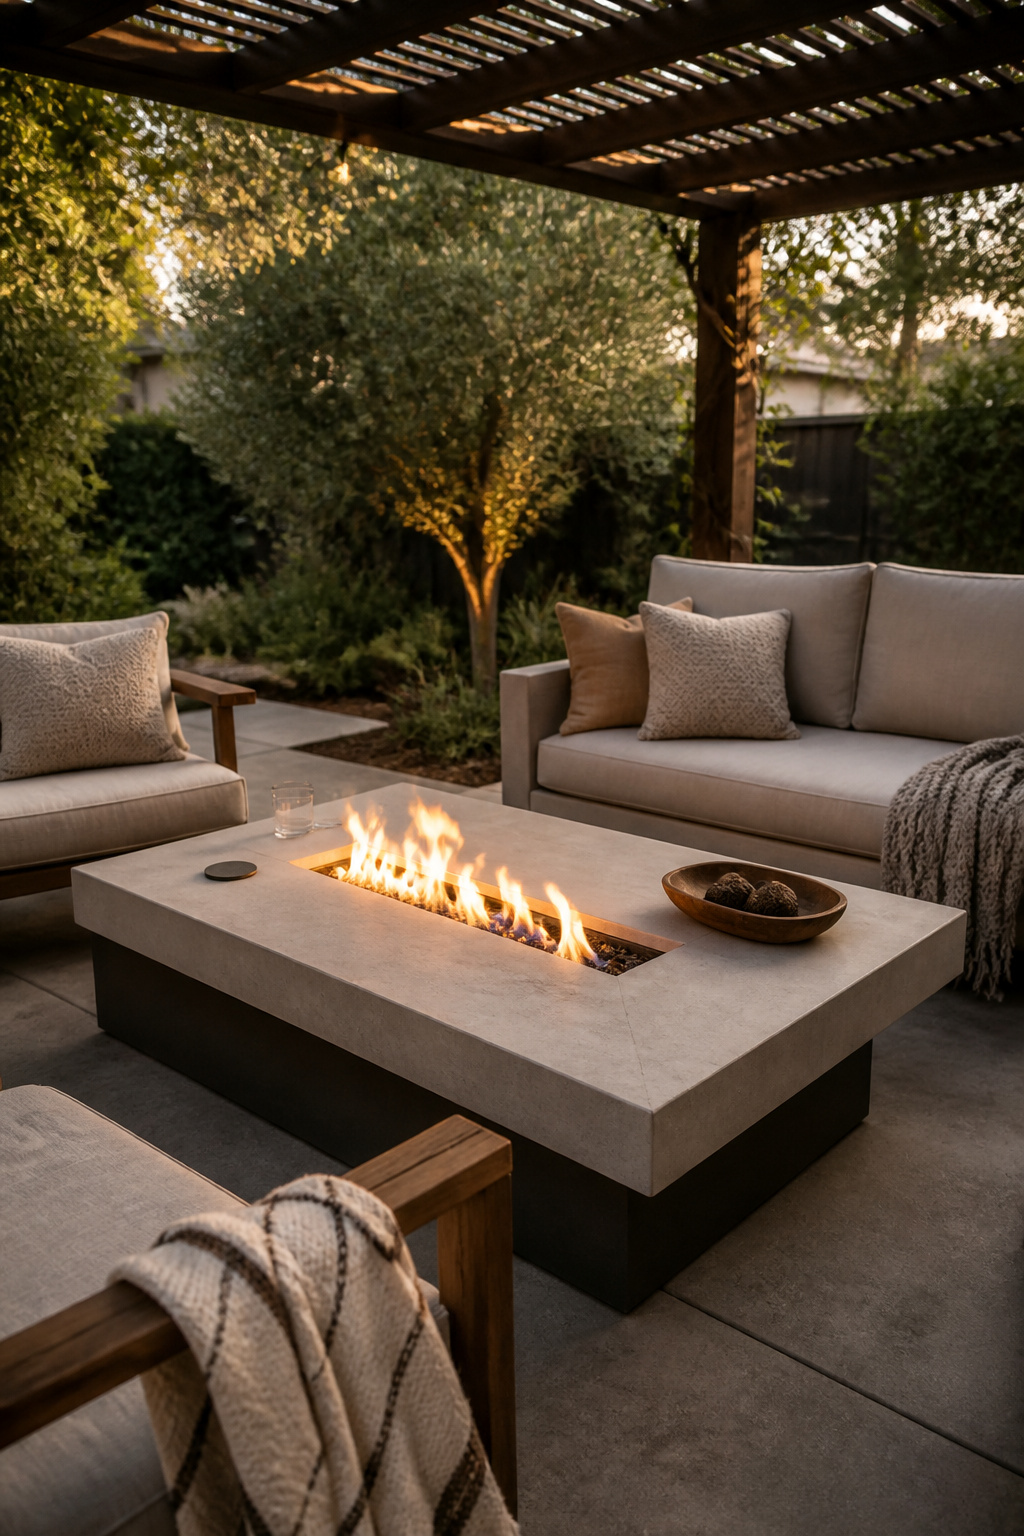
A fire pit table fills the awkward gap between wanting a place to set your drink and wanting to stay warm after sunset. The burner sits below a tabletop surface, usually with a narrow slit or central opening for the flame, so the same piece works as a coffee table in daylight and converts to a fire feature once you strike a match. What sold me on the idea, reading through enough backyard forums, was the double duty: one footprint, two functions, no dragging furniture around at dusk.
Propane and natural gas are the two practical routes. Propane runs off a refillable tank you tuck in the base or hide nearby; natural gas ties to a fixed line from the house, which costs more upfront but ends the tank-swap routine. Either way, you are trading the crackle of wood for push-button convenience and no ash to dump the next morning.
For actual warmth, not just atmosphere, look for 40,000 to 50,000 BTU as the range that keeps shoulders comfortable on a forty-five-degree evening. Less than that tends to read decorative. The gap between flame and tabletop matters too: a few inches of clearance, plus heat-diverting baffles in better units, keeps the rim cool enough to touch without thinking. That gap is what lets you use the surface for plates or elbows while the fire runs, which is the whole point of the design.
Materials run from cast aluminum to stone cladding like Utah limestone, and shapes from round to rectangular. A rectangular build can sit against seating like any coffee table; round versions pull people into a circle. Either way, keep paper napkins and decorations back from the flame slit. The table edge stays cool, but the center does not.
5. Moveable Fire Pits
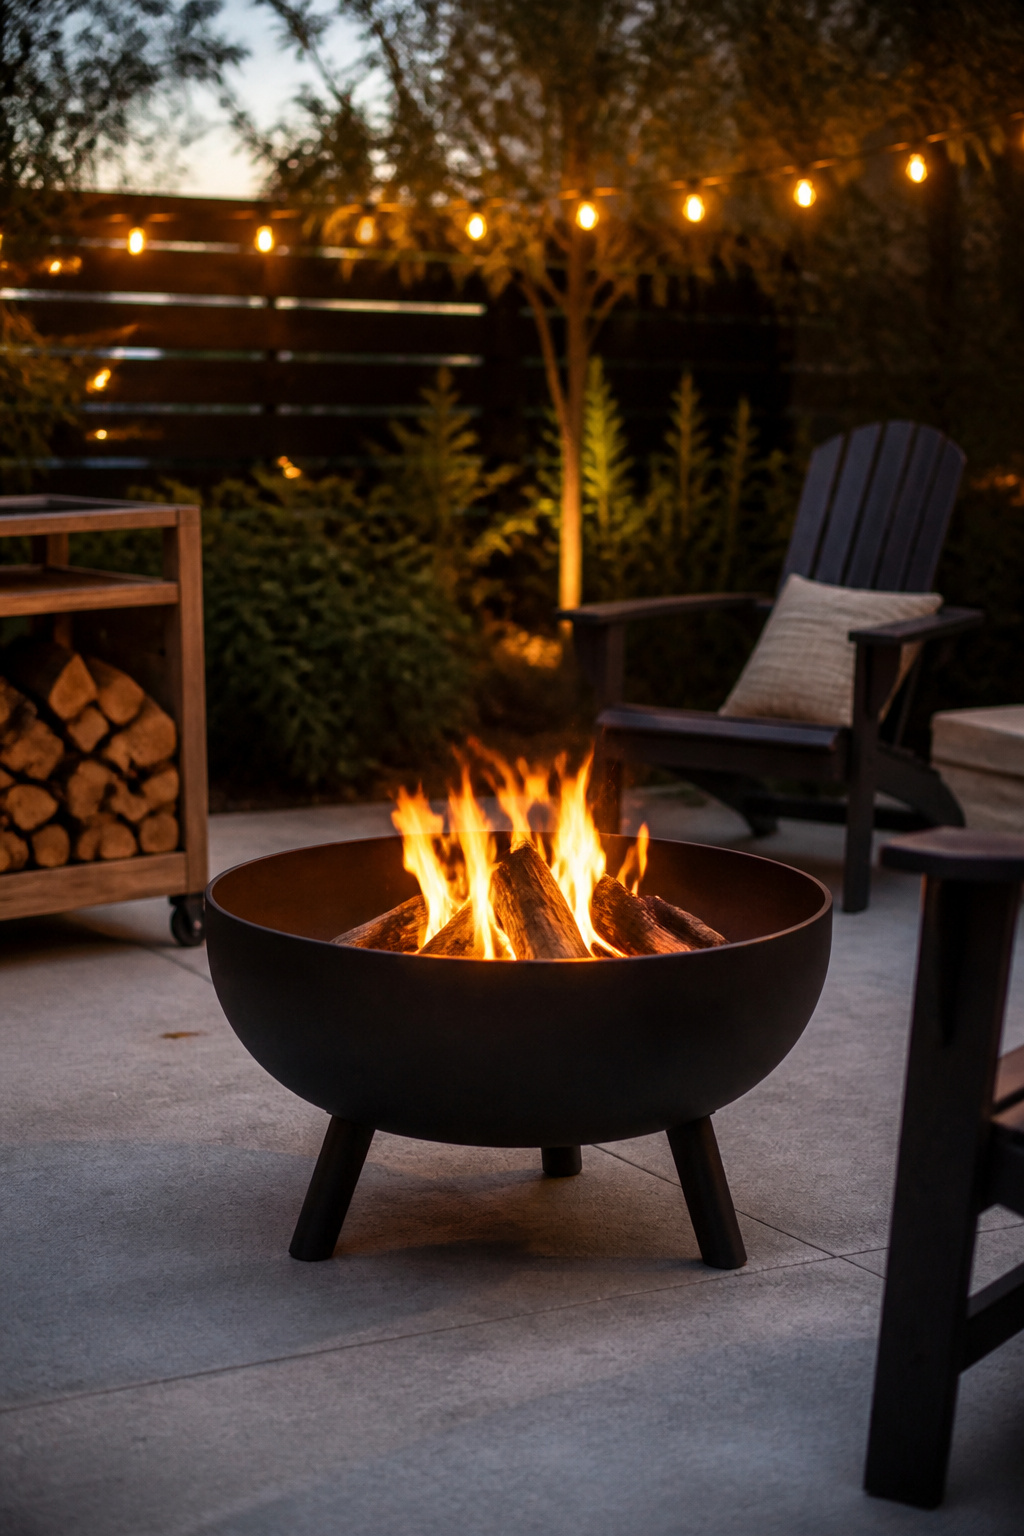
A moveable fire pit lands somewhere between a camping tool and backyard furniture. Most are steel or cast iron bowls on short legs, light enough to shift when the party drifts to the other side of the patio, and priced low enough that you can buy one on impulse and still have budget left for chairs.
Steel sheds heat faster once the fire dies; cast iron hangs onto it, which matters if you have kids or dogs who might bump the bowl after dinner. Either way, the fire itself stays smaller than what a built-in stone ring will hold, and the whole setup feels less like a destination and more like a portable campfire.
The real catch is what sits underneath. Bare wood decking needs a heat shield, not just the legs the manufacturer included. Gravel or concrete pavers underneath solve the problem permanently, but that starts to erode the flexibility you bought the thing for. I think of these as the right choice for renters or for anyone whose yard plan changes every season, not for someone who already knows exactly where they want to gather every Friday night.
6. Outdoor Fireplaces
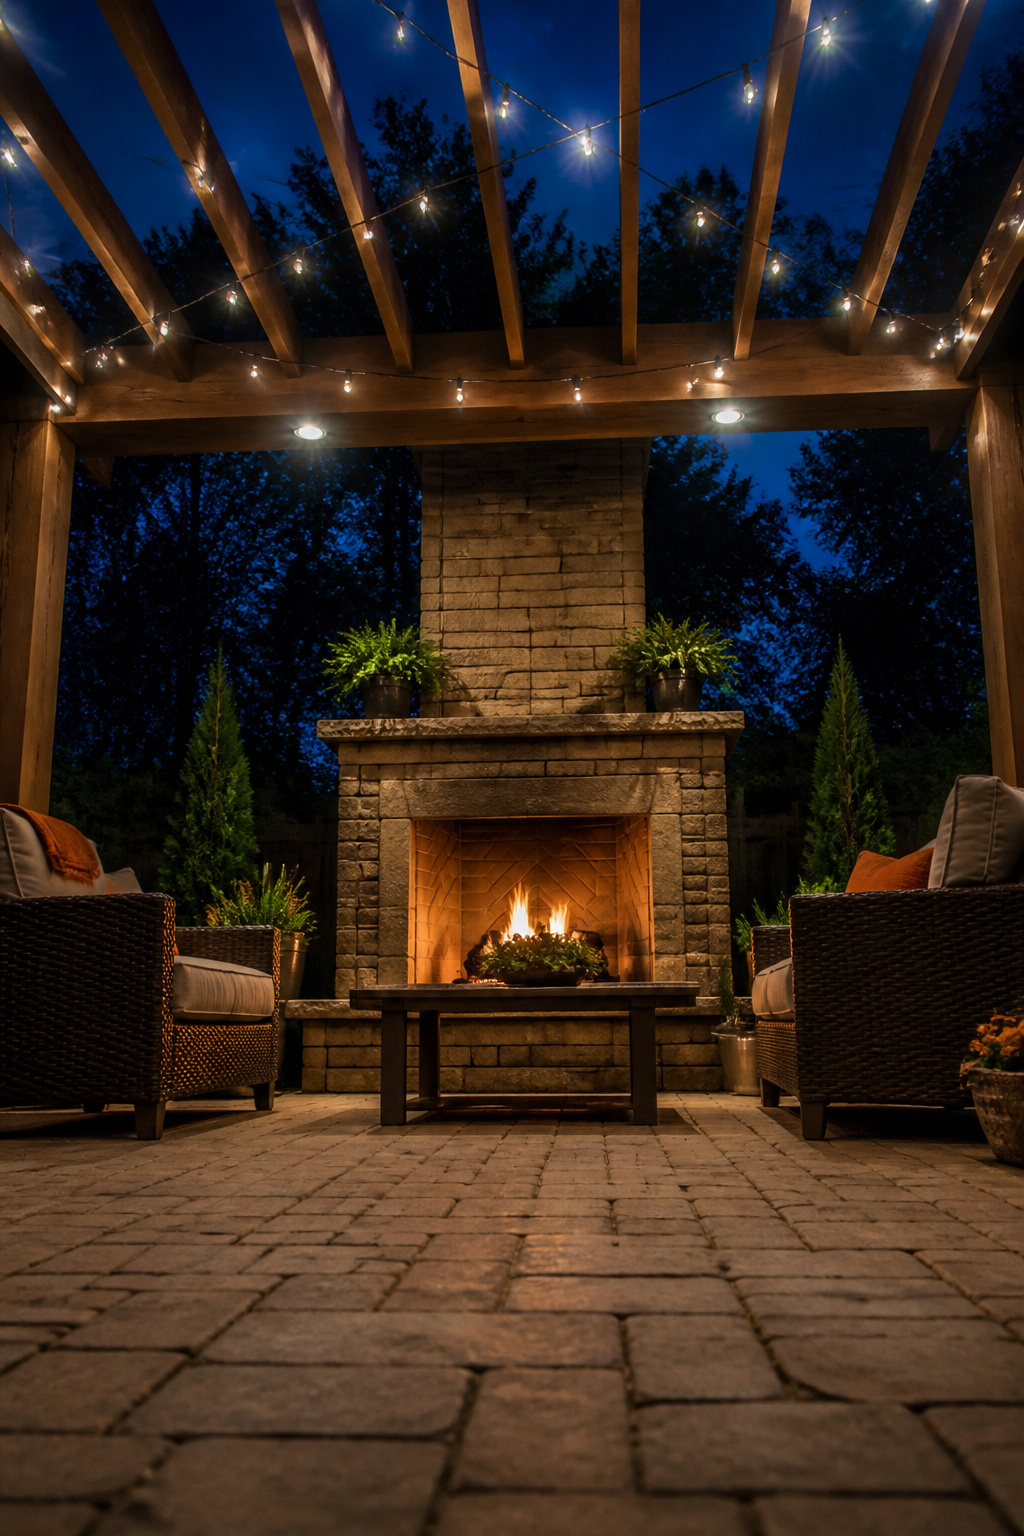
An outdoor fireplace is the closest thing to bringing your living room outside, and the chimney is what makes that possible. Smoke rises through the stack instead of drifting across your guests’ faces, which means you can seat people closer together and even tuck the structure under a covered patio or pergola where an open fire pit would suffocate the space.
That comfort costs more. The masonry needs a concrete footing below the frost line to keep the weight from settling and cracking, and the chimney itself is essentially a small brick tower that has to be built plumb and lined correctly or it will draw poorly and smoke you out anyway. I have watched neighbors try to skip the footing on a DIY outdoor fireplace, and within two seasons the mortar had opened up enough that you could slide a knife into the gaps.
Clearances still matter with every wall and ceiling nearby. Combustible siding, soffits, and overhead beams need measured distance from the chimney and the firebox opening, even with the smoke directed upward. The manufacturer’s specs or your local code will give the exact numbers, and they are not negotiable because embers can still escape the stack in a gust.
7. Statement Fire Pits
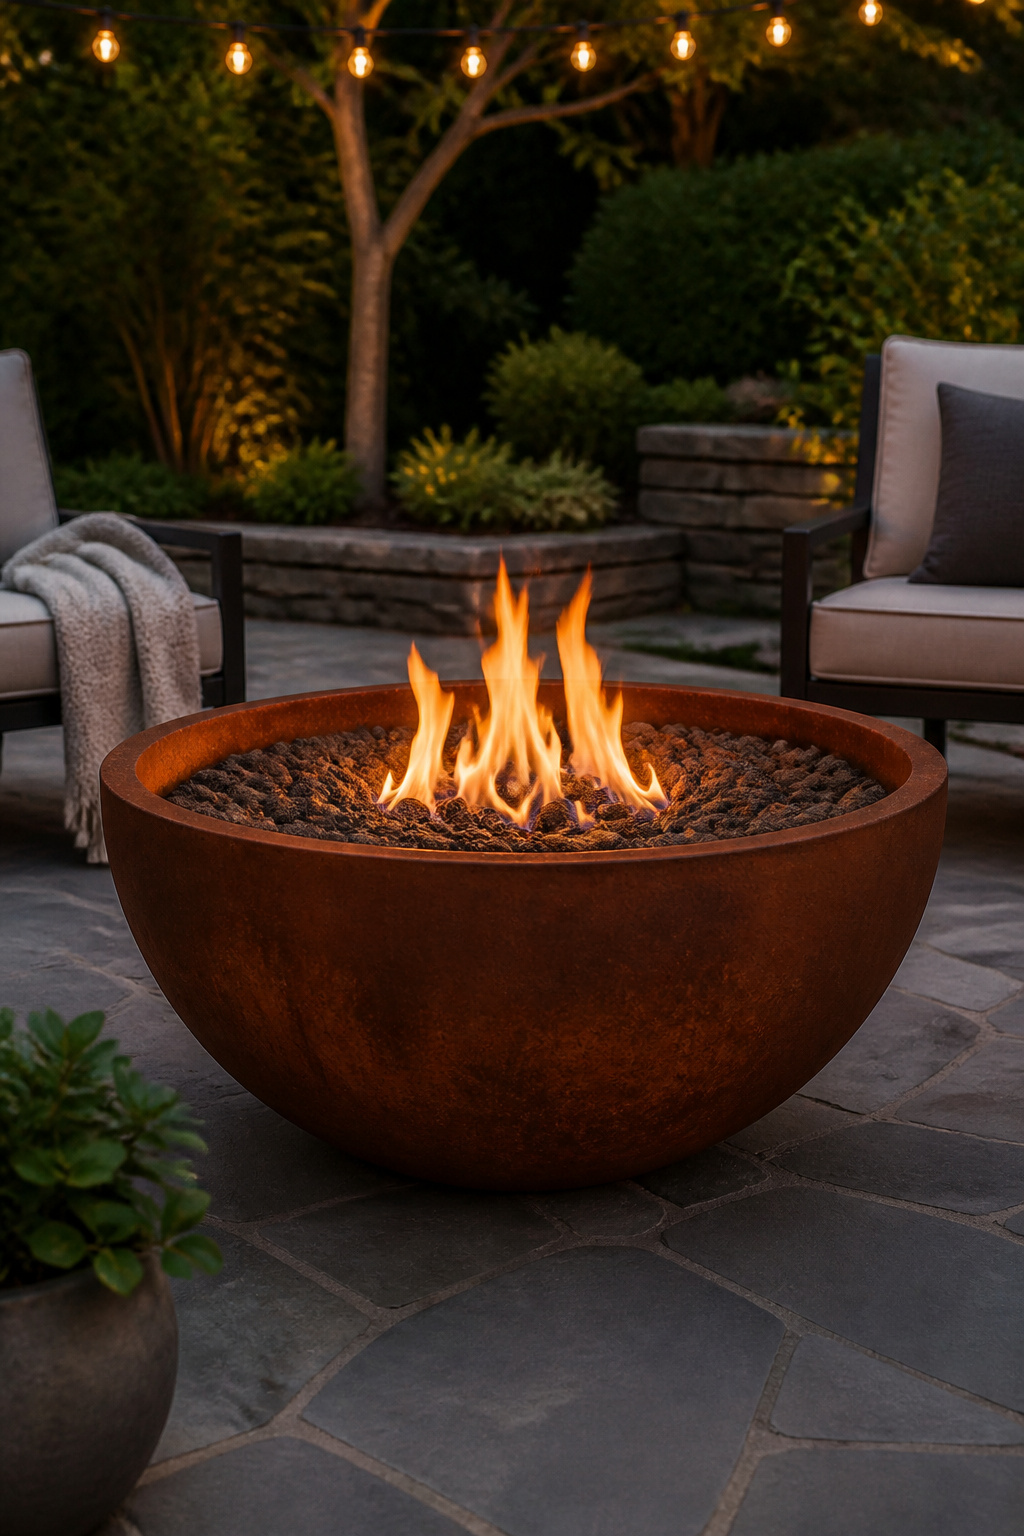
A 4-foot corten steel hemisphere can own a 12-by-12 patio so completely that the rest of the space becomes framing. I saw one set up this way, and the lesson stuck: when the fire pit is the sculpture, scale and placement do the heavy lifting, not the surrounding detail.
Corten steel keeps that vivid rust-red color because it is already weathered. The material does not need protecting from rain or snow; it arrives finished and stays that way. In the installation I am thinking of, the hemisphere sat on a flagstone patio with a water feature repeating the same steel lines at the far end. The match between them pulled the eye through the whole yard.
A hemisphere this large reads as grounded and monumental. A freestanding bowl of the same material, set poolside in one design I studied, works more like a spotlight piece. The difference is shape and context: the hemisphere sinks visually into the patio plane, while a lifted bowl calls attention upward.
Either piece needs breathing room. Crowding a statement pit with furniture or planting competes against the thing you bought it to feature. Give it the clear floor space its diameter demands, and let the steel do what you paid for.
8. Multi-Level Seating
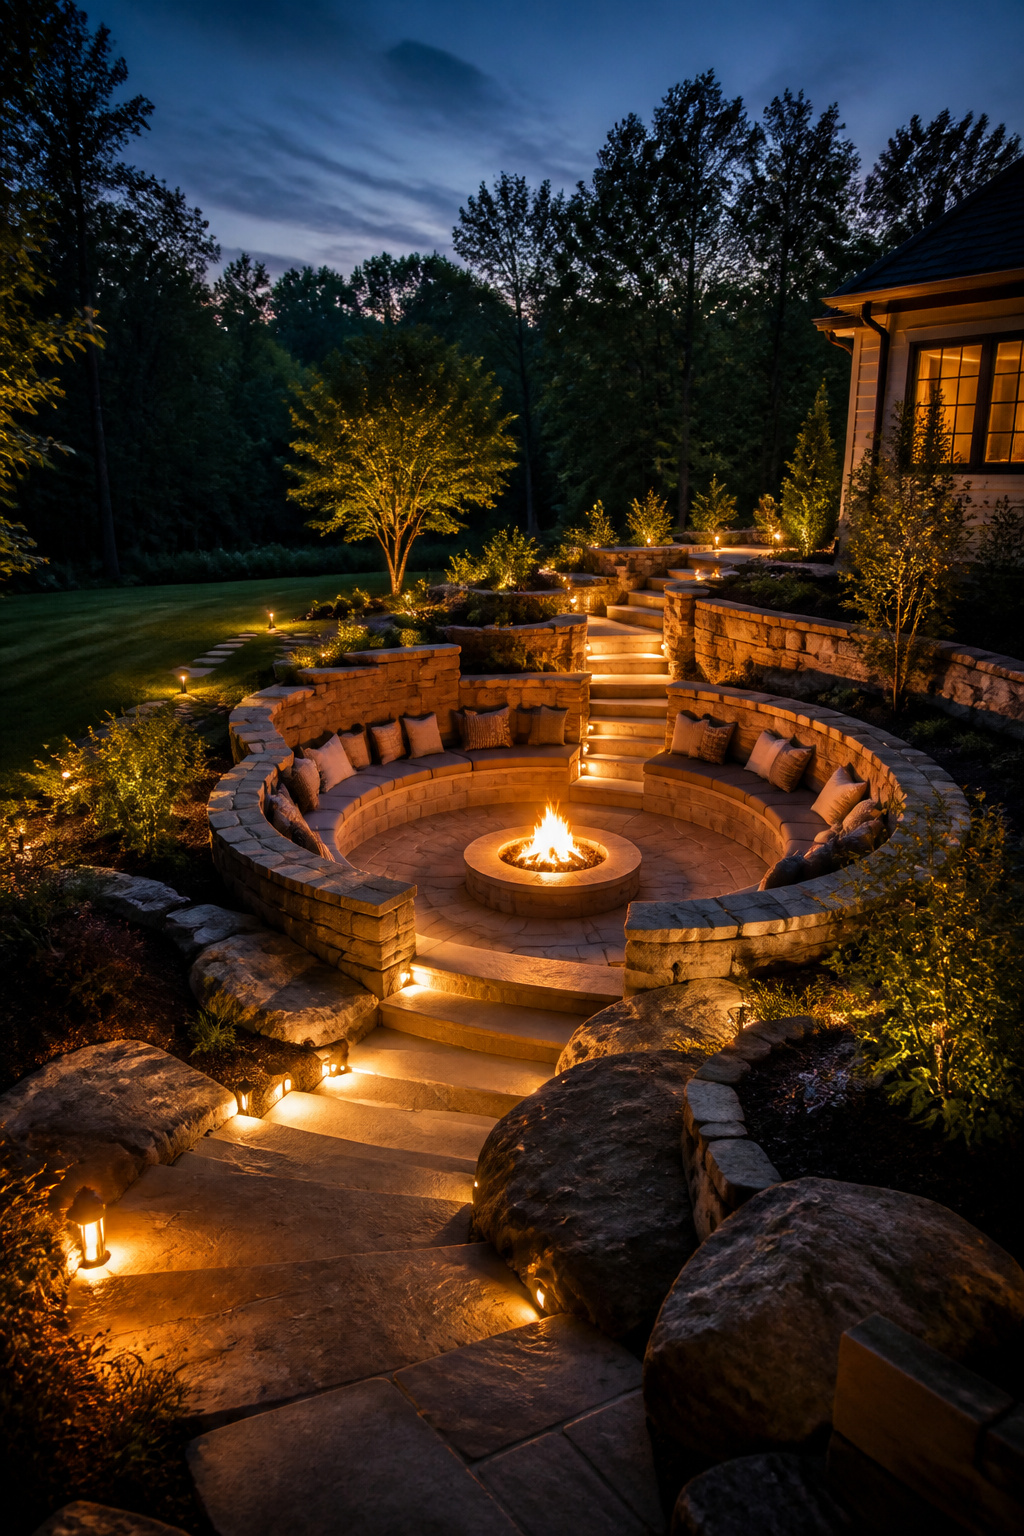
Stepped seating changes a fire pit from a backyard feature into something closer to an outdoor room. I came around to this after seeing how a single flat ring of chairs leaves half the group staring at backs instead of flames. Drop the pit 18 to 24 inches below grade and build retaining walls that double as benches in two or three terraced levels, and suddenly fifteen people can see the fire without anyone perched on someone else’s knee.
The retaining walls carry the soil load, but they also carry your guests, so the cap needs to overhang the block by enough to sit on comfortably. What convinced me, reading through a dozen of these builds, is that the real work happens underground. Water collects at the lowest point; without drainage channels running from the base of each step to daylight or a dry well, the lowest bench becomes a wading pool after the first hard rain. Plan the grading, the retaining structure, and the drainage before you touch a shovel, and check whether your town wants a permit for the excavation. This is a landscape project first, a styling project second, and the step lighting and finish materials only matter after the slope stays put and the water has somewhere to go.
Build cost starts around $1,000, and the skill level sits at advanced or pro help for anything beyond a very small yard.
9. Swing Seats
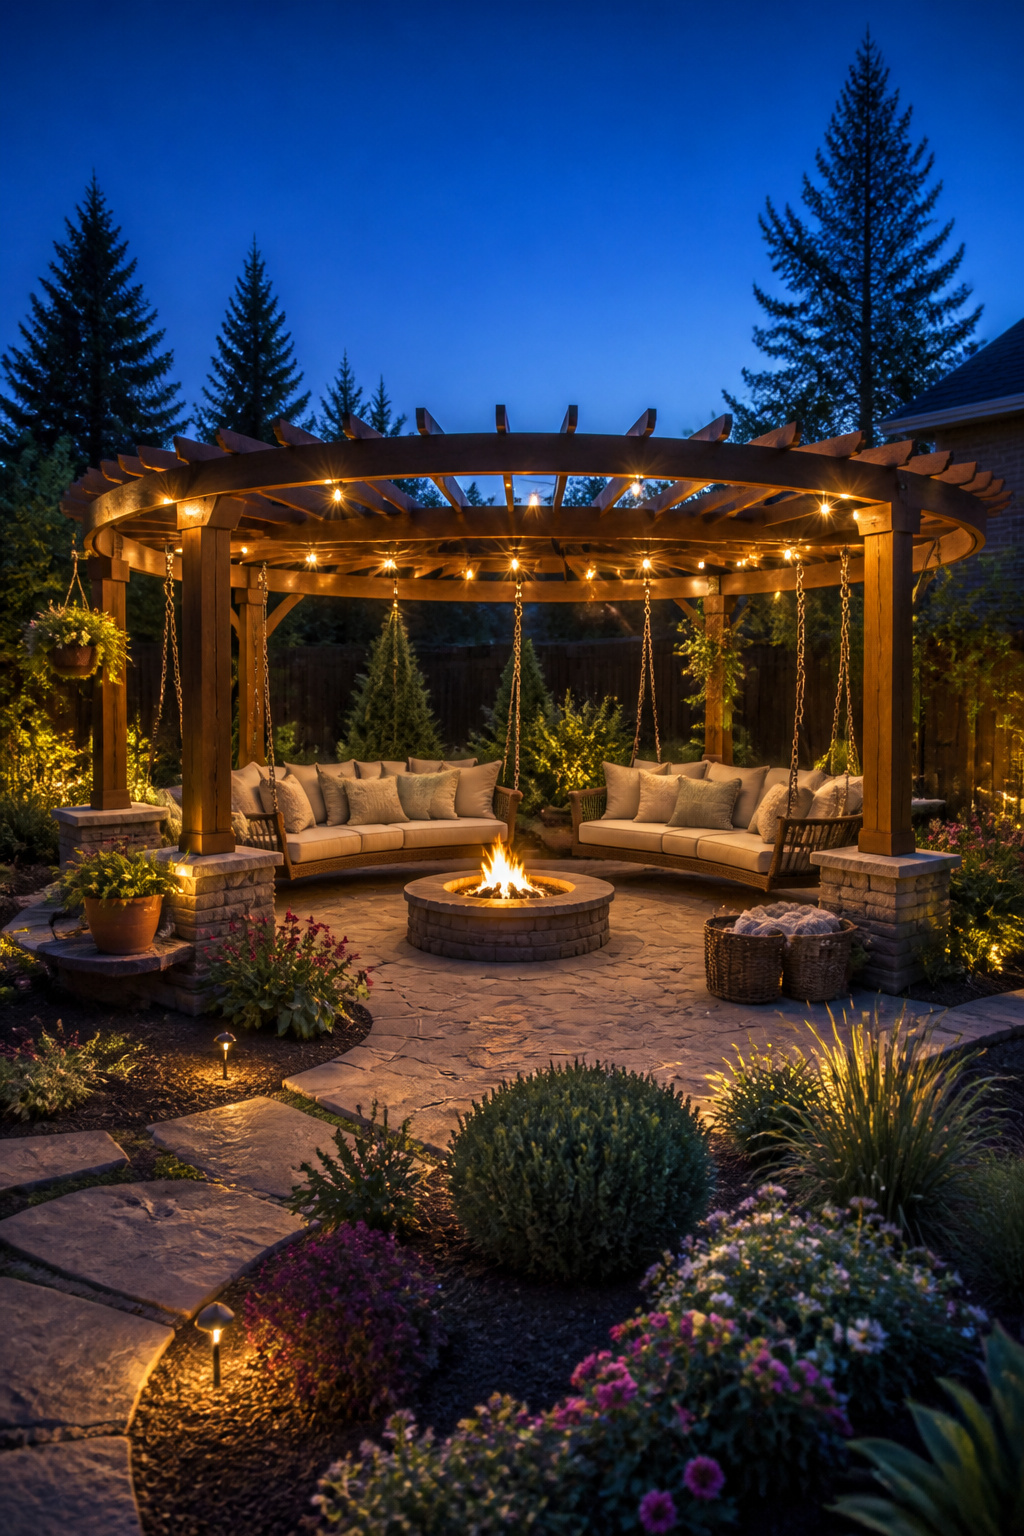
A swing seat circling a fire pit turns the usual campfire setup into something that feels like a permanent vacation spot. The motion is the draw: slow rocking while you watch flames, the kind of thing that makes an hour disappear.
What convinced me, reading through a dozen of these builds, is that the overhead structure matters more than the seat itself. You need at least 8 feet of clearance above the seat at rest to keep the arc from hitting anything or anyone. Most pergolas I looked at were built to about 9 feet just to leave breathing room.
Fabric or rope seats demand extra space from the flame, more than you’d think reasonable until you picture an ember landing on canvas. The safe bet is treating anything suspended as more flammable than it looks, because movement brings it closer to the heat than fixed seating ever gets. Chain or rigid hardware holds up longer than rope in that environment anyway.
The frame has to be engineered for lateral force, not just downward weight. A beam that holds a static porch swing will groan once four people are all rocking at different rhythms. Most builders I found who got this right used steel brackets or buried posts in concrete rather than bolting to an existing deck rail and hoping.
10. DIY Log Benches
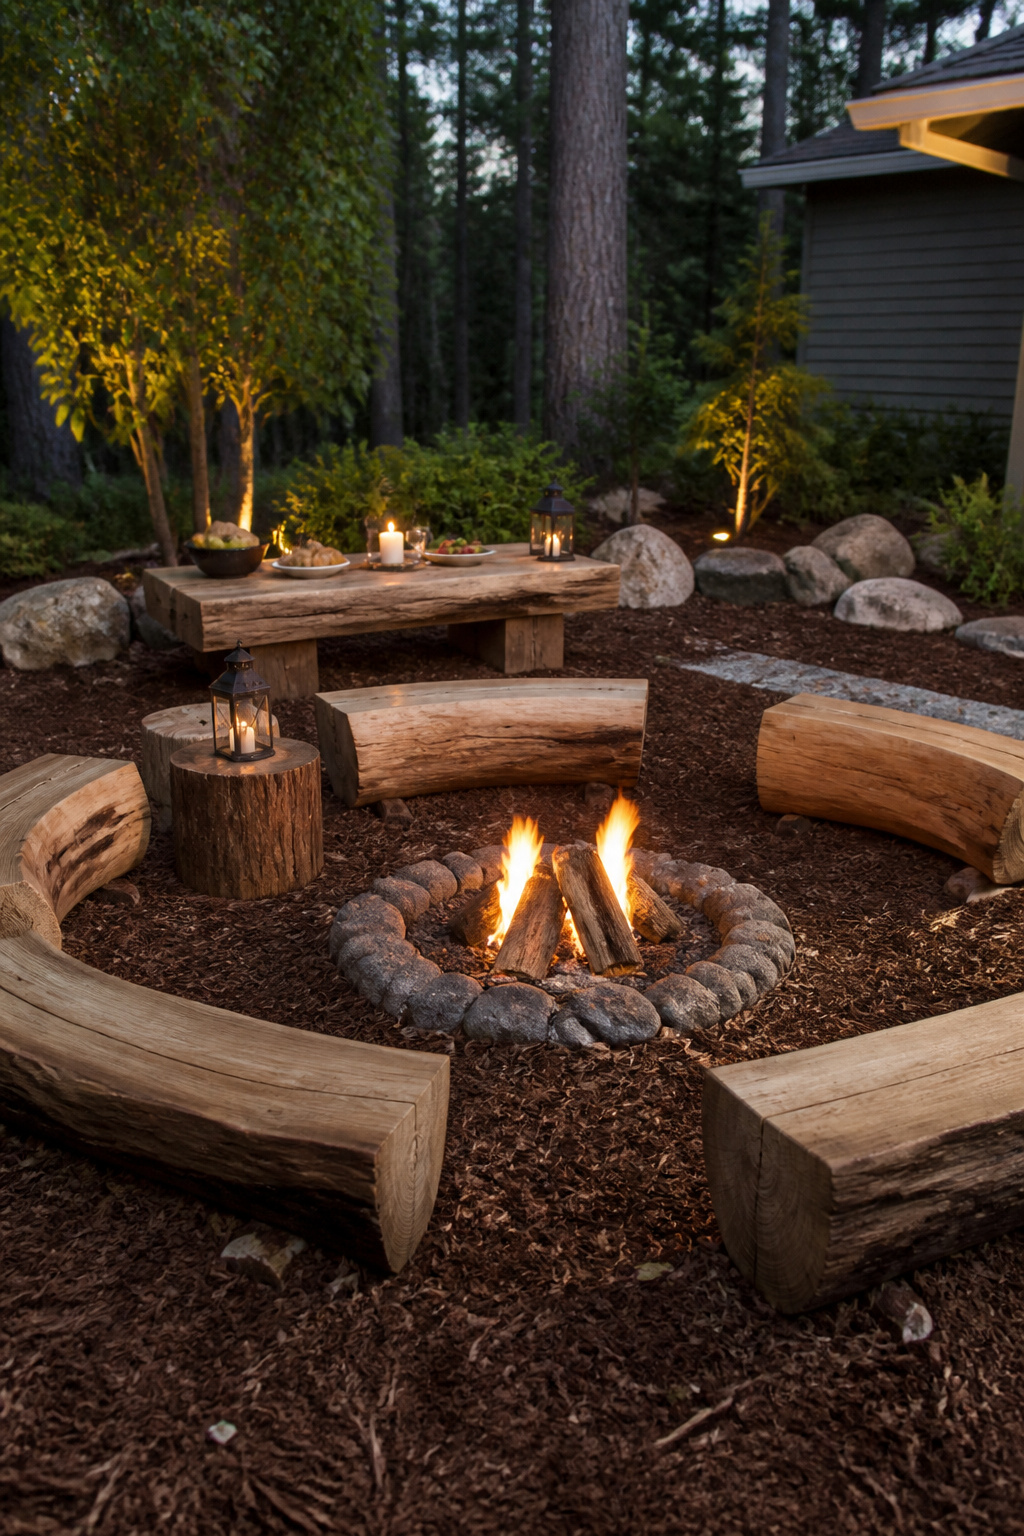
Split-log benches ring a fire pit in a way store-bought seating never manages, each piece angled slightly inward so knees point toward the flames without anyone twisting. The wood matters more than the build. Green timber cut from a fallen tree looks solid the day you buck it, but the moisture trapped inside exits unevenly: the flat face you split checks open in jagged lines, rounds warp into ovals, and legs that sat level in September rock like a chair by March. A full year of air-drying, or buying kiln-dried stock, saves the work from becoming yard sculpture.
Flat tops are the whole game. A slight hollow cups rainwater; a ridge presses into the back of a thigh through denim. I plane or draw-knife the sitting surface until a straightedge shows no gap wider than a pencil line underneath, and I stop there. Fancy joinery, mortises and wedged tenons, mostly hides underground or under a cushion. The ground shifts, the wood moves, and a simple half-lap or even a sturdy spike through the underside lets you knock the bench flat again in five minutes when summer heat opens a seam.
11. Destination Fire Pits
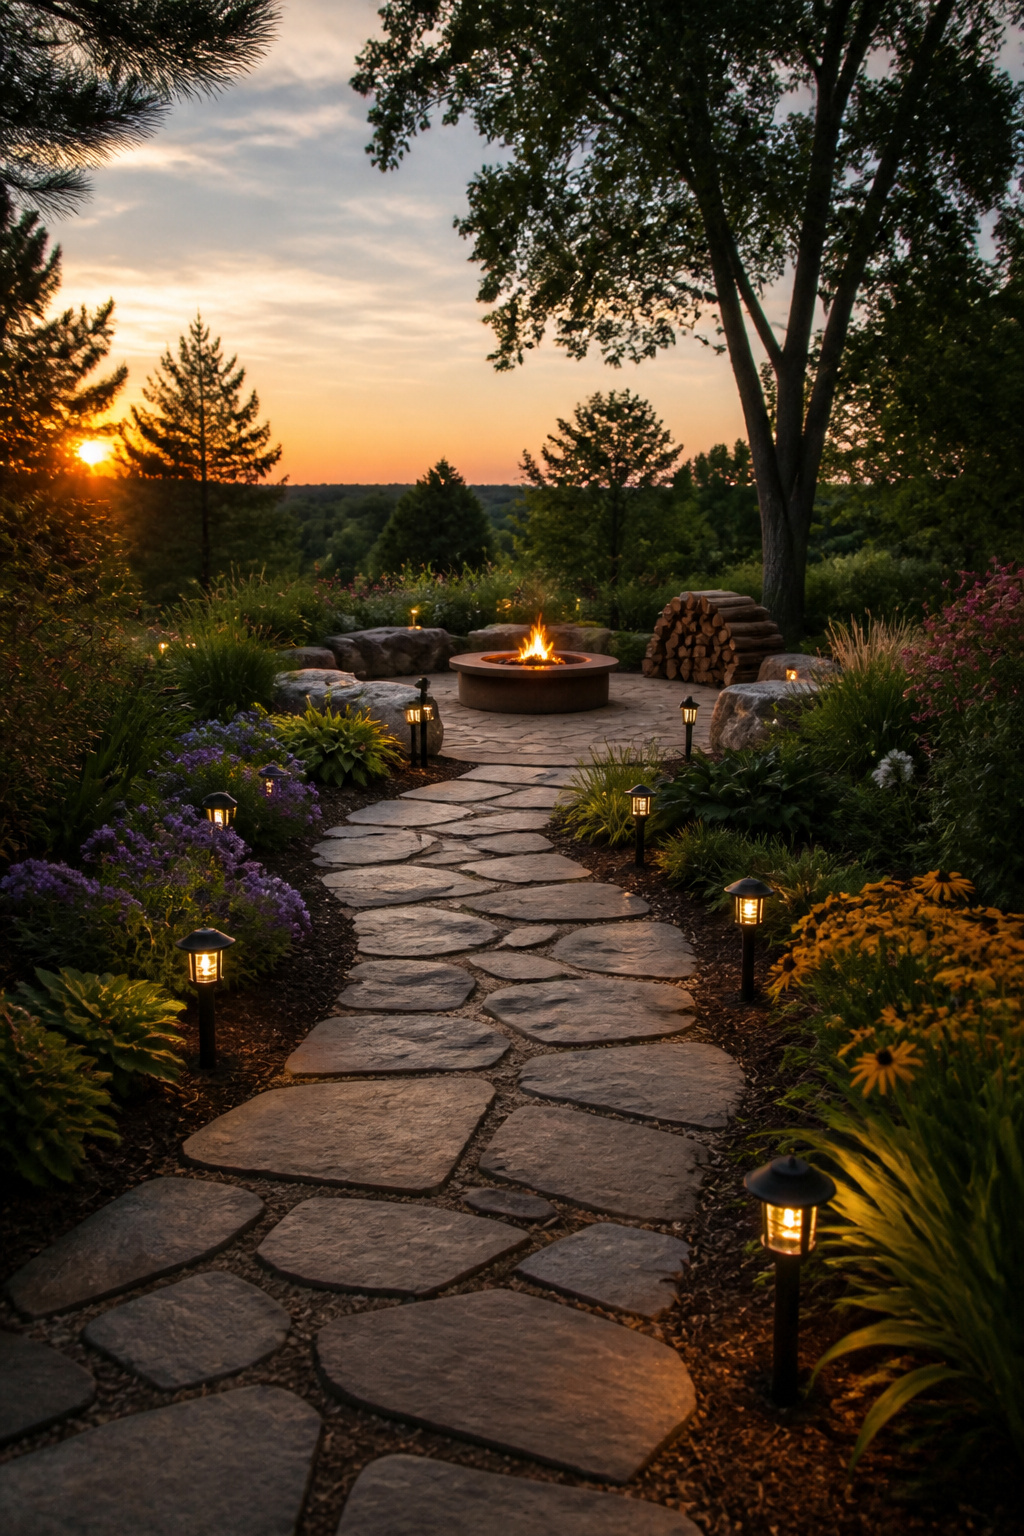
A fire pit at the far end of a yard works best when the walk from the door takes under two minutes. Beyond that, guests start looking for excuses to stay near the house. I learned this the hard way after placing one at the back corner of a quarter-acre lot; the fifteen-second dash with s’mores supplies turned into a trek nobody wanted to repeat after dark.
The path matters as much as the pit. Solar-powered path lights or lanterns along the route keep people from treating the journey like a camping expedition. One source suggests spending the budget on lighting along the route instead of around the flame itself, which I now follow: a defined gravel or paver field with a crisp edge reads as intentional, not afterthought.
Wood-burning pits need carrying capacity. I stack a weekend’s worth near the seating area, because making multiple trips kills the mood. Gas lines solve that, though running a natural gas line from the house or a propane tank is an investment, and you lose the crackling flames.
A secondary terrace tucked away from the main yard, surrounded by perennials and ornamental grasses, reads as a quieter room. The separation is the point. Just keep the distance short enough that people actually use it.
12. Chiminea
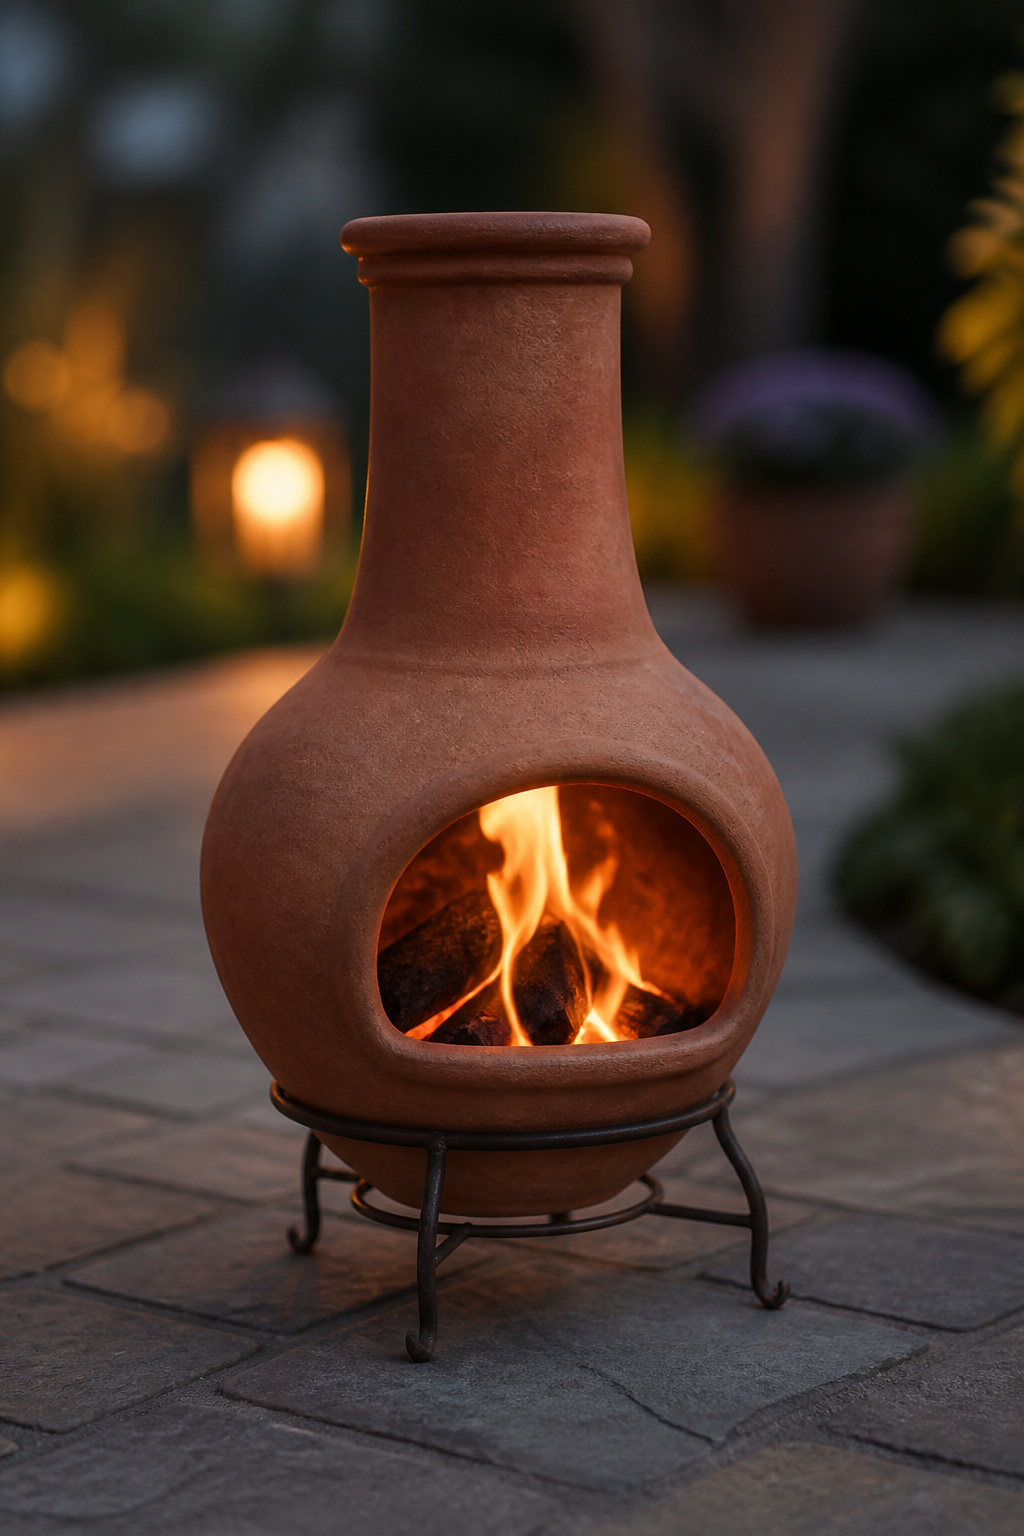
A chiminea directs most of its heat from the belly, so the side facing you runs hot while your back stays cold. That single-direction warmth makes it a poor choice for group circles but ideal when two of us just want a contained spot by the chairs. The fire itself stays small; the bulbous body only holds so much wood, and the vertical chimney wants a modest flame to draw properly.
Mine sits on a concrete paver even though the ground beneath is already gravel. Sparks stay inside better than with an open bowl, yet the cast aluminum base still radiates downward enough to stress whatever sits below it. Clay models crack from thermal shock if you overfeed them; metal ones heat faster but throw less of that stored warmth back out once the logs die down. Traditional terracotta still looks right on a patio, though the weight means you commit to its placement.
13. In-Ground Fire Pit
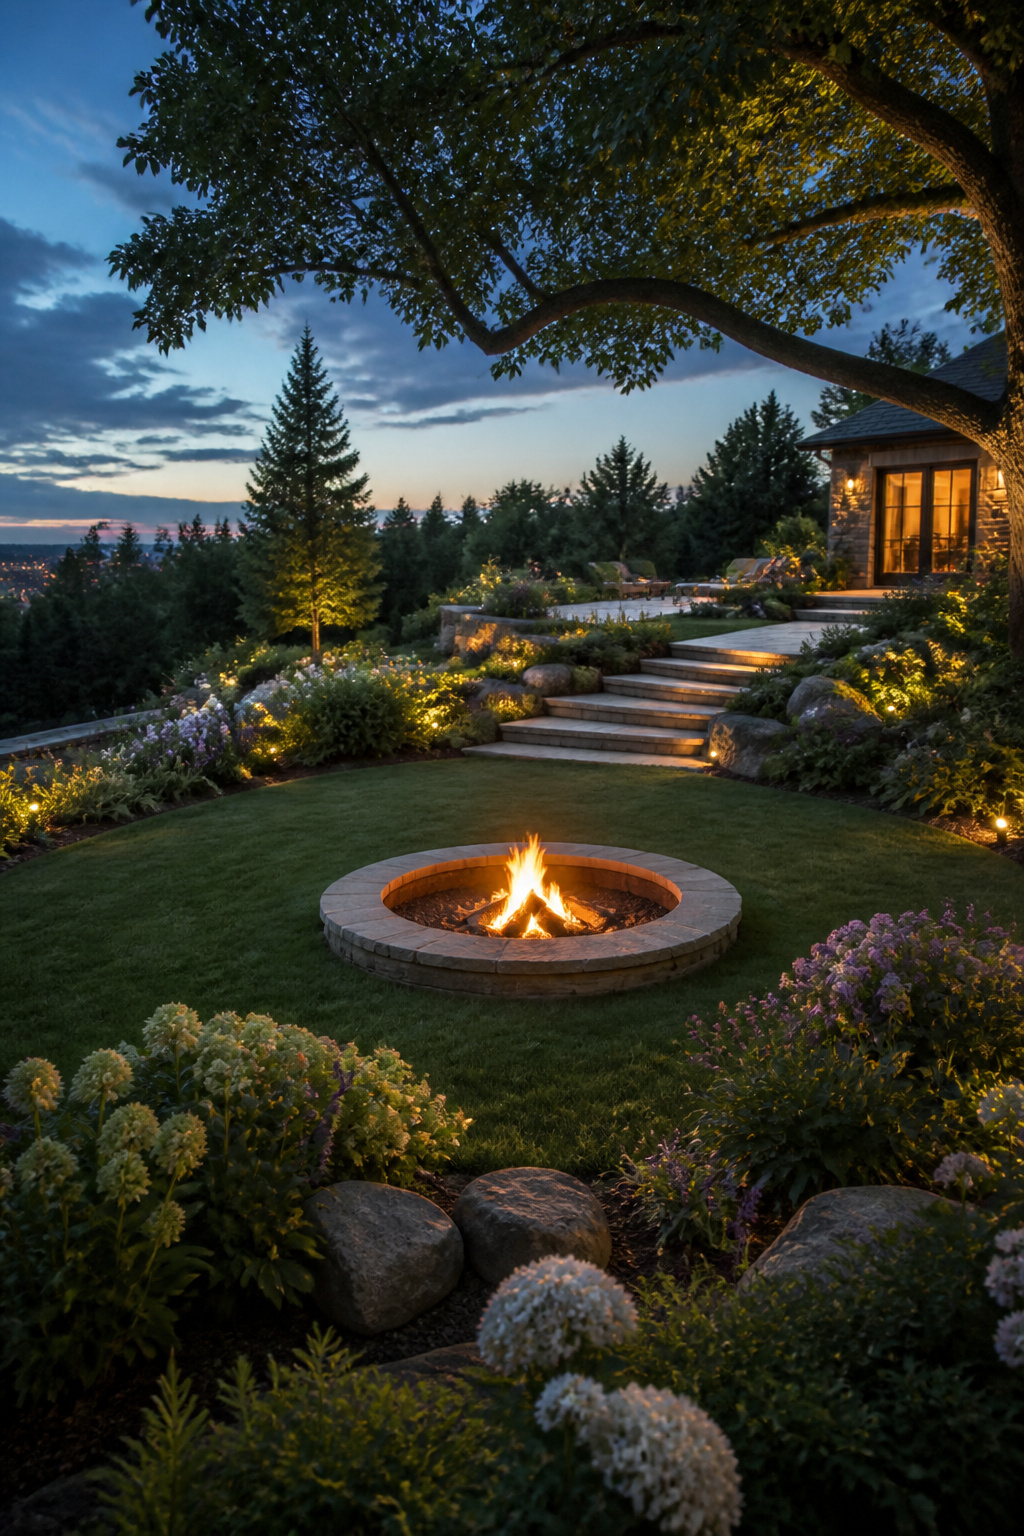
An in-ground fire pit sinks low enough that the rim sits at or below the surrounding grade, which keeps the sight line open but turns drainage into the whole project. Dig down 12 inches minimum to give the fire room and to build a base that water can escape through. Shovel out the soil, then pack in a 4-inch bed of crushed stone so any rain that finds the hole has somewhere to go instead of pooling around your wood.
The surrounding ground has to work with you, not against you. Grade the soil so it slopes away from the pit on every side; otherwise the depression you just dug becomes the easiest place for water to collect. That slope is what keeps the stone base doing its job.
A ring this low hides from view after dark, which makes it a trip hazard for guests, kids, and dogs. Keep it clear of paths people cut through the yard, and mark the edge with light or a contrasting material so the lip reads as a border, not a surprise. Build cost runs roughly $100–$350 and a weekend of work, and the skill level sits at intermediate: you are managing excavation, slope, and a heat-rated liner all at once. This one fits an open, low-traffic yard where the fire can recess into the landscape without fighting foot traffic for space.
14. Above-Ground Fire Pit
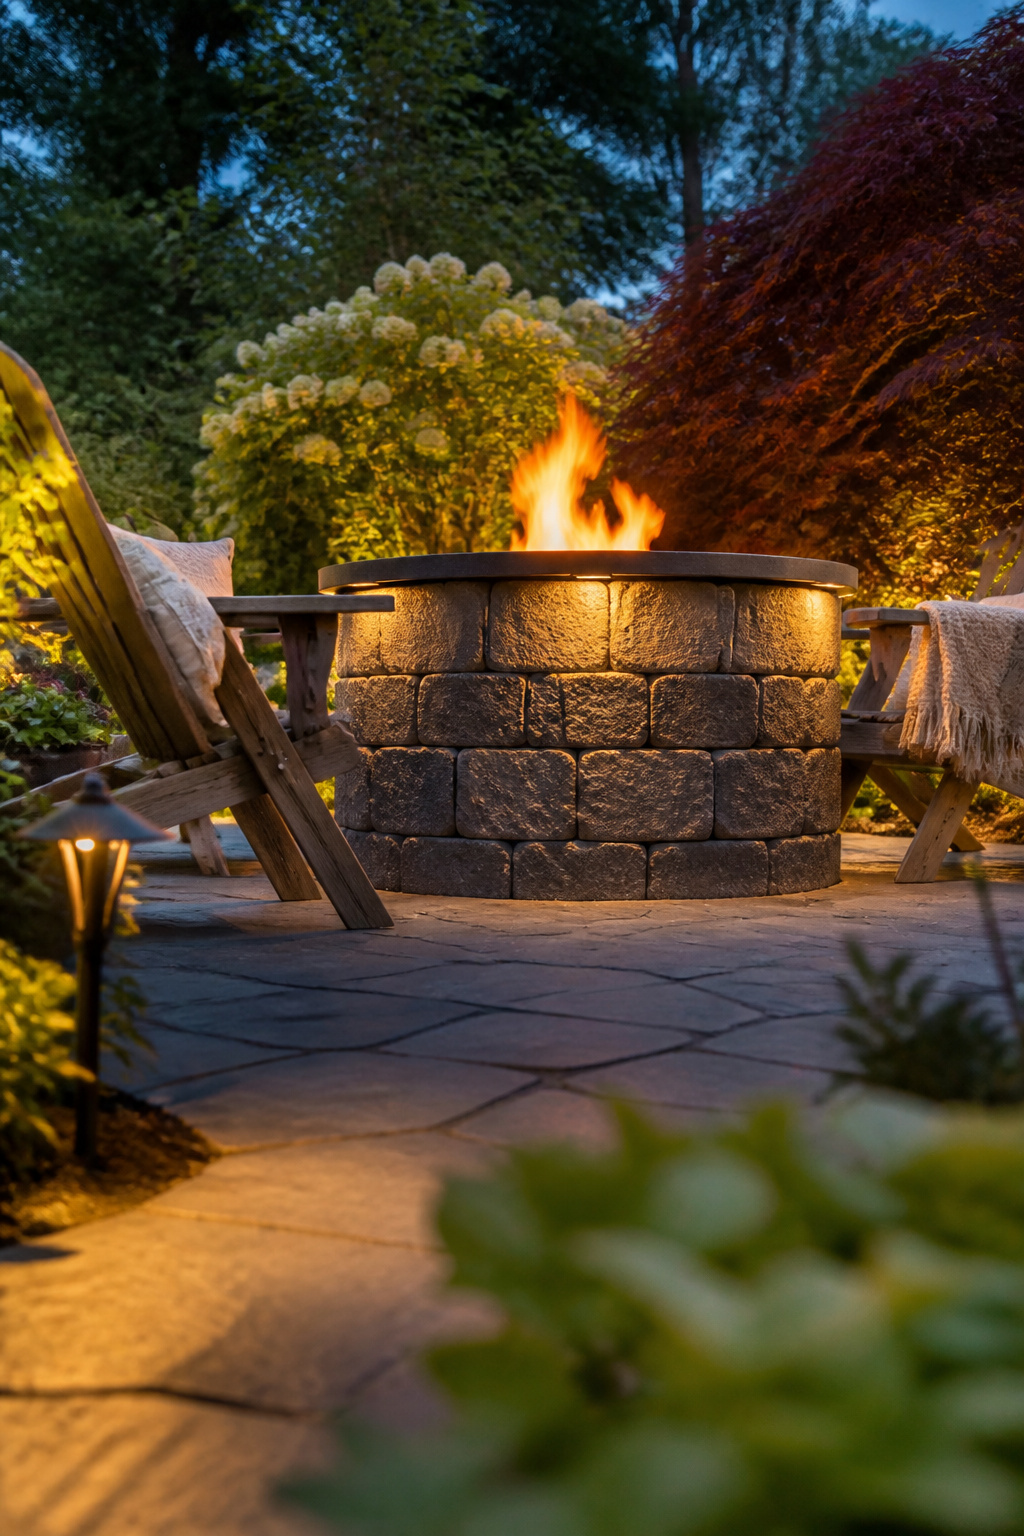
An above-ground fire pit starts at six inches of wall height above the surrounding grade, and most store-bought rings and DIY block stacks sit well above that line. Those raised walls do real work: they block wind that would otherwise scatter embers across your patio, and they radiate heat sideways toward seated guests instead of letting it all escape upward. The taller you build, the more structural stability matters. A dry stack of cinder blocks may hold at two courses, but at knee height or above you will want to think about how the weight distributes and whether the base can handle it without shifting.
I have seen the math on these projects turn fast. A concrete-block surround with a fire-safe insert runs an estimated $80 to $275, beginner skill level, half to full day of work. The key move is choosing the insert first and sizing your block wall to its clearance requirements, not the other way around. Ordinary concrete blocks are fire resistant, not fire rated; direct flame exposure will eventually make them crack or spall. Treat the blocks as exterior structure only, never as the firebox itself. Level a non-combustible base, dry-stack a precise outer form, and finish the surrounding ground with one consistent material so the whole setup reads as a room rather than a pile of yard supplies.
15. Mini Fire Pit
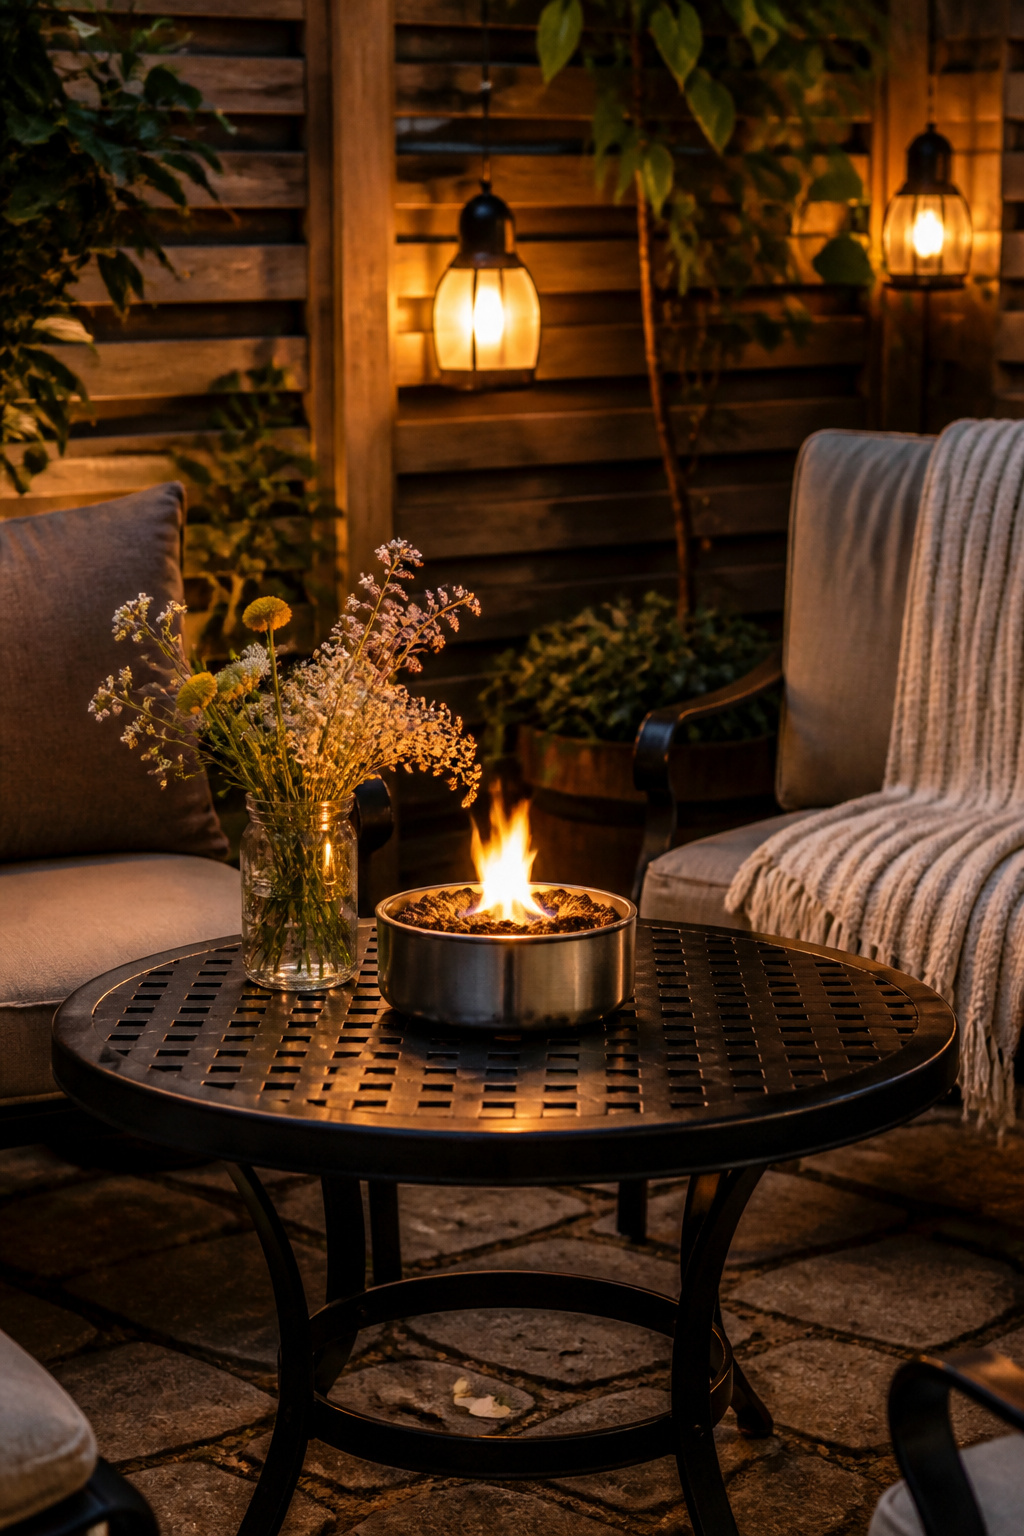
A mini fire pit under 15 inches across burns gel fuel or small propane canisters and delivers atmosphere more than real heat. The flame is pretty, and that is about it. You will not roast marshmallows or warm your hands on a cool evening, so buy it for the look and treat any warmth as a bonus.
I kept one on my patio table for two seasons. The unit came with a thin metal heat shield underneath, and the manufacturer listed wood surfaces as approved. The finish on my table still dulled in a perfect circle where the shield sat. I moved it to a stone side table and never put it back on wood, shield or not.
These run $50–$225, and most builds take a beginner an hour or two. Use a listed burner only, set it in a stable vessel that does not block vents, and keep the area clear of textiles, plants, and sleeves. If you use liquid fuel, let the unit cool completely before refilling. The flame is small, but the risk is not.
16. Concrete Fire Pit
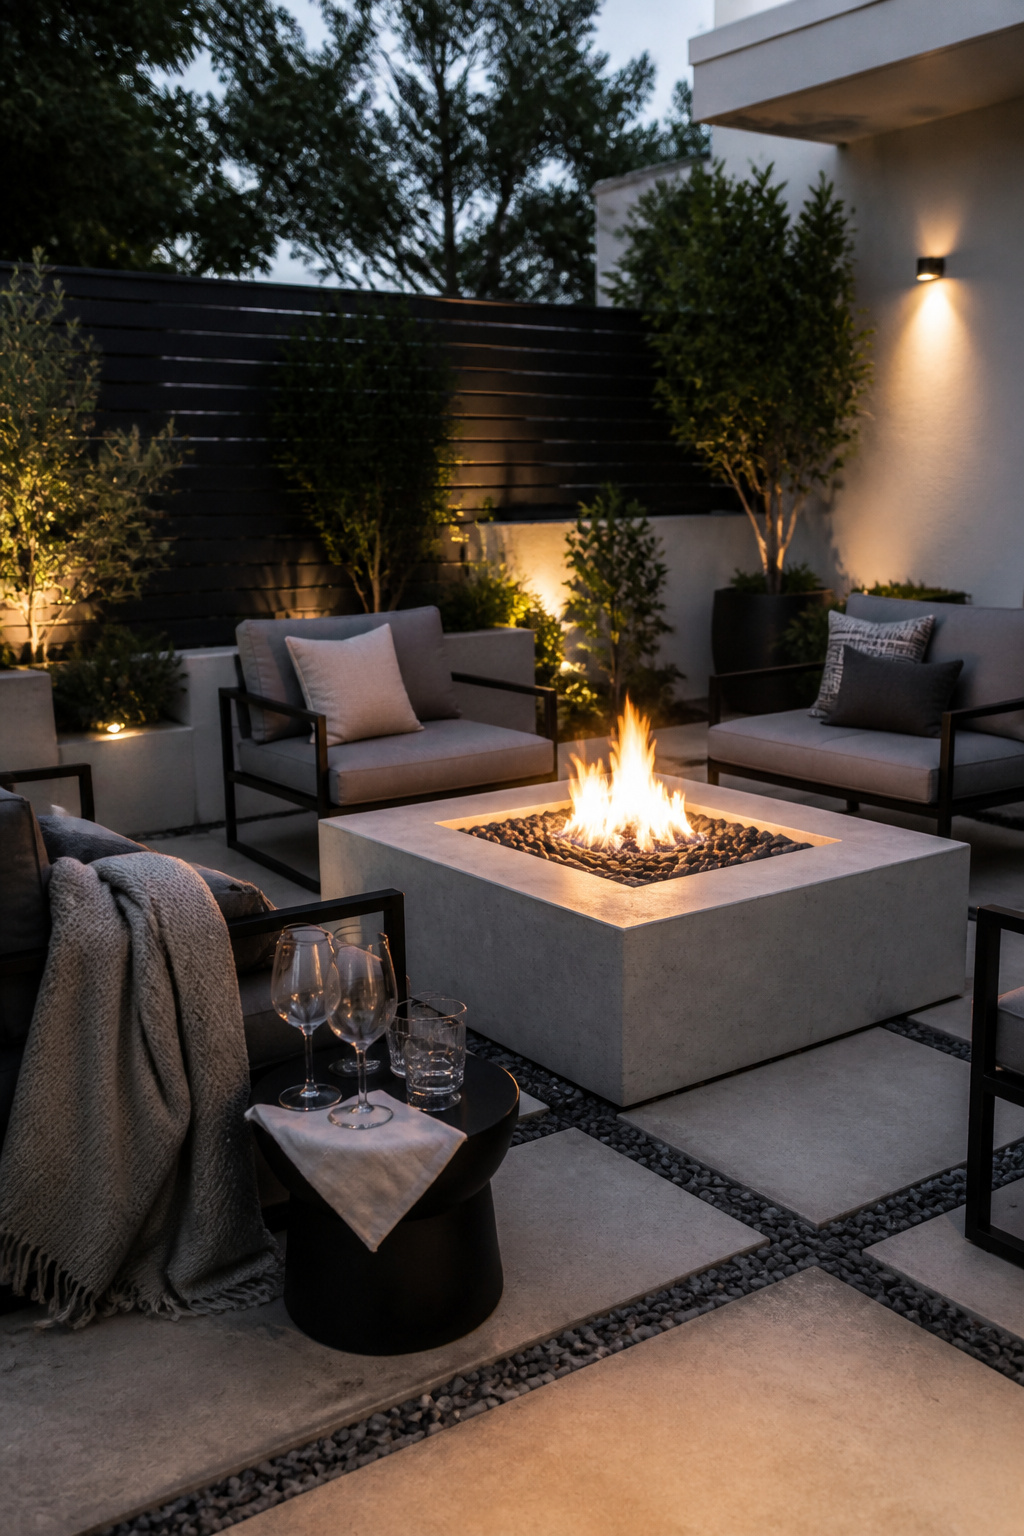
Concrete fire pits run from poured-in-place cubes to precast bowls you drop onto a pad. The clean lines suit modern patios, and a wide rim can double as bench space without extra furniture. What convinced me, reading build logs, is how many builders skip the thermal question and watch the surface flake within a season.
Standard concrete spalls and cracks under direct heat. The trapped moisture flashes to steam, and the aggregate expands at a different rate than the paste. For anything that holds flame, refractory or high-heat concrete mixes handle the cycling without the damage. I would not use backyard-grade bag mix for the firebox itself.
Span matters too. Anything over 30 inches across needs reinforcement, and the sources are split on method. Fiberglass mesh resists shrinkage cracking but can burn out at the surface over time. Rebar handles the load but must sit fully encased; a bar too close to the hot face corrodes and pops the concrete. My read is that 30 inches is the line where one or the other becomes non-negotiable, and a bowl with integral seating probably wants both.
Cost lands around $175–$600, with most of that weekend going to forming and cure time. Two to three days includes the wait; the pour itself is an afternoon if the box is built.
17. Metal Fire Pit
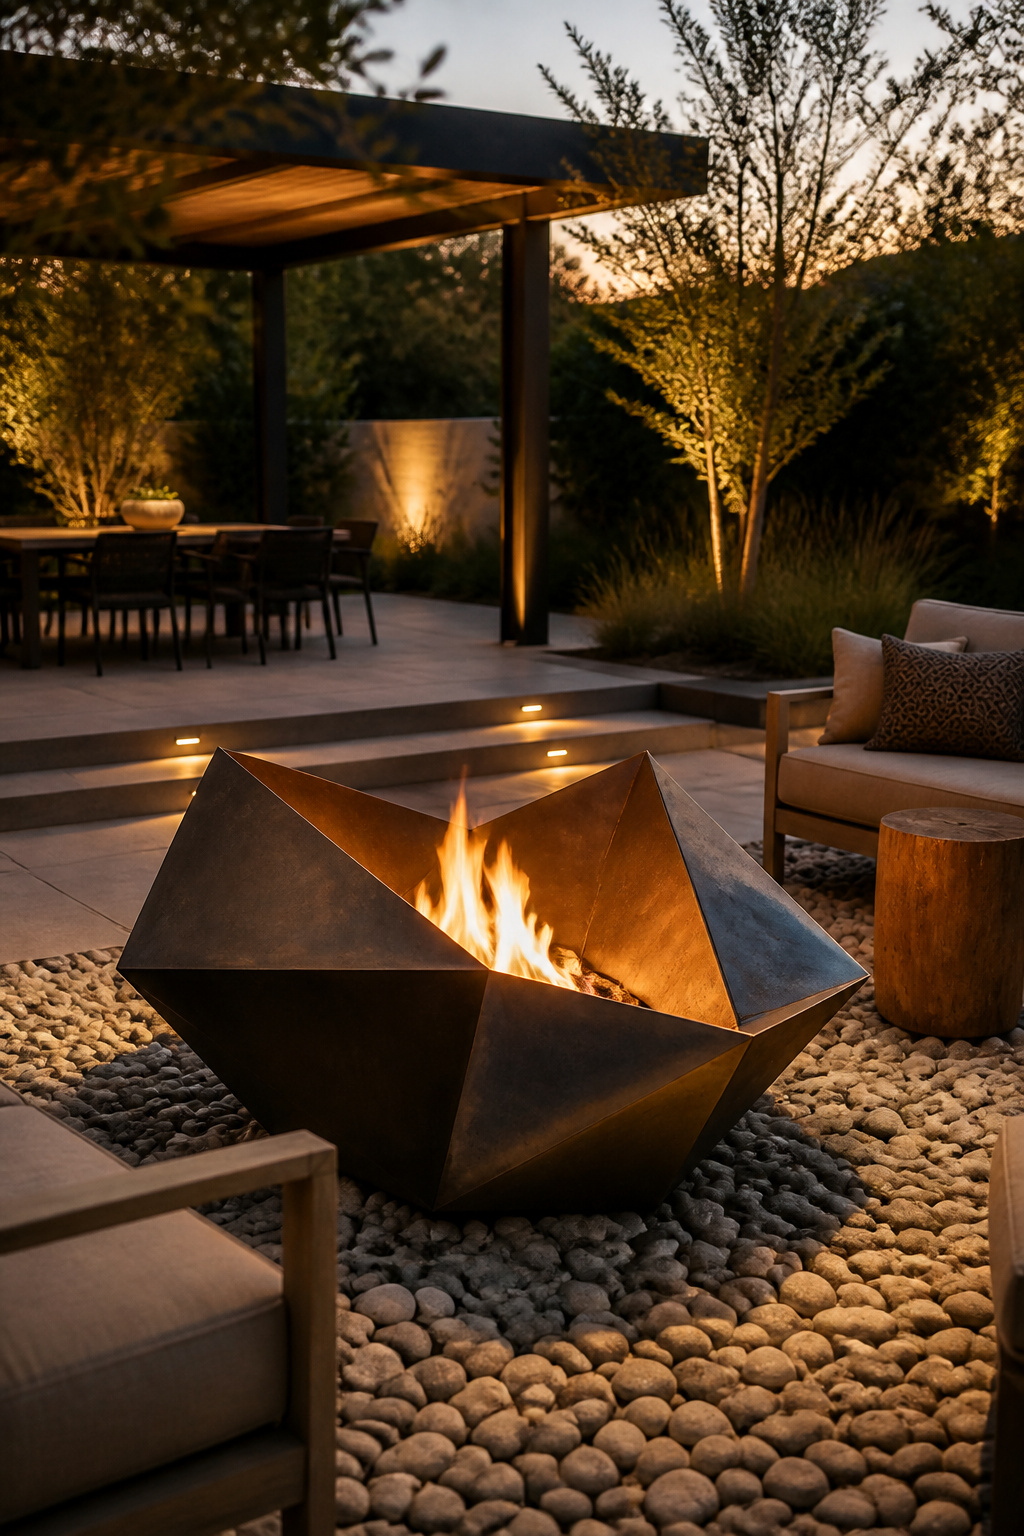
Steel bowls and fabricated geometric forms run from about $50 for a repurposed drum up to custom pieces, and each metal behaves differently once the fire is lit. Cast iron holds heat longest after the flames die, which makes it the choice for lingering outside on cool nights, but drop it on a hard patio and it can crack. Steel is lighter and more weather-resistant, though it will rust unless you manage it. I oil mine twice a year to slow oxidation, or you can let it go to the intended patina if the look suits your space. Stainless steel resists corrosion but shifts color with repeated heating, developing bronze or blue tones near the base that some homeowners like and others do not.
The poured-in concrete surround simplifies the seating and establishes the destination.
That approach works with a metal pit the same way: anchor the bowl with a fixed surround and you turn a movable object into a place people gather.
18. Wood-Burning Fire Pit
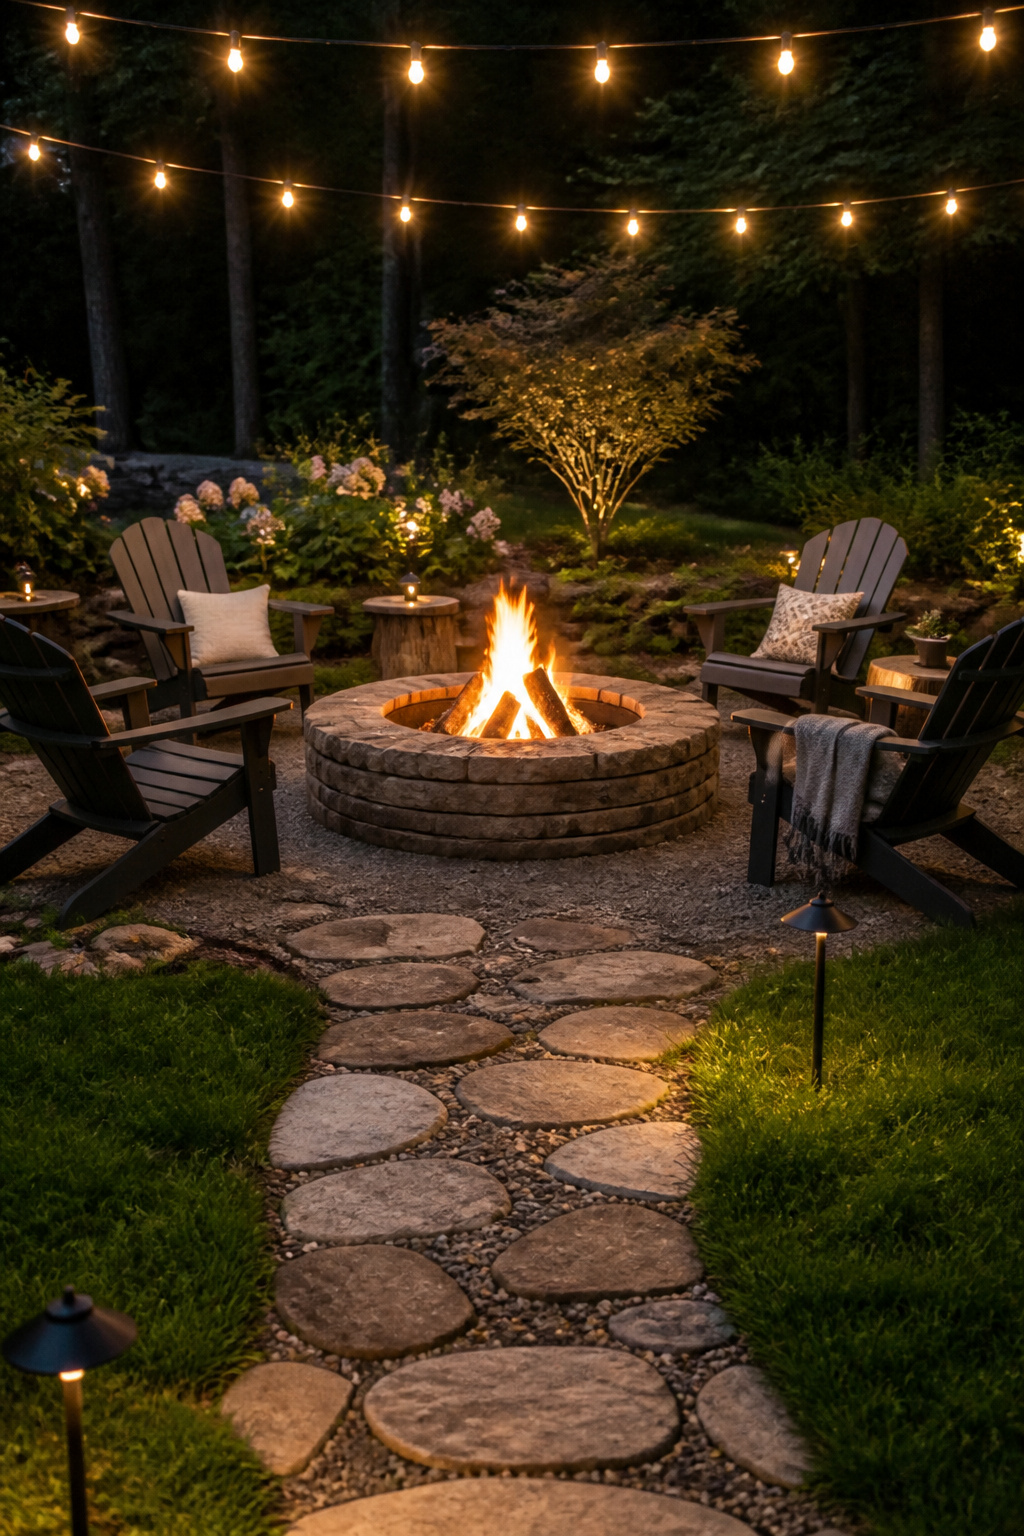
Wood-burning fire pits deliver the sound and smell that manufactured fuel never quite matches. The trade is more tending and stricter rules.
I set mine with twenty feet of clearance from any structure, including fences and low branches. That distance felt excessive the first season, until an ember sailed farther than I expected on a gusty October night. Wind direction matters as much as distance; a spot that seems sheltered at noon can turn into a channel after dark.
Dry months call for a spark screen. Mine sits on a hinged ring so I can reach in to adjust logs without removing it entirely. The mesh is fine enough that I have not had a single cinder escape since I started using it, though I still keep a bucket of sand beside the pit because water on hot ash turns to steam and spreads embers.
Ash disposal is where patience pays. I let coals sit for three full days, then sift the remains into a metal bucket. Adding hot ash to a compost pile or cardboard box has started enough garage fires in my county that the local extension office warns against it every spring. The cooled ash goes straight to the garden beds; tomatoes seem to like the potassium, and I like not carrying a fire risk through my side gate.
19. Gas Fire Pit
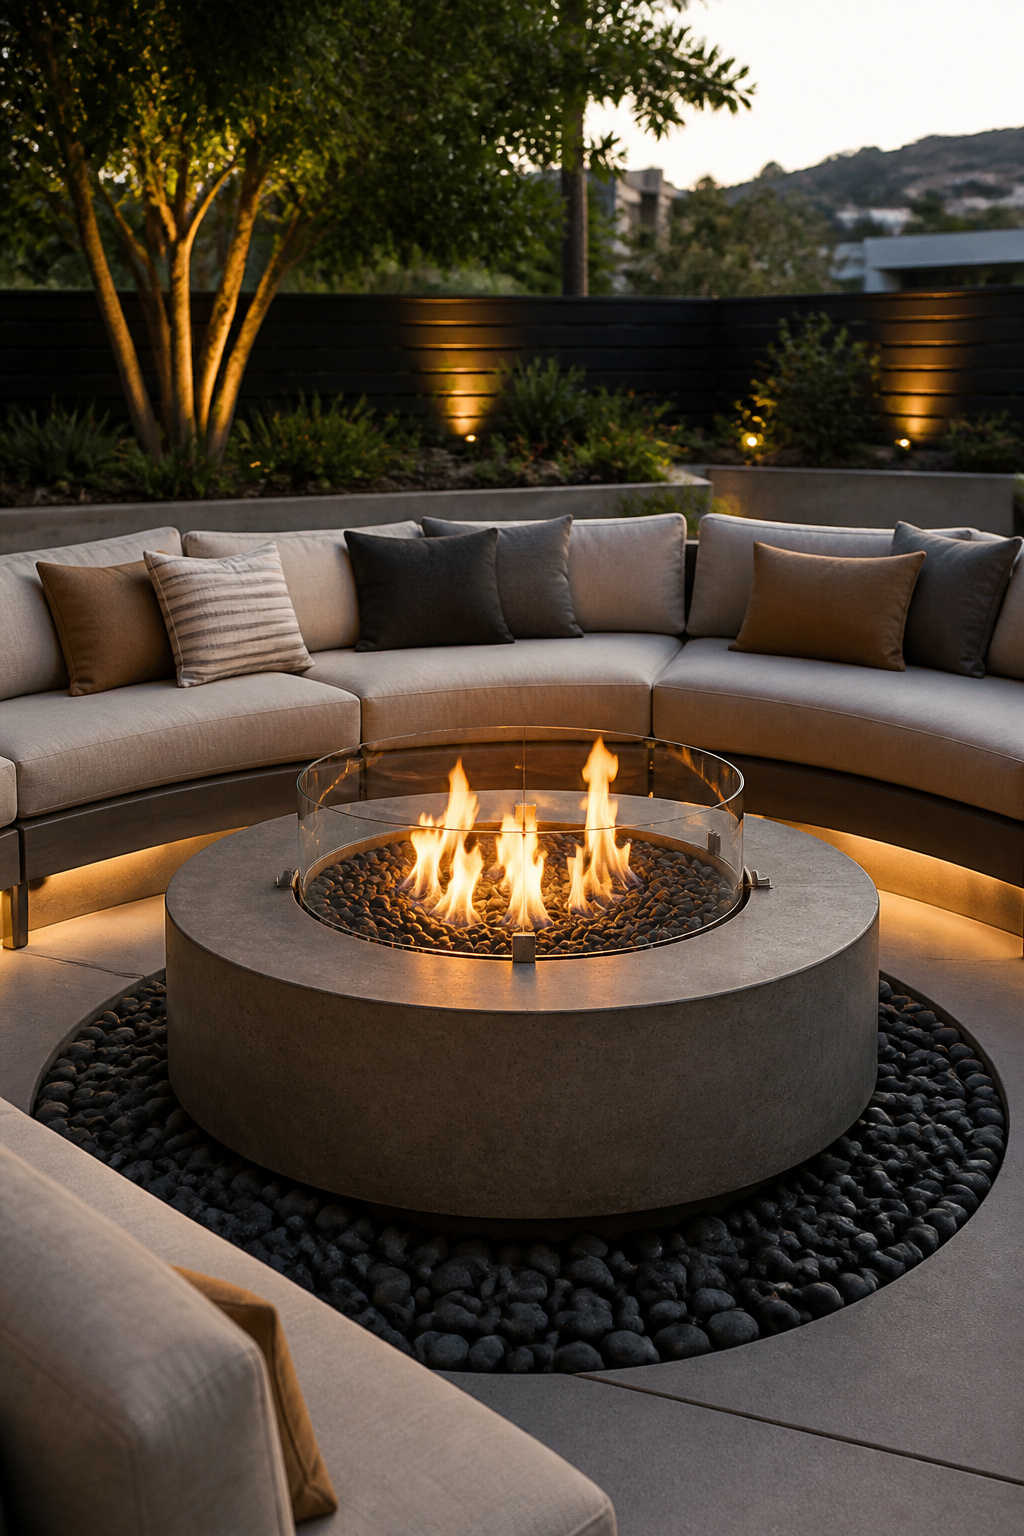
A gas burner running on propane or natural gas sits under the same fillers people expect from a wood fire: ceramic logs, lava rock, or glass media. The ignition comes three ways, match-lit, piezo spark, or electronic starter, and the heat matters. Fifty to a hundred thousand BTU is the range where you actually feel warmth on your shoulders, not just see a pretty flame.
The buried line for natural gas runs from the house and costs what it costs to trench and pipe, while propane means tank swaps or refills for as long as you own the thing. Convenience is real, no ash, no soot, no chasing dry wood, but the trade is the sound. A gas fire does not crackle.
One maintenance move I picked up from reading too many burner manuals: a spider screen in the burner orifice. Spiders build in the tiny ports, the gas flow goes uneven, and you get a flame that lifts or pops. The screen stops them before they lodge. Cheap part, seasonal check, problem avoided.
20. Fire Bowl
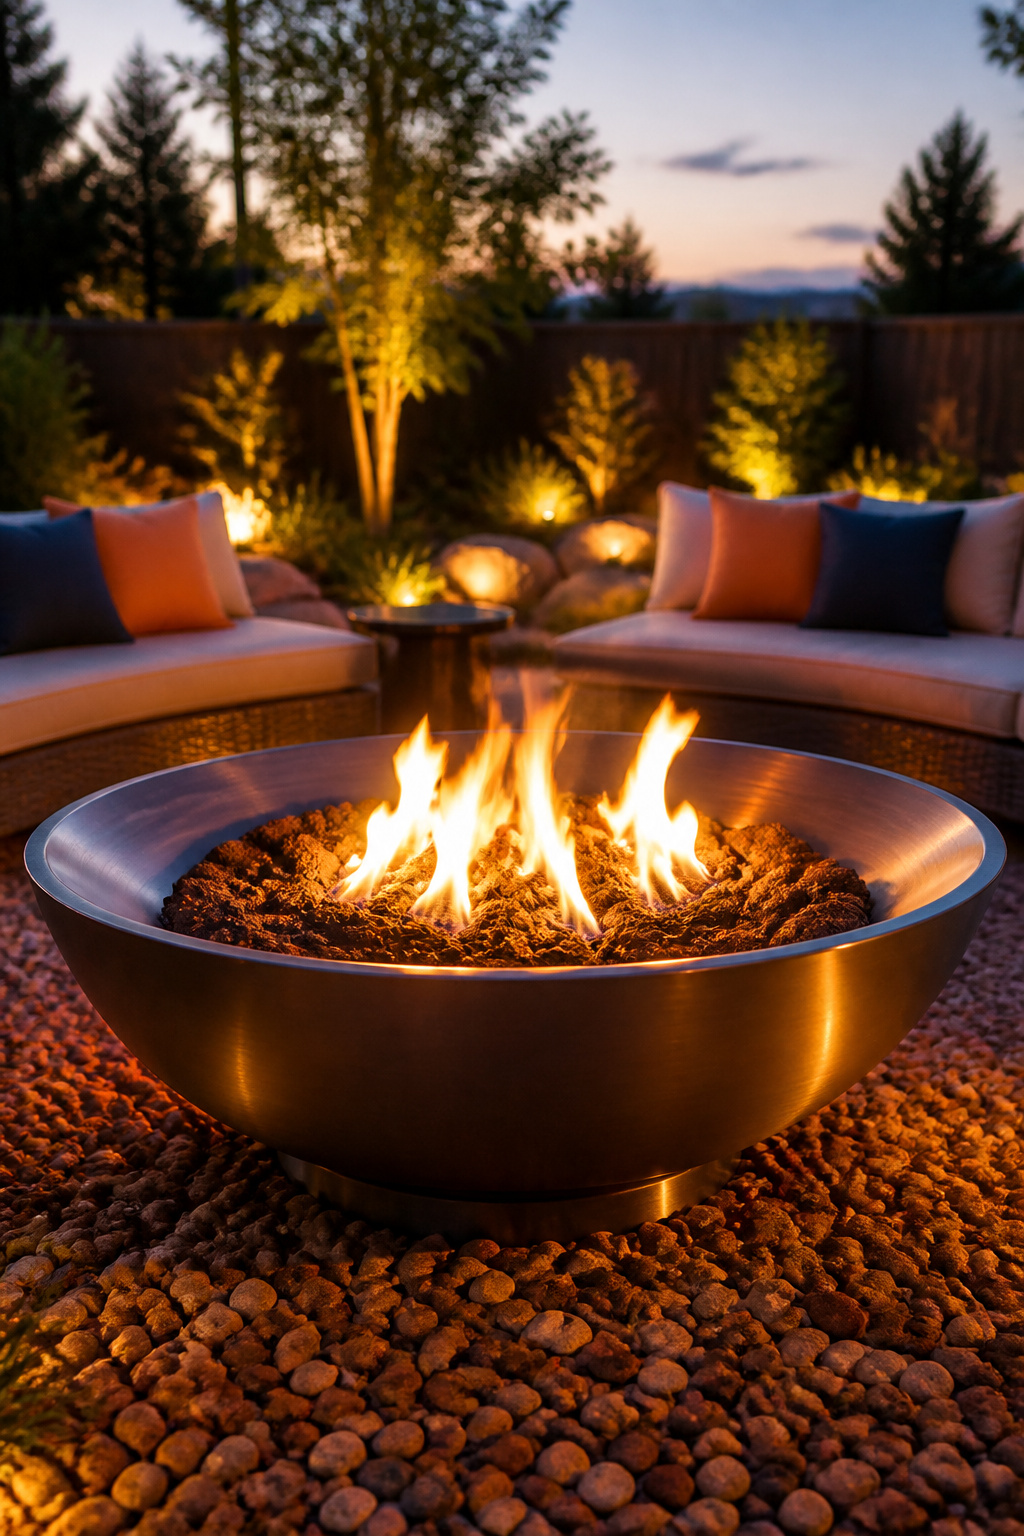
A fire bowl spreads warmth differently than the upright cylinders most people picture. The wide, shallow shape radiates heat across a broad horizontal circle, which makes it the better choice when you want a group to gather around it in a loose ring. The tradeoff is that heat escapes upward faster, so anyone standing back from the rim feels the drop-off sooner than they would with a deeper pit.
I learned this the hard way at a friend’s patio gathering last fall. The bowl looked generous, but guests in standard patio chairs kept inching forward while those in low Adirondack chairs stayed comfortable without crowding. The low wall works with reclined seating, not upright dining chairs. The proportions also suit spaces where you want fire visible from across the yard without building a tall structure that blocks sightlines.
Metal versions heat and cool quickly; concrete holds temperature longer but needs a stable base to prevent cracking. Either way, the horizontal footprint demands more floor space per seated guest than a vertical pit of the same fuel capacity.
21. Fire Pit with Seating
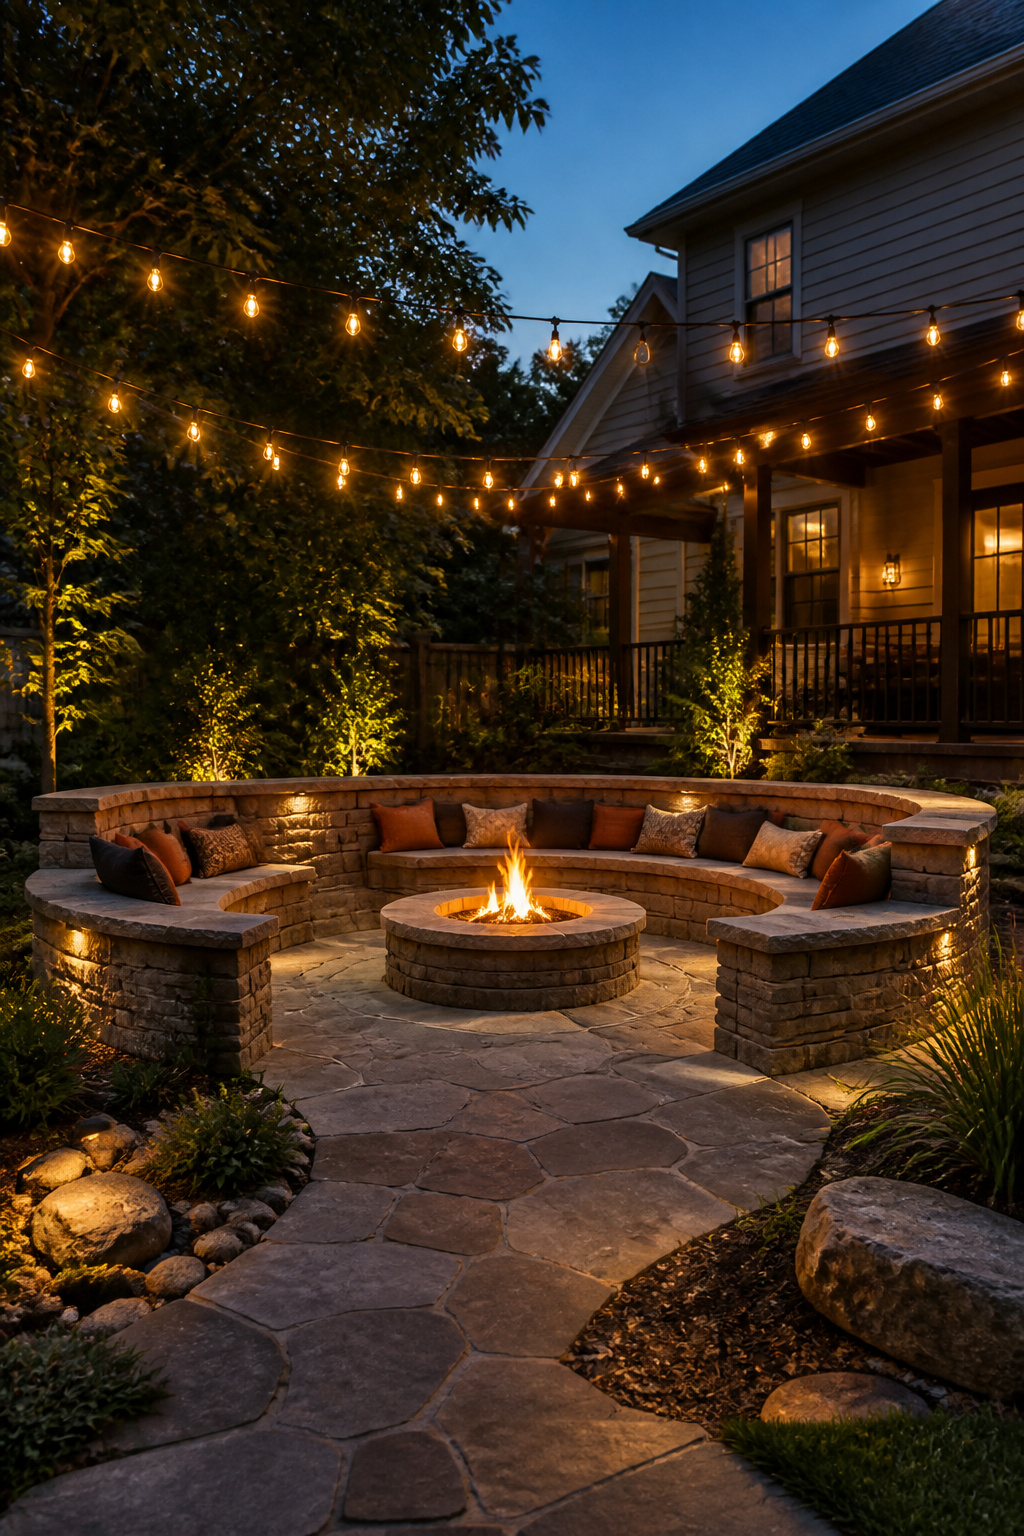
Built-in seating around a fire pit turns a loose gathering of chairs into a room that happens to be outdoors. Stone walls or bench caps define the edge and give everyone a place to settle without dragging furniture across the patio. The trade-off is permanence: you cannot spin the conversation circle toward sunset on a whim, and the seating you have is the seating you get.
Seat height at 18 inches lines up cleanly with a fire pit rim 12 to 14 inches tall, so your legs rest at a natural angle and you are not perched above the flames or sunk below them. What matters more than height is the gap in front of you. I leave at least 30 inches between the seat edge and the flame; less than that and knees start retreating, especially once the fire catches. Built-in benches can run continuous around the pit or break into sections for entry points. Sectional sofas or matched dining sets do the same job with the same spacing rules if you prefer furniture you can rearrange when the season changes.
22. Fire Pit with Lighting
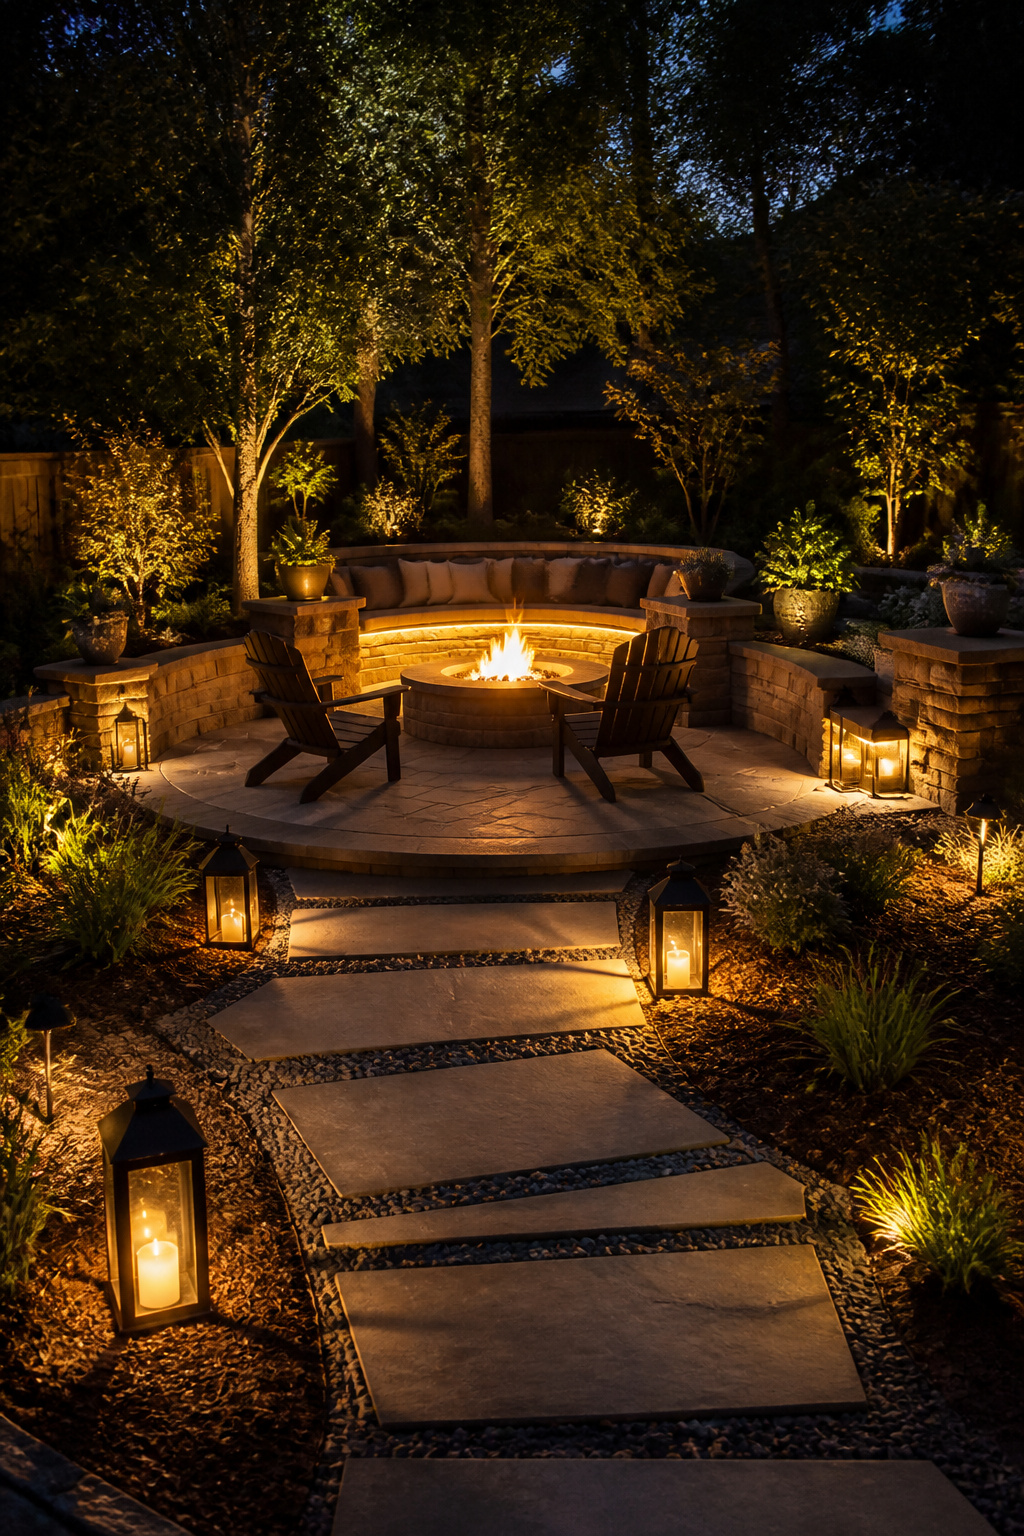
LED strips tucked under the cap of a surrounding bench cast light downward without throwing a beam across the fire itself. The first time I wired a pit this way, I used 4000K strips because they were what the hardware store had in stock. The cool white made the flames look muddy and cheap, like a gas-station coffee, so I pulled it all out and started over.
2700K is the temperature that lets flame stay the star. Anything warmer shifts toward amber and disappears against the orange; anything cooler starts competing for attention.
A separate dimmer circuit matters more than I expected. With the bench lights on full, guests look at the seating, not the fire. I run the path lights and the bench caps on one dimmer I can drop to maybe thirty percent once the wood catches. The fire stays the brightest point in the yard, which is the whole reason I built the thing.
Path lights leading inward should be low, knee height or below, so they guide without announcing themselves. I spaced mine every six feet along the walk, but that number shifts with how dark your property gets. The point is to feel your way toward the glow, not read a map.
23. Fire Pit with Cooking Grate

A fire pit with a cooking grate turns the evening fire into the evening meal without wheeling out a separate grill. Set an adjustable grate 12 inches above hot coals for searing steaks, or raise it to 18 inches for slower cooking that lets chicken finish through without charring the skin. Fixed-height grates work, but the adjustability matters more than I expected the first time I tried to cook over dying embers and found the heat too low to finish anything.
Cast iron grates carry heat beautifully and last decades if you treat them right. Season them the same way you would a skillet: oil, bake, repeat. Paint is the wrong move here. High heat burns off most finishes, and what doesn’t flake off ends up in your food. I learned that the hard way with an early grate that looked factory-coated and left black flecks on everything the first night.
24. Sculptural Fire Pit
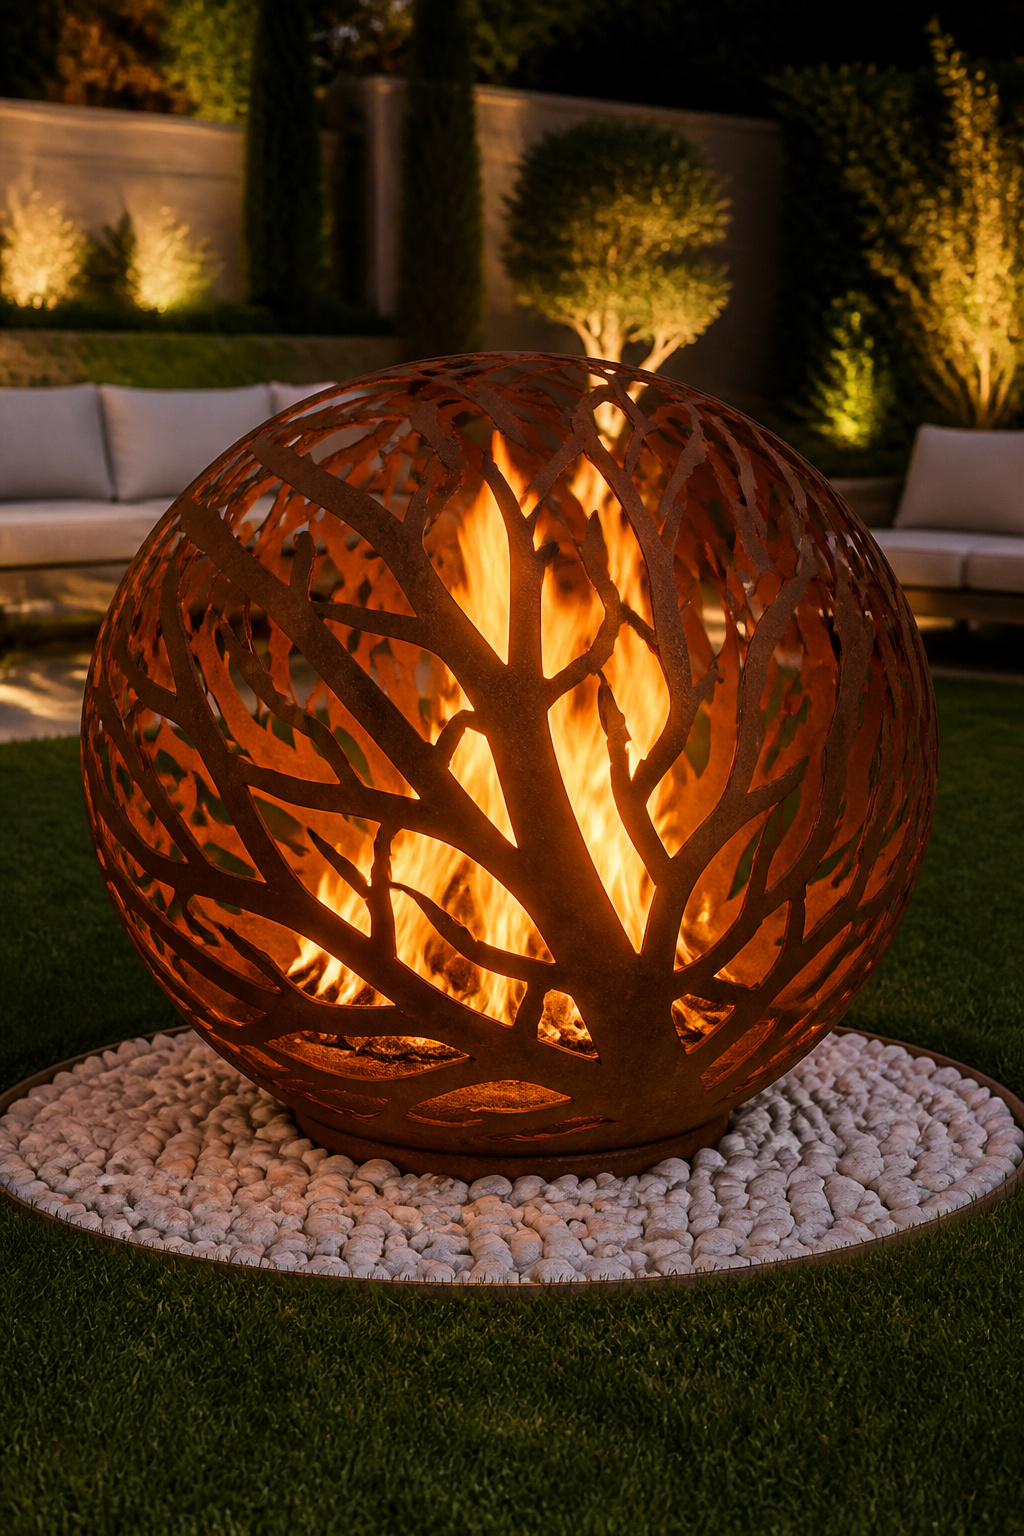
A corten sphere cut with constellation patterns, $4,200, threw star-shaped light across the patio and warmed six people adequately. That was the moment I understood how far sculptural fire pits have moved beyond the bowl-on-legs formula.
Geometric steel dominates the custom market. FireFeatures’ Fire Roll runs seven feet of stainless steel folded into an origami form that pushes warmed air outward while standing as garden sculpture when cold. The Zaha Hadid-reminiscent curves are not decoration; the encircling shape is what distributes heat.
Concrete fire bowls and raw stone forms read softer but still deliberate. Bronze finishes add warmth without rust anxiety, though cut-steel pieces need regular rust treatment since they stay exposed year-round.
The tradeoff is always the same: a propane-engineered showpiece like the Fire Roll commands the space architecturally, while organic cast forms settle into planting more quietly. Either way, fire becomes the secondary experience. The object itself holds the eye first.
25. Fire Pit with Water Feature
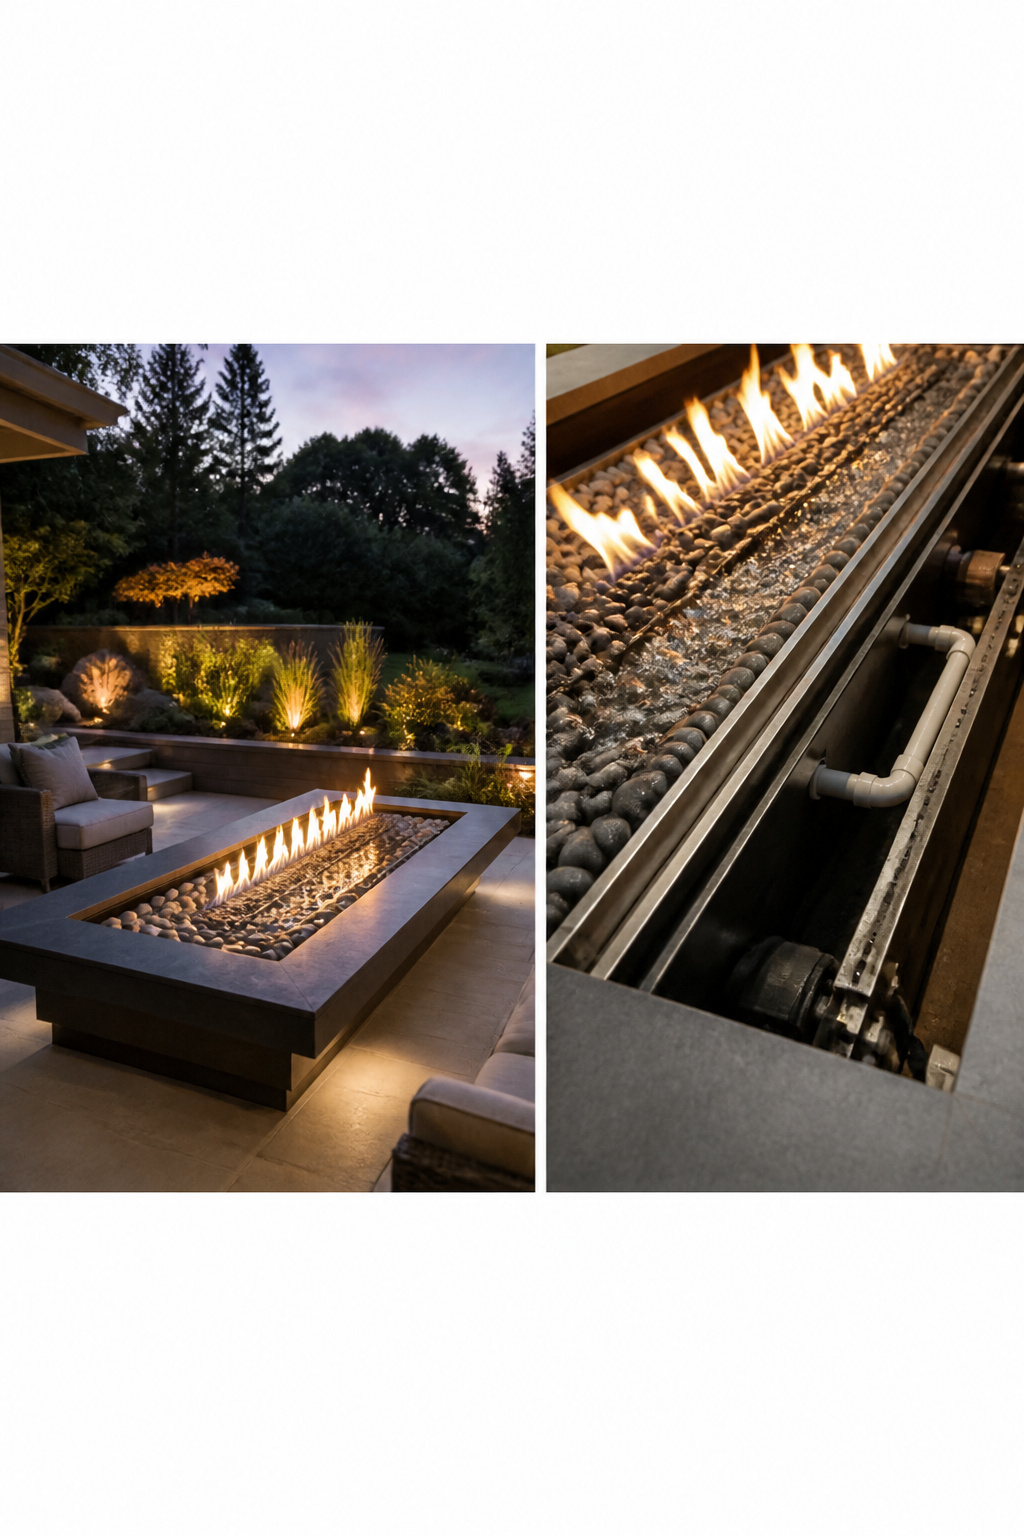
The first time a flame rose straight out of water, I thought it was a trick. What I later learned is that a gas line runs through the basin to a sealed burner sitting below the surface, and the engineering is serious enough that I would not try to build one myself.
A fire-and-water feature needs two utility runs: gas and water, each with its own shutoff, plus a pump, a sealed combustion chamber, and a basin that won’t crack from heat cycling. The burner has to stay dry enough to light and wet enough to look like it is floating. In every installation I have looked into, that balance came down to the placement of a millimeter or two.
I have watched two homeowners attempt this as a DIY project over the years. Both ended up hiring a certified installer after the flame sputtered, the pump pulled debris into the line, or the basin leaked around the gas feed. The sealed fittings and combustion codes are not suggestions; they are what keeps the feature from becoming a hazard every time you light it. If you want both elements in one place, budget for professional work and treat the doubled utility costs as the price of the effect.
26. Fire Pit with Pergola
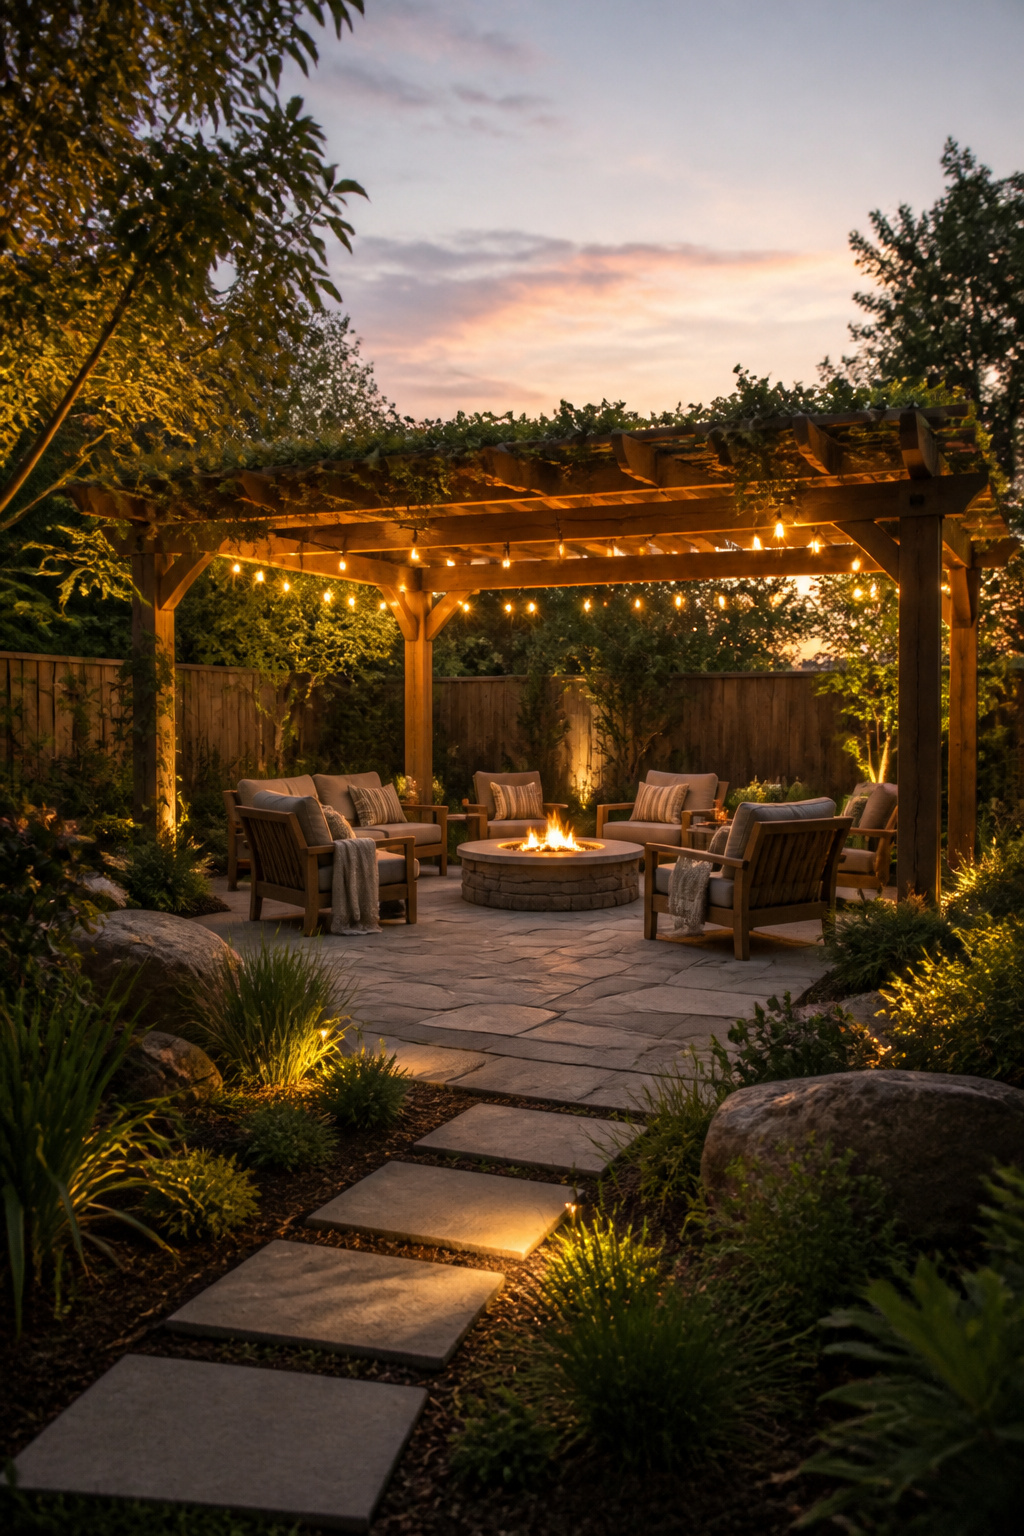
A pergola over a fire pit gives you partial shade overhead while the flame still draws open air from every side. That combination of cover and openness is what makes the idea worth building, but only if the structure stays far enough above the heat.
I set the ceiling height no lower than 10 feet at the lowest beam. Anything less and the rising heat concentrates, drying out the wood above and eventually scorching it. For any overhead member within 8 feet of the flame, I use non-combustible material or a fire-retardant treatment rated for exterior exposure. Untreated lumber at that distance is a risk I stopped taking after seeing a beam check split from repeated heating.
I never fully enclose a pergola over flame. Solid walls or a roof trap smoke, redirect heat downward, and turn the space into something closer to a fireplace without a flue. The open-beam overhead works precisely because it is not a ceiling; it blocks the midday sun while letting the fire behave like an outdoor fire, rising and dispersing as it should.
27. Fire Pit with Built-In Storage
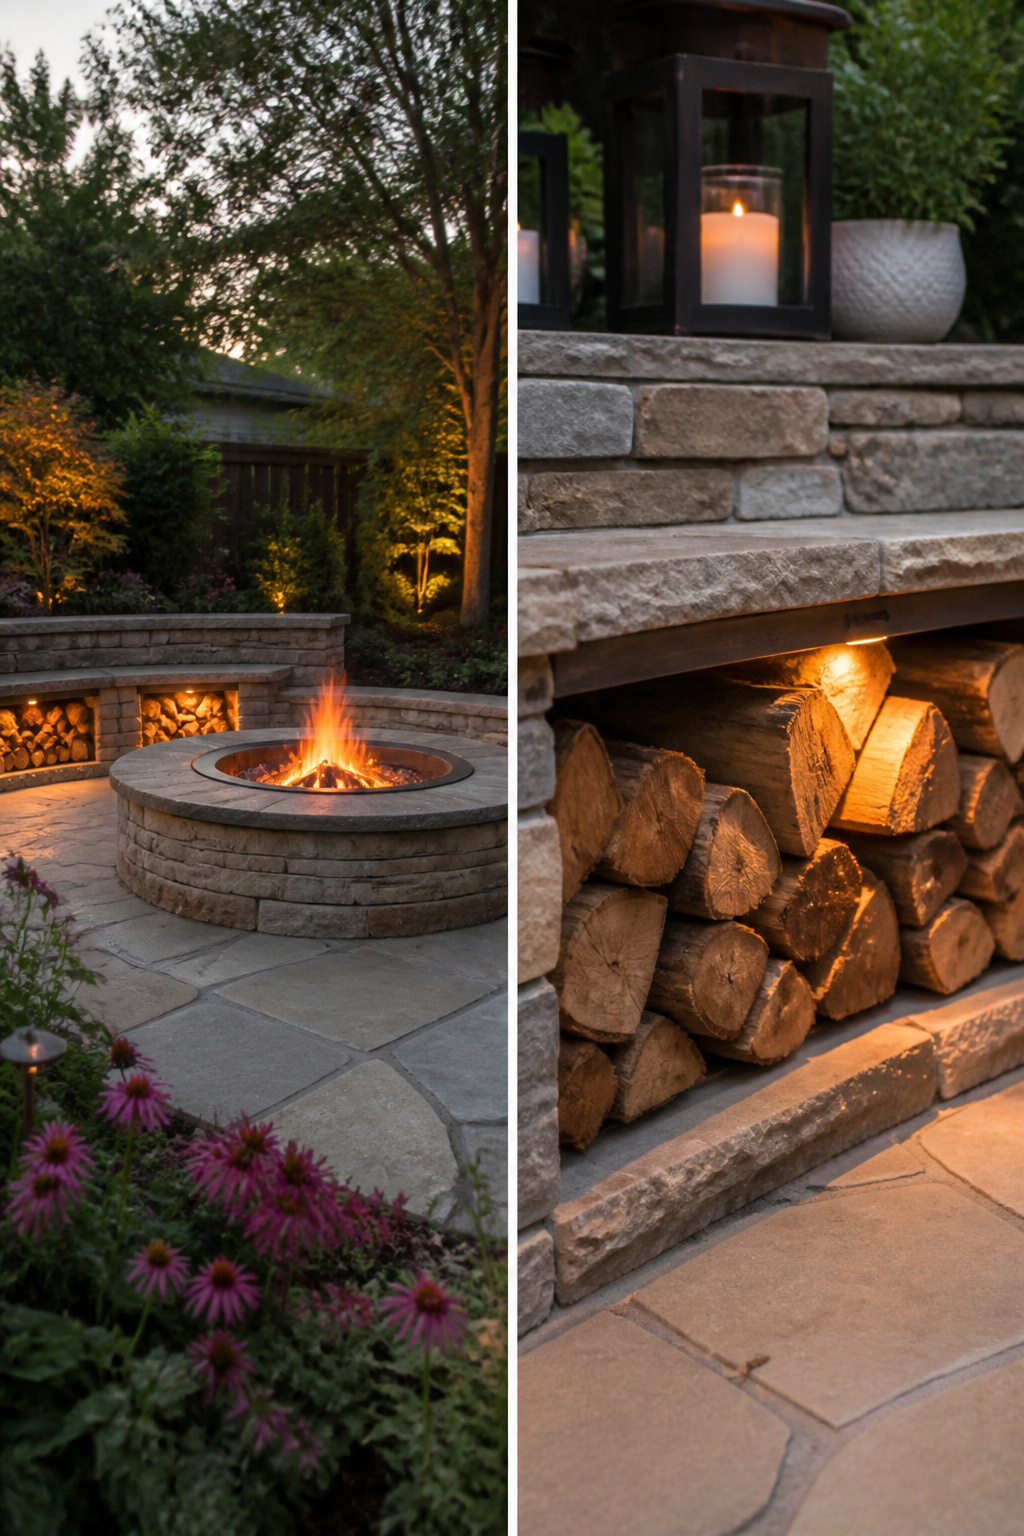
Hollow benches and seat walls around a fire pit turn dead space into storage for firewood, kindling, or the poker you always set down somewhere wrong. The catch is airflow. Without it, stacked wood sweats and molds through a season. I line my storage cavities with metal rather than leave bare wood; a hot ember rolling through a gap lands on steel, not on a surface that can char. The passages note that a steel pot and concrete tiles create that same barrier between flame and wood in a pallet-style build, and the principle carries over. Any storage opening needs at least 3 inches of clearance from flame to keep the contents from heating past safe storage. Vent the cavity with gaps at top and bottom so air moves through, or you are building a damp box, not a woodshed.
28. Fire Pit with Seating Walls
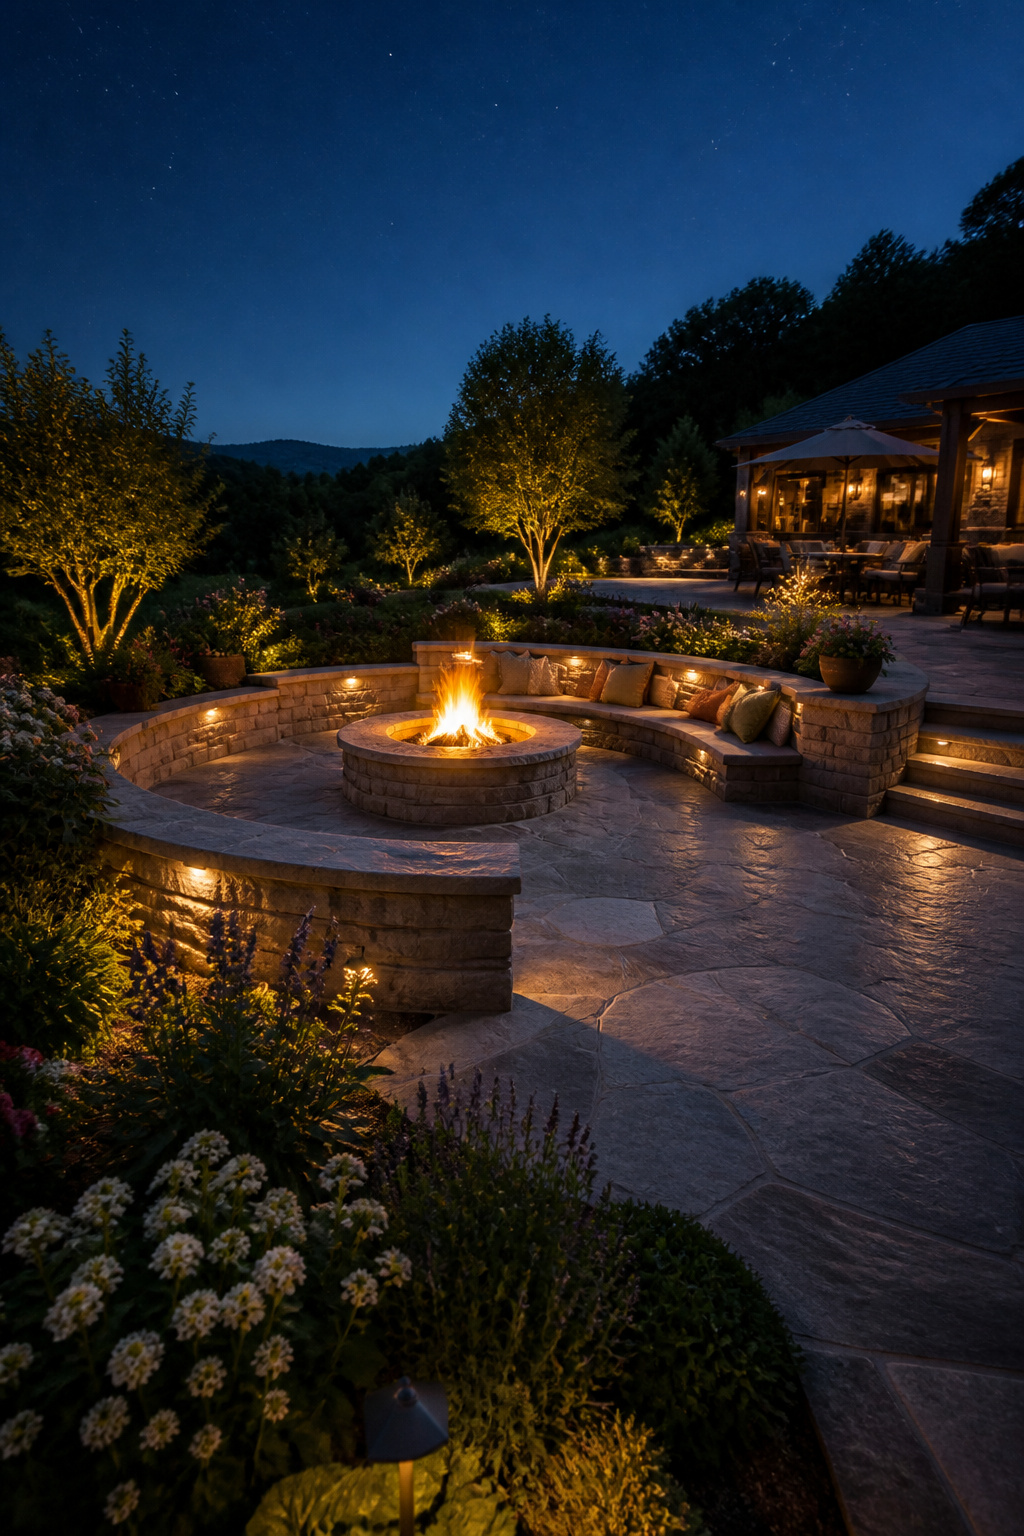
Stone or brick walls that double as seating turn a fire pit from a standalone ring into a room you actually want to linger in. The height matters more than most people guess at first: 18 inches is the sitting height that keeps your knees at a comfortable angle without feeling like you’re dropping onto a low stool. Go much higher and you’re perching; much lower and you’re doing a squat to stand back up.
Depth is the other easy detail to get wrong. A 24-inch wall lets someone lean back and still feel supported, or sit sideways with their legs stretched toward the flame. Shallower than that, and guests end up perched on the edge like they’re waiting for a bus.
The cap is where I drew the line on materials. Wood caps look warm and cost less, but they char, split, and need replacing. Thermal-resistant stone or concrete caps cost more upfront and survive the heat that radiates upward on still nights. After watching a neighbor’s cedar cap blacken across one summer, that tradeoff felt obvious.
29. Fire Pit with Decorative Rocks
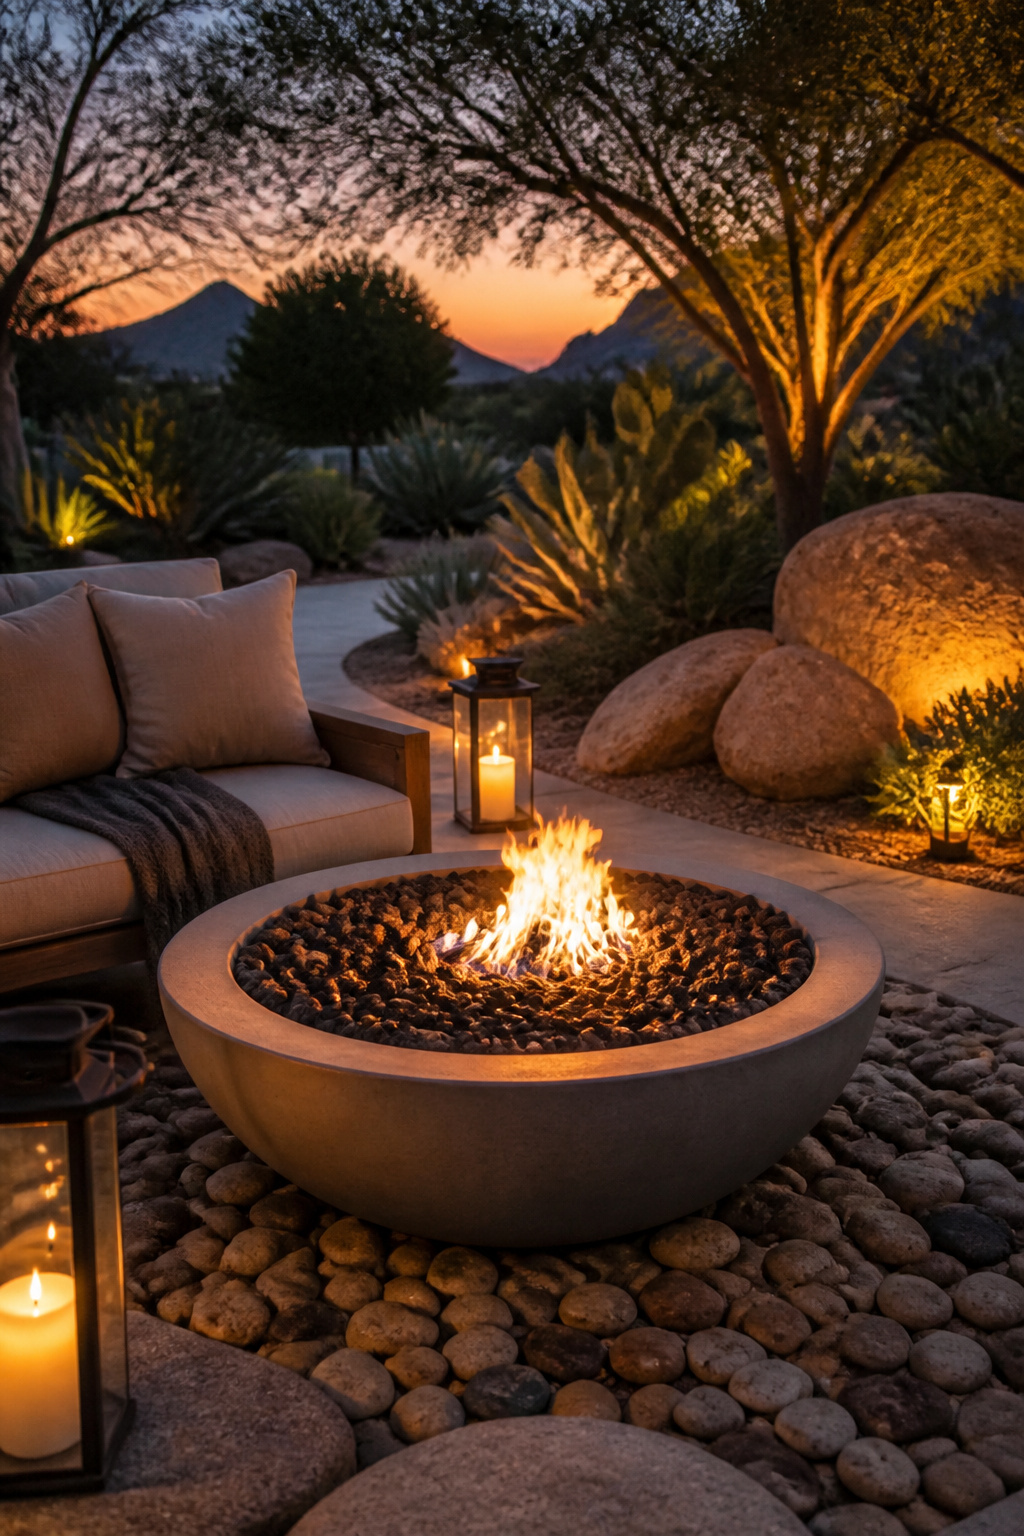
Lava rock, river stone, fire glass, and ceramic shapes each give a fire pit a different look, but only fire-rated media belongs in the flame zone. Materials like treated wood, sand, or gravel can release chemicals or fail under heat, while ordinary hard rock carries its own risk. Wet river rock in particular can explode when heated, sending shards outward with force. I learned about thermal shock the hard way: I added fire glass to a pit that was already hot, and a single shard cracked clean through from the sudden temperature change. The glass itself was rated for fire, but the timing was wrong. For gas or ethanol pits, fire pit fillers like lava rocks, fire beads, fire nuggets, or fire stones line the bowl safely and hold up to repeated burns. River stone or ceramic shapes can frame the base or sit outside the ring where they stay decorative and out of danger.
30. Fire Pit with String Lights
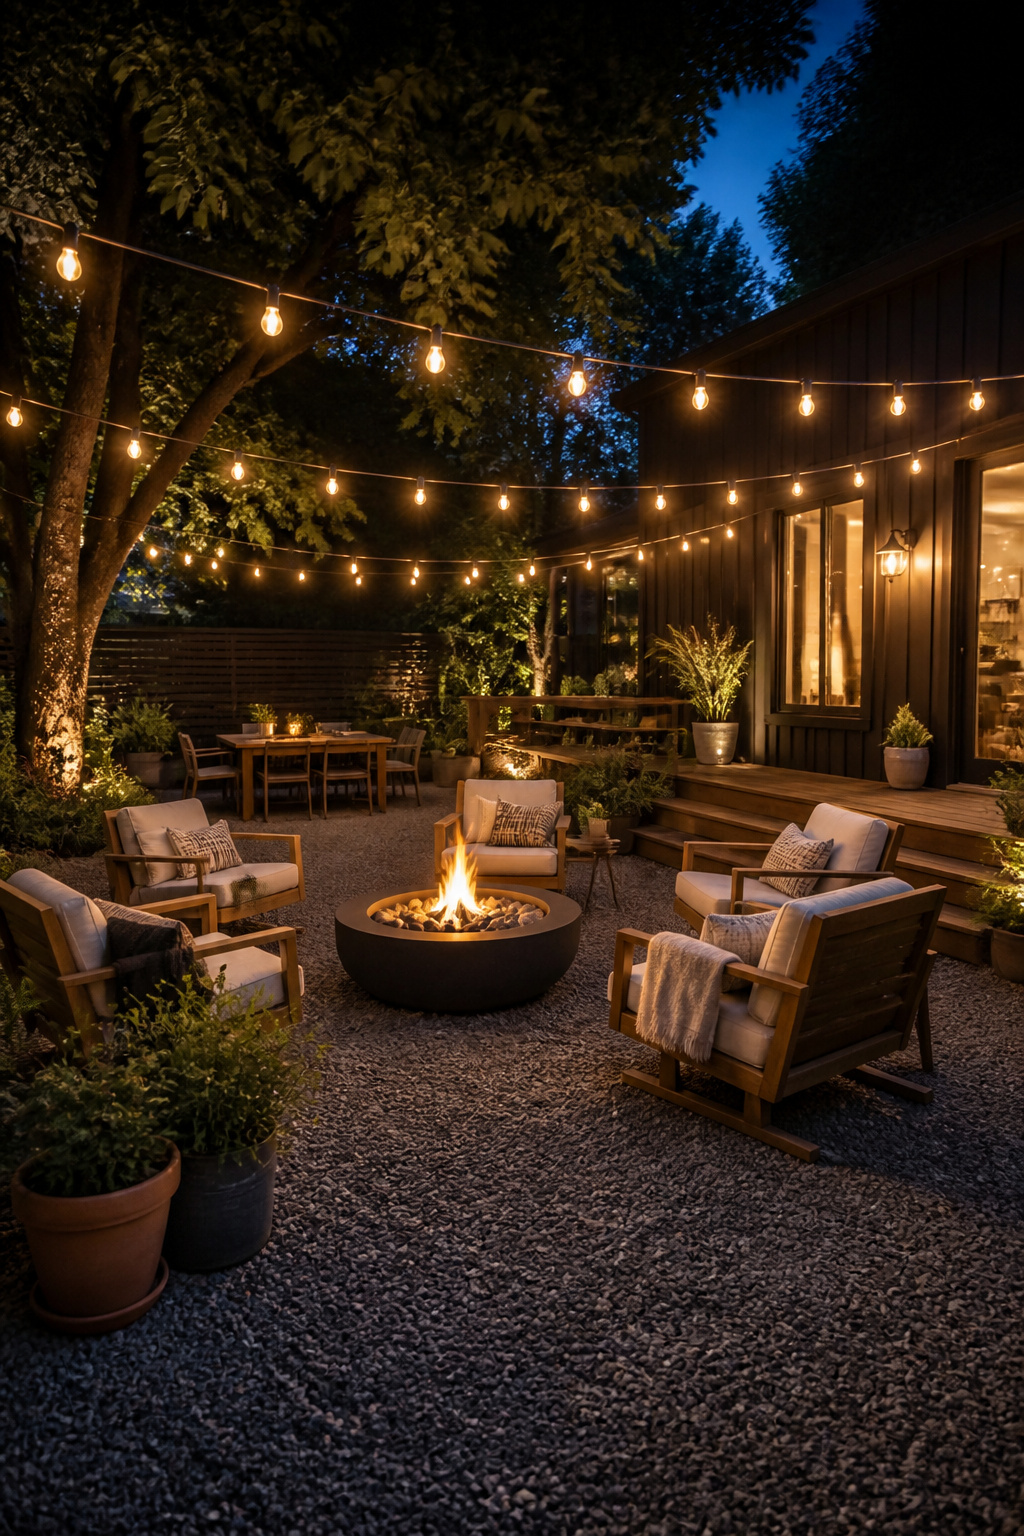
Overhead festoon or cafe lights strung above the seating area turn a fire pit into something you actually want to linger at after dark. The wire needs to run at least 10 feet above the flame, which is higher than most people guess and means planning the anchor points before you plant anything permanent underneath. I use LED bulbs for this, not incandescent. They put out almost no heat against the socket housings, and on a 50-foot run the total draw is low enough that a single outdoor-rated cord handles the load without getting warm to the touch. Outdoor-rated wire and sockets are non-negotiable; the jacketing on indoor cord cracks inside two seasons of UV and frost, and water in the socket is what actually starts the fires you read about. The cheap warm-white LEDs from the hardware store look identical to incandescent once they’re up, and they last long enough that you’re not climbing a ladder every other spring to replace the ones that shook loose over winter.
Materials
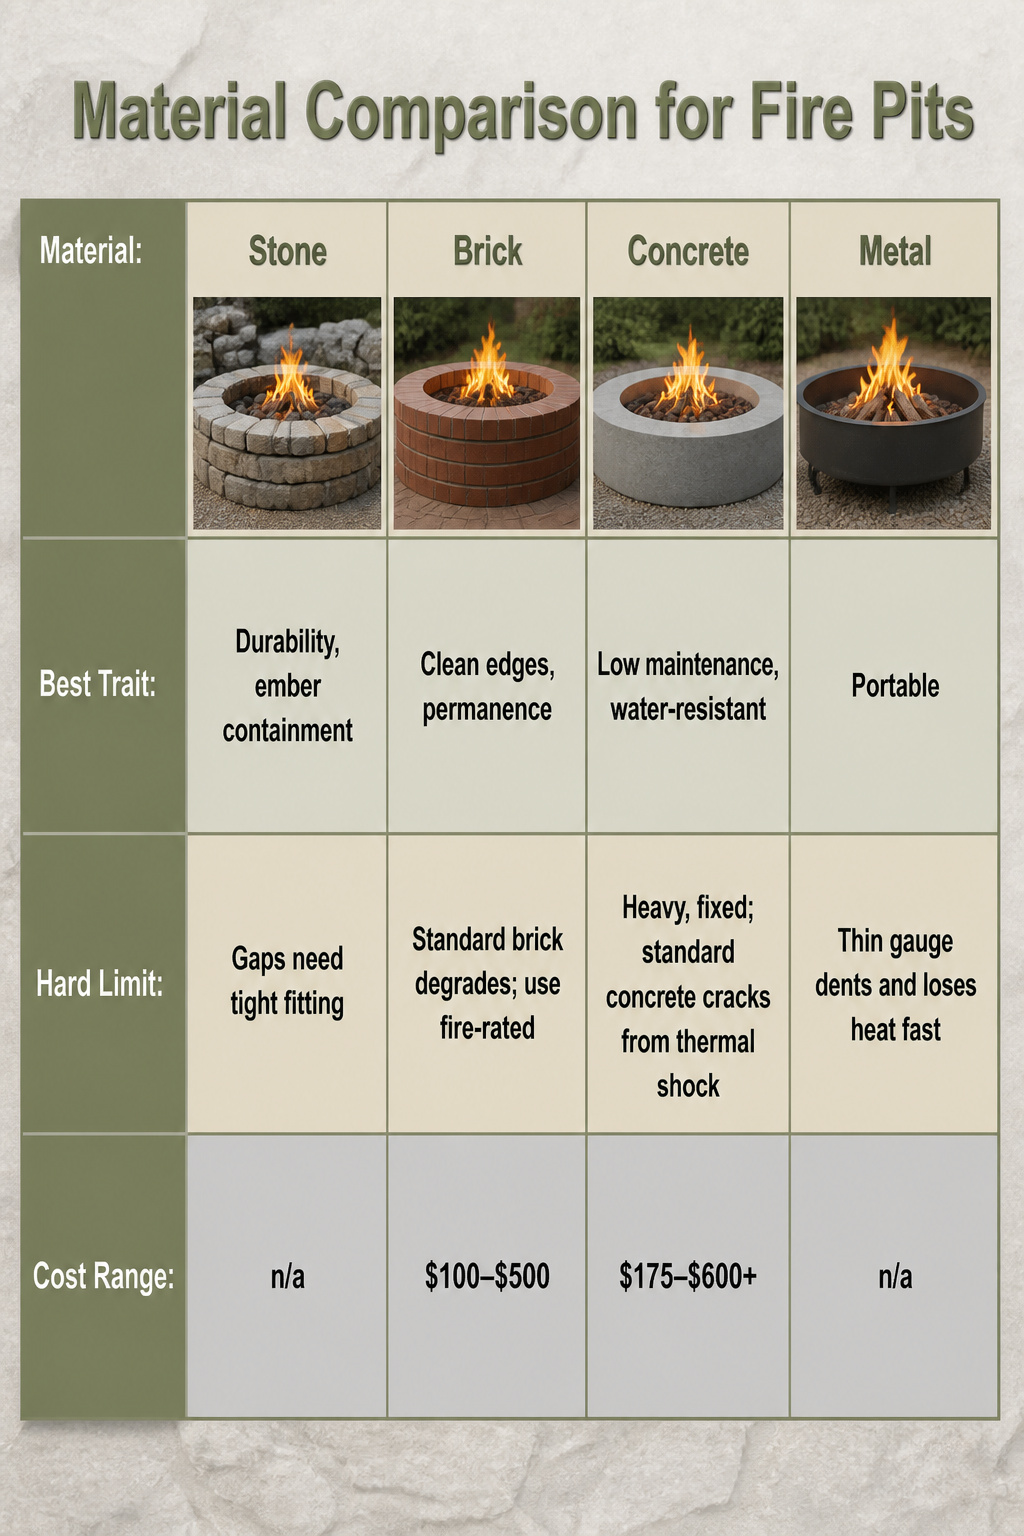
Stone holds heat well and weathers decades, but the gaps between pieces can let embers slip through. Brick gives the same permanence with cleaner edges, though standard brick degrades under repeated flame; fire-rated brick exists because the ordinary kind cracks and spalls within a season or two of real use. Concrete follows the same split, standard versus fire-rated: a basic pour traps moisture that flashes to steam under thermal shock, while refractory concrete with proper venting and a full cure cycle handles the stress. Metal bowls and rings move where you need them, yet the thin steel that keeps them light also means they radiate heat outward faster than they bank it, and they dent.
| Material | Best trait | Hard limit | Cost range |
|---|---|---|---|
| Stone | Durability, ember containment | Gaps need tight fitting | n/a |
| Brick | Clean edges, permanence | Standard brick degrades; use fire-rated | $100–$500 |
| Concrete | Low maintenance, water-resistant | Heavy, fixed; standard concrete cracks from thermal shock | $175–$600+ |
| Metal | Portable | Thin gauge dents and loses heat fast | n/a |
Fuel Types
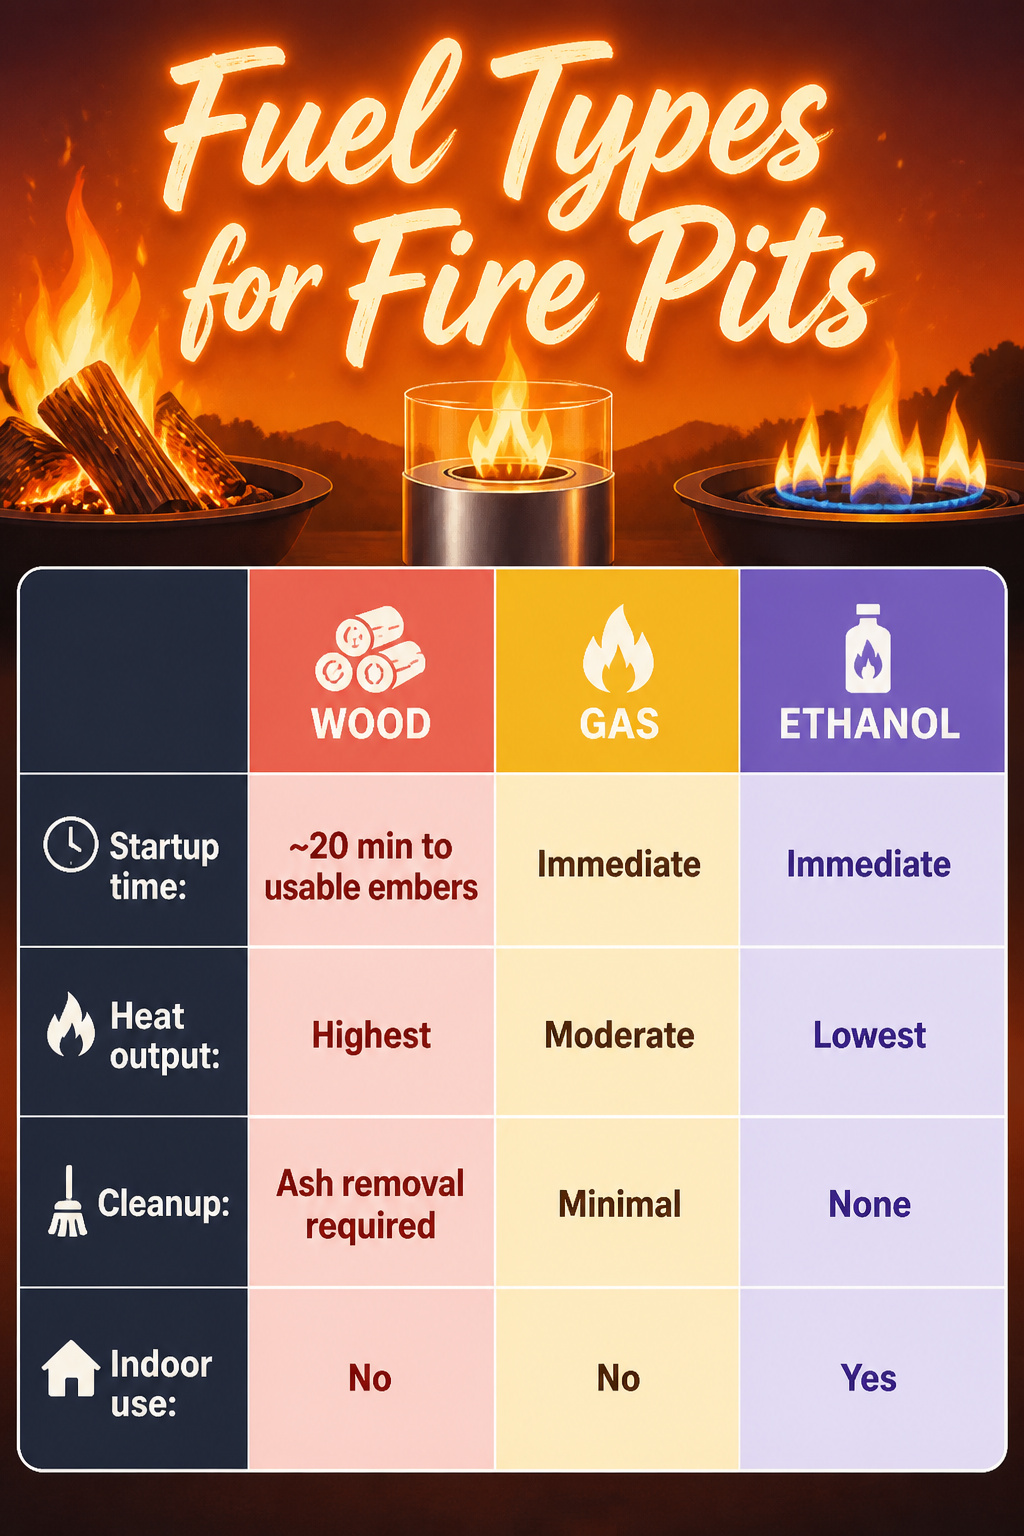
Wood still wins for heat and that nighttime crackle, but it leaves ash to shovel and needs a solid twenty minutes to settle into real embers. Gas flips the script: turn a knob and you have flame, though you will not hear much beyond the burner hiss. Ethanol sits in between for immediacy, burning clean enough for indoor use with only water vapor and carbon dioxide as byproducts, yet it stays cooler than gas or wood and feels safer when kids or pets are nearby.
| Feature | Wood | Gas | Ethanol |
|---|---|---|---|
| Startup time | ~20 min to usable embers | Immediate | Immediate |
| Heat output | Highest | Moderate | Lowest |
| Cleanup | Ash removal required | Minimal | None |
| Indoor use | No | No | Yes |
Ethanol’s lower heat output is the tradeoff for its clean burn and indoor flexibility. For a small patio where cooking marshmallows matters, wood or gas makes more sense. For a balcony fire pit you can carry inside, ethanol is the only fuel that works without ventilation.
Design Considerations
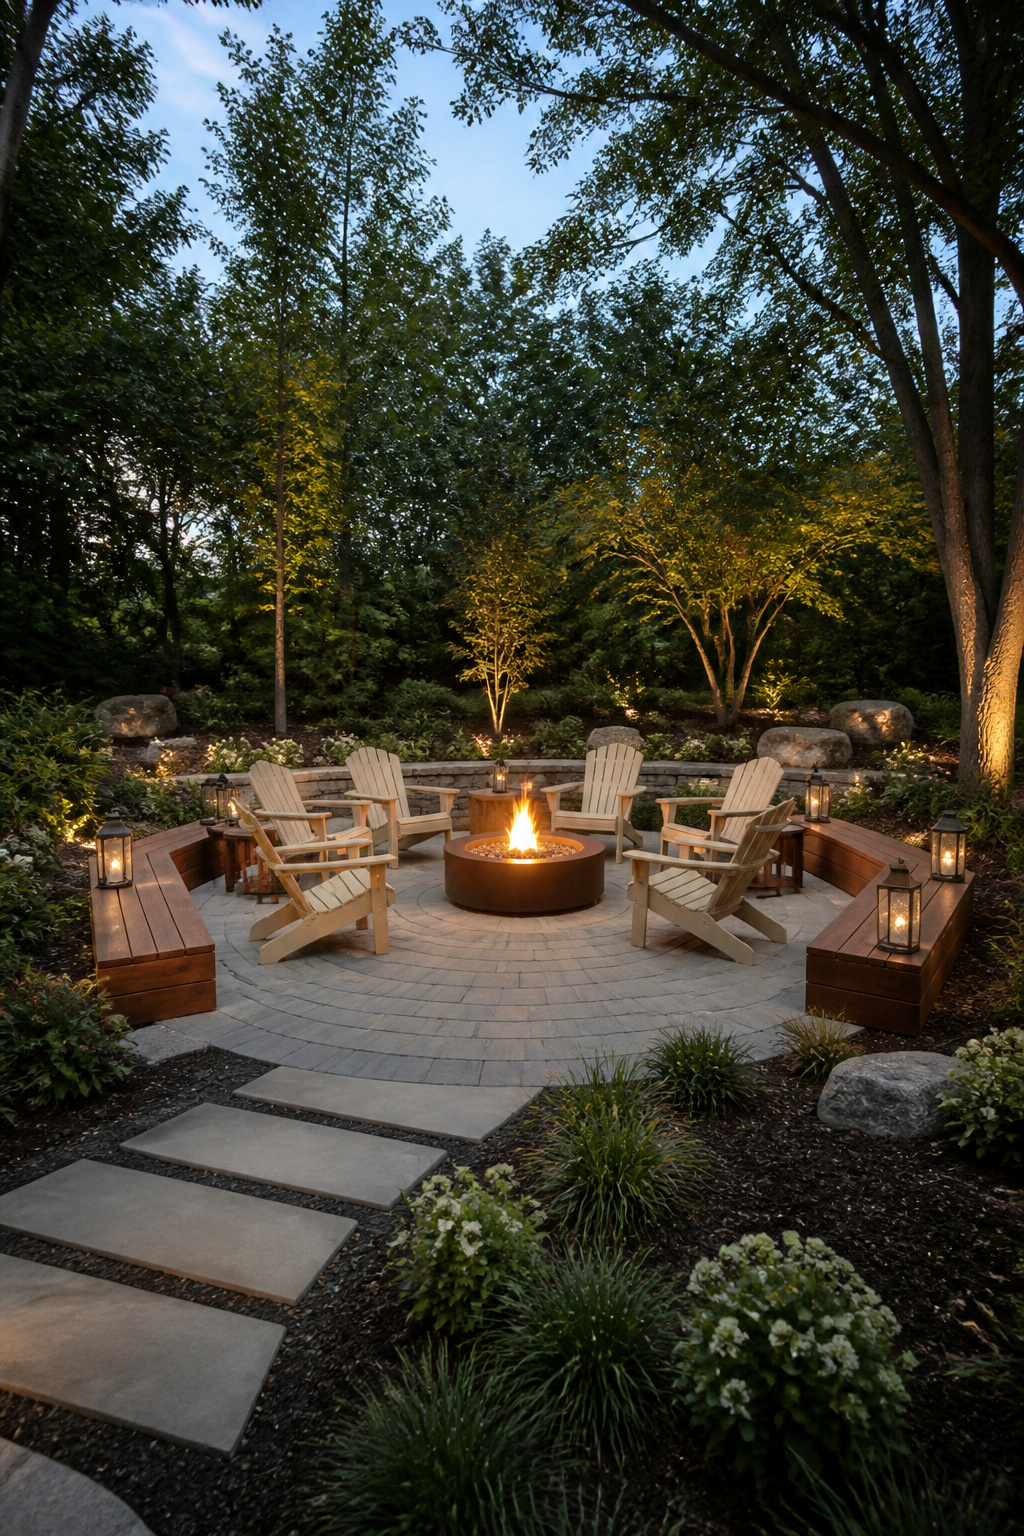
Where a fire pit sits shapes whether it gets used twice a summer or twice a week. I like to rough out the seating first, because the fire is only the center of gravity; the arrangement of chairs or benches around it is what makes the space feel intentional. Three basic patterns keep coming up in project write-ups: a tight circle for conversation, a horseshoe that opens toward a view, and paired benches across from each other that leave walking room between. Each one changes how the fire reads from the house and how smoke behaves.
Wind direction matters more than most people account for at the start. A spot that seems sheltered at noon can funnel evening breezes straight across the flames, which makes starting the fire harder and sends embers where you do not want them. A minimum of ten feet from structures and overhanging vegetation is the baseline that keeps appearing across build guides, though your local code may push that farther. Low-hanging branches and bushes within that zone need trimming back, not just noted and forgotten.
Sight lines from inside the house are worth testing before anything is permanent. The pit should read as a destination from the kitchen window or back door, not as an obstruction you learn to walk around. I have seen layouts where the fire pit is technically up to code but sits in a dead zone visually, and those spaces tend to go cold by September. Place it where the geometry of the yard pulls people toward it, not where the math of clearance alone dictates.
DIY Options
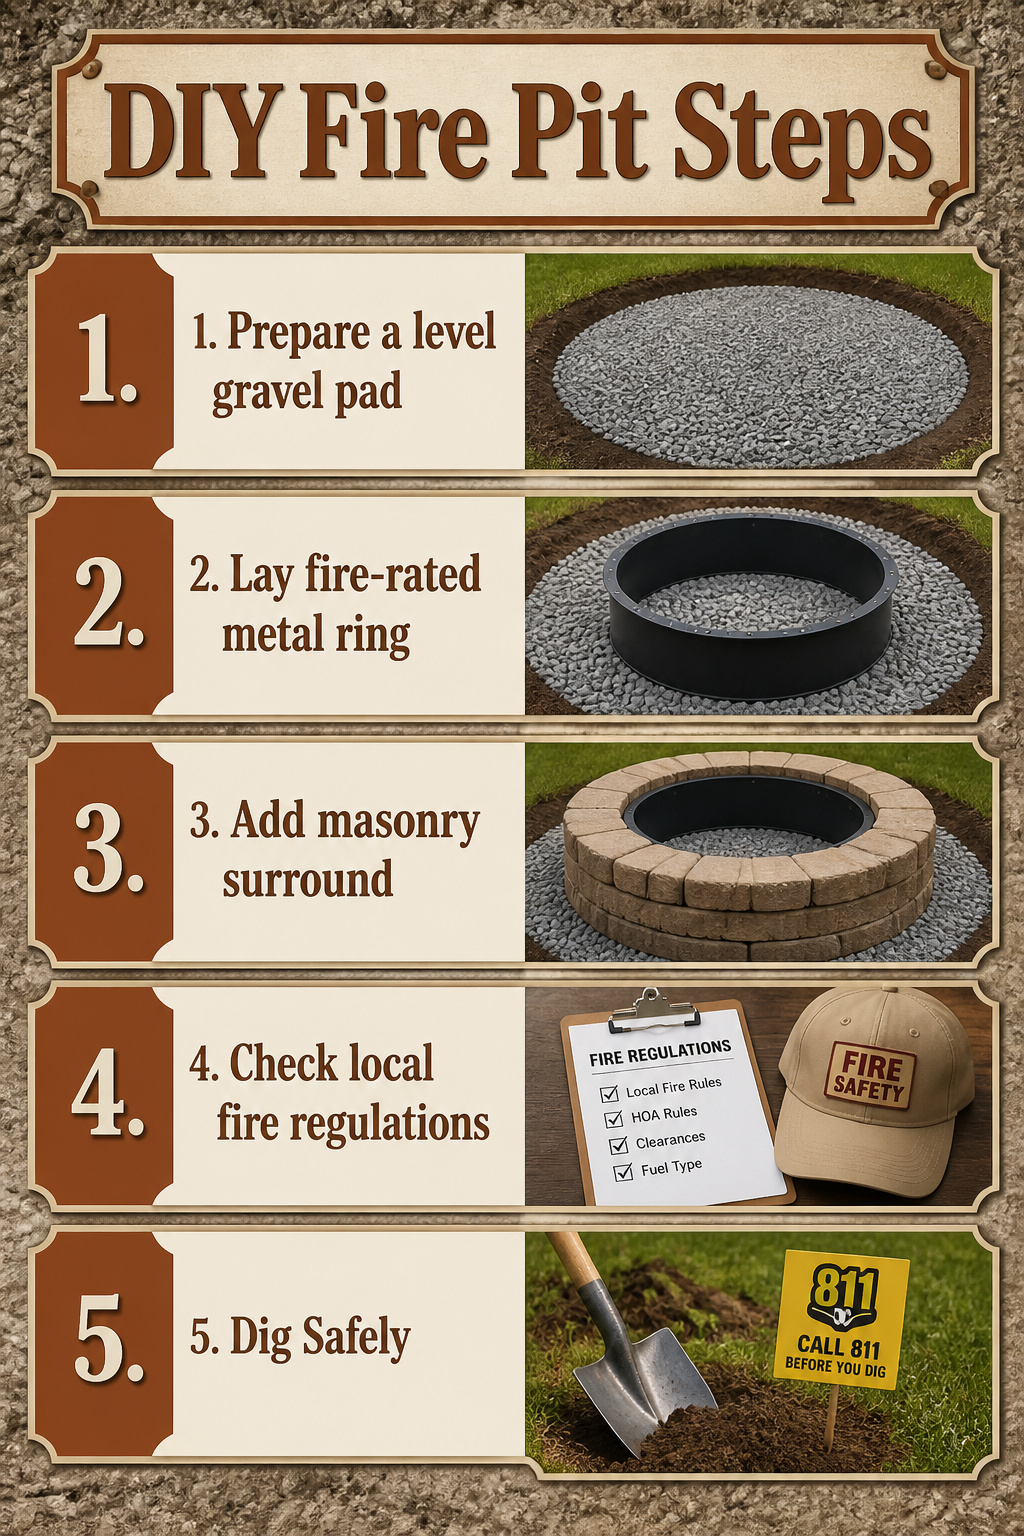
A level gravel pad with a fire-rated metal ring and masonry surround is the simplest place to start for most first-time builders. No poured concrete, no complicated forms.
If you are going the cinder block route, know the limit: standard blocks are fire resistant but not fire rated, and repeated heat exposure can make them crumble. Build around a compatible fire ring or liner instead of exposing them directly.
The gravel-and-metal-ring method keeps the budget low and the weekend intact. Lay landscaping fabric beneath the gravel to block weeds, set the ring, then add a simple masonry surround for containment and looks. Most of these builds run under $200 if you scavenge leftover brick or stone.
Before you dig, check local fire and HOA rules and call 811 to locate utilities. The manufacturer’s clearance instructions for your exact ring and fuel type are the number that matters, not a rule of thumb from a blog.
Safety Tips
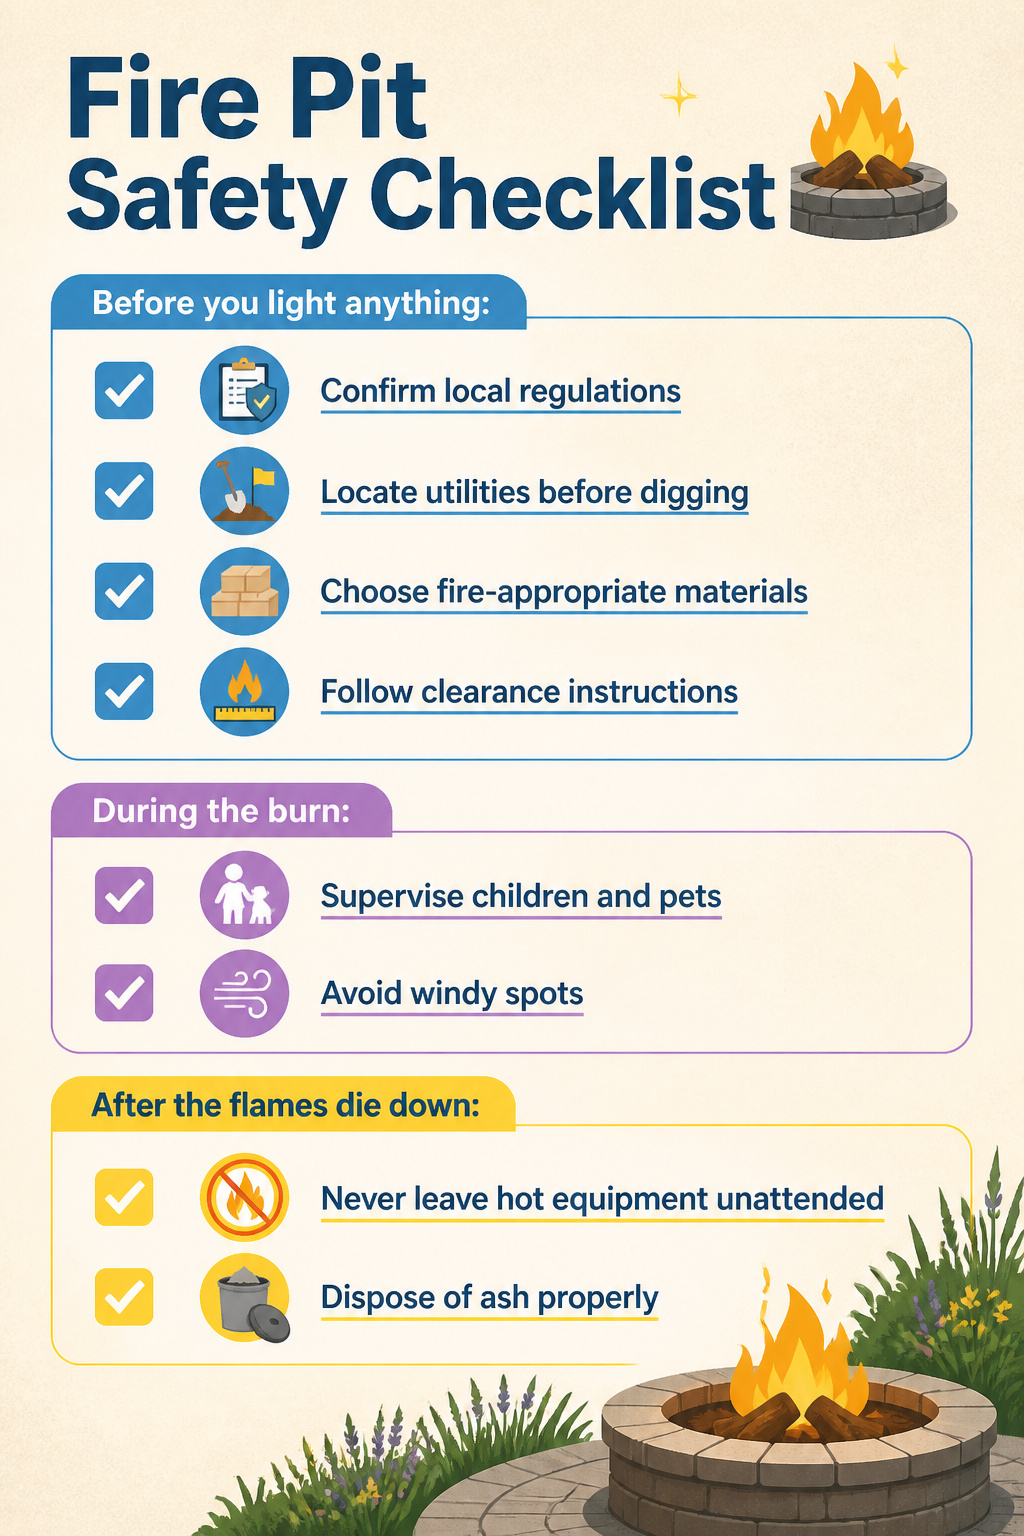
A fire pit that looks good on paper can still be the wrong fire pit if the base, fuel, or surrounding materials cannot handle flame and thermal cycling. Run through this checklist in order, and treat it as a prompt to check your local code and product manual, not a replacement for them.
Before you light anything:
- Confirm city, county, fire authority, and HOA rules for open flame, burn bans, permits, fuel type, and operating hours
- Locate utilities before any digging; use the utility-locating service and check for private lines it may not cover
- Choose fire-appropriate materials: regular clay bricks can crack under high heat, so firebricks or rated metal rings work better for the inner lining
- Follow the greater of local requirements or manufacturer clearances for the pit, insert, burner, fuel, surface, and any overhead condition
During the burn:
- Keep children and pets supervised, prevent trip routes through the fire area, and keep a fire extinguisher or bucket of sand and water within reach
- Skip windy spots; flying embers are a real concern and fires are hard to start in gusts anyway
After the flames die down:
- Never leave active or hot equipment unattended
- Dispose of ash and store fuel only as directed after everything has fully cooled
Seasonal Adaptations
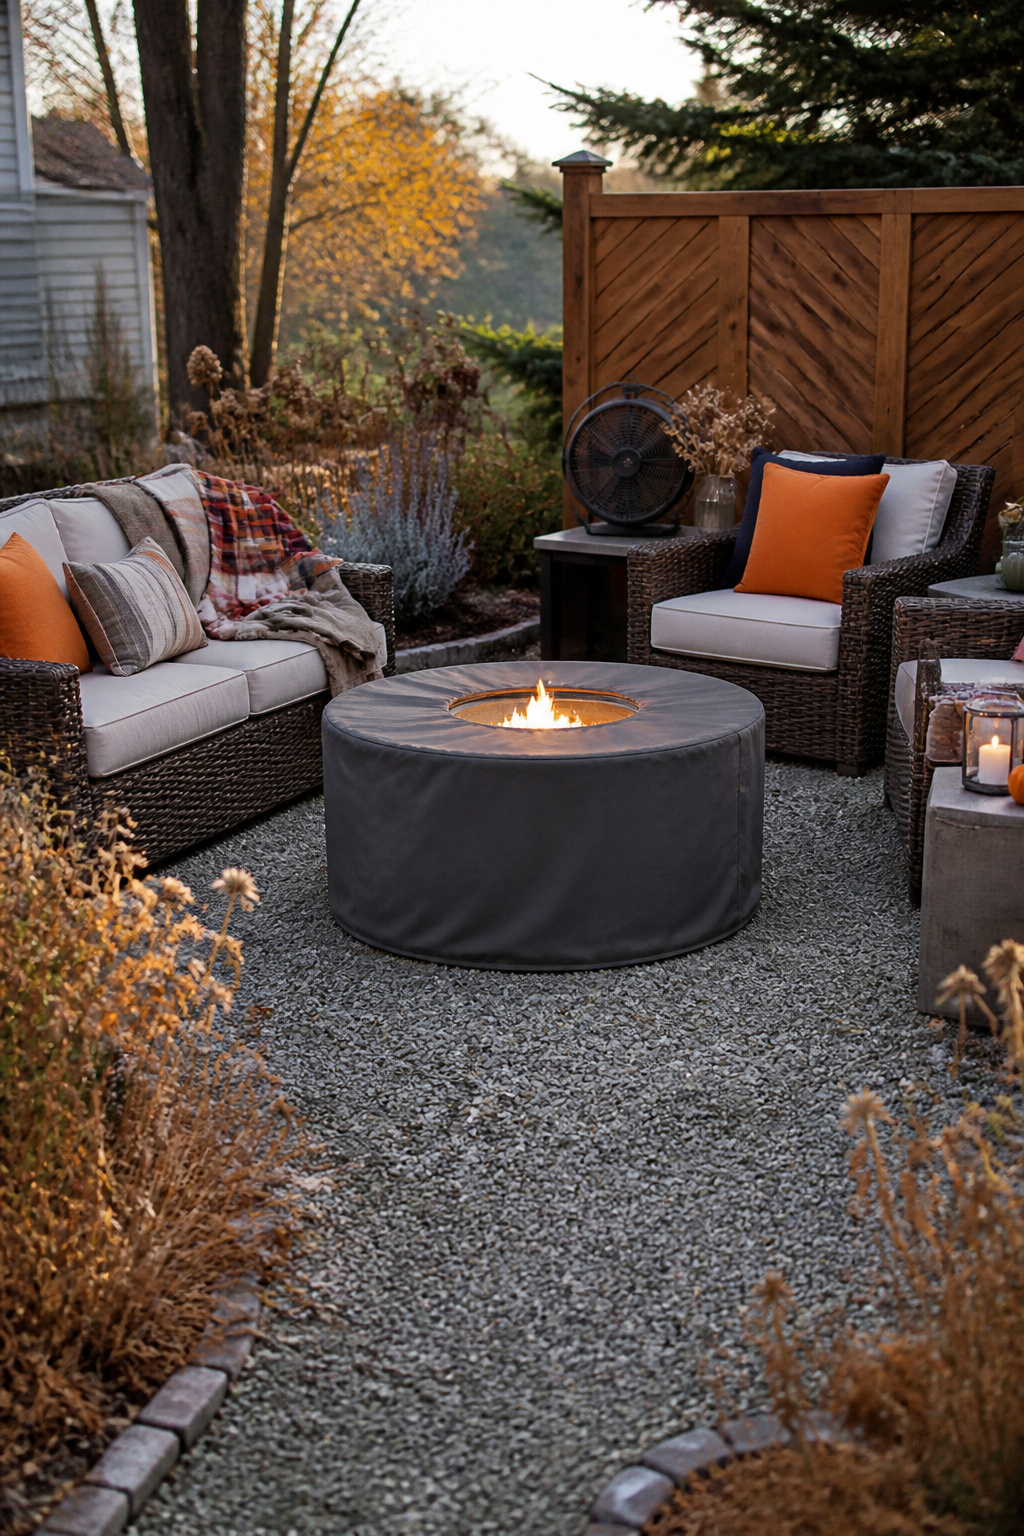
Most articles on fire pit ideas treat the thing as a three-season novelty, something to wheel into the garage once the leaves drop. That has never matched how I actually use mine. A waterproof cover that fits tight over the bowl, not just draped across the top, keeps rainwater from pooling and rusting out the pan through winter. I check the drawstring after heavy wind. For summer evenings, a box fan set on low at the edge of the seating circle does more than any citronella candle to keep mosquitoes from hovering in the smokeless pockets. They cannot land in moving air. In cold months the windbreak matters more than the flame itself; a three-sided plywood screen, freestanding and staked, cuts enough draft that a smaller fire still throws heat where people sit. Propane tanks lose pressure below forty degrees. The safe trick is setting the tank on a piece of rigid foam insulation off the cold ground, never applying flame or any direct heat. I learned that the hard way one January when the fire pit barely flickered while the thermometer read thirty-four.
Fire Pit Tables Detail
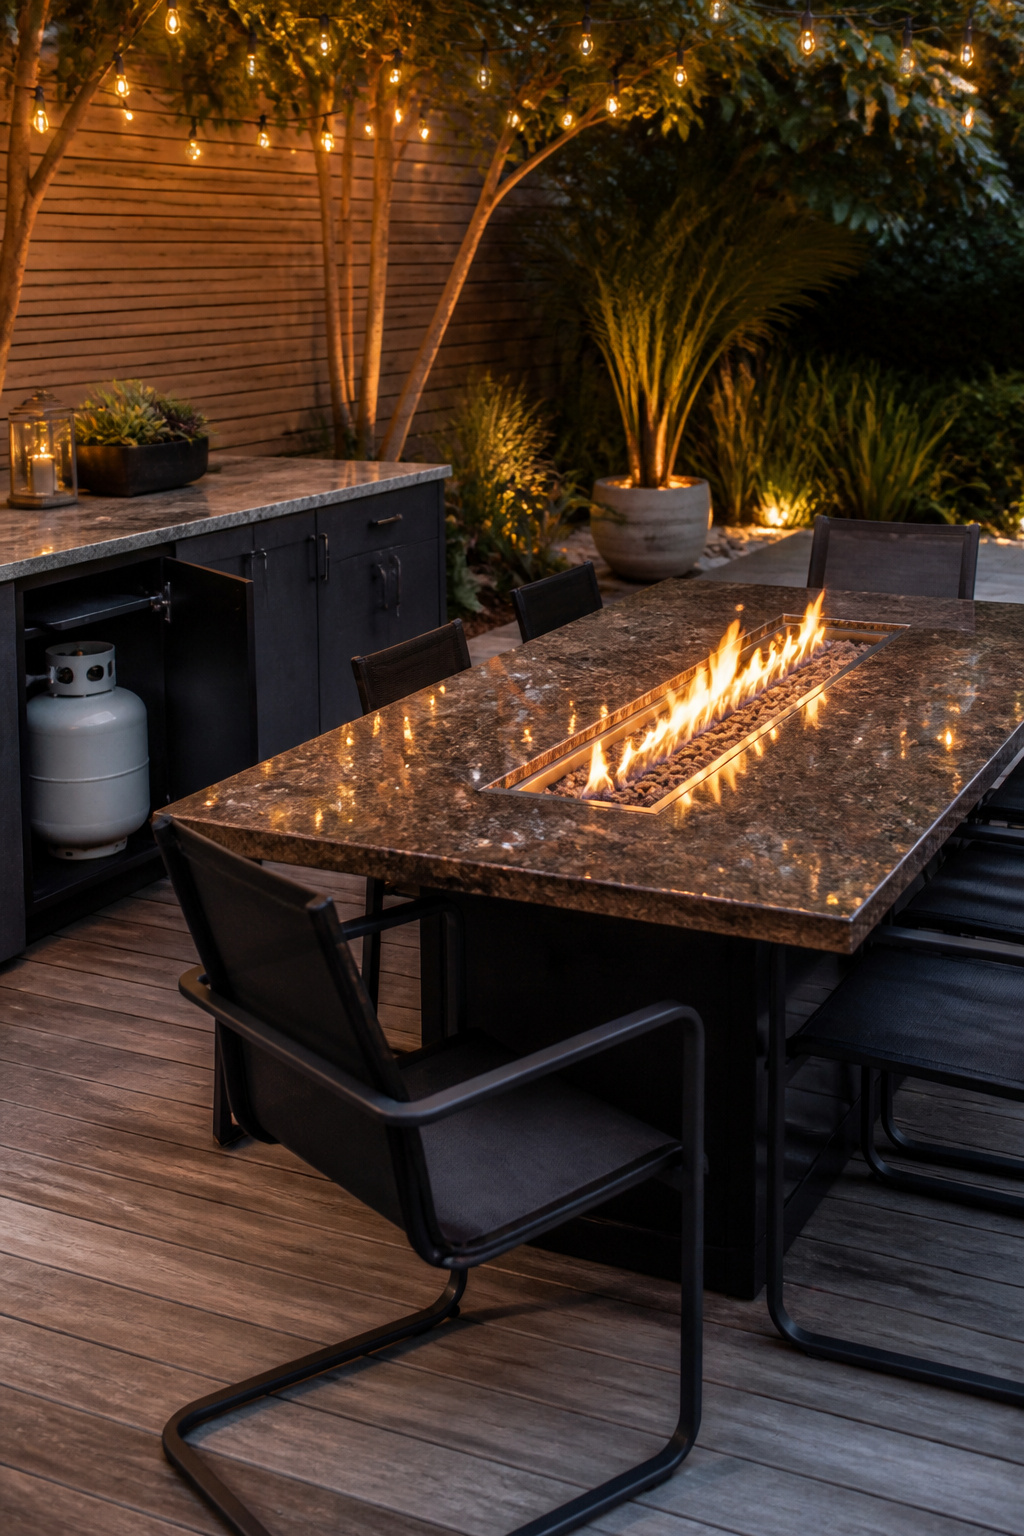
A fire pit table either earns its place or becomes an expensive inconvenience, and the difference sits in three details most product pages skip past.
Dining height versus coffee table height changes what the piece actually does for you. Coffee table height, like the rectangular built-in that goes incognito when unlit, works for cocktails and magazines but forces you to hunch forward for food. Standard dining height lets you eat a real meal without redesigning your posture. The sources that mention both treat the choice as aesthetic; after sitting through one actual dinner at coffee-table height, the functional difference is hard to ignore.
Burner size determines whether the flame heats anyone or merely displays itself. A narrow slit down the center of the tabletop, as in the three-part base-and-slit design, looks dramatic and roasts marshmallows adequately. For shoulder-season evenings when the point is staying outside, a burner running most of the table’s width puts out enough British thermal units to matter. The slim-channel versions tend toward the decorative side of that line.
Propane storage in the base cabinet sounds like a solved problem until you lift the actual tank through a narrow door. A cabinet that swallows a standard twenty-pound cylinder whole, without requiring you to angle it through a tight frame, saves the routine refilling from becoming a minor wrestling match. The sleek designs that complement backyard aesthetics often forget this; the ones that last in daily use do not.
Frequently Asked Questions
What is the easiest DIY fire pit to build?
A level gravel or paver base with a purpose-built metal ring and a simple fire-rated masonry surround is the simplest starting point for beginners. It skips poured concrete and complicated forms while still giving you a stable, contained fire. Budget $75 to $250 and half to a full day if you have not built one before.
How much room do I need around a fire pit?
The exact distance depends on your fuel type, heat output, nearby structures, vegetation, overhead cover, and local code, so start with the manufacturer instructions and your town rules. Add enough space beyond that for chairs to shift and guests to walk without passing through the heat zone. A circle pulls seating inward naturally, which helps keep the layout compact without feeling crowded.
Can I use regular pavers or cinder blocks for a fire pit?
Ordinary landscaping pavers and standard concrete blocks are not rated for direct flame or repeated high heat, and they will crack or spall over time. Build around a fire-rated metal ring, liner, or firebox so the flame never touches them directly. Always confirm the specific product is rated for your intended use before you buy.