
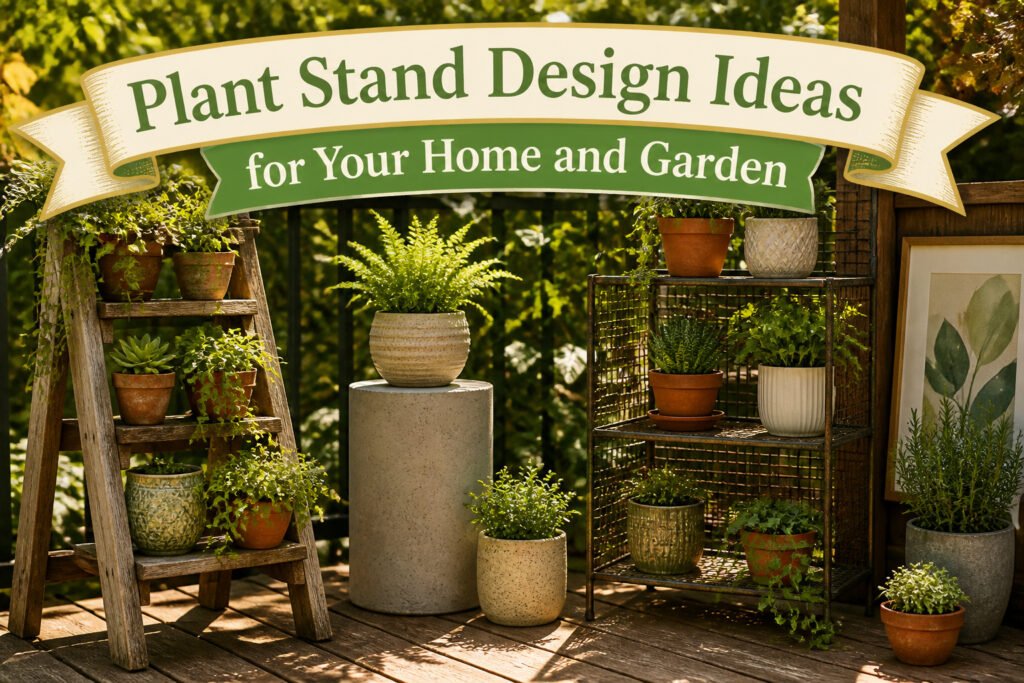
Plant stand designs ideas range from a $15 over-door shoe organizer to poured concrete with hairpin legs, but the one you actually build depends on whether you plan to move it after you set it down. A five-gallon bucket mold gives you a 50-pound cylinder that rain cannot touch, yet stairs become impossible once the mix cures. That same immobility is what makes concrete worth the afternoon; lighter stands walk across the deck in a breeze or swell and split by season two if you used pine outside.
1. Outdoor Stand With Arbor

An outdoor stand with an arbor changes what you can grow before you even pick a plant for the shelf. The overhead frame turns the structure itself into a trellis, so a clematis or morning glory trained up the back posts meets a horizontal lattice six or eight feet up and keeps climbing. Without that top, you are limited to what fits in a pot.
For lumber, cedar or pressure-treated lumber will survive the weather. Pine rots fast outside, and the prettier hardwoods crack and gray unless you are re-oiling every season. Cedar costs more upfront but needs nothing beyond age; pressure-treated is the budget move and holds up fine if you let it dry a month before staining.
The arbor also shades the roots of anything sitting on the lower shelf. That matters for plants like clematis, which want cool roots and warm tops. A trailing vine from the top tier, something like English ivy, can spill down and soften the edges while the climbing vine takes the vertical space. You get two zones from one footprint, which is worth the extra afternoon of cutting lap joints for the arbor top.
Fence pickets work for the slats if you are ripping your own; they are thin enough to bend slightly for a curved crown if you want some style.
2. Ladder Plant Stand
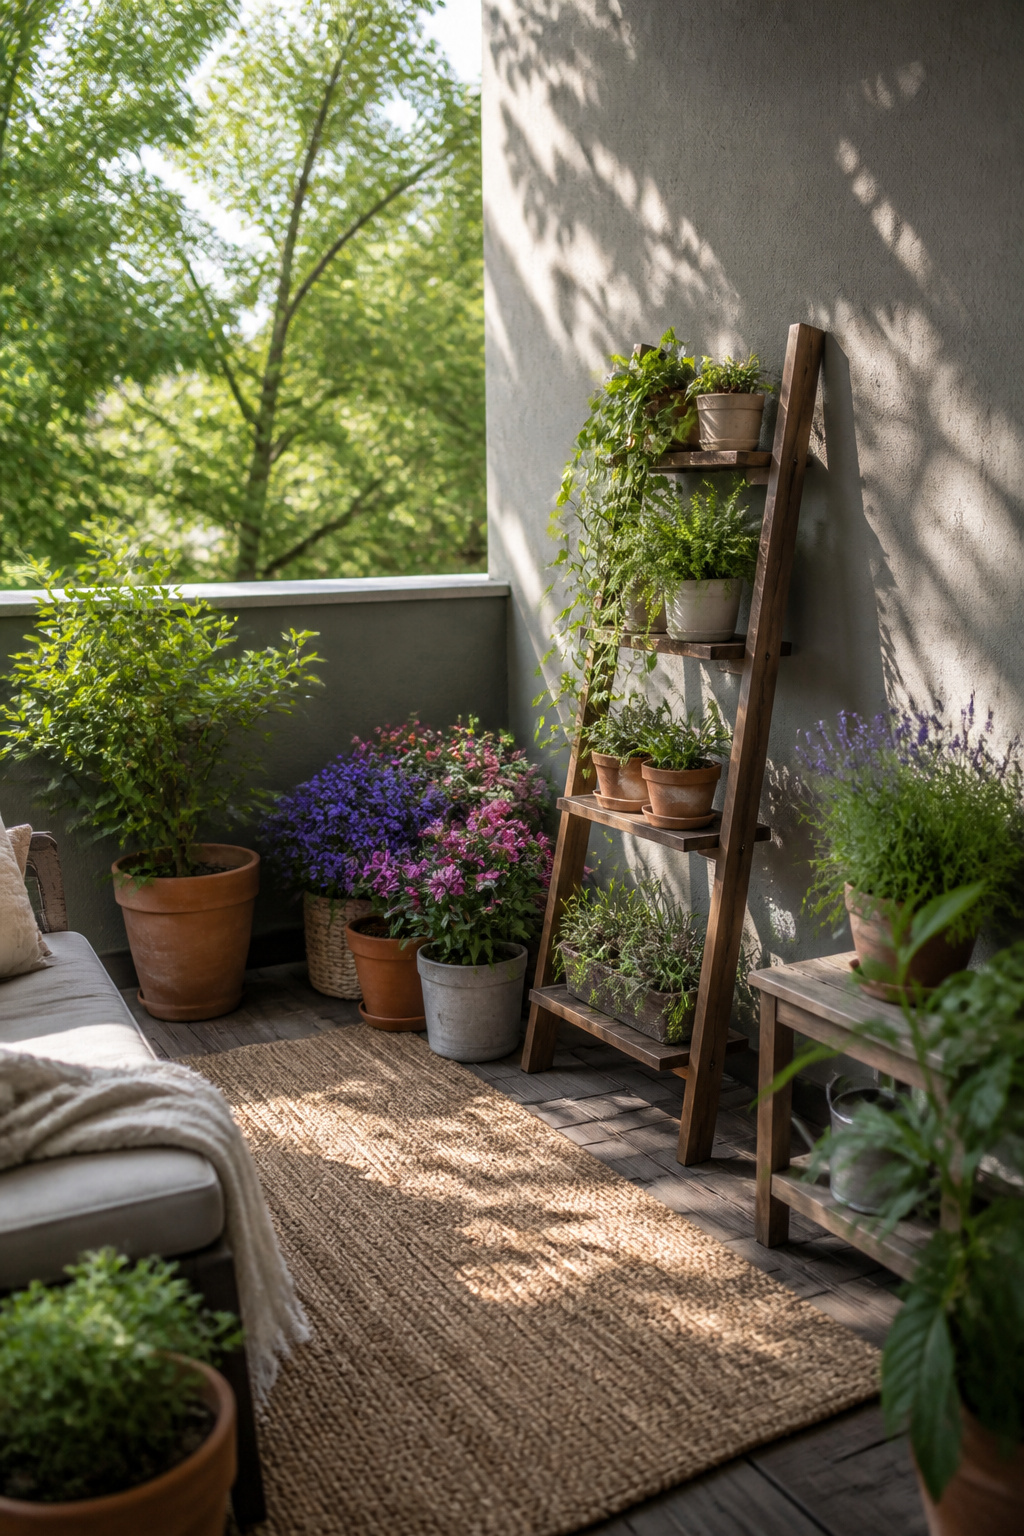
A leaning ladder rung shelf gives you staggered heights without eating floor space, which matters when your patio is basically a doormat with ambition. Lean it against the wall or let it stand freestanding in a corner; either way the narrow footprint tucks into balcony dead zones that wider furniture won’t touch.
Wood reads rustic indoors, but outside it needs protection or it swells and splits by season two. I would use cedar or treat it and still keep it under an overhang. For open balconies, powder-coated metal or a synthetic build skips the rot question entirely.
The build itself stays simple: 1x boards for the rungs, a Kreg jig and a nailer if you are making it from scratch. A low step version, maybe three or four rungs, keeps the top shelf within easy watering reach. Arrange smaller pots up high, heavier ones down low so the weight stays sane and the ladder does not walk itself across the deck in a breeze.
3. Mid-Century Plant Stand

Tapered legs and clean lines are what separate a mid-century plant stand from the rest of the furniture in the room. The angle of those legs, usually splayed outward at roughly 15 to 20 degrees, comes from a simple mortise-and-tenon joint or a doweled connection where the leg meets the apron. Hardwood, walnut or teak most often, keeps the frame rigid enough that the piece does not wobble once a terracotta pot and damp soil sit on top.
The typical height runs 24 to 30 inches, which places a trailing pothos or a compact fern near most window sills without blocking the lower glass. Anything taller starts to read as a side table; anything lower and the plant crowds the floor. I have seen builds where the maker tried to cheat the angle with a single screw through the leg into the underside of the top. The joint loosens within a season. A proper tenon, even a small one, takes the lateral force when someone bumps it moving a watering can.
Indoor use only, unless you seal the wood heavily. Rain gets into the end grain of those tapered legs and splits them from the bottom up. A coat of Danish oil on the dining room version, nothing on the one I keep on the covered porch, and the difference after two winters is obvious.
4. Concrete Plant Stand

Concrete handles the weight a ceramic or wood stand never could. A single poured cylinder made with a 5-gallon bucket as your mold will take a 50-pound pot without tipping, and rain does not touch it. The catch is that same mass: once cured, you are not sliding it across the patio to chase sun, and stairs are out of the question.
For the form itself, a bucket gives you a simple cylinder with a smooth face. Hairpin legs set into the wet mix turn the block into a low side table that reads as furniture more than plant stand. Dowels work if you prefer a warmer line, though they add thickness the hairpins avoid. A concrete paver on a 2-by-2 frame is the lighter cousin, easier to lift and easier to dress with paint or stencil, but it tops out at smaller pots and still wants a level spot.
5. Tiered Plant Stand

A tiered frame lets you stack six or eight small pots where one flat surface would have held two. The pyramid shape, widest at the base and narrowing to a single pot at top, stays stable on a patio but needs level ground; the staircase version, with each level offset to one side, sits flatter against a wall and catches more even light.
Water from the top tier drains straight down, so the lowest shelf takes the runoff. I learned to put succulents or anything drought-tolerant on the bottom, and keep moisture-lovers up high where they get first dibs on the watering can. A saucer under every pot helps, but on open-frame stands the drips still reach the leaves below. Powder-coated steel holds up outside; raw wood looks warmer indoors but swells if it stays wet.
6. Nesting Plant Stands

Nesting plant stands solve the storage problem most of us hit by October. A set of two or three in graduated sizes clusters tight in a corner when you need height, then spreads across the patio when plants fill out and demand their own real estate. I have watched the same trio hold six-inch seedlings in March, get pulled apart for tomatoes in July, and stack back into a single footprint once frost arrives. The smallest stand fits inside the middle, and both fit inside the largest, which means one shelf in the garage instead of three. Metal frames with open sides dry fast after rain, though wood looks softer indoors if you plan to bring them in for winter herbs. The trade is weight: a light frame tips when top-heavy plants get tall, so the bottom tier needs your heaviest pot. For renters or anyone working a balcony that doubles as storage half the year, this is the plant stand design that actually leaves room to stand.
7. Plant Display Bookshelves

A standard bookcase with its shelves pulled to different heights becomes a plant wall for almost nothing. The trick is leaving 12–18 inches between tiers for anything that will grow, not just the four-inch pot it arrives in. I have watched people fill every slot tight to the frame, then cut the thing apart six months later when a pothos hit the lip above it.
Water is the other half. Laminate swells, MDF turns to oatmeal, and even sealed wood takes a stain if you leave a saucer that overflows. Saucers help, but a boot tray across the whole shelf catches what the saucer misses and keeps the geometry clean.
Shelby Pine, in a piece for Architectural Digest, puts the planning before the planting:
"I strongly recommend planning out your plant-planter combinations before putting them on the shelf… Because you may be limited by the amount of space in each shelf gap."
What that means practically: set your tallest pot on the floor first and work upward, or you will end up with a top shelf full of six-inch plants simply because nothing taller fits. Drought-tolerant varieties up high save you from climbing a step stool twice a week.
8. Plant Stand Wall

A wall-mounted plant stand system turns any blank vertical surface into growing space without eating up floor area. Brackets, floating shelves, or pocket planters all work; what separates the ones that last from the ones that sag is how the weight gets back to the studs. Drywall anchors hold a single small pot. A loaded shelf row wants a lag bolt driven into framing, period.
Freestanding plant stands carry their own weight. A wall stand hangs it all on the structure behind it, so the math changes. A terra cotta pot with wet soil runs heavier than most people guess, and that load sits out from the wall on a lever arm. The bracket you would trust for a bookshelf may not be the bracket for a shelf of damp dirt.
Rental situations make this harder. Command strips and adhesive hangers work for a spare fern; they fail for a loaded herb garden in July heat. A french cleat system removes cleaner than rows of drilled holes, but still needs those studs found and hit.
What convinced me, reading through a dozen of these builds, is that the people who skipped the stud finder ended up with tilted shelves or patched drywall. The ones who bored a hole, hit open space, moved two inches and tried again got the solid mount that held five years on.
9. Repurposed Shoe Organizer

A canvas over-door shoe organizer hanging on a fence or balcony rail gives you sixteen narrow pockets that herbs fill out nicely. Trailing plants like bacopa or dichondra work even better, since gravity does the shaping for you and the foliage hides the fabric entirely.
The drainage issue is real. Each pocket needs two or three small holes poked through the bottom, and without them you are growing root rot, not basil. I have seen people line the pockets with coffee filters to keep soil from washing out, which works until it does not.
Fabric in direct sun lasts about one season, maybe two if you are lucky. UV breaks down the canvas, and the pockets sag until they tear at the seams. This is strictly a short-term planter or a shade-patio solution. At roughly $15–25 for the organizer, the cost matches the lifespan.
10. Woven Ottoman

A woven ottoman or stool gives leafy plants exactly the kind of company they want. The open rattan or wicker weave repeats the rhythm of fronds and stems, so the plant and the stand read as one gesture rather than a pot parked on furniture. I have seen this work best with something broad and cascading like a pothos or a fern, where the leaves thread through the gaps and soften the whole silhouette.
The catch is weight. Rattan and natural wicker are built for a footrest, not a loaded terra-cotta pot. A solid wood stand distributes downward force; a woven one concentrates it at each intersection of the weave. Anything over about 25–30 pounds stresses those joints, and the fiber itself compresses. I would keep the total load light: a plastic or fiberglass pot, a smaller specimen, maybe a cachepot setup where the real container hides inside a lightweight shell.
Moisture is the other hard limit. Natural fibers swell, then rot, and direct watering near the weave ruins it fast. This is an indoor-only move, and even there I would slide a plastic tray underneath, not for drainage but as a vapor barrier. The look is casual and warm, almost coastal, which makes it easy to place in a bright living room or a covered sun porch. Just do not ask it to do the work of a proper plant stand outside, or with anything heavy enough to make the weave sag.
11. Pallet Plant Stand

A shipping pallet can be stood upright against a wall or laid flat on the ground, then fitted with shelves cut from scrap lumber or pocket planters made from old gutters. The wood is already built to take weight, so heavy pots sit steady once you check that the slats are sound. Do not grow edibles in a pallet unless you know its heat treatment; the safe ones carry an "HT" stamp, meaning they were heat-treated rather than fumigated with chemicals you do not want near food. For ornamentals, the rough, grayed surface is the point. It belongs outdoors where the splinters and stains read as character, not neglect, and where a coat of exterior poly is optional. I have seen them given away behind garden centers and big-box stores, though it costs nothing to ask first rather than assume.
12. Rolling Plant Stand Shelves

A shelf unit on casters solves the problem most plant stands ignore: plants do not stay where you put them. Morning sun shifts, a cold snap hits, or you need to mop the floor. Solid wheels with a locking mechanism keep the whole unit from rolling the moment you bump it, which matters more than people assume once soil and terracotta add up.
Height-adjustable shelves let you move the tiers to fit what you actually own. Taller plants belong on the bottom; the center of gravity stays low, and the stand stays stable when you push it across thresholds or over the lip of a patio door. Smaller pots ride above without getting shaded out. Plywood construction keeps the weight manageable, though intermediate woodworking skills and a pocket-hole jig get you cleaner joints than basic butt screws.
The mobility is what sells it. Rolling the whole collection outside for summer, then back in before frost, beats carrying fourteen pots one at a time. Just remember to lock two wheels minimum before you walk away. A loaded three-tier stand on a slight grade becomes a projectile if you do not.
13. Coffee Table Planter

A coffee table with a built-in planter turns the center of a living room into something that actually grows. The build starts with a tabletop split horizontally to create a planting "river," then a waterproof trough fastened beneath it so the wood does not rot. Nick Catsumpas used cedar plywood for his trough and sealed it with resin, a step that matters more than the wood choice because standing water will find any gap.
The catch is the depth. A coffee table apron leaves only about three inches of vertical space for soil, which rules out anything with a real root ball. Catsumpas filled his with ten to twelve four-inch pothos and philodendron kept in their nursery pots, so the shallow tray became invisible and the plants seemed to rise straight from the surface. That three-inch limit means succulents or trailing tropicals, not tomatoes or herbs.
If you already own a solid wood coffee table, a removable planter box that sits inset into the top is the less destructive route. Finish the rim with tung oil where the wood meets soil, and accept that the plant selection is dictated by the furniture, not the other way around.
14. Library Catalog Cabinet
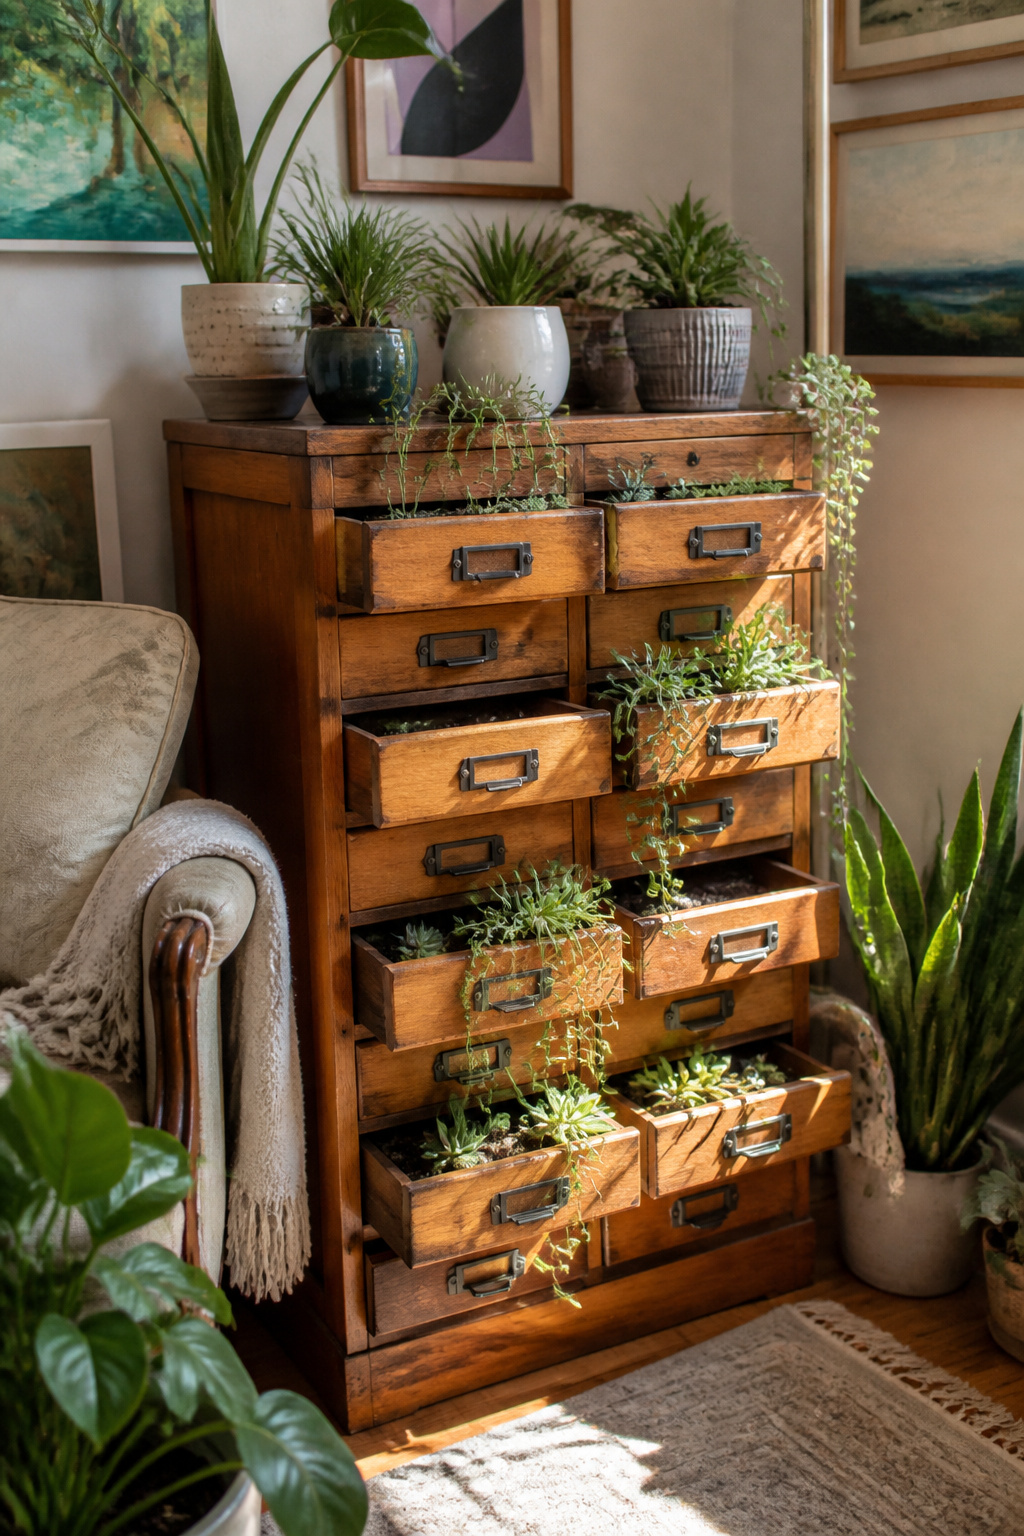
A small-drawer card catalog cabinet makes one of the more satisfying plant stand designs ideas because the structure is already built for separation. Each drawer becomes its own compartment, which means you can keep succulents with different water needs from drowning one another or start seeds in trays that slide out for inspection without disturbing the whole row.
The shallow drawer depth is the limiting factor, and also the reason this works. Most catalog drawers run three to four inches deep, which is too little for anything with a real root system but exactly right for sedums, echeverias, or a grid of seedling cells. You will need to drill drainage holes; the original cabinets never had them because paper cards do not rot. I have seen people line the bottoms with landscape fabric to keep soil from washing through, which helps if the holes you drill end up larger than you intended.
The hardware matters more than you might expect. The metal pulls and the oak or walnut case give the piece a weight that balances the small scale of the planting. Set it on a patio table where the drawers sit at arm height, and you have a workable surface that happens to be green. Leave it on the ground and the lowest drawers stay too wet after rain, at least in my experience with anything that does not dry fast.
15. Blooming Table
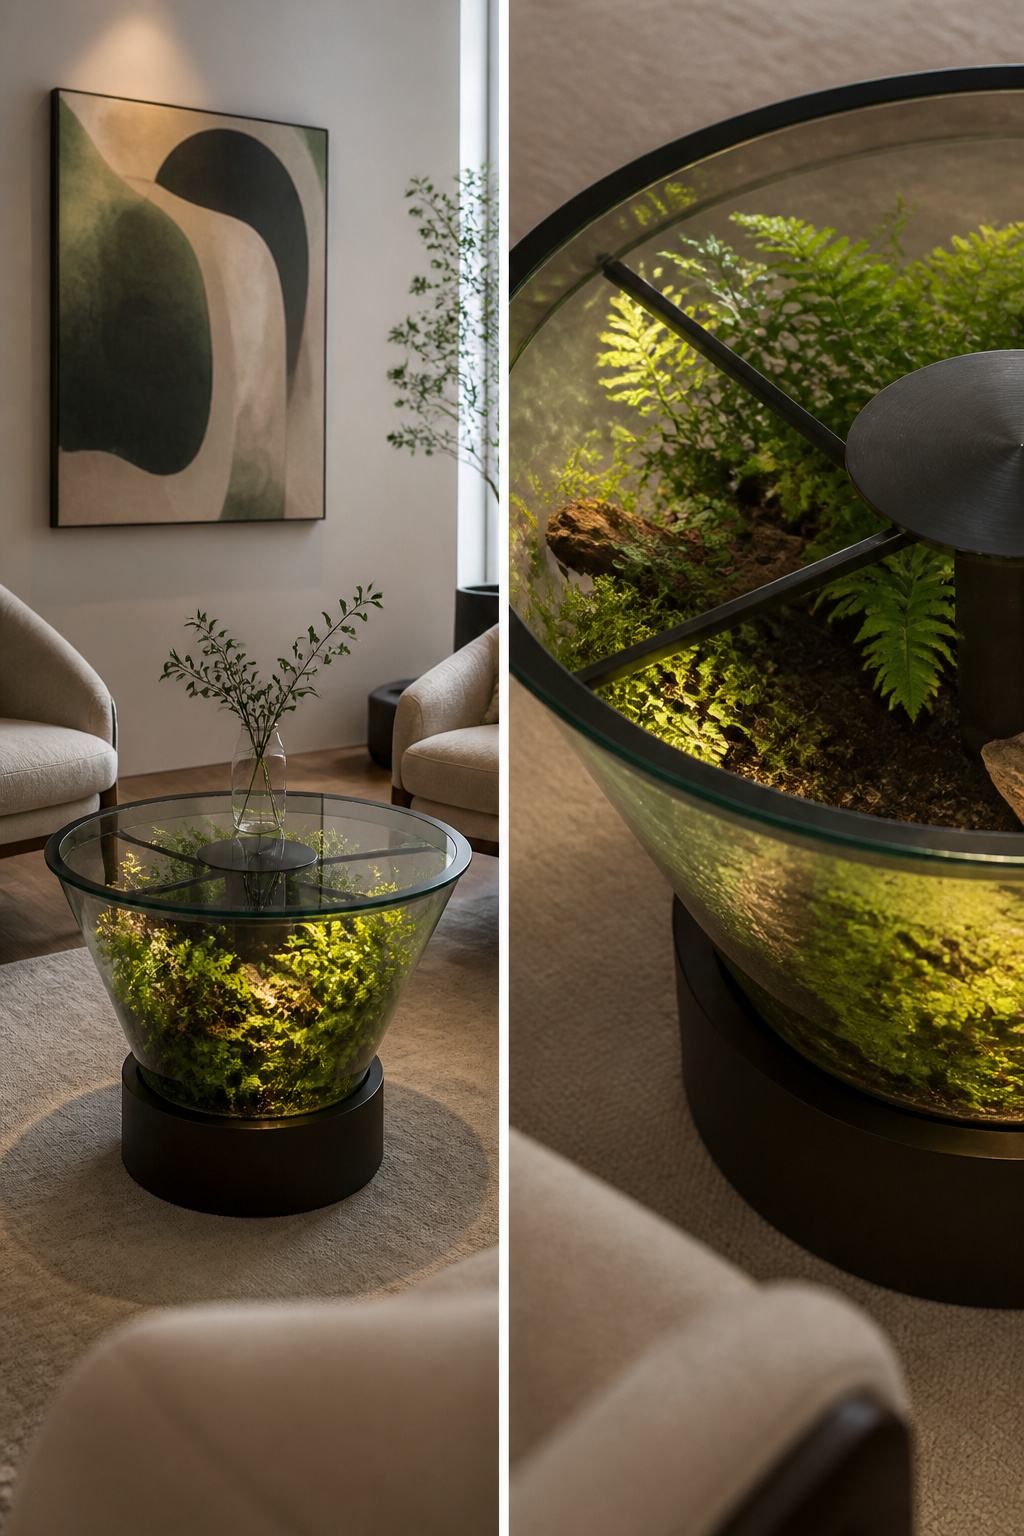
A glass-topped table with plants growing beneath the surface turns an ordinary piece of furniture into something closer to a terrarium you can set your coffee on. The sealed environment underneath creates its own microclimate, which is where the complications start.
Light becomes your first puzzle. The glass itself blocks some wavelengths, and any framing or supports cast shadows that leave certain spots in perpetual dusk. Ferns, moss, and the hardier small succulents are about the only plants that tolerate this inconsistent, filtered exposure. Anything needing direct sun will stretch and pale within weeks.
Condensation is the second battle. A closed cavity with soil and living plants generates moisture that beads on the underside of the glass, fogging your view and eventually dripping onto whatever sits below. Some designs solve this with a discreet ventilation gap at the base; others rely on you lifting the top periodically to let air circulate. Skip that step and you are growing mold, not a display.
The plant selection stays narrow for another reason: root depth. Six to eight inches of soil is typical, which rules out most houseplants by month three. What convinced me, reading through a dozen of these builds, is that the people happiest with the result treat it as a low-maintenance moss garden with occasional fern accents, not a showcase for anything showy.
Tools and Materials

Most plant stand designs ideas call for a small, repeating tool set. A drill handles the joinery, a miter saw or hand saw cuts the stock to length, and an orbital sander smooths the faces before finish. Wood screws, pocket hole screws from a Kreg jig, and wood glue cover the connections. A tape measure and safety glasses complete the kit; nothing here is exotic, and the same tools carry across indoor and outdoor builds.
Cedar or pressure-treated lumber belongs outside; pine, plywood, or whatever scrap you have on hand works fine indoors. The outdoor grades resist rot in patio humidity and rain, while indoor stands stay dry enough that cheaper, lighter stock holds up for years. Paint or stain finishes either one, spray or brush applied.
Indoor vs. Outdoor Builds
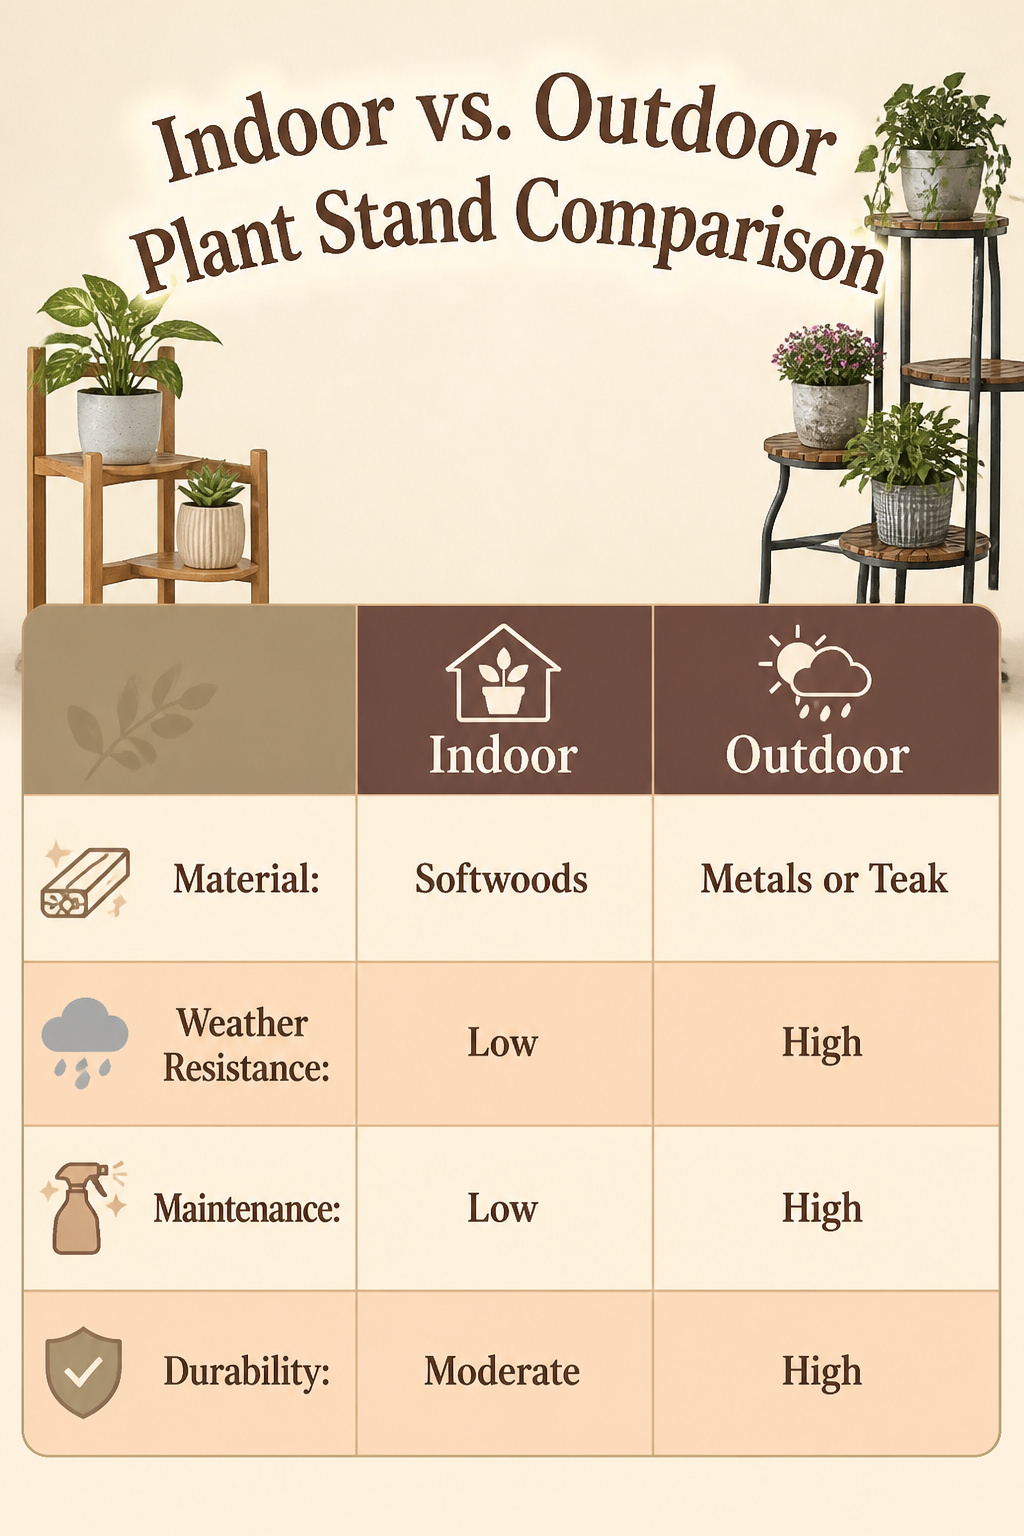
Weatherproofing is where plant stand designs ideas split cleanly into two camps. Metal or sealed teak will survive outside; anything less will swell, crack, or rot once it meets real rain and sun. Teak holds up because its natural oils resist moisture, but only if you reseal it. Metal needs cleaning and treatment to stop rust from starting at the joints.
Indoor stands get away with softer woods and lighter finishes because the environment stays stable. The same dimensional stability that lets a pine stand look perfect in a living room becomes a liability on a patio. I have watched a cheap indoor stand I liked enough to move outside turn into a wobbly hazard in one wet spring; the legs absorbed water, expanded unevenly, and never shrank back to square.
The maintenance gap is real. Outdoor stands need regular attention, wiping down, resealing, checking for corrosion. Indoor ones might need dusting. That difference matters when you are deciding where a stand lives before you build it, not after.
Design Styles That Match Your Space
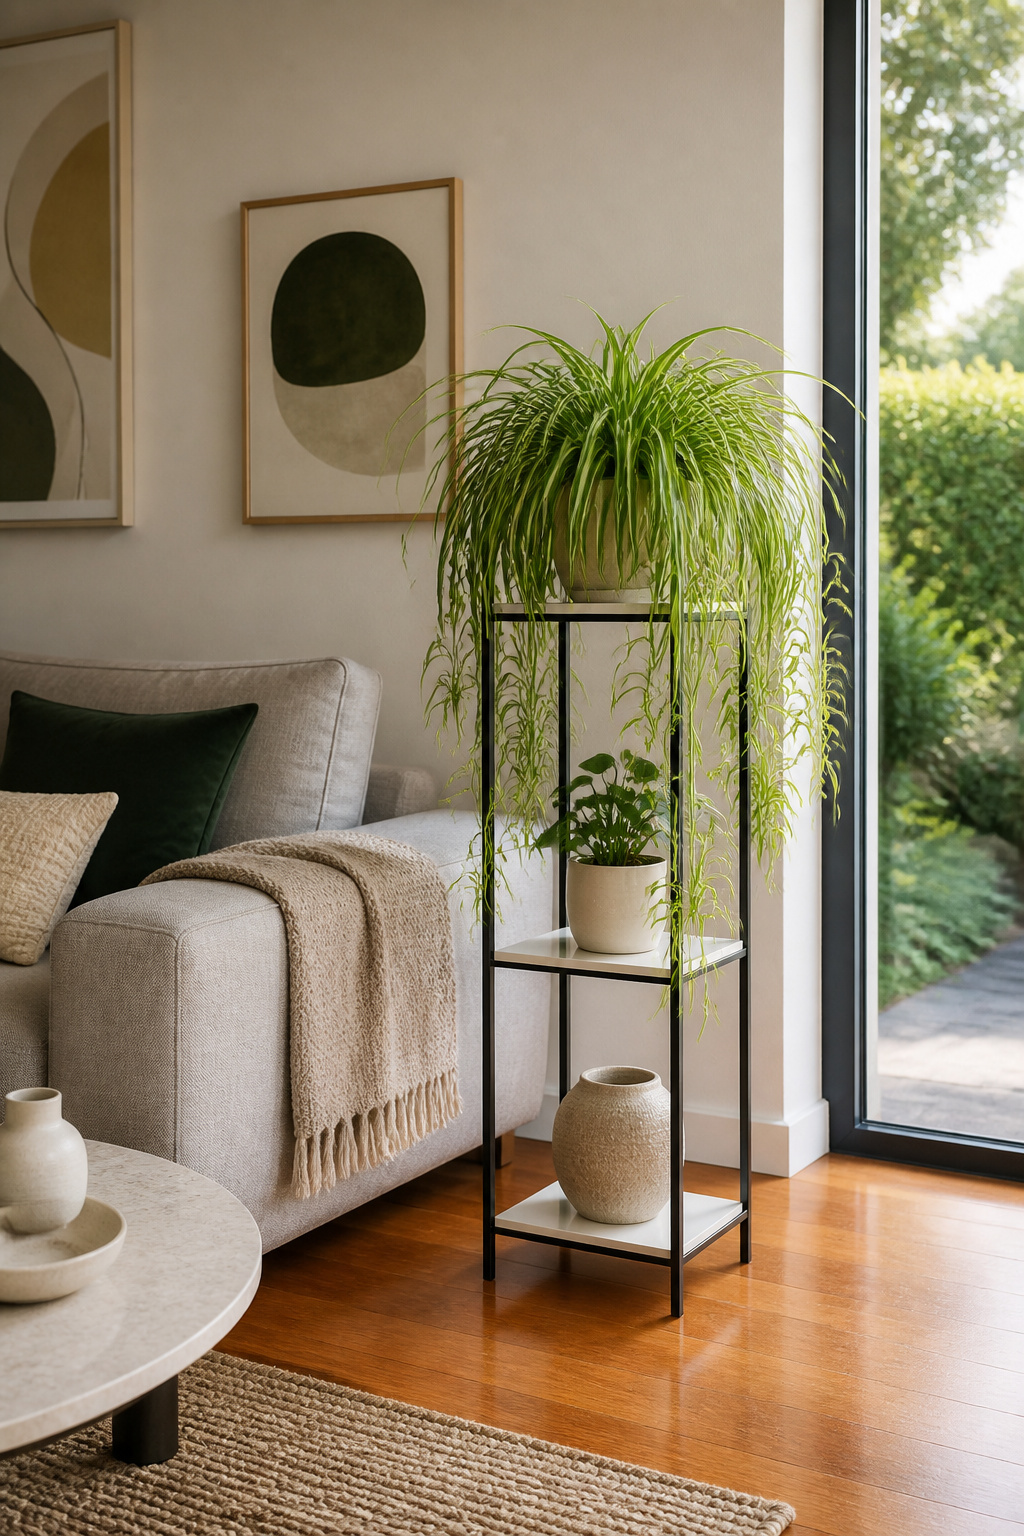
Clean-lined modern stands work best when the furniture you already own is doing the same job. Thin metal frames and unadorned shelves let the plant stay the visual focus, and they tuck neatly beside a low sofa or under a console table without fighting the room’s geometry. I learned this after trying to wedge a scrolled iron stand into a space with flat-panel cabinetry; the stand looked like it had wandered in from someone else’s house.
Rustic pieces, rough wood or reclaimed timber with the marks left in, need heavier company to feel grounded. They sit better against a farmhouse table or a leather armchair than they do floating in an open corner. The weight of the material asks for something equally solid nearby, or the stand starts to look like a prop.
Mid-century forms, those tapered legs and specific warm wood tones, are the pickiest of the three. They read as a period piece the moment they stand alone, and the effect tips from intentional to thrift-store fast. Pair them only with furniture that shares the same era’s vocabulary: a teak credenza, hairpin legs on a side table, anything with that slight lift off the floor. If your room runs traditional or ultramodern, this is the style to skip rather than force.
Seasonal Rotation and Repurposing

A side table that held your coffee mug in January can hold a fern by March. The same flat surface works both ways; only what sits on it changes. I have moved my own small wooden side table from beside the sofa to a bright corner near the kitchen window three times in the past year, and each time it earned its space differently: lamp stand, then seedling station, then a tiered display for three 4-inch pothos I propagated over summer.
Coffee tables with sunken waterproof troughs, built from planks cut to 46.5 inches long and 12 inches wide, turn into living furniture where plants appear to grow straight from the surface. That project takes planning and tools most weekend gardeners do not keep. The simpler move is the better one: use the table whole, set a tray beneath it for drainage, and let the existing structure do the work.
Nesting stands built from scrap pine do double duty indoors or on a patio as side tables through one season and plant stands through the next. The resourcefulness is not in buying something labeled for plants. It is in noticing what already holds weight in your house and accepting that its job can shift when the light does.
Frequently Asked Questions
What kind of wood should I use for a plant stand?
Cedar or pressure-treated lumber belongs outside; pine, plywood, or whatever scrap you have on hand works fine indoors. Cedar costs more upfront but needs no maintenance beyond aging, while pressure-treated lumber is the budget option that holds up fine if you let it dry a month before staining. Pine rots fast outside, and prettier hardwoods crack and gray unless you are re-oiling every season.
What tools do I need to build a plant stand?
A drill, miter saw or hand saw, and orbital sander form the core kit, plus wood screws, pocket hole screws from a Kreg jig, and wood glue for joinery. A tape measure and safety glasses round out the list. The same small set of tools carries across both indoor and outdoor builds.
Can I use plant stands outdoors?
Yes, but only if you build from weatherproof materials like metal, sealed teak, cedar, or pressure-treated lumber, and accept the maintenance that follows. Outdoor stands need regular cleaning, resealing, and corrosion checks; indoor stands moved outside can swell, crack, or rot within a single wet season.